Porting GoldSrc content (maps, models, etc.) to Source/en
Remember to check for any notes left by the tagger at this article's talk page.
Contents
- 1 Preparing for Porting
- 2 Porting Process
- 3 Comparison
- 4 Conclusion
- 5 Unincluded
- 6 Revisions
- 7 Porting projects
- 8 Projects
- 9 Subpages
- 10 See also
- 11 External Links
- 12 References
Game developers who have worked with the ![]() GoldSrc engine may find it challenging to port their content to the updated
GoldSrc engine may find it challenging to port their content to the updated ![]() Source engine. This undertaking requires diligent work and close attention to detail, with no room for shortcuts or frustration. The goal of this article is to provide clear and refined steps paired with expert guidance to assist game developers in navigating this intricate process. Whether a novice or a seasoned developer seeking valuable insights and effective tactics, this guide will aid in making the transition as seamless as possible.
Source engine. This undertaking requires diligent work and close attention to detail, with no room for shortcuts or frustration. The goal of this article is to provide clear and refined steps paired with expert guidance to assist game developers in navigating this intricate process. Whether a novice or a seasoned developer seeking valuable insights and effective tactics, this guide will aid in making the transition as seamless as possible.
Required tools:
 J.A.C.K. or
  Hammer 3.x - Can convert the map files
 Hammer or
  Hammer++ - Can edit the map files
 Warning:Hammer++ does not have the button used to fix the scale of VMTs resized from non-power-of-two WAD textures!
 Crowbar - Can decompile model files
- HUSKMD - Can decompile map files (WinBSPC, BSP2MAP, MBSPC, 005 are not recommended)
 VTFEdit and XWAD - Can convert WAD files to VMT and VTF
 Adobe Photoshop or
  GIMP - Can edit texture files
 TrenchBroom or J.A.C.K. - Can fix invalid geometry
- G2SFixer or VMF Updater - Can restore scripts.
- Warning:Still have to make manual corrections.
![]() WadMaker - Can convert
WadMaker - Can convert ![]()
decals.wad, which are formatted in a special way, into regular 32-bit PNGs with the correct color and an accurate alpha channel, unlike xwad.
Preparing for Porting
Map selection and analysis
ts_constryard is a map featured in ![]() The Specialists, a popular
The Specialists, a popular ![]() Half-Life modification. It is used for decompilation and porting due to its presence of embedded content. The map features an outdoor environment with construction structures and equipment, and is considered to be well-designed with an open layout and strategic gameplay.
Half-Life modification. It is used for decompilation and porting due to its presence of embedded content. The map features an outdoor environment with construction structures and equipment, and is considered to be well-designed with an open layout and strategic gameplay.
| Screenshots |
|---|


Map using the following content
Textures (.WAD) : Consisting 68 .bmp materials

Models (.MDL): «bank, water box, water box2, truck, fire hydrant, jeep, pa»

Skybox (.TGA): «ts_constryup, ts_constrylf, ts_constryft, ts_constrybk, ts_constryrt, ts_constrydn» Sounds (.WAV): "passaros, techno"
List of files to be converted
From .TGA (Old Format) to .VMT and .VTF (New Format) From .SPR to .VMT and .VTF
Obtaining source files
The use of decompilers for maps may initially sound like a mystical tool. Typically, the act of compiling transforms a beautiful and coherent structure into incomprehensible code. In the case of GoldSrc maps, the brush source data is not included in the compiled map. When using ![]() HLCSG, the brush is split into six faces and the ones not visible in-game are removed. When brushes are in contact with one another, the remaining faces are usually split further. Consequently, decompilers must reconstruct the brush from scratch, resulting in noticeable discrepancies between the original and outputted versions.
HLCSG, the brush is split into six faces and the ones not visible in-game are removed. When brushes are in contact with one another, the remaining faces are usually split further. Consequently, decompilers must reconstruct the brush from scratch, resulting in noticeable discrepancies between the original and outputted versions.
Map decompilation
Introduction
The .map or .rmf file of the desired map is necessary for porting maps to ![]() Source. Acquiring the original source from the creator will greatly facilitate the process, although it is not mandatory. Map source can be obtained by decompiling.
Source. Acquiring the original source from the creator will greatly facilitate the process, although it is not mandatory. Map source can be obtained by decompiling.
![]() GoldSrc does not store original brush geometry in its BSPs like
GoldSrc does not store original brush geometry in its BSPs like ![]() Source does. As a result decompiles will not be "clean" in the sense that there will be very odd looking geometry generated compared to a decompile of a Source map.
Source does. As a result decompiles will not be "clean" in the sense that there will be very odd looking geometry generated compared to a decompile of a Source map.

The two methods of decompilation can be described as Tree-Based and Face-To-Brush. Tree-Based the "cube" generate map files that appear as if the map geometry is carved out of the center of a cube. While not easy to work with when trying to modify a decompiled map, this method is the better of the two. This is primarily due to how this method prevents leaks.
Face-To-Brush decompilation converts every single brush face into its own separate 1 unit thick brush. This method is the worse of the two mainly due to all the texture z-fighting that arises on convex corners. This method typically results in a map file which exceeds Hammer's brush limit.
Choosing a tool
Half-Life Unified SDK Map Decompiler
This is by far the best decompiler to use. It cannot be reiterated enough that any attempts at porting GoldSrc content should start with this decompiler. This decompiler has following:
- Support of Tree-Based and Face-To-Brush methods
- GUI
- Rarely if ever crashes when attempting to decompile
- Customizable decompile options
- Can automatically extract embedded textures
MBSPC (not recommended)
This decompiler has following:
- Exclusively Tree-Based method
- No GUI
- Rarely if ever crashes when attempting to decompile
- Customizable decompile options
- Does not automatically extract embedded textures
WinBSPC (not recommended)
The original Tree-Based decompiler for GoldSrc. This decompiler has following:
- Exclusively Tree-Based method
- Has a GUI
- Prone to crashing and failing to decompile all types of maps
- Customizable decompile options
- Does not automatically extract embedded textures
BSP Viewer (not recommended)
The precursor to Crafty, both these programs are standalone tools that are capable of loading and viewing BSPs without having any game open. BSPV is capable of Face-To-Brush decompiles.
This decompiler has following:
- Exclusively Face-To-Brush method
- GUI
- Rarely if ever crashes when attempting to decompile
- Decompiles are almost always thousands of brushes over Hammer's limit
- Limited decompile customization options
- Does not automatically extract embedded textures
BSP2MAP (not recommended)
The original GoldSrc decompiler. This decompiler has following:
- Exclusively Face-To-Brush method
- No GUI
- Prone to bad generating
- Limited decompile customization options
- Can extract embedded textures
Porting Process
Sounds converting
To port sounds from old games, usually no action is required. However, there are cases when a WAV file still cannot be played.
Textures porting
Getting
To obtain the textures of a map, Wintextract can be used. The user must select the bsp file and specify the folder to store the extracted textures (saved in the WAD format).

Converting
Once the necessary steps have been followed, the WAD file of the map can be obtained. xwad can be used as a conversion tool, which is the official Source SDK tool designed to convert old texture formats to new ones. It should be noted that these steps were performed using the pre-installed Source SDK (downloaded via Steam) on Windows. To access the Command Prompt:
- Click the "Start" button
- Click "Run"
- Type "cmd" and press ↵ Enter.
- Specify the location of xwad.exe
 Example:cd "\SourceSDK\bin\ep1\bin\xwad.exe"
Commands to be used:
-basedir [Output] -wadfile [File('s) Directory\*.wadAfter this operation ![]()
Materials and ![]()
Materialsrc - will be created in the specified [Output] folder. The files with VMT extensions will be located in ![]()
/materials, while the TGA files will be located in the ![]()
/materialsrc and must be converted to VTF.

VTFEdit can be used to convert TGA files to VTF format: Tools → Convert Folder → select the [Input] and [Output] folders → Convert Input (Location of the files to be converted) Output (Converted files location)
With the following options:
Normal Format BGR888 // For better texture quality.
Alpha Format DXT5 // Interpolated alpha channel (recommended).
To VTF → .tga // For working with the required format.Additionally, transparent textures will often benefit from BGRA8888, although the file size will quadruple.
See VTF (Valve Texture Format)#Choosing an image format and Compression (Source_1)#Texture Compression.

After the conversion, VTF files that are ready for use can be obtained. In theory, it is possible to unpack the WAD file and then convert the BMP textures using VTFEdit.
However, this is not a good approach, as some textures used in Goldsource have non-standard values or non-power-of-two dimensions.
xwad automatically creates an additional file called name_texture.resizeinfo (which scales the material to the required size).
A similar operation with VTFEdit should be performed with skybox textures. It is necessary to use the "Create VMT Files" function, which will create files that contain information about the material type. The output folder must be named materials\ (as the game will look for files in a directory with this name). After the conversion, VMT file parameters should be changed to function as sky textures. Using the same program, change the values from LightmappedGeneric (brush shader) to sky (Skybox shader), and add a line “$ignorez 1”. This should be done as follows
sky
{
$ignorez 1 // This is a logical setting. It is mainly used for interface materials that will always be in front of the 3D world, and for skybox materials that will always be behind.
"$basetexture" "skybox/ts_constrybk" // texture directory (The sky texture must be located strictly in the skybox)
}
Also need to convert spr files to a new format using xwadand a command like -basedir [Output] -sprfile [File location*.spr]. Then convert tga files to vtf using VTFEdit without the "Create VMT Files" parameter. Then configure the files to function as sprites in the game by changing the first line value from LightmappedGeneric to Sprite, which represents a visualized world object with unique geometry. Finally, add new lines with specific values:
"$spriteorientation" "vp_parallel" //sprite orientation. vp_parallel - sprite is always facing the player
"$spriteorigin" "[ 0.50 0.50 ]" // Sprite center, locationConfiguration
Once all the map textures have been converted, they need to be configured (VMT).
Since ![]() GoldSrc is an old engine, many textures today don’t look great, the following commands will be added to improve each texture:
GoldSrc is an old engine, many textures today don’t look great, the following commands will be added to improve each texture:
"$detail" "detail/detail_noise1" //This texture is found in [[Half-Life: Source]] [[VPK]] files, very effective for increasing the apparent texture resolution:
"$detailscale" 10.0
To obtain the desired texture, first, download ![]() Half-Life: Source. Then, navigate to the
Half-Life: Source. Then, navigate to the ![]()
…/Half-Life 2/hl1/ and open the file hl1_pak_dir.vpk with GCFScape. Finally, locate and access the ![]()
root/materials/detail/ and select the desired texture file named detail_noise1.

Open it and archive it to the ![]()
…materials/detail/ with the moved textures. Go to the texture location and delete the following vmt and vtf materials with the names:
- {invisible
- sky
- skip
- {blue
- clip
- hint
- null
They are already included in the Source Engine by default, but earlier they had to be added to the map. Replace them on the map with other similar textures.
Type of surface (optional)
Now each texture needs to be configured by adding the following command: $surfaceprop "which object's physical properties will be applied."
The material system in ![]() GoldSrc differs significantly from the Source engine. In Goldsource, the texture surface type was stored in a file called materials.txt (located in the
GoldSrc differs significantly from the Source engine. In Goldsource, the texture surface type was stored in a file called materials.txt (located in the ![]()
mod/sounds) and was represented by a single letter,
However in ![]() Source the process works quite differently. To assign the correct surface to a texture, you need to configure the .vmt (Valve Material Type) file associated with the texture and add the line ($surfaceprop "material") to it, replacing "material" with the desired surface type.
Source the process works quite differently. To assign the correct surface to a texture, you need to configure the .vmt (Valve Material Type) file associated with the texture and add the line ($surfaceprop "material") to it, replacing "material" with the desired surface type.
In materials.txt
To understand the physical properties that should be applied to a specific material, are advised to open the file materials.txt. It can be found in the mod folder,
valve/sounds/Once opened, the values related to different surfaces can be observed.
For further assistance, please refer to the following article: Surface properties in Source Engine
| Property | Replacement |
|---|---|
| M (or G) | Metal |
| V | Metalvent |
| D | Dirt, Sand, Snow |
| S | Slime or Water |
| T (or S) | Tile |
| G | Metalgrate |
| W (or V) | Wood |
| P | Computer or Glass |
| Y | Glass |
| N | Snow |
| X | Grass |
| C | Concrete |
| F | Flesh |
In-Game[ Deprecated]
To understand the physical properties that should be applied to a specific material, the BSP map file must be dragged into the ![]()
Half-Life/valve/maps/ and Half-Life must be launched. This will enable observation of properties of the materials in-game in order to apply them correctly, resulting in realistic material behavior in the game world.
After the menu has loaded, click on the "Create Server" option → Map (choose ts_constryard) → and click on the "Start" button. This will load the chosen level.
| Menu | In-Game |
|---|---|


Result
These methods is utilized to define the physical characteristics of objects, which is optional but improves the overall game quality. In this instance, specific textures will display particular decals of materials when damage is caused to them via shooting. If uncertain regarding the material to use for a particular texture, it can be determined visually or by examining the texture name. For instance, if the texture is labeled "grass,” then the corresponding physical properties should be assigned to "grass.” Below is a sample configuration of the texture for “{gate.vmt”:
 "LightmappedGeneric"
{
"$basetexture" "tsconstr\{gate"
"$alphatest" "1" //It specifies the mask used to determine the binary opacity.
"$ALPHATESTREFERENCE" "0.5" //Specifies the minimum alpha color value at which the effect is rounded up to 255.
"%compilepassbullets" 1 //Useful for foliage or metal trellises.
"$detail" "detail/detail_noise1"
"$detailscale" 10.0
"$surfaceprop" "metal" //The physical properties of the metal are applied.
}
Glowing (optional)
Read more about Glowing Textures.
There will also be textures that need to have an alpha channel added (transparency effect),
$selfillum //parameter whose value can be 1 (enabled) or 0 (disabled), specified in the material's VMT. - Use this for most purposes not compatible with transparency. (Alpha channel is optional)
Alpha channels will be added using Adobe Photoshop CS6 with the VTF plugin installed. (The Adobe Photoshop VTF plugin allows the opening and saving of single-frame, one-sided 2D textures directly from Photoshop without the need to convert them to an intermediate format, such as a TGA file. Multiframe/multi-sided/3D textures can also be opened, but only the first frame/side/layer will be available. The plugin is built on VTFLib and does not support all the advanced features available in VTFEdit)
Adobe Photoshop is a multifunctional graphics editor developed and distributed by Adobe Systems.
Plugin installation:
- Adobe Photoshop → Close Photoshop. (if launched)
- Extract VTFLib.dll to

..\Photoshop\. - Extract the VTF.8bi file to
..\Photoshop\Plug-Ins\File Formats\. - Launch Photoshop.
Selection

The objects that will be part of the alpha channel should be preserved; in this case, the middle of the lamp should stay while the edges should be deleted. Then, press CTRL+C → DELETE → CTRL+S (save as VTF, DXT5 format). After saving, close the texture, reopen it, and paste the copied object using CTRL+V. This results in two separate layers. Save it again as VTF.

In this case, everything was done correctly. To check if the alpha channel works, open the texture using VTFEdit and go to View → Enable Mask.
| Example |
|---|


Perform a similar operation with similar lamp textures. Their VMT file should be modified as follows:
"LightmappedGeneric"
{
"$basetexture" "tsconstr\+0~tnnl_lgt3"
"$detail" "detail/detail_noise1"
"$detailscale" 10.0
"$surfaceprop" "glass"
"$selfillum" 1 // Texture Glowing (alpha channel)
"proxies"
{
"ToggleTexture"
{
"toggletexturevar" "$basetexture"
"toggletextureframenumvar" "$frame"
}
}
}
"ToogleTexture”: Apply the signage file to the brushes in Hammer and use env_texturetoggle and logic_relay for animation (in this case, it’s not necessary). Sometimes it’s necessary to create multiple animated textures,

After completing the necessary operations, an animated material was obtained. To verify it, go to the Image section and click Play to toggle between the two textures. Once it’s confirmed that it’s working properly, the file may be saved. Go to File, Save As -> select the VTF format, and save it as ‘+0~drkmtls3’ (since this texture is already assigned to the map). Also, the VMT file for this texture should be updated, and the final version should look like this:
"LightmappedGeneric"
{
"$basetexture" "tsconstr\+0~drkmtls3"
"$detail" "detail/detail_noise1"
"$detailscale" 10.0
"$surfaceprop" "computer"
"$selfillum" 1 //Glowing
"proxies"
{
"ToggleTexture"
{
"toggletexturevar" "$basetexture"
"toggletextureframenumvar" "$frame"
}
}
}
In this case, "ToggleTexture" is necessary because the material will be changing
Similar operations should be done with other similar textures.
Models Porting
{{warning model lightmaps}} for more information.
Utility setup
When working with models, Crowbar will be employed. To use Crowbar, Half-Life 1 must be installed for decompilation, and Half-Life 2 for compilation. Before beginning the decompilation process, it is necessary to create a distinct folder for each mdl file based on the file name. Smaller, individualized folders are required to prevent confusion and erroneous model collisions as overlapping names may occur after decompiling smd reference models. Below is a visual representation of what this folder structure should resemble:

To start working with this tool, it is necessary to go to the Set Up Games section and specify the directory of the Steam library with the pre-installed Half-Life 1 and Half-Life 2. After setting up. To decompile, go to the Decompile section and use the Decompile button, where MDL input (Folder and subfolders) is the location of the models for decompilation. And Output to (Work folder) is the output of the source files after decompilation.

Configuration
After completing the procedure, directories will appear in the designated location that will contain the source files of the models. These cannot be compiled on the Source Engine at present, as they contain outdated values that will result in errors. To correct this issue, it is necessary to edit the .qc file of each model. Demonstration on the banco model:
 // Created by Crowbar 0.71
// Stored modelname (without quotes): "D:\3D Studio Max Models\Devastation\Bench3\bench3.mdl"
$modelname "banco.mdl"
$cd "."
$cdtexture "." //converts clipart to textures
$cliptotextures //tells the compiler to convert .bmp to textures.
$scale 1.0
$bodygroup "body"
{
studio "bench3"
}
$flags 0 //(parameter that controls the visualization of materials)

$cbox 0 0 0 0 0 0
$bbox 0 0 0 0 0 0
$hbox 0 "joint1" -14.22 0 -39.560001 17.540001 46.57 50.919998
$sequence "idle" {
"banco_anims\idle"
ACT_IDLE 1
fps 30
loop
}
The outdated line is flags, as they no longer work. It is necessary to remove these commands and replace them as follows:
"$flags 0" → "cdmaterials" [model texture directory\].$cdmaterials (specifies the folders in which the game will look for model materials (subfolders are not searched). Each path is related to <game>\materials.) An interesting feature of the Goldsource engine is that textures are embedded in the model. In the Source Engine, textures are separate from the model.
Additionally, the following values must be added to give the model collision:
$collisionmodel "[reference name].smd"
{
$automass // Calculates the mass of the model based on the volume of the collision model and the material.
$concave //Smooth out shell shading
}Such an operation must be carried out with each QC file of the model source.
// Created by Crowbar 0.71
// Stored modelname (without quotes): "D:\3D Studio Max Models\Devastation\Bench3\bench3.mdl"
$modelname "constryard\banco.mdl"
$cd "."
$scale 1.0
$bodygroup "body"
{
studio "bench3"
}
$cdmaterials "models\banco\"
$collisionmodel "tree_deciduous_01a_physbox.smd"
{
$automass
$concave
}
$cbox 0 0 0 0 0 0
$bbox 0 0 0 0 0 0
$hbox 0 "joint1" -14.22 0 -39.560001 17.540001 46.57 50.919998
$sequence "idle" {
"banco_anims\idle"
ACT_IDLE 1
fps 30
loop
}
Using the same tool, models will be compiled. Go to the Compile menu, then select the "Game that has the model compiler" option and choose Half-Life 2. Select directories and click on the Compile button.

Check whether the mdl files have been generated in the specified [Output to] folder corresponding to the number of QC files. Here, there are 7 files.
Textures
After decompiling the models, bmp format images appear in their source files which need to be converted to texture format using XWAD. Similarly to the previous step, use the command:
-BaseDir [Output] -BmpFile [Location of files\*.bmp]Each texture should have its own directory according to $cdmaterials (during compilation, the game will look for materials for the model in the specified directory).
After converting bmp to tga, use VTFEdit to convert to vtf without the "Create VMT Files" parameter. It is necessary to edit vmt files generated by XWAD. The files should be modified like this
"VertexLitGeneric" //Model Shader
{
"$basetexture" "models\banco\BENCH1A" //location of textures, according to .qc $cdmaterials.
}
Type of surface (optional)
Determining the surface type of a model visually is possible, or it can be observed within the game. To assign the surface type for the model, the command $surfaceprop "type of surface" must be written in QC like to VMT.
Issues
Map Porting
Getting the source
What is needed for porting a map? It is necessary to have the source. The source can be requested from the author or an attempt can be made to decompile the map to obtain the source file. The MBSPC decompiler will be used here.
- Click on the "Start" button.
- Click on "Run”.
- Type "cmd" and press ↵ Enter.
- Specify the location of [mbspc.exe].
With the following commands:
--cluster //compute level clusters
-optimize //optimize
-capsule //use spherical collision model
-bsp2map220 //convert BSP to Valve's MAP 220 format
To decompile, just open the .bsp file with mbspc.exe

Adaptation of the source
To open the converted MAP file, it needs to be converted to RMF format. Will be chosen J.A.C.K. as the viewer tool, which can open files with the MAP extension, but in this case, it should not be done. Opening it will result in an error:

Using J.A.C.K., a MAP file can be saved with the RMF extension. Prior installation of Half-Life is required for J.A.C.K. to function, as well as specifying the ![]() Half-Life SDK directories. The user needs to navigate to Tools → Settings → Game profiles to access certain sections where directories must be specified.
File → Save As → RMF
Half-Life SDK directories. The user needs to navigate to Tools → Settings → Game profiles to access certain sections where directories must be specified.
File → Save As → RMF

Once this operation is completed, the resulting file can be opened in the Hammer Editor. Valve Hammer Editor, which is located in the Source SDK ![]()
/bin/hammer.exe, will be used to edit the map. By default, Hammer is already set up, but if any issues arise, navigate to Tools → Options → Game Configurations and adjust the necessary directories.
In the top left corner, click on File → Open → select the .rmf format and open the decompiled file.

Troubleshooting
Textures[ Deprecated]
Missing
Upon opening the map, it can be observed that it lacks textures.

They need to be applied. To do so, go to the "File → Convert WAD to VMT" option (only in ![]() )(not in
)(not in ![]() ). The "Convert WAD to VMT" tool will apply the textures that have already been converted. If everything has been done correctly, the following message will appear:
). The "Convert WAD to VMT" tool will apply the textures that have already been converted. If everything has been done correctly, the following message will appear:

If something has been done incorrectly, instead of the aforementioned message, statements will appear indicating that some textures are missing. The final result will appear as follows:

Rotation
Further, errors related to the texture axis need to be identified. For this, Crafty Object Viewer is required. This program is used for viewing bsp and bsp, .gcf, .ncf, .pak, .vpk, .wad, .xzp files. A comparison between the resulting version and the original work is necessary. This is illustrated using the following screenshots:
| After decompilation | Original version |
|---|---|


The textures are incorrectly placed and must be corrected manually. Surfaces will be selected using the Toggle Texture Application tool:

Read more about Hammer Tools Menu Change the "Rotation" value from 180 to 0. Some textures may be incorrectly rotated. To correct this, change the "Align" value from "World" to "Face”. This is demonstrated in the following screenshots:
| After decompilation | Original version |
|---|---|


Compare the original file and the source version manually to correct similar issues. If changing the "Rotation" parameter does not work, the "Justify" → "Fit" (scale to fit the size of the face) option can be used.
| without using "Fit" | using the "Fit" |
|---|---|


| After decompilation | Original version |
|---|---|


On this surface, the "Align" parameter needs to be changed from "World" to "Face”, the "Rotation" value needs to be changed from 180 to 0, and the "Fit" function should be used.

It also happens that the decompiler applies an incorrect texture to the surface of an entity:


Use "Browse" (opens the Texture Browser) → look for the nodraw texture (to speed up the process, go to the "Filter" tab and enter "toolsnodraw" there) → apply it to similar surfaces. This is necessary to optimize the map because players will not see this texture during gameplay. If this is not done, the unnecessary load will be placed on the computer. This is done for any similar areas, and it should look like this:


Sometimes neither of the functions is effective, in which case it is necessary to adjust the dimensions manually. In this instance, using "Texture shift" and manually set the "X-axis" value.


There are instances where a texture is incorrectly applied to multiple brushes (two separate surfaces), such as in the case of buildings.


To correct this issue, activate the "Treat as one" function. When multiple sides are selected, enabling this flag causes Face Edit to treat them as one large face. This feature is generally used in tandem with "Fit.” Highlight all surfaces and click "Fit" to eliminate the problem. However, if this method does not work, it is necessary to adjust the values manually. The values from similar surfaces can be used to simplify the correction process, and the "X and Y" axis can be edited manually.


Wrongs
Sometimes errors occur where a different texture overlaps a brush


The solution for the problem is simple. Search for the "woods_wood2" texture and replace the incorrectly applied material. Check for errors in the map by pressing ALT+P in Hammer. Upon error detection, selecting one highlights the object/solid impacted (if applicable) and three options will appear:
- Go to error - press to center the 2D and 3D views on the object related to the error.
- Fix - click to attempt to correct the current selected error.
- Fix all (type) - use this button to correct all errors of the chosen error type.
Read more about Hammer Hotkey Reference.
Geometry
When scrolling down, "Invalid solid structure" errors may be discovered, necessitating resolution. This signifies an invalid structure of the solid likely due to vertex manipulation and indicates that it is not convex in all planes.

The solid must be corrected or rebuilt if infeasible. Click "Go to error" and examine the error. Selecting "Fix" may alter the model shape resulting in inconsistency with the original structure. As a result, the solid must be recreated.
Before using the "Fix" function.
After using "Fix”.


After the operation, the structure became corrupted. Although manual reconstruction is feasible, an alternative approach will be employed instead - using BSP2MAP to decompile the map and extracting the affected brush from there.
The next stage is similar to the previous using J.A.C.K. to export the detail to the RMF format before opening the final file in Hammer Editor to apply the textures.
This decompiler broke it into various parts.

To optimize, selecting all sides of the structure.

Using a combination, the dialog box for hammer properties can be opened, which is the main method for changing an object’s properties. This also allows the adjustment of VisGroup properties for one or multiple brushes. For objects that are not entities, the Properties dialog box will only display the VisGroup tab. Information on individual entities can be found in the entity list. These brushes can be converted to func_detail for optimization. Read more about func_detail. Next, the detail needs to be copied using the CTRL+C and pasted into the version where the "invalid solid structure" problem occurred using the CTRL+V.

Further, according to the size, it is inserted at the same coordinates (Sometimes the model cannot be placed in the same spot due to large grids.
This structure has many problems (related to texture axis and incorrect structure):
BSP2MAP
MBSPC


The process of fixing can be simplified by taking some of these building brushes from BSP2MAP.
BSP2MAP deconstructed the map in a less-than-perfect manner (the brushes inside have space). To optimize the brushes of this structure, the textures need to be replaced with -nodraw (these areas should not be rendered as the player will never see them).


The question may arise as to why BSP2MAP was not used. Despite decompiling the structure better, it is not true. Gaps appeared in the map, and many structures looked bad. However, it should be noted that the majority of textures have the correct axis.

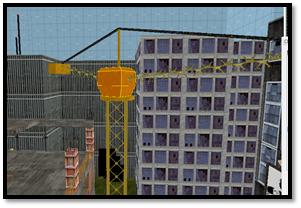
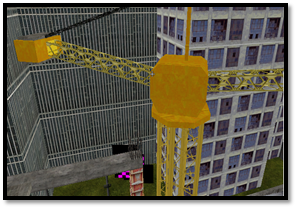
After performing the necessary operations, the required brush of this crane is selected. Using the CTRL, it is first converted into an entity using CTRL+T and set as "Func_detail.”

The structure is copied from the source (BspTwoMap) using CTRL+C, after deleting the structure from the original file (from MBSPC), and pasted into the same version using CTRL+V (at the same coordinates). If nothing happens after clicking "Fix,” delete the brush. Sometimes the problem "Invalid solid structure" occurs with brushes that are already on the map (or very similar). Simply duplicate another brush, select the required brush, copy it, and paste it. Then, using the grid, insert it in the necessary coordinates.


The dialog box is opened using the ALT+P, and the remaining problems are fixed using the "Fix all (of type)” command for each entity (which are related to the use of outdated values). If the error "There is no player start" remains, it will be fixed after creating the respawn point (for the player). However, this is not necessary at the moment.

Entities
Obsolete
On the map, the following objects that do not represent something functional can be seen:

Outdated entities usually do not work. Often, what they did can be done better using something else. In this case, using the Hammer Editor, some are identified of these entities and remember their names. Even modest levels can contain hundreds - even thousands - of objects. Two ways are offered by Hammer to track items in the level: normal grouping and visibility grouping (VisGroups). To quickly identify each outdated entity, simply use the "VisGroups" window → "Auto" and uncheck all except for "Brush Entities”.

It should turn out like this:

In such a case, it is easier to find outdated entities, but before deleting them, move to the "File" section → "Save As" → Indicate the VMF format.

Now, open the saved VMF file using the ![]() Notepad++ (close the Hammer Editor). What it should look like is demonstrated in the screenshot:
Notepad++ (close the Hammer Editor). What it should look like is demonstrated in the screenshot:

Use the CTRL+F → find the item "Replace" and in "Find:” enter "ts_model" (an outdated entity that no longer works). And in "Replace with:” enter "prop_dynamic" (this is a point entity available in all Source games. It is used to add a model to the world that can animate itself. In our case, this is optional). After that, click "Replace all" and outdated entities will be replaced. Then find any line, replace "Find:” with "Prop_dynamic" → Find next. After that, lines of models will be visible, and their directory will be there.
Also, replace info_player_deathmatch with info_player_start in the same way. And Cycler (used to display a model for testing purposes. After turning it on, the model will play available animations.) with prop_dynamic. It should be changed according to the location of the model. In this case, the replaced "model" "models/ts_constryard/hidrante.mdl" with models/constryard/ hidrante.mdl. To simplify the process, do this as in the previous step (replacing all lines with the necessary ones at once). After that, use the File → Save option. And start the resulting VMF file. The models work.

Using the VisGroups dialog box, uncheck everything except for Brush Entities. Manually delete all outdated entities by selecting them with the CTRL and pressing the Delete. In this case, deleting all entities with the names "ts_groundweapon" and "ts_powerup" (these are entities from a modification for which this map was created, namely weapons and abilities). After completing these steps, return all objects to the "VisGroups" and it should look like this:

After saving the RMF file as VMF, holes appeared in the structure when compiling with BSPtwoMAP.


Brush to model (optional)
After compiling the map, holes appear in the structure (not visible in Hammer).

If this structure has been converted into a "Func_detail”, convert it back into brushes by using the Ctrl+⇧ Shift+W ("Move to world", which removes the entity status from the selected brushes). Then, select the previously mentioned brush and go to File → New (this will open a new blank map file). Next, use the Ctrl+V to paste the object onto the new map file and edit it. Using the Ctrl+T, edit the class option and replace Func_Detail with propper_model. To use Propper, open the map in Hammer and then turn several brushes into propper_model entities.
Model Name: artpass/arch
Material path: models/artpass/arch
Source folder: C:/propsource
To duplicate this entity, turn it into a func_detail and replace all of its textures with "Clip" using the ‘Apply current texture’ tool.
To run Propper, one can create an object and convert it into a model, similar to creating maps with vbsp. When prompted, the current game directory and vmf file should be provided.

A new object should now be ready for use! If replacing an existing model, it may be necessary to restart Hammer in order to see changes. Access the map where the object needs to be inserted. Create a prop_static entity (this is an internal point available in all Source games. It is used for inexpensive addition of models to the world. It cannot move, animate, or accept input, and no longer exists as an object after the map is compiled). Using the Entity tool (this tool allows for the placement of point-based objects on the map. Point-based objects are objects that exist only in a point and do not rely on the brush for their effect), select Categories → Entities in the resulting window. In Objects → prop_static.
For the "World Model,” select the compiled model through Propper. In this case, it would be "Constryard_building.” After this, insert it at the same coordinates where the brush was.

Point[ Deprecated]
Configure the sprite entities on the map by searching for "env_sprite" in the VMF file through ![]() Notepad++. If necessary, replace all instances of "sprites/ts_constryard" with "sprites.” Open the map in the Hammer Editor and select all "env_sprite" entities. Group them together with the CTRL+G, and access the properties of these objects. Adjust the settings as follows:
Notepad++. If necessary, replace all instances of "sprites/ts_constryard" with "sprites.” Open the map in the Hammer Editor and select all "env_sprite" entities. Group them together with the CTRL+G, and access the properties of these objects. Adjust the settings as follows:

Read more about env_sprite.
Now the "Env_sprite" objects appear to be too blue… This needs to be corrected using Adobe Photoshop. Open the VTF sprite files and use the "Color Range" tool (Selection). Select the blue area and lower the brightness in "Hue/Saturation" (Image → Adjustments) until the color appears to be black. Alternatively, run the sprite through xwad.

Clips
After these actions, the situation will improve. Add clips to the map.
| Result |
|---|


Optimization[ Deprecated]
All textures in these areas should be covered with “-Nodraw" (except for the Skybox texture, which can be left as is). A comparison can be seen below:
| Before | After |
|---|---|


To optimize the map further, replace old Func_illusionary's (originally added as a deprecated entity from Half-Life for backward compatibility) with Func_detail. However, some Func_illusionary's that use the {apoio texture should be left as is and instead add an invisible wall around each column. This modification will result in the following:

Cubemaps (optional)
Now add Cubemaps to the map. Read more about Cubemaps. The result looks like:


Nodes (optional)
Now add Nodes to the map. Read more about Nodes. The result looks like:


Lighting
Increase its values (Low values in Goldsource are equivalent to high values in Source). Access the properties of the object and modify the "Brightness and color + Ambient" value to a higher but similar color palette. Read more about light_environment.
Light environment, some KVs have different names:
Mechanism
Now it’s time to work on the func_train's. Read more about func_train.
In this case, it’s a elevator. Replace the func_train with the func_tracktrain. Configure it like in the screenshots below:
- No User Control Only from button control
- Fixed Orientation Axis
| Result |
|---|


Additionally, add two path_tracks to the middle of the lift and combine them. Be sure to assign names to these entities. Use the Next Stop Target command to connect them sequentially,
| Result |
|---|


Each of these entities must have a name. In the Next Stop Target field, specify the destination where the lift will go. In this case, a loop needs to be created (P_BAXIO → P_CIMA and back to P_BAXIO):
- Stop stops the train
- SetSpeed sets the speed (for stopping the lift)
- OnPass stops at a designated stop (otherwise there may be problems and it won’t stop)
| Necessary parameters for configuration |
|---|


Next, let’s configure the func_button. Add the env_texturetoggle next to the button.
| Result |
|---|

In the Target Brush(es) field, enter the name of the func_button object to which the entity should be attached. This will allow the button to have an animation when it is interacted with. Open the properties of the button and add the following values to Outputs:
| Result |
|---|

The flags for the buttons should look like this (flag combination determines the specific features of the entity):
| Result |
|---|

Avoid moving the button from its static position after being pressed. Use the Activates function so that players can call the elevator by pressing E.
Perform the same operation on all similar objects, then proceed to the final stage. Access the VisGroups window, uncheck all boxes except for Entities select all entities, go to properties, and change the rendercolor value from 0 0 0 to 255 255 255 (otherwise, all entities will be black. In GoldSrc, this function worked differently). Afterwards, open the Error Check window and fix any remaining issues.
Saving: Open the File menu, and choose either Save or Save As. Compile the saved file and start the game after compilation. The map in the new engine can now be used. Also, don’t forget to build cubemaps and set up lighting for HDR. After completing these steps, the porting process is considered finished. Now the new BSP works in Source.
In this case, it's an elevator. Change the func_train to the func_tracktrain (This is a brush available in all Source games. It functions as a moving platform that the player can ride on. It follows the path_track entities path).
And add two path_track's (a point entity available in all Source games. It is used to build paths that other objects can follow. Each path_track is a path node, each containing the name of the next path node).
It was placed in the middle of the elevator, and merge them. Definitely assign a name to these entities. Using the command: Next Stop Target (They must be connected in series,
Each such entity must have a name. The Next Stop Target should contain the target where the elevator will go. In this case, one needs to make chain. (P_BAXIO → P_CIMA and in a circle).
SetSpeed - Set the speed (to stop the elevator).
- Let's move on to the
func_buttonsetting, add theenv_texturetogglenext to the button. - In Target Brush(es) The name
func_buttonwas assigned to the identified the object which needed to be attached. to the object (In order for the button to have animation when it is interacted with). Open the properties of the button. And add the following values to Outputs: - Flags (Toggles the exclusive functions of the object, its specific number is determined by the combination of added flags) buttons should look like this:
- Don’t move (So that after pressing the button does not fly to another place, and remains static).
Color correction
Do this operation with all similar objects. Proceeding to the final stage is now possible. Go to the "VisGroups" window, uncheck everything except "Entities" → Select all entities → move to properties → and change the rendercolor value from "0 0 0" to "255 255 255" (Otherwise, all entities will be black, in GoldSource it worked differently (if the map has colored sprites don't do it! Instead, select all "Brush Entities" and props, if any)) Otherwise just open notepad++ and edit all lines with value rendercolor 0 0 0. After that, open the Error Checking window and fix the remaining problems. Preservation.
Compiling
Open the "File" menu, and choose one of the two: "Save" or "Save As...": After compilation, the game will start. The map can now be used in the new engine. Also don't forget to build cubemaps and set the lighting to HDR. After the done actions, it can be assumed that the porting is completed. The new bsp is now running in Source Engine 24.
Comparison
To compare the original version with the port, ![]() Half-Life on the
Half-Life on the ![]() GoldSrc Engine and
GoldSrc Engine and ![]() Half-Life 2 on the
Half-Life 2 on the ![]() Source Engine were used.
Source Engine were used.
| Original | Port (HDR) |
|---|---|


Judging by the screenshots, the texture quality has improved (due to the use of $detail), the map has become darker, and the level geometry remains the same. The overall quality is significantly higher.
light_environmentConclusion
Old map was successfully ported to a new game engine, and the resulting map was even modernized with additional texture values. A comparison was made with the original work. Decompilation of the necessary files was successful, with the main focus being on fixing issues after decompilation, which involves recreation, with most entities being ported. Optimization was successful, and many complex geometric shapes were converted into models, both in func_detail and using-nodraw to optimize the final map. Cubemaps and AI nodes were added. After completing all the stages, compilation was initiated, and the map was successfully ported.
Unincluded
Porting from ![]() GoldSrc has many branches, and each porting is unique. Here are all the cases that were not covered in the main analysis of content porting.
GoldSrc has many branches, and each porting is unique. Here are all the cases that were not covered in the main analysis of content porting.
Detail textures
In ![]() GoldSrc, detail texture information is usually contained in
GoldSrc, detail texture information is usually contained in ![]()
maps/<mapname>_detail.txt.
Open the needed detail file.
- The first string is the name of the WAD texture. This is equivalent to the name of your VMT in
 Source.
 - The second string is the path and filename (without extension) of the detail texture, relative to
<moddir>\gfx\. This is equivalent to $detail in Source. - The last two numbers are the scale of the detail texture (how many times it repeats). This number works the same regardless of texture resolution, so the same numbers can be used for both
 GoldSrc and Source, even if the WAD texture has been resized from a power of two. This is equivalent to $detailscale in Source.
So assuming the detail texture was placed in ![]()
materials\detail\, the ![]() Source VMT for the above WAD texture should look something like so:
Source VMT for the above WAD texture should look something like so:
| Color info? | Most | |
|---|---|---|
| Greyscale | I8 | ATI1N |
| Colored | BGR888 | BC7 |
Ready-to use VTF conversions of the detail textures used by ![]() Counter-Strike: Condition Zero,
Counter-Strike: Condition Zero, ![]() Counter-Strike (Xbox), and
Counter-Strike (Xbox), and ![]() Day of Defeat 1.3 can be found on GameBanana.
Day of Defeat 1.3 can be found on GameBanana.
Tool textures
See also Tool textures (Source) and Tool textures (GoldSrc)
| Notes | ||
|---|---|---|
| {blue {invisible |
N/A | Create a new material with $alpha 0.0. Do not use tools/toolsinvisible, as some things will be able to pass through in certain games.
|
| aaa_hurt aaa_multi aaa_once aaa_push aaatrigger aaa_push2 |
tools/toolstrigger | Alternatively, create a new material with %compiletriggerand $alpha 0.5, to retain distinction.
|
| cr_matmetal bark cr_matcard cr_matbark cr_mathvymetal cr_matsand cr_matwood cr_matleaf |
N/A | Create a new material with %compileclip or %compilenodraw and appropriate $surfaceprop. See /VMTs#Clip textures. |
| CLIP CLIPBEVELBRUSH CLIPBEVEL |
tools/toolsclip | |
| HINT | tools/toolshint | |
| ORIGIN | [ |
Although there is a new (sometimes functional) tool texture tools/toolsorigin, a brish entity's origin now is a dragable point, available regardless of whether an origin brush is present. As such, the origin brush should be removed and the origin of the entity adjusted appropriately. |
| NOCLIP | N/A | Create a new material with %CompileNonSolid 1 and %CompileInvisible 1
|
| SKIP | tools/toolsskip | |
| WHITE | tools/toolswhite | |
| BLACK | tools/toolsblack | |
| sky | tools/toolsskybox tools/toolsskybox2d |
|
| NULL BEVEL CONTENTEMPTY Black_HIDDEN |
tools/toolsnodraw | |
| SOLIDHINT | tools/toolsnodraw | Add %CompileNoChop 1 to the VMTs of the applicable drawn faces to have this tool texture's behavior.
|
| CLIPHULL1 CLIPHULL2 CLIPHULL3 |
tools/toolsclip tools/toolsnpcclip ? |
No direct equivalent, due to changes in how Clip |
| TRANSLUCENT BOUNDINGBOX |
||
| CONTENTWATER | tools/toolsnodraw | Add $no_cull %CompileNonSolid to visible materials that should receive the contentwater effect
|
Map Scripting
Outdated
Lines
| Notes | ||
|---|---|---|
| target | [ |
OUTPUTS TARGET (SELECT ACTION) |
| killtarget | [ |
OUTPUTS Target (KILL) |
| body | bodygroup | |
| dmg | damage | |
| skin | [ |
|
| angles | movedir | |
| _cone2 | _inner_cone | |
| fadein | fadeinsecs | |
| spr | vmt | If this value is not changed, then the game will have errors with sprites. |
| 0 0 0 | 255 255 255 | rendercolor Neutral color in |
Entities
| Notes | ||
|---|---|---|
cycler_spritecyclerenv_modelitem_generic |
prop_dynamicprop_staticprop_physics |
Static props with multiple submodels should either use prop_dynamic or be split into separate MDLs, as prop_static does not support selectable submodels, but will still draw lightmap shadows from all submodels.
|
trigger_camera |
point_viewcontrol |
|
env_glow |
env_sprite |
Select "Glow" Mode |
env_sound |
env_soundscape |
Set applicable DSP mode in the Soundscape. |
trigger_auto |
logic_auto |
|
trigger_relaymulti_manager |
logic_relay |
multi_manager exists in |
aiscripted_sequence |
scripted_sequence |
|
func_train |
func_tracktrainfunc_tanktrain |
func_train may still be working in game. Despite the fact that it is absent in the fgd files.
|
trigger_brush |
trigger_multiple |
|
multisource |
Inputs and Outputs in | |
info_player_deathmatch |
info_player_start |
This value does not always need to be changed. Depending on whether the mod supports this entity. |
armoury_entity |
weapon_mp5navyweapon_tmp (1)weapon_p90 (2)weapon_mac10 (3)weapon_ak47 (4)weapon_sg552 (5)weapon_m4a1 (6)weapon_aug (7)weapon_scout (8)weapon_g3sg1 (9)weapon_awp (10)weapon_m3 (11)weapon_xm1014 (12)weapon_m249 (13)weapon_flashbang (14)weapon_hegrenade (15)(16)[Clarify] (17)[Clarify] weapon_smokegrenade (18) |
The numbers imply Item value of armoury_entity, equivalent to the entity in Source.
|
func_door_rotating |
Without changes | The origin and flags need to be configured. |
I/O Layouts
My Output Target Entity Target Input Parameter Delay Only Once 
OnStartTouch trigger_example CallScriptFunction OnStartTouch 0.00 No OnEndTouch trigger_example CallScriptFunction OnStartTouch 0.00 No
Complex Map Scripting
Doors
If the map you are decompiling has doors. You will be able to notice that this brush has a green cube (no matter where) - this is a rotation point that previously worked in ![]() GoldSrc, but in
GoldSrc, but in ![]() Source this brush needs to be removed. And configure the door rotation point separately.
Source this brush needs to be removed. And configure the door rotation point separately.
Func_door_rotating
| Sequence | Screenshot | Actions |
|---|---|---|
| 1 |  |
Obsolete door |
| 2 |  |
Select this entity, and you can see that there is another rotation point (it is in the center), it needs to be configured. |
| 3 |  |
|
| 4 |  |
In solids mode, remove the green square. |
| 5 |  |
Recreations
Displacements
Most likely, the structure that is the displacement will be indicated as a invalid solid structure. We'll have to recreate it from scratch, on appearance.
Although you can try using a tool that converts maps into models. And accordingly convert the map source (.map) into a model (.ase)[1]
Revisions
The methods shown in the main article are not the only ones, there are many other ways to port content.
Troubleshooting
Geometry
Although the method demonstrated in the geometry error fixing guide is quite affordable and can save some time, it is not the best solution.
TrenchBroom
- Install Trenchbroom
- Select Half-Life experimental mode (and set game path)
- Utilize J.A.C.K. to open the map and find any invalid brushes.
- Open Trenchbroom. Proceed by accessing the .map file and combine multiple brushes into a single one by control-clicking on each of them and pressing CTRL+J (convex merge) or Edit → CSG → Convex merge.
| Example |
|---|
|


Keep in mind that this process might be time-consuming, especially if the map is extensive and intricate.
Newbspguy
Porting projects
Game selection and analysis
As an example for the porting will be chosen a once popular mod They Hunger (only Episode 1) for Half-Life 1. This decision to use it is justified by the fact that it has its own unique design and storyline, interesting content, and above all a slightly modified code.
They Hunger is a full conversion horror-themed mod for the Half-Life video game. It was created by Neil Mahnke and released in three episodes between 1999 and 2001. The plot of the mod unfolds in a small town in rural America, flooded with zombies after a series of unusual events. The player takes on the role of a lone survivor who must make his way through the town to uncover the source of the zombie outbreak and put an end to it. They Hunger featured the use of cinematic horror elements, such as atmospheric sound design and lighting effects, as well as an emphasis on puzzles and exploration in addition to combat. The mod was also praised for its attention to detail and high quality production. They Hunger has become a popular and influential mod for Half-Life, especially in the horror genre. It has inspired other horror-themed mods, including the popular Cry of Fear.
Projects
Standalone
| ||||||||
Extras
Subpages
- Porting_GoldSrc_content_(maps,_models,_etc.)_to_Source/VMTs
- Porting GoldSrc content (maps, models, etc.) to Source/Replacements
- Porting GoldSrc content (maps, models, etc.) to Source/Ricochet Maps (Archive)
See also
- Porting GoldSrc content to Source
- Porting GoldSrc maps to Source
- Goldsource to Source texture porting
- Converting Textures
- Porting IdTech 3 Maps to Source
External Links
- CnicK tutorial
- Noug4at' tutorials
- 3kliksphilip' tutorial (porting map)
- Maggot' Guide (porting V_models)
- Oteek' (porting map)
- Porting GoldSRC maps to Source on the
 Momentum Mod documentation (only covers map geometry and textures)
 - Redistributor' Steps (Porting Maps) on GameBanana
- VD-Info (porting animated textures)
- Adam' Guide (porting models)
- loKkdoKk' Instruction (porting models)
- INsane' note (before you port)