Worldmachine
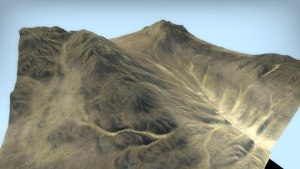
![]() Worldmachine is a very powerful tool for creating realistic terrain. Thanks to its ability to export heightmaps, you can convert terrain generated in World Machine into displacements using DispGen for use in the Source Engine.
Worldmachine is a very powerful tool for creating realistic terrain. Thanks to its ability to export heightmaps, you can convert terrain generated in World Machine into displacements using DispGen for use in the Source Engine.
This tutorial assumes a few things:
- You have World Machine installed, you know how to use the program, and you have already created the terrain and megatexture you want to import into Source.
- You have Dispgen installed and working.
- You know how to convert a texture to a VTF and create a working VMT.
Exporting the Bitmaps
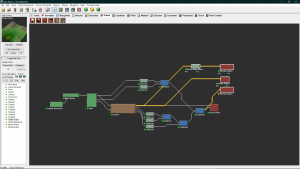
To import this into Source, we will need 3 textures: a Heightmap, a Diffuse texture, and a Normal Map. To get a normal map, add a "Normal-Map Maker" device (located under the "Converter" tab). To the input, connect your primary terrain heightmap. From the normal map output, connect a Bitmap Output (found under the "output" tab). Don't forget to double-click on the bitmap output and set a file destination.
Next, we need a heightmap. Connect your primary terrain heightmap to a Height Output node (located under the "output" tab). Double click on it, set your file location, and change your file format to BMP. This is required to import the heightmap into DispGen.
Finally, we need to export the megatexture. Connect the output of your texture to a Bitmap Output and make sure to set your file path.
Go to File -> Export Terrain Files and press "Export All." If you are prompted to build the files, press Yes.
Generating the displacements with DispGen
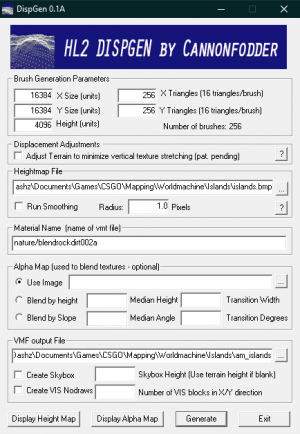
Next, we need to use DispGen to convert the heightmap into displacements. The settings used for this tutorial are 16384 units for the X and Y size, 4096 for the height, and 256 for the X and Y triangles, but these numbers should be changed to suit the scale of your terrain and the resolution required. In addition, uncheck the box next to "Adjust Terrain to minimize vertical texture stretching" (checking it can cause the texture to become misaligned) and uncheck "Run Smoothing." You can leave the material name alone, as we will be making a custom texture later. These settings can (and should) be changed to fit your map or 3D Skybox
Finally, define your heightmap and VMF Output file and press generate!
Creating the texture
Now, we need to import our megatexture into Source so that we can apply it to the terrain. You can convert your textures into VTFs using VTFEdit. Here is an example VMF for our megatexture:
LightmappedGeneric
{
	$basetexture "worldmachine/terrain1"
	$bumpmap "worldmachine/terrain1_normal"
	$surfaceprop Rock

	$detail "detail/detail_rock001"
	$detailscale 8
	$detailblendfactor 0.47
}
This VMT includes a detail texture. The detail texture helps add extra texture to the otherwise bland surface, even when viewed at a distance. The high detailscale adds detail without having too much repetition.
Applying the texture and finalizing
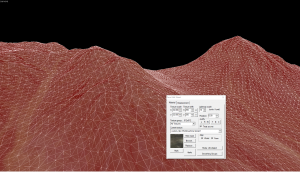
It's finally time to texture the terrain! Open the VMF from wherever you saved it in DispGen. The first thing you should do is select all of the displacements (by drag-clicking a box around them in one of the 2D views) and group them together so they are easier to handle. Next, select all of your displacements, press Shift + A to open the Face Edit Tool, and navigate to the displacement tab. There, you need to make sure your displacements are either power 2 or 3. If they are Power 4, reduce them to power 3 or lower to prevent crashes. After reducing the power, you may need to sew the displacements to get rid of gaps between them.
Next, we need to fit the texture to our terrain. With all of your displacements still selected, navigate back to the Material tab. There, press Browse, search for your texture, select it, then hit apply. Check the box that says "Treat as one," then press "Fit." Your terrain is now ready to go!
Before compiling, don't forget to add a skybox, an environment light, and change your map's skybox to one available in your game, as DispGen sets the skybox to one from Half-Life 2.
| |||||||||||||||||||||||||||||||||||||||||||||||||||||||||||
| Environment articles: | |
|---|---|
| Skies and environment maps | |
| Terrain and displacement mapping | Displacements • Creating Holes in Displacements • Digital Elevation Models • Creating custom terrain with Worldmachine |


