Materialize

You can upload screenshots at Special:Upload. For help, see Help:Images.
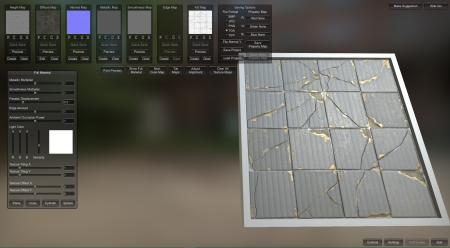
![]() Materialize is a free 3D software tool used to create PBR materials. It also can create Heightmaps and Bump maps from a Diffuse texture.
Materialize is a free 3D software tool used to create PBR materials. It also can create Heightmaps and Bump maps from a Diffuse texture.
Contents
Features
- Completely free; no subscription required. All features are free to use.
- Built in
 Unity
Unity - Fully 3D texture preview with adjustable cubemap and lighting preview
- Supported texture transitions:
- Diffuse→Heightmap
- Diffuse→Metalness Map
- Diffuse→Smoothness Map (Inverse of Roughness)
- Heightmap→Normal Map
- Normal Map→Heightmap
- Normal Map+Heightmap→Ambient Occlusion map
- Save textures as PNG, JPG, TGA, BMP, and more.
- Support for 3DS Max and Maya styles of Normalmaps
- Supports any texture resolution
- Low system requirements
How to Use
Materialize is a powerful free tool, however little to no tutorials exist online for how to use it, especially for Source games. Here is a short guide on how to use it properly for Source games.
Downloading the Program
The first step is, of course, downloading Materialize. The download link can be found here. Before you use this program, however, you need the Visual C++ Redistributable Packages (2013) installed. That can be found here. Make sure to extract the program into a folder that does not require special write privileges (Do not install in ![]()
Program Files for example). After this is done, just launch the program. It is entirely standalone and does not require registry writing privileges.
Opening a Texture
To open a texture from a Source game, extract the texture from the VPK and convert it to a TGA file; Materialize cannot read VTF files. Next, in Materialize, find a box that says "Diffuse" at the top left of the page. In that box, there should be a button that has the letter "O" on it, which stands for open. Click this button and navigate to the texture you just extracted. This is the same process for any texture map you want to open.
Creating a Texture map
From a Diffuse texture, you can create a Heightmap, Metalness, and Smoothness map. From a Heightmap, you can create a Bumpmap, AO map, and Edge map. Edge maps are not used in Source PBR shaders, so it can be ignored. To create any of these textures, click the "Create" button in their respective boxes. Play around with the sliders and boxes; the best way to learn is by doing!
Saving and Exporting to Source
You can save a project and its textures by clicking the "Save project" button. Navigate to the folder you want to save the project in and type a name in the text box at the bottom. After saving, your textures will be saved in that folder with the name "<name>_<texturemap>.<filename>". To port these textures to PBR-supported Source games, see Creating PBR materials. To port into standard Source games, see Adapting PBR Textures to Source.
See also
External links
- https://boundingboxsoftware.com/materialize/ - Official Website
| |||||||||||||||||||||||||||||||||||||||||||||||||||||||||||
