Creating PBR materials
Physically Based Rendering is an excellent shading technique that gives modders the ability to create amazing photorealistic maps. However, the creation process for PBR materials is much different from that of standard ![]() Source materials, and many modders new to the PBR workflow may not know how to create them. This article will review the process of creating a PBR material.
Source materials, and many modders new to the PBR workflow may not know how to create them. This article will review the process of creating a PBR material.
Overview
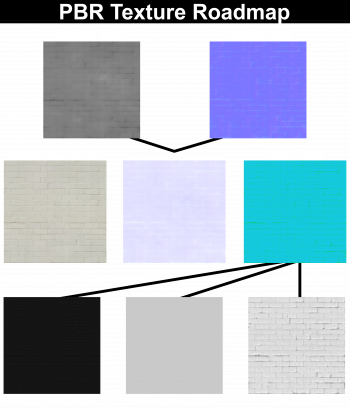
A PBR material consists of 3 main files:
- A Diffuse (base) texture
- A Normal map (optionally with a Heightmap embedded in the Alpha channel
- A MRAO map, containing information on the Metalness and Roughness data as well as Ambient Occlusion
While the Diffuse and Normal map textures may already be part of the standard Source texture workflow, the MRAO map may present some difficulty to create, as standard image editing programs do not have ways to create the textures needed to make an MRAO texture. Modeling programs, such as ![]() Blender, and image-to-texture programs, such as
Blender, and image-to-texture programs, such as ![]() Materialize can create such materials.
Materialize can create such materials.
Creating an MRAO texture
There are a couple of methods used to port PBR textures to an MRAO texture. Here are two methods known to work for ![]() Strata Source based games and also with Thexa4's PBR shader.
Strata Source based games and also with Thexa4's PBR shader.
GIMP
First, create a new image with the same resolution as your PBR maps. Next, open your PBR maps with the "Open as Layers..." button. This will open your PBR maps as layers to the current image, and not as separate image files.
Next, navigate to Colors→Components→Compose and set the Red, Green, and Blue channels to the Metalness, Roughness, and AO layers respectively. Once you are done, export the image to a PNG or TGA file, convert it to a VTF, and then place it in the same folder as your diffuse and normalmap textures.
Next, create a blank VMT file. Copy-Paste the following text:
Change the parameters to your specified filepaths, and you are done!
PBR-2-Source
Open the program and select "PBR(<desired use>)" in the dropdown on the right. Open each texture in their respective box on the left, select which reflections you want and click "Export".
Substance Painter
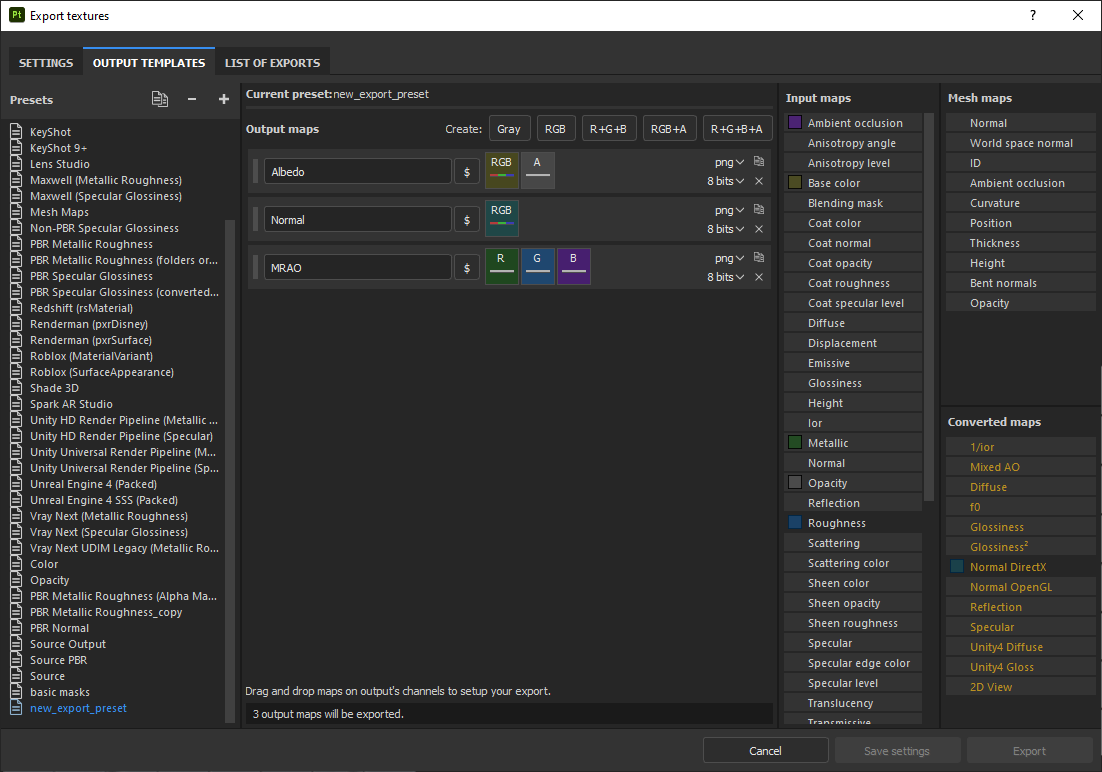
If you have made your textures in Substance Painter, you can export an MRAO texture using a custom Output Template.
Create a new template by pressing the '+' next to Presets in the 'Output Presets' tab of the 'Export Textures' window and create a new 'R+G+B' output map.
Drag the Metallic input map to the R slot, the Roughness input map to the G slot, and the Ambient Occlusion Mesh Map to the B slot. When exported, this will automatically create an MRAO map.
While in this window, you may also add 2 more Output maps, one 'RGB' map for 'Normal DirectX' and one 'RGB+A' map for 'Base Color' and 'Opacity'. This way, you can export all the basic maps you'll need to make a PBR texture in one export window.
Embedding the Heightmap
![]() Strata Source games and mods with Thexa4's PBR shader support embedding a Height map into the alpha channel of the Normal map, which is used for Parallax mapping, giving more depth to the material without the need for unnecessary brushwork or complicated models. This can be done through GIMP very easily.
Strata Source games and mods with Thexa4's PBR shader support embedding a Height map into the alpha channel of the Normal map, which is used for Parallax mapping, giving more depth to the material without the need for unnecessary brushwork or complicated models. This can be done through GIMP very easily.
First, open both your Normal and Height maps as separate images. Next, click once on the height map and copy (Ctrl+c) the image. Next, go to your Normal map, find the layers box, and right-click on the active layer. Click "Add layer mask", then click OK (the type is not important). Finally, with the layer mask selected, paste (Ctrl+v) your Height map. Your Normal map should now appear transparent, this is intended. Export your image as a PNG (so the transparency persists) and convert it into a VTF. Next, add the following to your VMT file:
Strata Source/Thexa4 games
Black Mesa
For full details on these parameters, see this page
Adjusting the parameters
You can adjust the parameters to your liking to get the effect you want. Remember, if you emphasize the effect too much, it can look ugly.
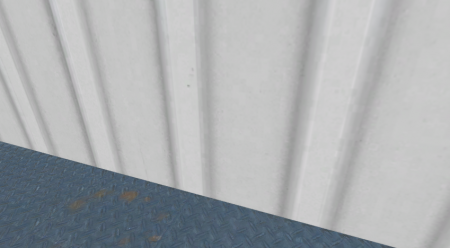
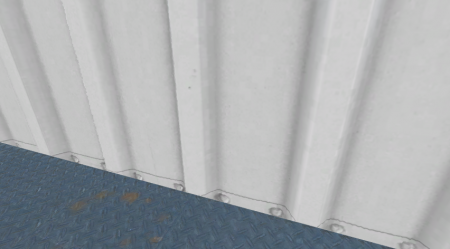
If your game runs on Strata, you will be adjusting two main parameters. The first is $parallaxdepth, which controls the depth of the lowest point of the material, or the strength of the Heightmap. This parameter does accept precision up to the hundredths place, on a scale of 0 (no depth) to 1 (maximum depth) so you can adjust this to the precision of your liking. This parameter will do most of the work of how your material will appear.
The second and most important parameter is $parallaxcenter, which controls the depth of the highest point of the material. This parameter also accepts precision up to the hundredths place as well, on a scale of 0 (closest to face) to 1 (farthest away from face). This parameter needs to be adjusted until the highest point of your material is "touching" the face, otherwise it will appear to extend past the neighboring faces very unrealistically.
|
|
Conclusion
If you followed all these steps correctly, parallax mapping should now be enabled on your material. Don't be afraid to experiment, and remember that if your material doesn't quite work with parallax mapping, you can always turn it off.
