Help:Images
That means that this article contains information intended to advise or aid on the functions of the wiki, on how to use the wiki, or on general recommendations for users of the wiki.
Many articles require screenshots or other images to illustrate article subjects or add visual reference to tutorials. Any registered user can upload images to be used in articles. Note that all images must adhere to the Image Use Policy.
When to use an image
- To show the appearance of an interface or dialog box
- To demonstrate the appearance of the article's subject in game (for example, a screenshot of an effect or model)
- To illustrate an aspect of the development process (for example, a screenshot of designing a moving platform in Hammer)
- To quickly convey how to set up object properties or inputs and outputs in Hammer (for example, a screenshot of an object's properties with all the correct keyvalues in place)
- To add a diagram or chart to help explain the subject or a procedure (for example, a flow chart illustrating the flow of logic in a complex puzzle)
How to upload an image
Go to Special:Upload and follow the instructions there. Please use descriptive filenames.
.JPG (quality 90-98) or .PNG with TinyPNG, which would make the page and images load faster for those who have insufficient internet connections.4K (3840x2160) images are unnecessary, use 4K images sparingly.
Inserting an image into an article

- Begin editing the article, and locate the point in the text where you would like the screenshot to appear.
- Add a new line with this template: [[File:IMAGENAME.ext|thumb|right|300px|CAPTION]]
 Tip:Put the image code on the line above the line you want it to appear next to unless:Tip:If the image is supposed to appear at the top of a section, put the image code on the line below the section heading.
- Replace the "imagename.ext" with the name of your file as it appears on the Wiki. Replace "CAPTION" with a description that will be displayed under the image. Replace ".ext" with the file extension (.png, .jpg, etc...). To resize the image, change 300px to the desired width in pixels. To align the image to the left (which should normally be avoided) replace "right" with "left".
Here is the code for the example image on the right: [[File:Point_Tesla.jpg|thumb|right|300px|An example image]]
Inserting a gallery into an article
For some articles, a gallery of several images may be appropriate to reduce the amount of space taken up. A gallery is inserted in this manner:
<gallery>
File:IMAGENAME1.ext|Caption 1
File:IMAGENAME2.ext|Caption 2
</gallery>
Replace "imagename#.ext" with the filename of the image, and write a descriptive caption (not required) after the |.
Here is how galleries typically look:
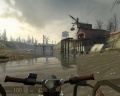
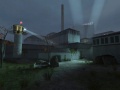
Station 7 from the airboat, seen near the start of Water Hazard.
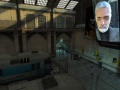
Eli's scrapyard in Black Mesa East, seen on d1_eli_02.
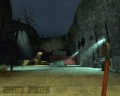
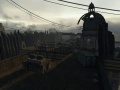
The City 17 train station.

Highway 17.
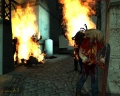
Zombies on fire.
Bird's eye view of the top of the Nexus building (d3_c17_11).
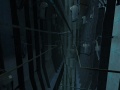
Inside the Citadel.


Adding images through a URL
If you paste a URL into a page, it will display an image if it points to one. It's an option, but not recommended because you will not have as much control over the appearance of it, and because it's external, the image may change or disappear at any time.
See also
- Special:AllMyFiles - View all images you've uploaded.
- Special:FileDuplicateSearch - Enter a file name, and see if there's any duplicate images.
- Special:ListDuplicatedFiles - Lists all images that are identical to others.
- Special:ListFiles - Lists all uploaded images.
- Special:Log - Shows a log with all image uploads (and page moves).
- Special:MediaStatistics - Lists stats about uploaded images.
- Special:MostLinkedFiles - Lists most frequently used images.
- Special:NewFiles - Lists newest images.
- Special:UncategorizedFiles - Lists images that are not listed under any categories.
- Special:Upload - To upload images
- Special:UnusedFiles - Lists images that are not used on any pages.
- Special:WantedFiles - Lists images that are posted onto pages, but do not exist. These images to need to be replaced in some manner. This list should be showing no pages, ideally.