VMT Editor: Difference between revisions
Kwp17pitts (talk | contribs) m (Created Redirect) |
GamerDude27 (talk | contribs) m (Updated username) |
||
| (8 intermediate revisions by 6 users not shown) | |||
| Line 1: | Line 1: | ||
{{LanguageBar}} | |||
{{Distinguish|Source VMT Editor}} | |||
{{vmteditor|4.1}} is a free open source editor for [[VMT]] files written by [[User:Dima-369|Dmytro "Dima-369" Butemann]] and [[User:Yanzl|Jan "Yanzl" Gortnar]]. | |||
== Features == | |||
<center>[[File:VMTEditor-Fast_VMT_Creation.gif]]</center> | |||
<div style="text-align: center; padding-top: 9.529px; padding-bottom: 2.700px;"><span style="color: white; font-weight: bold; font-size: 132%;">FAST VMT CREATION</span></div> | |||
Material parameters are arranged in groups that you can add to your material, like Reflection or Specular. Commonly used groups and shaders are just a click away. | |||
<gallery mode="packed" widths="300px" heights="300px"> | |||
VMTEditor-Support_for_Latest Parameters.png|<h3>SUPPORT FOR THE LATEST PARAMETERS</h3><p style="text-align: left;>Support for latest CS:GO parameters, such as layer blend and brush specular.</p> | |||
VMTEditor-VMT_Validation.png|<h3>VMT VALIDATION</h3><p style="text-align: left;">Every imported material is validated for missing textures, mismatching parameters, or missing brackets.</p> | |||
VMTEditor-Texture_Preview.png|<h3>TEXTURE PREVIEW</h3><p style="text-align: left;>Every imported material is validated for missing textures, mismatching parameters, or missing brackets.</p> | |||
</gallery> | |||
<center>[[File:VMTEditor-Drag_and_Drop_Conversion.gif]]</center> | |||
<div style="text-align: center; padding-top: 9.529px; padding-bottom: 2.700px;"><span style="color: white; font-weight: bold; font-size: 132%;">DRAG AND DROP CONVERSION</span></div> | |||
Drag and drop your texture files into the VMT Editor window to have them automatically converted to VTF and copied to the appropriate folder. | |||
<gallery mode="packed" widths="300px" heights="300px"> | |||
VMTEditor-Fast_Reconvert.png|<h3>FAST RECONVERT</h3><p style="text-align: left;>VMT Editor remembers imported texture paths so you can reconvert textures to VTF with a click of a button.</p> | |||
VMTEditor-Templates.png|<h3>TEMPLATES</h3><p style="text-align: left;">Save your VMT files as templates that contain multiple commonly used parameters.</p> | |||
VMTEditor-Proxies.png|<h3>PROXIES</h3><p style="text-align: left;>Edit proxies with syntax validation and autocompletion.</p> | |||
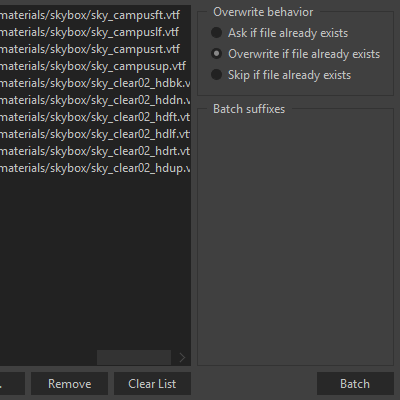
VMTEditor-Batch_VTF_Conversion.png|<h3>BATCH VTF CONVERSION</h3><p style="text-align: left;>Convert multiple textures at the same time. Choose a custom output folder.</p> | |||
VMTEditor-Batch_VMT_Creation.png|<h3>BATCH VMT CREATION</h3><p style="text-align: left;>Auto-create multiple VMT files based on your open material.</p> | |||
VMTEditor-Blend_Tool_Texture.png|<h3>BLEND TOOL TEXTURE</h3><p style="text-align: left;>Generate a blend tool texture for your blend material. Works on both WorldVertexTransition and Lightmapped_4WayBlend.</p> | |||
</gallery> | |||
<div style="text-align: center; padding-top: 9.529px; padding-bottom: 2.700px;"><span style="color: white; font-weight: bold; font-size: 132%;">AND MORE...</span></div> | |||
sRGB color correction, water texture creation, editing the VMT Preview, adding custom alpha channels... | |||
== Quick Start == | |||
<div style="padding-top: 9.529px; padding-bottom: 2.700px;"><span style="color: white; font-weight: bold; font-size: 132%;">1. DOWNLOAD AND EXTRACT</span></div> | |||
Download the '''.zip''' file from the GitHub page and extract it anywhere on your computer. | |||
<div style="overflow: hidden;> | |||
[[File:VMTEditor-Set_Up_Games.png|right|374px]] | |||
<div style="padding-top: 9.529px; padding-bottom: 2.700px;"><span style="color: white; font-weight: bold; font-size: 132%;">2. SET UP GAMES</span></div> | |||
<p>Open VMT Editor by clicking on '''VMT_Editor.exe'''. It should automatically detect the Source games you have installed. Select a game from the game menu and you can start working.</p> | |||
<p>If there are no games detected, navigate to the '''''Games > Manage Games...''''' dialog. Click on the '''Add''' button, then type in a name and browse for the game installation folder. This should be the folder that has '''[[Gameinfo.txt|gameinfo.txt]]''' in it.</p> | |||
</div> | |||
<div style="overflow: hidden;> | |||
[[File:VMTEditor-The_UI.png|right|374px]] | |||
<div style="padding-top: 9.529px; padding-bottom: 2.700px;"><span style="color: white; font-weight: bold; font-size: 132%;">3. THE UI</span></div> | |||
<p>The VMT Editor UI has 4 parts: toolbar on the left, main tab widget in the center, and '''VMT Preview''' and '''Message Log''' on the right.</p> | |||
<p>Editing materials are divided into groups you can add from the '''Add...''' menu or by clicking on the toolbar buttons.</p> | |||
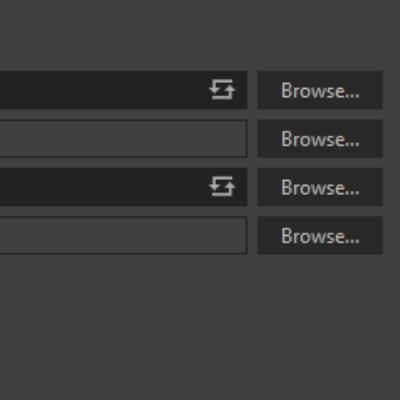
<p>To add textures to your material you can click on the Browse button next to the appropriate text box, or you can drag and drop your textures directly into the box. You can add both VTF files or normal image files (PNG, TGA ...).</p> | |||
</div> | |||
<div style="overflow: hidden;> | |||
[[File:VMTEditor-Options.png|right|371px]] | |||
<div style="padding-top: 9.529px; padding-bottom: 2.700px;"><span style="color: white; font-weight: bold; font-size: 132%;">4. OPTIONS</span></div> | |||
<p>Open the '''Options''' dialog to change how VMT Editor behaves. You can specify your own texture suffixes and enable auto renaming. You can select your preferred mipmap filter. You can also add VMT Editor to '''.vmt''' files context menu and change '''.vmt''' and '''.vtf''' file icons.</p> | |||
</div> | |||
== Screenshots == | |||
<gallery mode="packed"> | |||
VMTEditor-Screenshot01.png | |||
VMTEditor-Screenshot02.png | |||
VMTEditor-Screenshot03.png | |||
VMTEditor-Screenshot04.png | |||
</gallery> | |||
== See also == | |||
* [[Creating a Material]] | |||
* [[VTFEdit]] | |||
* [[VTFVer]] | |||
== External links == | |||
* [https://dima-369.github.io/VMT-Editor/ VMT Editor] - The official website | |||
* [https://github.com/dima-369/VMT-Editor GitHub page] - VMT Editor's source code | |||
* [https://github.com/dima-369/VMT-Editor/releases/latest Download @ GitHub] | |||
{{sdktools|0}} | |||
[[Category:Third Party Tools]] | |||
[[Category:Material System]] | |||
Latest revision as of 09:05, 14 October 2025
![]() VMT Editor is a free open source editor for VMT files written by Dmytro "Dima-369" Butemann and Jan "Yanzl" Gortnar.
VMT Editor is a free open source editor for VMT files written by Dmytro "Dima-369" Butemann and Jan "Yanzl" Gortnar.
Features

Material parameters are arranged in groups that you can add to your material, like Reflection or Specular. Commonly used groups and shaders are just a click away.
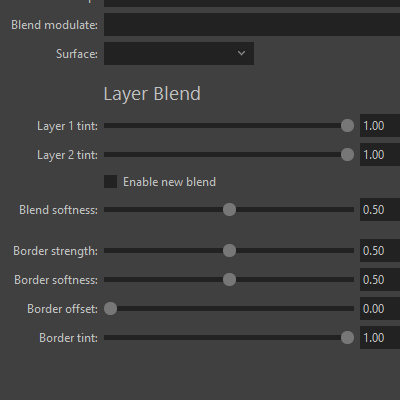
SUPPORT FOR THE LATEST PARAMETERS
Support for latest CS:GO parameters, such as layer blend and brush specular.
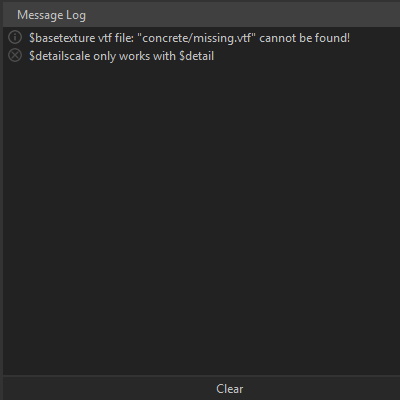
VMT VALIDATION
Every imported material is validated for missing textures, mismatching parameters, or missing brackets.
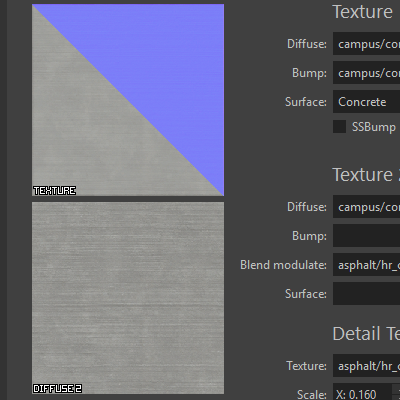
TEXTURE PREVIEW
Every imported material is validated for missing textures, mismatching parameters, or missing brackets.


Drag and drop your texture files into the VMT Editor window to have them automatically converted to VTF and copied to the appropriate folder.
FAST RECONVERT
VMT Editor remembers imported texture paths so you can reconvert textures to VTF with a click of a button.
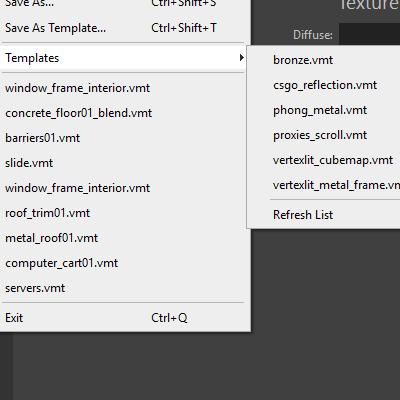
TEMPLATES
Save your VMT files as templates that contain multiple commonly used parameters.

PROXIES
Edit proxies with syntax validation and autocompletion.

BATCH VTF CONVERSION
Convert multiple textures at the same time. Choose a custom output folder.
BATCH VMT CREATION
Auto-create multiple VMT files based on your open material.
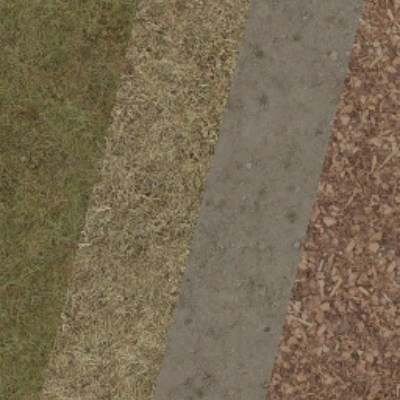
BLEND TOOL TEXTURE
Generate a blend tool texture for your blend material. Works on both WorldVertexTransition and Lightmapped_4WayBlend.


sRGB color correction, water texture creation, editing the VMT Preview, adding custom alpha channels...
Quick Start
Download the .zip file from the GitHub page and extract it anywhere on your computer.


Screenshots


See also
External links
- VMT Editor - The official website
- GitHub page - VMT Editor's source code
- Download @ GitHub
| |||||||||||||||||||||||||||||||||||||||||||||||||||||||||||