WiseDisplacement01: Difference between revisions
m (category & minor tidy) |
mNo edit summary |
||
| (5 intermediate revisions by 3 users not shown) | |||
| Line 1: | Line 1: | ||
== | {{DISPLAYTITLE:WiseDisplacement01: Displacement basics}} | ||
{{SDKNuts Tutorials}} | |||
{{wisemxport|[[User:Plykkegaard|Peter [AGHL]]] 13:27, 12 Feb 2008 (PST)}} | |||
==Introduction== | |||
First the facts | First the facts | ||
# Displacements can not be converted into entities. (i.e. func_detail) | #Displacements can not be converted into entities. (i.e. {{ent|func_detail}}) | ||
# They do not seal your map. Your map must be sealed against leaks. | #They do not seal your map. Your map must be sealed against leaks. | ||
# Do cast shadows and have a collision system. (i.e. Players, NPCs and Vehicles) | #Do cast shadows and have a collision system. (i.e. Players, NPCs and Vehicles) | ||
# They are static and can not be moved in the game. | #They are static and can not be moved in the game. | ||
# Displacements must be created from normal 6-faced (4 sided) brushes. | #Displacements must be created from normal 6-faced (4 sided) brushes. | ||
# Do not block [[Controlling_Geometry_Visibility_and_Compile_Times|PVS Visibility]]. | #Do not block [[Controlling_Geometry_Visibility_and_Compile_Times|PVS Visibility]]. | ||
# Can add dramatically to the overall file size of your map. | #Can add dramatically to the overall file size of your map. | ||
# They can be [[Hammer_Clipping_Tool|Clipped]], [[Hammer_Vertex_Tool|Vertex Edited]], [[Hammer_Selection_Tool#Rotate_mode|Rotated]], and [[Hammer_Selection_Tool#Moving_and_cloning_objects|Moved]] in [[Hammer]]. | #They can be [[Hammer_Clipping_Tool|Clipped]], [[Hammer_Vertex_Tool|Vertex Edited]], [[Hammer_Selection_Tool#Rotate_mode|Rotated]], and [[Hammer_Selection_Tool#Moving_and_cloning_objects|Moved]] in [[Hammer]]. | ||
==Creation== | |||
Displacements will be one-sided once they are created, the original brush is tossed. As a general guideline you can seal behind the visible face with normal world brushes entirely textured with [[nodraw]]. Making these sealing brushes 16 units thick works out well. | Displacements will be one-sided once they are created, the original brush is tossed. As a general guideline you can seal behind the visible face with normal world brushes entirely textured with [[nodraw]]. Making these sealing brushes 16 units thick works out well. | ||
They can overlap the displacement but be careful that they don’t come through the face or you will see gaps in the game. | They can overlap the displacement but be careful that they don’t come through the face or you will see gaps in the game. | ||
| Line 18: | Line 21: | ||
Displacements can be used anywhere but they may require finessing. | Displacements can be used anywhere but they may require finessing. | ||
As you can see by my tutorial | As you can see by my tutorial [[wiseColumns]] there are many more uses for them than just outside map geometry. Notice in [[wiseGrass]] how the effect is only possible with a displacement floor. | ||
Here are some uses for displacements in your maps: | Here are some uses for displacements in your maps: | ||
* Outside map geometry, such as seen throughout HL2. | *Outside map geometry, such as seen throughout HL2. | ||
* Columns and | *Columns and pipes. | ||
* Perfectly round cylinders. | *Perfectly round cylinders. | ||
* Corners on buildings. | *Corners on buildings. | ||
* Tunnels and caves. | *Tunnels and caves. | ||
* Contoured cushions for beds and seats. | *Contoured cushions for beds and seats. | ||
* Glass tubes. | *Glass tubes. | ||
{| style="float: right; clear: right; background-color: transparent; margin-left: 1.4em" cellpadding="0" cellspacing="0" | {| style="float: right; clear: right; background-color: transparent; margin-left: 1.4em" cellpadding="0" cellspacing="0" | ||
|[[ | |[[File:wiseDisp01_01.jpg|thumb|150px|right|Create worldbrush]] | ||
|- | |- | ||
|[[ | |[[File:wiseDisp01_02.jpg|thumb|150px|right|Clone the brush]] | ||
|- | |- | ||
|[[ | |[[File:wiseDisp01_03.jpg|thumb|150px|right|Apply texture]] | ||
|- | |- | ||
|[[ | |[[File:wiseDisp01_04.jpg|thumb|150px|right|Displacements]] | ||
|} | |} | ||
== Create Floor == | ==Create Floor== | ||
=== Brushwork === | ===Brushwork=== | ||
Let’s create a simple displacement floor. | Let’s create a simple displacement floor. | ||
* Make sure Snap to Grid | *Make sure '''Snap to Grid''' is on. ({{key|Shift|W}}) | ||
* Create a normal world brush entirely textured with '''nodraw'''. | *Create a normal world brush entirely textured with '''nodraw'''. | ||
* Select this new brush, hold | *Select this new brush, hold {{key|Shift}} and drag a clone of this brush by dragging it in the side or Front viewport. | ||
* With the new brush still selected chose a texture and apply it to the entire brush. | *With the new brush still selected chose a texture and apply it to the entire brush. | ||
* For this example I’m going to use | *For this example I’m going to use <code>nature\blenddirtgrass006a</code>. | ||
* We now have two identical brushes, once entirely textured with '''nodraw''' and one entirely textured with | *We now have two identical brushes, once entirely textured with '''nodraw''' and one entirely textured with <code>nature\blenddirtgrass006a</code>. | ||
* The bottom brush is complete; we will not do anything else to it. | *The bottom brush is complete; we will not do anything else to it. | ||
* This brush now serves the purpose of sealing the map. | *This brush now serves the purpose of sealing the map. | ||
=== Create the displacement map === | ===Create the displacement map=== | ||
* Open the '''Face Edit''' dialog. | *Open the '''Face Edit''' dialog. ({{key|Shift+A}}) | ||
* Click the '''Displacement''' tab. | *Click the '''Displacement''' tab. | ||
* Left mouse click on the top textured brush face to select it.(To select multiple faces hold Ctrl.) | *Left mouse click on the top textured brush face to select it.(To select multiple faces hold {{key|Ctrl}}.) | ||
* With only the top face selected click the '''Create''' button, it will default to a | *With only the top face selected click the '''Create''' button, it will default to a power of 3 which is fine for our project. Click '''OK'''. | ||
* The Power of your displacement surfaces can be 2, 3 or 4. | *The Power of your displacement surfaces can be 2, 3 or 4. | ||
:* '''Power of 2''' = Simple displacements where fewer triangles are required. | :*'''Power of 2''' = Simple displacements where fewer triangles are required. | ||
:* '''Power of 3''' = Common applications, all around best option. | :*'''Power of 3''' = Common applications, all around best option. | ||
:* '''Power of 4''' = | :*'''Power of 4''' = High triangle count, should be used with caution. | ||
* The top face is now a displacement surface and all other faces of that brush are gone. | *The top face is now a displacement surface and all other faces of that brush are gone. | ||
=== Noise === | ===Noise=== | ||
{| style="float: right; clear: right; background-color: transparent; margin-left: 1.4em" cellpadding="0" cellspacing="0" | {| style="float: right; clear: right; background-color: transparent; margin-left: 1.4em" cellpadding="0" cellspacing="0" | ||
|[[ | |[[File:wiseDisp01_05.jpg|thumb|150px|right|Applying noise]] | ||
|- | |- | ||
|[[ | |[[File:wiseDisp01_06.jpg|thumb|150px|right|Taking shape]] | ||
|- | |- | ||
|[[ | |[[File:wiseDisp01_07.jpg|thumb|150px|right|Paint Geometry]] | ||
|- | |- | ||
|[[ | |[[File:wiseDisp01_08.jpg|thumb|150px|right|Paint Alpha]] | ||
|} | |} | ||
* Our new displacement surface is still flat. | *Our new displacement surface is still flat. | ||
* Let’s add some '''noise''' to give it some shape. | *Let’s add some '''noise''' to give it some shape. | ||
:* With the '''Face Edit''' dialog still open and the displacement surface still selected click on the '''Noise''' button. | :*With the '''Face Edit''' dialog still open and the displacement surface still selected click on the '''Noise''' button. | ||
:* Adjust the '''Min''' and '''Max''' | :*Adjust the '''Min''' and '''Max''' and click '''OK'''. | ||
* Our displacement surface now has shape. | *Our displacement surface now has shape. | ||
* Even though the original brush shows as being the same in the 2D viewports you can see how the brush will look in the game in the 3D viewport. | *Even though the original brush shows as being the same in the 2D viewports you can see how the brush will look in the game in the 3D viewport. | ||
{{Note|The details sprites, from blend textures, won’t show in Hammer}}. | {{Note|The details sprites, from blend textures, won’t show in Hammer}}. | ||
=== Paint Geometry === | ===Paint Geometry=== | ||
* We have shape now but we can add a little more by using the Displacement '''Paint Geometry''' tool. | *We have shape now but we can add a little more by using the Displacement '''Paint Geometry''' tool. | ||
* Don’t go crazy with this tool, it’s far too easy to blow your displacements out of proportions with this tool. Use the adjustments and make careful changes. | *Don’t go crazy with this tool, it’s far too easy to blow your displacements out of proportions with this tool. Use the adjustments and make careful changes. | ||
* Click where the triangles intersect to make changes in that area. | *Click where the triangles intersect to make changes in that area. | ||
* Left click to raise the geometry. | *Left click to raise the geometry. | ||
* Right click to lower the geometry. | *Right click to lower the geometry. | ||
* Make subtle changes at first until you get used to this tool. | *Make subtle changes at first until you get used to this tool. | ||
{{Note|It is possible to create invalid displacements if you stretch any of the points too far.}} | {{Note|It is possible to create invalid displacements if you stretch any of the points too far.}} | ||
=== Paint Alpha === | ===Paint Alpha=== | ||
For our final touch we’ll add some contrast to the floor texture by using the Displacement '''Paint Alpha''' tool. | For our final touch we’ll add some contrast to the floor texture by using the Displacement '''Paint Alpha''' tool. | ||
* Move around with the '''WASD''' keys as you use the Left mouse button to paint. | *Move around with the '''WASD''' keys as you use the Left mouse button to paint. | ||
* You can hold down on the Left mouse button and just sweep the area. | *You can hold down on the Left mouse button and just sweep the area. | ||
* Use the Right mouse button to restore. | *Use the Right mouse button to restore. | ||
== Sealing | |||
Seal your new displacement project by building | ==Sealing Off== | ||
Your new displacement has nothing to do with sealing your map, you should only be concerned right now with that normal brush we created in the beginning, the one that has remained under our displacement. | Seal your new displacement project by building [[skybox]] brushes and ignoring the displacement brush. Your new displacement has nothing to do with sealing your map, you should only be concerned right now with that normal brush we created in the beginning, the one that has remained under our displacement. | ||
Place a | Place a {{ent|light_environment}} in your map, an {{ent|info_player_start}} and you’re ready to compile the map and test your new displacement. I’ve also placed one {{ent|env_cubemap}} in the very center at the player's eye level. | ||
I’ve also placed one | |||
* Keep in mind objects will need to be placed above the displacement surfaces so they aren’t stuck when spawned in the game. | *Keep in mind objects will need to be placed above the displacement surfaces so they aren’t stuck when spawned in the game. | ||
* For many objects it’s best to place them well above the displacement surface and let them fall to the ground when they spawn. | *For many objects it’s best to place them well above the displacement surface and let them fall to the ground when they spawn. | ||
The final effect: | The final effect: | ||
[[ | [[File:wiseDisp01_09.jpg]] | ||
[[Category:Level Design | ==See also== | ||
*[http://type3studios.com/downloads/tutorials/SdkNutsTutorials/hammer_displacement_tut.rar Video tutorial] (74MB) | |||
*[http://type3studios.com/downloads/tutorials/SdkNutsTutorials/wiseDisplacement01.zip Example VMF] | |||
*[https://cdn.discordapp.com/attachments/434089157875466242/462030378618716161/wiseDisplacement01.vmf Example VMF backup] | |||
*[[Displacements]] | |||
*[[Hammer_Face_Edit_Disps|Face Edit of Displacements]] | |||
*[[Creating_Holes_in_Displacements|Creating holes in Displacements]] | |||
*[[wiseColumns]] | |||
[[Category:Level Design]] | |||
Latest revision as of 06:22, 15 April 2024
This tutorial was originally created by wisemx. It was originally posted on SDKnuts.net.
Introduction
First the facts
- Displacements can not be converted into entities. (i.e. func_detail)
- They do not seal your map. Your map must be sealed against leaks.
- Do cast shadows and have a collision system. (i.e. Players, NPCs and Vehicles)
- They are static and can not be moved in the game.
- Displacements must be created from normal 6-faced (4 sided) brushes.
- Do not block PVS Visibility.
- Can add dramatically to the overall file size of your map.
- They can be Clipped, Vertex Edited, Rotated, and Moved in Hammer.
Creation
Displacements will be one-sided once they are created, the original brush is tossed. As a general guideline you can seal behind the visible face with normal world brushes entirely textured with nodraw. Making these sealing brushes 16 units thick works out well. They can overlap the displacement but be careful that they don’t come through the face or you will see gaps in the game.
When creating displacement floors it’s often best to create two brushes for the floor identical in size. The top one will become the displacement, the bottom one will seal your map. Before you create a displacement apply the texture you will be using to the entire brush you are starting with. Once you create the displacement faces the other faces will be discarded and you can not have nodraw faces on displacement surfaces.
Displacements can be used anywhere but they may require finessing.
As you can see by my tutorial wiseColumns there are many more uses for them than just outside map geometry. Notice in wiseGrass how the effect is only possible with a displacement floor.
Here are some uses for displacements in your maps:
- Outside map geometry, such as seen throughout HL2.
- Columns and pipes.
- Perfectly round cylinders.
- Corners on buildings.
- Tunnels and caves.
- Contoured cushions for beds and seats.
- Glass tubes.
Create Floor
Brushwork
Let’s create a simple displacement floor.
- Make sure Snap to Grid is on. (⇧ Shift+W)
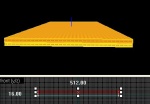
- Create a normal world brush entirely textured with nodraw.
- Select this new brush, hold ⇧ Shift and drag a clone of this brush by dragging it in the side or Front viewport.
- With the new brush still selected chose a texture and apply it to the entire brush.
- For this example I’m going to use
nature\blenddirtgrass006a. - We now have two identical brushes, once entirely textured with nodraw and one entirely textured with
nature\blenddirtgrass006a. - The bottom brush is complete; we will not do anything else to it.
- This brush now serves the purpose of sealing the map.
Create the displacement map
- Open the Face Edit dialog. (Shift+A)
- Click the Displacement tab.
- Left mouse click on the top textured brush face to select it.(To select multiple faces hold Ctrl.)
- With only the top face selected click the Create button, it will default to a power of 3 which is fine for our project. Click OK.
- The Power of your displacement surfaces can be 2, 3 or 4.
- Power of 2 = Simple displacements where fewer triangles are required.
- Power of 3 = Common applications, all around best option.
- Power of 4 = High triangle count, should be used with caution.
- The top face is now a displacement surface and all other faces of that brush are gone.
Noise
- Our new displacement surface is still flat.
- Let’s add some noise to give it some shape.
- With the Face Edit dialog still open and the displacement surface still selected click on the Noise button.
- Adjust the Min and Max and click OK.
- Our displacement surface now has shape.
- Even though the original brush shows as being the same in the 2D viewports you can see how the brush will look in the game in the 3D viewport.
.
Paint Geometry
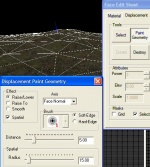
- We have shape now but we can add a little more by using the Displacement Paint Geometry tool.
- Don’t go crazy with this tool, it’s far too easy to blow your displacements out of proportions with this tool. Use the adjustments and make careful changes.
- Click where the triangles intersect to make changes in that area.
- Left click to raise the geometry.
- Right click to lower the geometry.
- Make subtle changes at first until you get used to this tool.
Paint Alpha
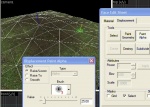
For our final touch we’ll add some contrast to the floor texture by using the Displacement Paint Alpha tool.
- Move around with the WASD keys as you use the Left mouse button to paint.
- You can hold down on the Left mouse button and just sweep the area.
- Use the Right mouse button to restore.
Sealing Off
Seal your new displacement project by building skybox brushes and ignoring the displacement brush. Your new displacement has nothing to do with sealing your map, you should only be concerned right now with that normal brush we created in the beginning, the one that has remained under our displacement.
Place a light_environment in your map, an info_player_start and you’re ready to compile the map and test your new displacement. I’ve also placed one env_cubemap in the very center at the player's eye level.
- Keep in mind objects will need to be placed above the displacement surfaces so they aren’t stuck when spawned in the game.
- For many objects it’s best to place them well above the displacement surface and let them fall to the ground when they spawn.
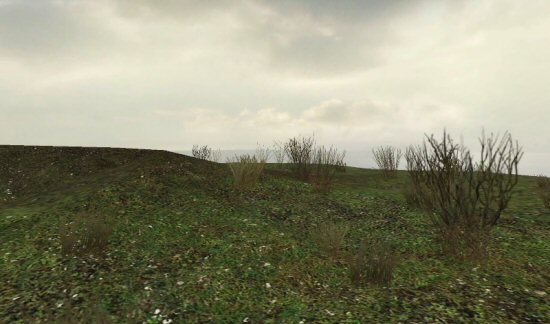
The final effect:


