WisePhysbox: func_physbox
This tutorial was originally created by wisemx. It was originally posted on SDKnuts.net.
Introduction
In short, to make our brush based object be a physics object, we’ll need to make it into a func_physbox. The first thing I’ve done for this tutorial is create a basic map with terrain and water because for this we are going to build one of those crash-able docks you see in HL2 and just a little bit of water will help with the effect. Those are a lot of fun in HL2 so I can see why there’s been a demand for a tutorial.
For this example I’m not going to build the vertical posts so they can be destroyed but I’ll have at least one of them fall over when the structure comes tumbling down. Seems like that will be a much nicer effect than destroying them or having all of them fall over.
Creation
We’re going to build our posts with brushes then texture them and finally turn them into func_detail with the exception of the one we want to fall over because we want control over that one and there’s not much we can do with a func_detail except look at it. There are a lot of advantages to using func_detail but we’ll leave that for another time.
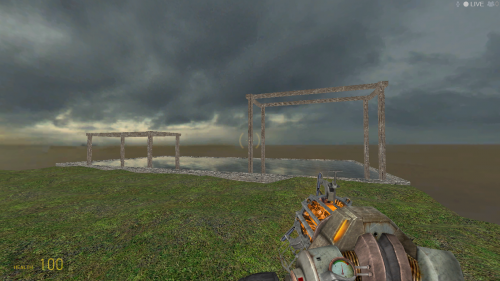
This is a shot of our finished posts:
All of them with the exception of one are func_detail and I’ve cloned the first one to create the remaining 7. Notice that 4 of the posts are taller. For this example we’re going to build a horizontal plank at a slight angle between the two docks, similar to what you have seen in HL2, it just gives us a little more effect.
Our first func_physbox objects are going to be the horizontal supports so we’ll need a minimum of 8 and all of them will be created with the same name so we can control them all at once later. Later you will want to make individual events for a group as large as these. I’m going to create these the same way you create walls in Hammer and once I texture them I’ll turn them into func_physboxs. Think in terms of real world wooden structures as you build these supporting members.
Here’s what we have so far:
- 8 posts that are
func_detail, one of which will soon become afunc_physbox. - 8 horizontal
func_physboxs that all have the exact same properties:
- Name: HorizontalSupports
- Disable Shadows: Yes
- Performance Mode: Limit Gibs
- Material Type: Wood
- Gib Direction: Random
- Flags: Motion Disabled
Your settings can be varied but for this example I’ve used settings that I believe will work best for the horizontal supports and all of these are flagged with motion disabled so we can enable motion later to make them fall, which is why the gibs are limited, we want these to fall in chunks, not get blown to bits.
Now we’re going to pick on of those horizontal posts and change it to a func_physbox.
- Double click on any one of them. A tall one will work best.
- In the dialog window that opens change Class
func_detailtofunc_physboxwith the dropdown list and then click Apply. - Now make your changes for the properties and give it a name.
- Name: tallPost01
- Disable shadows: No
- Material Type: Wood
- Mass scale: 1
- Flags: Motion Disabled
Now when we’re finished our supporting structure will give off effects along with our boards. All 8 of the horizontal supports will fall at once when we trigger “Enable motion” for them and we’ll time it so a fraction of a second later one of the tall posts will fall over. The material for all of them is set to “wood” so the ones that fall in our water are going to float and the mass has been increased just a bit on our tall post so if everything goes right it is going to slowly fall over onto the grass and lumber there like it is heavy. Very cool.
Here’s what they look like in HL2 at this point and the little clown is pointing at the one tall post I turned into a func_physbox:
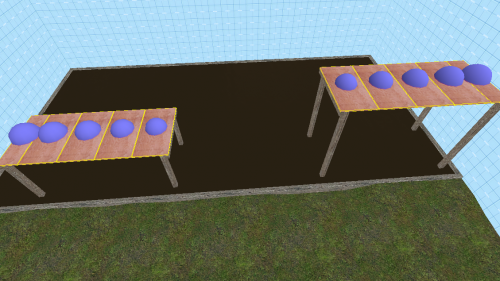
We have two more sets of structures to build, the individual horizontal boards and the angled board(s) that will go from one dock to the other. For the boards we’re not going to use the nodraw texture as I normally would because every face of our boards will be visible. Let’s just build them with the wood texture from the start. Actually I’m only going to build one and clone it for all the others in this example. You could build multiple board widths as you might see on some docks. In the shot below, from the 3D view port in Hammer, the boards on the right all have the same name “PlanksTall” and the boards on the left are all named “PlanksShort”.
All of them share these properties:
- Class: func_physbox
- Name: PlanksShort or PlanksTall
- Disable Shadows: Yes
- Performance mode: Limit Gibs
- Prop Data: Wood medium
- Strength: 10
- Material Type: Wood
- Gibs Direction: Random
- Flags: Motion Disabled
We’re almost ready to blow it up!
Now let’s create that horizontal plank at an angle. You would want to create several of these and give them a few extra supports but for this I’m only creating one.
- Create a plank and turn it into a
func_physboxlike you did for the others. - Size it in the 2D Top view port in Hammer.
- With the object selected click on it in one of the 2D view ports until you see a red border with white handles at each corner. (Use the Selection tool)
- In either the Side or Front 2D view port drag one of the corner handles until this plank is at the angle you need. Move, Size and Angle this with the corner handles.
Make the properties for the angled plank the same as the horizontal boards but give it a unique name.
Now it’s time to create our timed events and effects. Create one env_physexplosion and place it under the angled plank at about the center.
- Name: PlankExplosion
- Parent: AngledPlank01
- Magnitude: 75
- Flags: No Damage Only Force
Next create two logic_relay entities. One for the events on the left and one for the events on the right. The logic is this; if the boards on one dock are destroyed they trigger the center plank which triggers the opposite docks collapse. A series of events. Name one logic_relay “LeftRelay” and the other one “RightRelay”.
The left horizontal boards will Trigger the LeftRelay OnBreak. The right-hand boards will do the same to RightRelay.
Now run the project and experiment with breaking the boards on the left, right and the center plank. With only two logic relays and a hand full of outputs we were able to create a nice series of events. The env_explosion isn’t even needed but as you can tell when you run this they can be used for force when an actual explosion isn’t required. By the way, both of the structures we built will support the weight of a player and there’s no limit to the effects you can create, just take this tutorial and run with it.
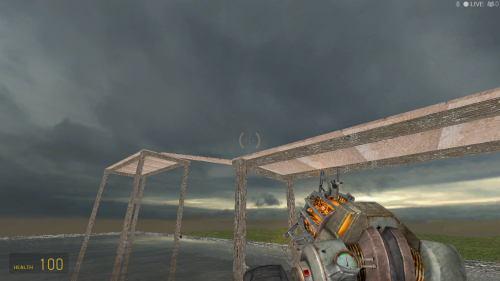
Here’s our finished product:


