WiseGrass: Creating Grass
This tutorial was originally created by wisemx. It was originally posted on SDKnuts.net.
Introduction
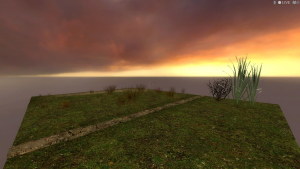
To create grass that appears in random locations is a simple task in Source mapping. Without going into a detailed displacement tutorial we're going to cover the basics of achieving this effect with a sample project where I have created 3 brushes to illustrate how blended textures can work for you. In this example I’ve created a HL2/HL2DM example and a separate CS:Source example. As always the download is at the bottom of the tutorial. There are a few things you need to keep in mind, the most important being that displacement surfaces do not seal leaks and they don’t block visibility.
Creation
When you are looking for “blend” textures for your maps use the filter word “blend” and you will find blended textures for grass, sand and gravel. Experiment with these. I’ve applied the textures to every face of the displacement brushes but only 2 faces of the normal brush the player will start on. The reason is to show there will be no grass sprites on the normal brush but it will have the same grass texture as the other surfaces, and I’ve textured the one face that faces the neighboring displacement brush out of habit, this can help to eliminate those flickering lines you see in maps at the edge of brushes. Always texture your displacement brushes on all sides, this way you won’t get the “nodraw on displacement surface” error, and besides, the compiler is going to toss out those faces anyway, only the displaced faces will be created.
Because displacements don’t seal your map you will always have another brush behind them. In this example the bottom brush is entirely textured with the nodraw texture. Thus a normal world brush textured with nodraw is sealing the map under the displacements.
To produce our grass we will first create the displacements. For this example we are going to use displacements powers of 2 and 3. A displacement power of 4 is really not needed for something like this unless you are trying to create something that is extremely smooth/round.
With the Face Edit tool open click on the Displacement tab and then select the brush you want to create the displacement on, and finally click the Create button. This is where you will enter either 2, 3 or 4 as the power of your displacement.
With the Paint Alpha tool we are going to bring out some of the sandy area of our brush and in those sandy areas you won’t see grass or grass sprites. You should really experiment with the settings on this tool, and the brush sizes. For this example I only used the Raise/Lower option with a brush size of either 1 or 2 and settings of 25.0 and 117.0, using the right and left mouse buttons to either apply or ease the blended textures. Try it, this will make a lot more sense once you use the tool.
I’ve also placed a few static props in the example maps to show how simple things like weeds can be added. There are lots of SDK models you can use in your maps.
There are the prop_static settings:
- World Model:
models\props_foliage\cattails.mdlormodels\props_foliage\Shrub_01a.mdl - Collisions: Not Solid
- Disable Shadows: Yes
Notice that I’ve disabled shadows. You can get some pretty odd effects when you place props like these in your grass, sometimes it’s best to disable shadows for your “weeds”.
I’ve also created a small rock ledge using the Noise tool but with a higher setting of Max 7.0 and the same Min of 0.5 to create a blended rock area. (I only did this in the HL2 version but it's the same method for CS:S.) This can be very helpful when you need to hide mating edges or anything odd plus rocks like these are always nice in an outdoor map so they should hardly ever look out of place.
