WiseTrains2: Automated Trains
This tutorial was originally created by wisemx. It was originally posted on SDKnuts.net.
Introduction
In this tutorial we’ll:
- Build a monorail that is fully automated.
- Create an automated aircraft in a 3D skybox.
- Surround the map with endless water, for effect.
For our automated ride we’re going to lock the player into the vehicle, take the player on a one loop ride and then open the door and let the player out. The endless water is for effect; while the player is riding the monorail the view is great. As with the first tutorial on trains this project is a mini map when it’s compiled. When the player gets in the train a door will appear and lock the player inside.
I realize there is a lot of confusion with 3D skyboxes and that’s part of the reason I’ve used one in this project, to illustrate that they are actually very simple to create, even for more complex jobs, like our circling aircraft. The first thing I did was use the previous trains project and delete everything we don’t need, I changed the tunnel to a small building and added a ladder.
You can find help on Source ladders here. Once I had the building and ladder completed I built my new brush based train, or monorail. Same as in the first trains project this one is a func_tracktrain. This one however does not have user controls.
Creation
Train
Our train/monorail (func_tracktrain):
- Name: Train1
- Disable Receiving Shadows: Yes (Saves on resources)
- Disable shadows: Yes
- First Stop Target: Track22 (The track where it first spawns)
- Max Speed: 100 (Slightly slower speeds for our Monorail)
- Initial Speed: 0 (Spawns stopped)
- Change Velocity: Linear blend
- Change angles: Near path_tracks
- Distance between the wheels: 75
- Height above the track: 62 (Larger vehicle, larger number, experiment)
- Bank angle on turns: 0
- Move Sound: ambient/levels/citadel/field_loop1.wav
- Start Sound: buttons/button1.wav
- Stop Sound: buttons/button4.wav
- Flags: No User Control, HL1 Train, Is unblockable by player

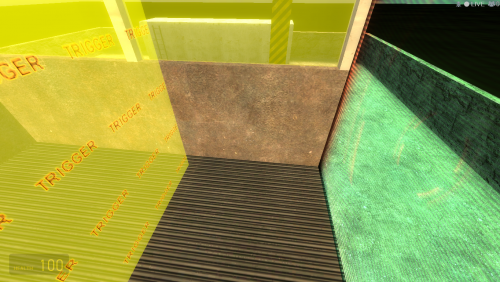
Inside this monorail is a trigger_multiple. This is what senses the player and locks the door, then starts the train forward.
Our trigger:
- Parent: Train1
- Start Disabled: No
- Delay before reset: 30
- Flags: Clients
| My Output | Target Entity | Target Input | Parameter | Delay | Only Once | |
|---|---|---|---|---|---|---|
| OnStartTouch | shake1 | StartShake | 0.00 | No | ||
| OnStartTouch | Train1 | StartForward | 0.00 | No | ||
| OnStartTouch | BackDoor | Enable | 0.00 | No | ||
| OnStartTouch | BackDoorSound | PlaySound | 0.00 | No | ||
| OnStartTouch | shake1 | StopShake | 0.00 | No |
Also inside the monorail is an env_shake, to make it shake a bit when it takes off.
- Parent: Train1
- Amplitude: 9
- Effect Radius: 150
- Duration: 2
- Frequency: 2.5
- Flags: In Air, Physics
The door on the back of the monorail is a func_brush.
- Name: BackDoor
- Parent: Train1
- Disable Receiving Shadows: Yes
- Start Disabled: Yes
- Disable Shadows: Yes
- Solidity: Toggle
- Solid BSP: No
- Flags: Ignore Player USE
When the door is enabled an ambient_generic is played.
- Name: BackDoorSound
- Sound name: ambient/machines/combine_shield_loop3.wav
- Volume: 6
- Max Audible distance: 500
- SourceEntityName: BackDoor
- Flags: Start Silent
When the monorail makes a complete loop the last path_track stops the forward motion, stops the sound and opens the door.
- Name: Track21
- Next Stop Target: Track22 (Our first
path_track)
| My Output | Target Entity | Target Input | Parameter | Delay | Only Once | |
|---|---|---|---|---|---|---|
| OnPass | Train1 | Stop | 0.00 | No | ||
| OnPass | BackDoor | Disable | 0.00 | No | ||
| OnPass | BackDoorSound | StopSound | 0.00 | No |
Skybox
First off, these aren’t that difficult to make. Don’t let them aggravate you. I created this one, without the aircraft, in less than a minute. The most difficult part of 3D skyboxes is the scale. Everything in the 3D skybox needs to be 1/16th scale. If you place a prop in there it will be 16 times larger in the game. This works for you and against you. Textures also need to be scaled, which you can do with the Face Edit tool. Texture scales of 0.20 work out fairly well.
These are the steps I used to create this 3D skybox:
- Make sure your map has a normal skybox and a
light_environment. - Place a
sky_camerain the center of your map. - In the top left, click Edit, Select All. (Your entire map is now selected.)
- Press Ctrl+C. (To copy the entire map.)
- Press Ctrl+V. (To paste the entire copy.)
- In the top (x/y) 2D viewport move the copy off to any side, away from the main map.
- Save your project at this point, in case you make a mistake.
- Go into your new copy and delete everything that will not be in your 3D skybox. This is an important step, and there are other ways of doing it. It’s best to do this part when you first create the basic geometry in your map. For this project all I needed was the
sky_cameraand thelight_environment. - Now select everything in your 3D skybox, so you can scale it.
- Press Ctrl+M, to open the Transform tool.
- Place a mark in Scale, to select that option.
- In each of the three input boxes, X Y and Z, enter the number
0.0625. - Click OK to scale your 3D skybox.
- Now go back to the main map and delete the
sky_camera. - You should now have two exact
light_environments but only onesky_camera. - Add your map geometry to the 3D skybox and then build a normal skybox around it. The only thing I added to the actual geometry is the water brush.
That’s the method I use, then I run the map and make any changes needed to the height of the sky_camera. When you adjust the height make small changes, single units at a time. You can do a lot more with your 3D skybox but for this project I simply needed something for the effect of the aircraft and water looked better than earth. I also experimented with fog but the water looked so nice so I left fog out of it.
Aircraft
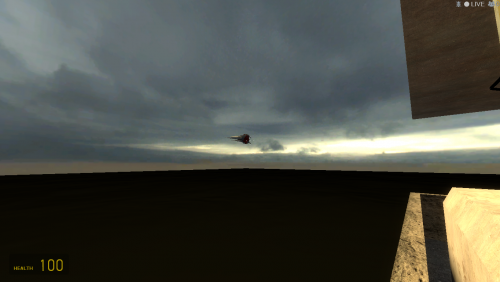
The aircraft in the 3D skybox is another train. For this one I’ve created a func_tracktrain that is very tiny, only 16x16x1. For the aircraft I’ve placed a prop_dynamic_override and env_sprite, both are parented to the func_tracktrain so they move with it.
The smaller func_tracktrain:
- Name: skyTrain1
- Disable Receiving Shadows: Yes
- First stop target: skyTrack2
- Max speed: 40 (A lot slower, its speed will be magnified by the scale.)
- Initial speed: 40 (Spawn moving)
- Change angles: Linear blend (Less jerky)
- Distance between the wheels: 20
- Height above the track: 0
- Flags: No User Control, Passable
Our prop_dynamic_override:
- Parent: skyTrain1
- World Model: models/Gibs/Scanner_gib04.mdl
- Disable Shadows: Yes
- Collisions: Not Solid
Our env_sprite:
- Name: skyLight1
- Parent: skyTrain1
- Render FX: Slow Strobe
- Render Mode: Additive
- Disable Receiving Shadows: Yes
- Framerate: 10.0
- Sprite Name: materials/sprites/orangeglow1.vmt
- Scale: 0.04
- Size of Glow: 2.0
- Flags: Start On
Once you compile this project and run it in the game you can see that even though the Aircraft was made from a Gib, broken piece, because of the angle used and the flashing sprite it works out nicely. You can have a lot of fun with a project like this, please don’t let it frustrate you, just keep experimenting and stick with what works.
See also
- Example VMF I've added a second vmf to the zip showing how to make the train's front glass breakable.
- Example VMF backup
- WiseTrains: Player Controllable Trains
- WiseTrains2: Automated Trains
- WiseTrains3: HL2 Synchronized Trains
- WiseTrains4: HL2 Trains and Complex paths
