WiseHouse: Build a house
This tutorial was originally created by wisemx. It was originally posted on SDKnuts.net.
Introduction
This tutorial isn’t just about building a house in Hammer, the real purpose of this tutorial is to illustrate many techniques you can use for the objects you create.
The first step should always be the planning stage where you will decide what will be needed and how it will be laid out. I’ve heard of people using lego blocks for this, whatever works best for you will be the best method. There’s an old process called P.D.C.A. which stands for Plan, Do, Check and Action. This is an excellent process for mappers. First we’ll make a plan, then we’ll create what is required and finally we’ll check our work and take any actions. Your own quality control.
If you are having a hard time with the planning part a good resource is the Google Image Search Tool.
Stage 1
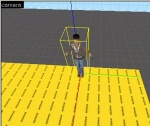 Class: npc_alyx |
For our house I want to illustrate how to create at least two types of windows in HL2 (One you can look out and one you can’t), a functional door, textured walls and a basic pitched roof.
Important: Make sure you have Snap to Grid (⇧ Shift+W) enabled and reduce your grid size. (Keep pressing the left “[“bracket key until the grid is reduced)
Foundation
To begin let’s build the floor and with that determine our entire floor space.
- Select the nodraw texture.
- On the right side of Hammer in the Texture Group, click the Browse button and in the Filter use nodraw then double-click on the texture to select it.
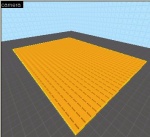
- Use the Block tool to create a brush that is 576 units wide, 384 units long and 8 units tall.
Measurement
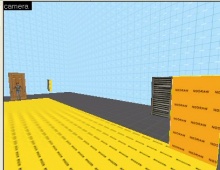
Now we need walls but we’re going to do it a little different than you might have thought. To get the best possible walls we’ll put in our doors and windows first.
- Let’s create Alyx and have her pose where our first door will go. As we’re building the house we can move her around and we’ll delete her when it’s complete.
Now let’s place our front door (prop_door_rotating) where Alyx is standing.
- Skin: 13
More information about rotating doors on WiseDoor, or if you want sliding doors, like in the spy or sci-fi movies take a look at WiseSlidingDoor.
Wood Shutter
On one wall of our house let’s build windows that are for appearance only.
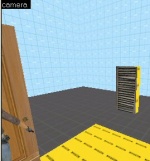
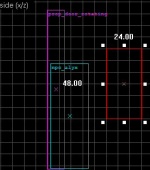
We’ll use a wood shutter texture on a normal brush and Alyx can help us to get these set at the correct height if we watch her wireframe in the 2D view ports.
- Brush size: 24 units wide, 8 long and 48 high.
- Texture:
wood\woodshutters001a
We’re going to put two of these windows on that wall, although it would be best with 3 to 4 of them.
- To space the windows properly create a temporary brush that is the width of the window to the first edge.
- Now move this temporary brush to the opposite side of this wall.
- Then clone our first window by holding ⇧ Shift and dragging the window in the 2D Top view, when you release you should have a perfect copy of the first window.
- Move the clone into place by using the temporary brush as a guide.
- Your windows are perfectly spaced. Use this same method to space objects, it’s quick and simple.
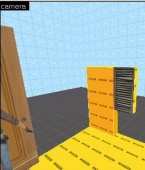
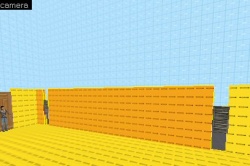
Next thing we’ll do is close up all the space in that wall and the space between that wall and the door with normal brushes. Make all of these walls 120 units tall.
Now with smaller brushes close up the spaces below and above the windows.
file for this project at the conclusion of Stage 1.
Stage 2
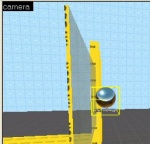 Add env_cubemap |
Breakable Glass
Now we’re going to create a very simple type of breakable glass for a large window we’ll place in the front or our house then we’ll build the wall and finish it up with window moldings.
Using the nodraw texture create the brush that will become your breakable window.
I’ve created this brush with these dimensions: 1 unit wide, 88 units long and 54 units tall. Remember we’re making the wall in this house 8 units wide, so let’s create the wall to the left of our new window so we can properly place it. Another simple guide system.
Use the Selection tool to select the wall we already created to next to the door and then with the brush tool and the nodraw texture create the wall for the entire area on the left side of our new window.
Now use the Selection tool and the 2D View Ports to move the window into the center, of the edge, of our new wall.
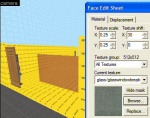
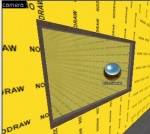
Now use the Face Edit tool (⇧ Shift+A) to browser for, and apply, the texture glass\windowbreak070a to the outside face of this window. (Use the filter word “windowbreak”)
With the window selected press Ctrl+T and tie this brush to entity func_breakable_surf. Assign these properties:
- Health: 5
- Material Type: Glass
- Surface Type: Glass
It may not look any different but you now have a breakable window. Experiment with the properties and flags to achieve your desired effects.
Cubemap
We need one env_cubemap for our window. Use the Entity tool to place an env_cubemap on the textured face of the window. Press Alt+↵ Enter to bring up the properties for the env_cubemap and click on the “Brush Faces” Pick button, then select the textured window face, click Apply and exit the properties dialog window.
env_cubemap, it will automatically create the proper distance between itself and the window. More Walls
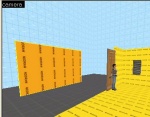
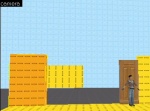
Now we’ll create the rest of our walls. (Remember to select a wall first.) Let’s create the remaining walls like this:
- The wall between the window and the door.
- The connecting walls above and below the window and above the door.
- And the remaining two large walls.
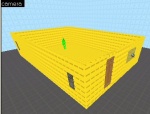
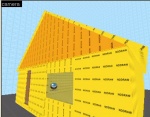
It may be a little on the yellow side but it’s looking a lot more like a house now.
This is the end of Stage 2. At this point, before going any further, go around and check all of your walls for placement and size. One thing I typically do at this point is decide which of my walls will intersect with each other in the corners. Picture the outside of your house and how you will apply textures later. There are lots of ways to do this, you should experiment and stick to what works best for you.
The file for this project at the conclusion of Stage 2.
Stage 3
Doorstep
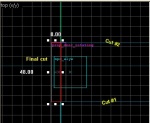
Before we build the roof on our house let’s split the floor. Why? Look closely at our door, look at the floor under our door. If we texture the floor inside the house it’s going to look a little funny when that texture is showing up outside when the door is closed. To fix this we’ll create divisions in the floor with the Clipping tool. Refer to WiseClipPlane for help with this tool.
Create cuts in the floor at the edge of each wall that touches the door and then create a cut in line with the door so you have a small piece under the door that can be textured like a doorway entrance. Make this any size you want, the design is subjective only to what you desire.
To the right is our completed floor. These three cuts with the Clipping tool took me less time that it took to type this sentence. If you are not comfortable with this tool give yourself some time to practice, it’s a lot of fun to use and you can make perfect cuts with it.
Roof
Now we’re ready to build the roof. At this point a few considerations would be a chimney, an inner roof, another floor, etc. We are not going to build a ceiling but if we were I would still build the roof first, you will of course learn your own best method.
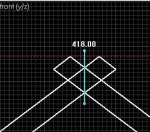
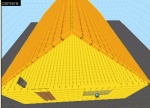
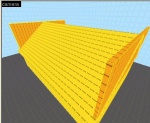
What are the characteristics for our roof? Our house will have a simple Gabel roof with no chimney. To do that we are going to build the roof with two brushes that will overlap each other and the edges of the house, then we’ll use the Clipping tool to cut them to fit. Create these brushes larger than they need to be but with the exact thickness you want for your roof. Our roof will be 4 units thick. Real world wood roofs are typically 4, 6, 8 or 12 inches thick. (Say “real world wood roofs” fast a few times, it’s funny.)
When you rotate these brushes to create the angle for your roof hold ⇧ Shift and with the brush selected click once on it in a 2D View port and then use one of the 4 handles to rotate the brush. If you mess up press Ctrl+Z and start over. Do this for both sides so they overlap in the center but rest perfectly on the walls. Select both halves and use the Clipping tool to cut them at the roof center.
Then select and delete the left over ends until you have a perfect roof junction. Make precise cuts with the Clipping tool. You don’t want jagged edges and you don’t want to have to correct any problem surfaces later.
If you want to trim your roof a little more this is the time to do it, maybe a horizontal cut at the lower roof edges or a place for a chimney, let your imagination go to work. One note about our roof overhang; depending on the texture you plan on using on your inner roof you may need to make additional cuts the roof so you can have a different texture under the roof outside the house. For example, an inner painted ceiling will look rather odd under the roof when viewed from outside.
So how are we going to close our roof? This is the most complicated part but it’s only a little more complex than that last part and we are going to use the very same methods. Create a wall above your other front and back walls, which come up to the very top edge of our roof.
Now use the Clipping tool to cut them so they intersect perfectly with our roof. Also we can delete our little helper, bye Alyx, and go over the design to clean up anything that might need attention. (P.D.C.A.)
This concludes Stage 3, in the next part we’ll create moldings for our window and apply all of our textures.
file for this project at the conclusion of Stage 3.
Stage 4
Let’s create those window moldings.
This time we are going to start with the texture that our window moldings will use instead of building with the nodraw texture. Any performance savings lost by not applying the nodraw texture to hidden faces of our moldings will be too small to measure and it will make it a lot easier to create them if they are textured. Again, use the method that works best for you.
- With the Texture Group Browse button, on the right side of Hammer, browse for the texture that you want for your moldings. Use Filter words like “wood” or “plaster”. The texture I’m using is:
wood\woodstair002c. - Now create the window moldings on each side of the window. Make them 2x2 units thick and as wide as they need to intersect each other
At this point it’s time to texture all of the walls, floor, foundation and roof. Use the Face Edit tool, leave it open as you move around the map, and browse for and apply textures to the exposed faces. Remember left-click to select a texture from an object and right-click to apply a texture to an object. Experiment with the many options on the Face Edit tool and as a rule use 0.25 as your Texture Scale for X and Y. Once the textures are applied and the door is adjusted our house is complete. Now you can go add props, like lights or furniture, and then any additional detail brush work you may find the house needs, such as floor moldings, light switches and electrical plugs.
Take the things you may have learned in this tutorial and expand on them with your own methods, and above all else have fun doing it.
