WiseAttachment: NPC Attachments
This tutorial was originally created by wisemx. It was originally posted on SDKnuts.net.

Introduction
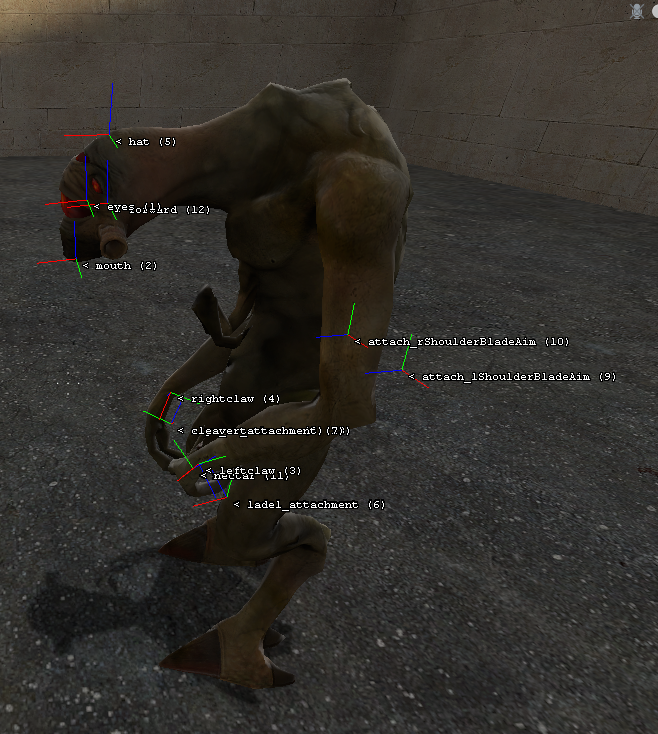
In ![]() Half-Life 2, NPC’s can hold things like tools, weapons, and clipboards. To do this you first need to find the attachment points for the NPC you’re working with. To find the attachment points load the model viewer, from the SDK launcher. From the File menu load the model for your NPC. Click on the Attachments tab and you can now view the valid attachment points for this NPC.
Half-Life 2, NPC’s can hold things like tools, weapons, and clipboards. To do this you first need to find the attachment points for the NPC you’re working with. To find the attachment points load the model viewer, from the SDK launcher. From the File menu load the model for your NPC. Click on the Attachments tab and you can now view the valid attachment points for this NPC.
Look in the image to the right where hat is currently highlighted. Attachment hat is one of the valid attachment points for this NPC. The three attachment points we’ll use for this project are hat, ladel_attachment and cleaver_attachment. You can close the model viewer after you have made a note of this information.
Creation
In this example I’m using a logic_auto to place the tools in the NPC’s hands and the hat on the NPC’s head. The first thing we need to do is add the tools and hat and make sure the Parent of each is our NPC. Give the NPC a name. I’ve named this npc_vortigaunt cook. The hat, cleaver and ladel are all prop_dynamic.
The three models are:
models/chefHat.mdlmodels/props_lab/Cleaver.mdlmodels/props_lab/Ladel.mdl
The outputs for the logic_auto are all pretty predictable. When OnMapSpawn (map load) fires, it sends cleaver01 (the cleaver prop) the input SetParentAttachment with the parameter cleaver_attachment (one of the attachment points from above). Vice Versa occurs for the ladel and hat. Now when the map loads the tools will be in the NPC’s hands and the hat will be in place.