WiseClip: Clipping
This tutorial was originally created by wisemx. It was originally posted on SDKnuts.net.
Introduction
In the HL2 Source engine there are multiple methods for clipping.
- Clip/block the players movement.
- Clip/block NPC movement. (Zombies, etc.)
- Clip/block Physical objects.
- Clip/block Line of Sight.
- Clip/block sections with “portals”.
- Visible blocking with brushes.
With the exception of that last line the other 5 are all invisible once compiled.
The first thing we need to determine is what needs to be clipped and why. If you look at Valve’s example maps you can see that the developers are very kind. What do I mean by that? Notice that Valve clips areas that could possibly snag a player. For example, ladders should always be clipped since the player doesn’t really go up the ladder at all why let them get hung on it? This is a shot from Valve’s sdk_lockdown map:
Notice how the ladder has that pinkish area surrounding it? The pink you see is a world brush with tools/toolsplayerclip applied to it. The golden colored cube you see is the func_useableladder. The purple squares are all info_ladder_dismounts. The ladder (prop_static) itself is only for appearance. Each of these objects works together to create the ladder and the clipped areas make sure everything is smooth. This ladder will work without them, the only benefit of creating a player clip in this case is to help the player.
Another use for a player clip would be someplace where they might do something they’re not supposed to, like Gravity Gun jump over a wall. You can create a player clip horizontally at the top of that wall to keep them from ever going over it, unless of course the cheat command noclip is used, then even Area Portals won’t stop them.
Here’s an example of a player clip Valve created to control the player:
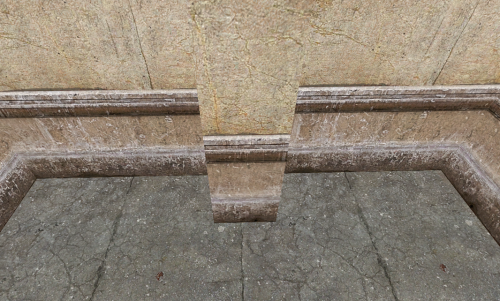
Another example of a clip that should always be used is the typical wall columns. Just about every mapper creates some sort of section of the wall that a player could get snagged on. That’s the player clip we’re going to create for this example, step by step.
Creation
The first thing I’ve done is create a basic room for this tutorial, now the step by step part begins.
Create a column.
- On the right-side of Hammer click on the browse button to select a texture.
- In the filter input area enter “nodraw”.
- Double-click on the yellow nodraw texture.
- Click once with the Selection tool to select the wall for our column.
- On the left-side of Hammer click on the grey Block tool.
- Click and drag with your mouse to create the column in the Top view 2D window.
- Notice that because we selected the wall first our column automatically used the height of our wall, this is a big time saver.
- When the column is in the right place and is the correct size right-click on it in a 2D window and select Create Object.
- Our column exists but doesn’t look very nice. There’s an advantage to creating objects with the nodraw texture, when compiled none of the faces with the nodraw texture will show so they save on resources. All we need to do now is paint the faces that will show, the hidden faces like the back, top and bottom of the column don’t need any texture. Now our column looks beautiful doesn’t it?
- On the left-side of Hammer click on the Toggle Texture tool.
- When the tool opens click once on any face of the column. (This step isn’t needed but it’s a good practice so things don’t go wrong.)
- Click the Browse button on the tool.
- In the Filter input area enter “wall”.
- Double-click on the one you want to use.
- Experiment with the settings. For this example make sure Face is checked then right-click to apply that texture to any face of our column. Do this for all three exposed faces.
- I’ve used a more common method for the face texture on the column, while the Face Edit tool was open I left-clicked on an existing wall texture and then right-clicked on each face of the column.
Our column is created and it took less than a minute.
You can see there’s a good chance the player can get hung-up on that column just passing by it. Let’s create a solution for that.
- Click the Browse button on the right-side of Hammer.
- In the Filter input area enter “clip”.
- Double-click on the “Player Clip” Texture: (
tools/toolsplayerclip) - With the Selection tool click on the column to select it.
- Select the Block tool again.
- In the Top view 2D window create another column next to the first one, do this on both sides so you have three identical columns in the Top view.
- You could also create both of these extra columns by cloning the first one and then applying the
tools/toolsplayercliptexture to them. Same method but for me the method I used for this tutorial is faster. You should learn how to clone objects, it’s going to save you a lot of time on certain tasks. You can clone objects or entire groups of objects.
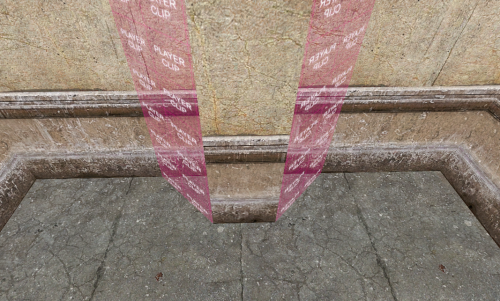
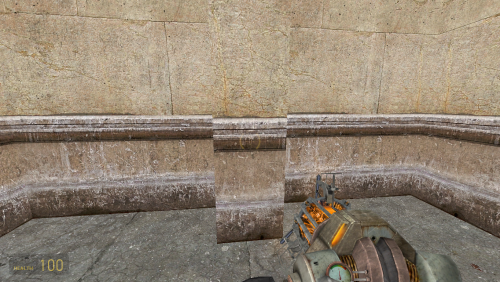
Now we have two clipped areas. When the map is compiled those two additional columns will not show but the player won’t be able to walk there either.
But they’re not right are they? We need to turn those two columns into angled columns so the player slides right off them, just like butter.
- With the Selection tool select one of the Player clip columns.
- Click the Clipping Tool on the left-side of Ham
- Press Ctrl+E and in the Top view 2D window drag a line from one corner of the column to the opposite corner until you have a perfect triangle. You should see a red side and a white side. If the red side is not the side you want to clip away click on the Clipping tool again until it is, now press ↵ Enter. If you did it right the half we wanted to remove is now gone.
- Do the same for the other clip column.
- You could also clone the first column and flip it, but personally I like using the Clipping tool and it’s really fast.


