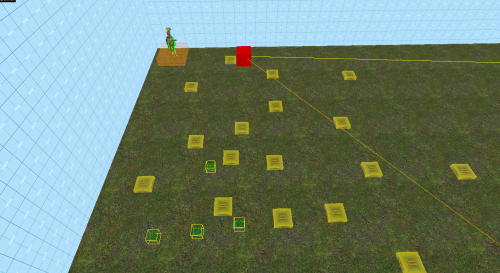
WiseNPC07: Combine Dropship and Soldier dropoff
This tutorial was originally created by wisemx. It was originally posted on SDKnuts.net.
Introduction
The sample file for this project, at the page bottom, illustrates:
- Combine dropship on a path.
- Landing.
- Deploying troops.
- Leaving the scene.
The Combine dropship is a lot of fun to work with and makes a great effect for your HL2 maps but can also lockup HL2 if not configured properly. There are multiple methods I could have used for this example. What I’ve chosen to illustrate are the most common uses. In this project the dropship lands and deploys but doesn’t leave the troop carrier behind. By simply changing the single output that causes the troops to deploy the very same project could have the troop carrier left on the ground when the dropship leaves. The same as in my Combine helicopter tutorial I couldn’t get the dropship to self-destruct. I was hoping to do that on its last stop. No dice.
Creation
The first thing to consider is the path and environment for the dropship. One of the nice effects is the way it will dance around as if it were thinking. You can get more of that effect by adding additional path_track entities. In this project I could have used 4 path_track entities for everything but by adding 4 more the dropship has a lot more activity.
An interesting thing about the dropship is the double AI. In this project I’m using an ai_relationship to cause the dropship to ignore the player. Once the Combine spawn they, with an ai_relationship, will begin to attack the player, if within sight. You can add assault points to your dustoff points to cause the Combine to begin a specific attack pattern. Once the dropship deploys the soldiers they can be controlled as you would expect.
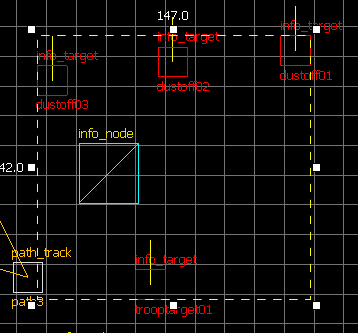
The dustoff points are created with info_target entities. This entity is handy for a lot of tasks but here we are using it for two specific tasks.
- The dustoff points, or suggested deployment spots for each soldier.
- The landing spot for our dropship.
The info_target entities I’ve used here have no useful properties in the project except for the names I’ve given them and their positions on the ground.
Shown above is path_track path3 in red. The 4 info_target entities are shown in yellow. The three on the bottom are the dustoff points and the one above them is the landing point. Notice the yellow direction indicators in the image below. These indicate the direction of your dropship and deployment. These are all specified in the properties for the npc_combinedropship.
Notice that we are using an npc_template_maker to spawn the dropship but not for the soldiers. The dropship will spawn them, all we have to do is place the correct amount in the map and adjust the properties for each. The properties and options for npc_combinedropship are many.
- Name: dropship01
- Target Path track: path1
- Squad name: combine_squad
- Land target name: trooptarget01
- Name of Templace NPC 1: combine01
- Name of Templace NPC 2: combine02
- Name of Templace NPC 3: combine03
- Name of dustoff point for NPC 1: dustoff01
- Name of dustoff point for NPC 2: dustoff02
- Name of dustoff point for NPC 3: dustoff03
- Crate type: Soldier Crate
- Flags: No Rotorwash, Think outside PVS Template NPC
Outputs:
| My Output | Target Entity | Target Input | Parameter | Delay | Only Once | |
|---|---|---|---|---|---|---|
| OnFinishedDropoff | dropship01 | FlyToSpecificTrackViaPath | path1 | 0.00 | No | |
| OnFinishedDropoff | dropship01 | Disable | Break | 17.00 | No |
As you can see that’s where the names of our 4 info_target entities come in. The npc_combine_s are also named and those names are specified above.
- Name: combine01, combine02 and combine03
- Squad name: combine_squad
- Wake Squad: Yes
- Waiting to Rappel: No
- Weapons: AR2 (You can specify different weapons)
- Number of Grenades: Unlimited
- Model: Regular Soldier
- Flags: Fall to ground, Template NPC
The properties for our npc_template_maker:
- Name: dropshiptemplate01
- Start disabled: Yes
- Number of NPCs: 1
- Frequency: 5
- Name of templace NPC: dropship01
It doesn’t matter where you place the npc_combine_s in your map, they will spawn when needed and will come from inside the carrier. The npc_template_maker however should be placed where you want the dropship to spawn.
All of the timing in this project is done with a trigger_once with the exception of an output from path_track path3, when the dropship reached this entity the following output is executed:
| My Output | Target Entity | Target Input | Parameter | Delay | Only Once | |
|---|---|---|---|---|---|---|
| OnPass | dropship01 | LandTakeCrate | 3 | 0.00 | No |
When the dropship reaches path3 it will land and deploy our 3 soldiers. We could make it leave the carrier by changing LandTakeCrate to LandLeaveCrate.
These are the outputs for the trigger_once:
| My Output | Target Entity | Target Input | Parameter | Delay | Only Once | |
|---|---|---|---|---|---|---|
| OnTrigger | dropshiptemplate01 | Spawn | 0.00 | No | ||
| OnTrigger | dropship01 | Activate | 1.00 | No | ||
| OnTrigger | dropship01 | FlyToSpecificTrackViaPath | path3 | 2.00 | No |
As you can see 2 seconds after the dropship spawns it will begin to move to path3. The trigger_once and ai_relationship used in this project are the same ones from the previous projects in this series of NPC tutorials.

