WiseLevelChange: HL2 Level Change
This tutorial was originally created by wisemx. It was originally posted on SDKnuts.net.
Introduction
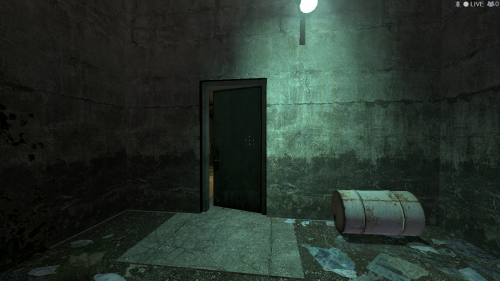
The level changes in HL2 single player maps are created with a trigger. In this tutorial I’ll begin by referencing one of your HL2 SDK maps: sdk_d1_trainstation_01.vmf (the opening train station scene). After you jump out of a window HL2 has its first level change when you go through this door:
Notice the door is ajar when you first get to it. To get that affect from your prop_door_rotating use these settings:
- Spawn Position: Ajar (use Ajar Angles)
- Ajar Angles: 0 255 0
(Use your own angles, “0 255 0” is the setting used in this example)
Be very careful about where you create level changes in your maps.
There are three varieties of level changes:
- Seamless - New map, same environment. (i.e. Hall, Door)
- Displacement - New map, different environment. (i.e Teleport to place)
- One-Way – Can not go back.
Imagine creating a changelevel right in the middle of a ball field, it would drive the player nuts. Level changes seem to work very well where the player is jumping or falling so for this example I’ve created an environment where the player jumps down to trigger the change. I’ve made the two areas gray and orange to illustrate one method of providing the player with a visual key.
Think about the places in HL2 where Level Changes occur.
- Doors. (Train Station, Ravenholm, City 17)
- Tunnels (Coast)
- Player dropping. (Canals)
What you want to avoid at all costs is the player forgetting which direction they were going when the next level begans to load. If it was in a 90 degree hall with a turn behind them and also in front of them they might accidentally go back towards the level they just left once the map loads, multiple times. (Porter's note: Yes, and especially because the player camera can still turn even between level loads! Always have a clear visual landmark.)
Another thing to consider is a naming system for your maps that will make sense to you. For example, these are the names of the first levels in HL2:
- d1_trainstation_01
- d1_trainstation_02
- d1_trainstation_03
- d1_trainstation_04
- d1_trainstation_05
- d1_trainstation_06
Creation
You must:
- Place an info_landmark in both maps that marks the same location in each map.
- Place an trigger_changelevel in both maps. (You might not need the second
trigger_changelevelbut the reference system does.)
Both info_landmark entities must have the same name. (Try to give it a name that references both maps.)
Both trigger_changelevel entities reference the info_landmark name in their Landmark Name property.
The first map's trigger_changelevel's New map Name is the name of the second map. The second trigger_changelevel's New map Name is the name of the first map.
The easiest way to do this is to clone part of the map the player is leaving, like a hallway with a door, and use that section in both maps. Your info_landmark will remain exactly the same but you will make changes in the trigger_changelevel for each map.
Another entity you may need to use is a trigger_transition. This is not required. The optional trigger_transition entity is used to control how a level change will function and what comes through in the destination. To control which entities go through the level transition, create one or more trigger_transitions and give them the same name as the landmark. Any entities within the trigger_transition(s) will go to the next map. (Porter's note: Strongly recommended you use. Pretty much every map in hl2 uses it because without it even stuff like NPCs and objects the player holds won't carry over.
To fire events in the next level, use the OnLevelChange output to turn on an env_global in the current level. Create an auto_trigger in the next level that checks for the state set by the env_global. (Porter's note: I think wisemx had a slip-up here. He must have meant trigger_auto, but that's for GoldSource anyways. For Source, use logic_auto.)
That came straight from Hammer. (Porter's note: ...or maybe a Valve employee needs to be fired.)
The trigger_changelevel entity has an input named ChangeLevel and an output named OnChangeLevel. This allows us to target the trigger_changelevel with other entities, such as buttons or timers. Imagine for example a map where the player has three minutes to find a “key” or they will be knocked back to the previous level, where they first entered a teleporter. The optional input and output are at your service.
Well, let's get to it for real.
For our example I’ve created a basic map and then saved it to another file so I ended up with two identical maps and have only changed the player spawn locations. For this example we’re going to create a level change from wiseLevelChange01 to wiseLevelChange02.
Our trigger_changelevel doesn’t need a name in this example; we won’t be targeting it with any inputs. The info_landmark however must have a name. In our second map the info_landmark is the same, an exact copy. The <trigger_changelevel in the second map needs to have the flag Disable Touch checked -- we don’t want our player to be able to go back.
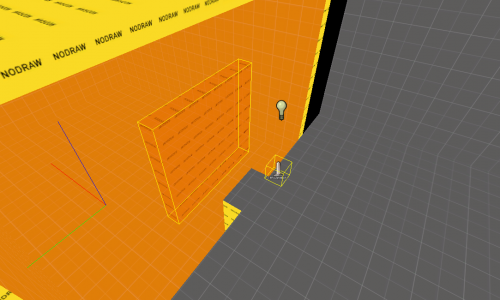
Here’s a shot from Hammer of our info_landmark and trigger_changelevel:
In the example files for this project I’ve sized and placed the trigger_changelevel where the player will jump down through it but will not accidentally trigger it by walking up.
You may need to get creative with these. But that’s what you enjoy, right?

