WiseAPC: APC on Path
This tutorial was originally created by wisemx. It was originally posted on SDKnuts.net.
Introduction
The request for this tutorial was: APC comes barreling in, stops, and begins an attack against the player.
In this tutorial we are going to:
- Use the Valve HL2 “apc_on_path” prefab.
- Fire events with a trigger.
- Our finished project will be a tiny HL2 map, when the player first steps forward they will activate a trigger, the APC will come barreling in, stop and begin to attack. Even for a tiny little HL2 map it’s going to work great.
Let’s begin.
Creation
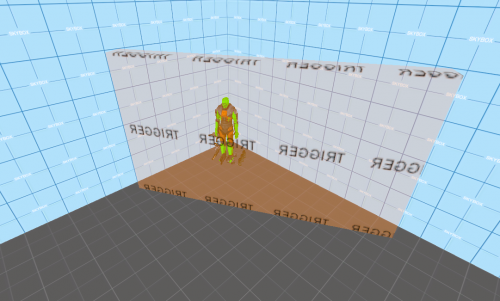
First create the trigger. You can make your triggers any size you want, open a few of the sample maps Valve has provided us with and look at the ways they use trigger_once and trigger_multiple. Our trigger only needs to fire once, so let's use trigger_once. Make sure the Clients flag is checked.
Now we’re going to insert the HL2 “apc_on_path” prefab. (I’m going to give the step by step for those who are not sure how to do this.)
- Click on the Entity tool. (Looks like a Chess piece)
- On the right side of Hammer click on Categories and select “Prefabs HL2”.
- In the Objects list select “apc_on_path”.
- Place your mouse in the Top 2D view port and then left click to set the location.
- Make adjustments in the Top and Side 2D view ports then click “Insert original prefab” or press ↵ Enter.
- While these objects are grouped place them exactly where you want them by clicking on the Selection tool and then moving them with your mouse in the 2D view ports. You can rotate this group of objects at the same time by clicking once on the group in the Top 2D view port so you now see 4 white handles instead of 6, now hold ⇧ Shift and drag one of the 4 corners to rotate the entire group. Holding ⇧ Shift constrains the group to precise angles, which is very helpful if you need objects at 45 degree angles. Click on it twice again in the Top 2D view port to return the 6 handles.
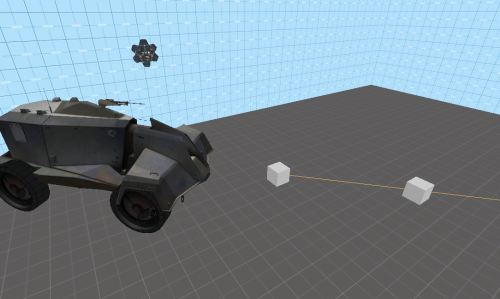
With your “apc_on_path” HL2 prefab still selected ungroup all of the objects by pressing Ctrl+U. We can now make individual changes. Notice the rollermine floating in the air? That’s our APC driver, npc_vehicledriver. Those blocks on the ground are the path for our npc_vehicledriver. The APC itself is a prop_vehicle_apc. We are not going to create any inputs for this; our npc_vehicledriver will do all the work.
Now that they are no longer grouped alter your APC and it's path as needed.
Now let’s create a few outputs in the trigger_once we placed in front of Gordon.
| My Output | Target Entity | Target Input | Parameter | Delay | Only Once | |
|---|---|---|---|---|---|---|
| OnTrigger | apc_1_driver | StartForward | 0.00 | No | ||
| OnTrigger | apc_1_driver | StartFiring | 2.50 | No |
That’s it. Compile the map and run it in HL2. In this same example I’ve added three crows: npc_crow. The crows are triggered with the APC and then they fly away. The crows are just a bonus; they have nothing to do with the prefab we used.

