Prefab
A premade fabrication, or prefab, is a separately saved object, usually consisting of multiple parts - brushes, props, or entity elements. The prefab system allows you to easily store pieces from your levels that can be used repeatedly. Examples of useful prefabs include hallways, pillars, special entity setups, etc.
Prefabs are simply small map files (.VMF) that contain only your prefab. These files are stored in a particular prefab folder, generally ![]()
\sourcesdk\bin\prefabs, so that Hammer can find them and allow you to easily insert them into your levels.
Note: For orangebox games, make sure to use the ![]()
\sourcesdk\bin\orangebox\bin\prefabs. For additional guidance on the location of built-in Source SDK prefabs, see Category:Prefabs.
Prefabs can be organized into their hierarchy by simply adding sub-folders to the \prefabs directory. This allows you to sort prefabs based on, amongst others, the intended map or mod they belong to, thus possibly easing their navigation.
Creating prefabs
Prefabs can be created in the Hammer editor with these steps:
- If this prefab is intended to interact with named objects inside itself, add the "_&i" token at the end of each object's name. See Prefab tokens below.
- Select the objects you wish to include in your prefab (using Ctrl+
 ).
). - If you plan on inserting the prefab using the Entity Tool, the origin (0,0,0) of your map will be used as a reference point to where you insert the prefab, so it is advisable to drag the selected objects to this origin and centering the prefab on it.
- Either click the Create Prefab button in the Object bar, or select the Create Prefab command from the Tools menu. (Shortcut key: Ctrl+R)
- A Save As... dialog will open, displaying the Hammer prefabs directory. Type in the filename to save your prefab as and click the Save button.
 Note:While the .vmf extension should be automatically added to the filename, some users have experienced this not being the case. To be on the safe side, add .vmf to the filename to ensure that the prefab will show up. You can also add it later by browsing to the prefabs folder.
 Bug:After saving the very first prefab, Hammer might crash.
 - The new prefab will now be available for insertion in the Object bar.
Prefab tokens
A special token "&i" can be added to the name of entities in prefab objects so the entity will have a unique name when placed in the level. When the prefab is placed, the &i token will be replaced by a unique number. The token can be included in the targetname, inputs and outputs, etc. All tokens in the prefab will be replaced with the same number. This allows entities within the prefab to reference each other, but still have a unique name so multiple prefabs won't trigger each other.
For example, a func_door entity with the name "door_sliding_&i" in the prefab would become "door_sliding_1" when placed in a level. Consecutive placements of the prefab would be called "door_sliding_2", "door_sliding_3", ...
A trigger_multiple included in the same prefab, set to trigger "door_sliding_&i" upon initial creation, would upon insertion share the same token number as the door.
For ways to address prefab names using this token, see search wildcards.
Parent property. The same will happen with outputs.Prefab containers
In Valve Hammer Editor up to Version 3.5 prefabs can be stored in .ol files. This File Format acts as a container and can store several .map and .rmf prefabs in it. With the Prefab Factory Menu in Hammer Editor it is possible to add or remove Objects to the Libary.
Inserting prefabs
Once you have prefab objects created, it is a simple task to insert a prefab into your level.
There are two ways of putting a prefab into your level: Using the Entity tool ![]() , or using the Block tool
, or using the Block tool ![]() .
.
The process is basically the same for both tools: First select the tool you wish to use, then select the prefab from the Object bar, and then insert it through one of the views.
The Entity tool ![]() should be used for most prefab placement, as it retains the exact size of the original prefab. Placement with the Block tool
should be used for most prefab placement, as it retains the exact size of the original prefab. Placement with the Block tool ![]() allows for resizing of the prefab as it's placed, but is slightly more time-consuming to place correctly.
allows for resizing of the prefab as it's placed, but is slightly more time-consuming to place correctly.
Using the Entity Tool
The Entity tool ![]() is used to place a prefab object that should retain its original size.
is used to place a prefab object that should retain its original size.
- Select the Entity tool
 from the toolbar. (Shortcut: Shift+E)
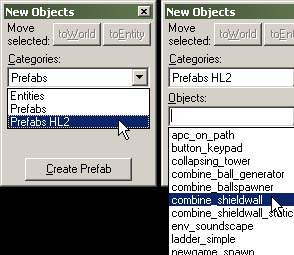
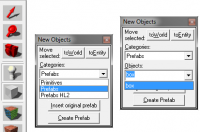
 - In the Object bar, select a prefab library in the Categories: selection box.
- Select a specific prefab to insert from the library in the Objects: selection box.
- Click in one of the 2D views where you want the prefab to be placed. Alternatively you can instead just click in the 3D view, whereupon the prefab will be inserted automatically.
- Press Return or ↵ Enter to insert the prefab.
Using the Block Tool
The Block tool ![]() is used if you want to insert a prefab scaled to a certain size.
is used if you want to insert a prefab scaled to a certain size.
To place a prefab object, scaling it to an exact size:
- Select the Block tool
 from the toolbar. (Shortcut: Shift+B)
 - In the Object bar, select a prefab library in the Categories: selection box.
- Select a specific prefab to insert from the library in the Objects: selection box.
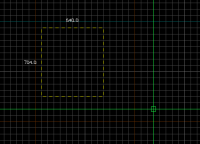
- Drag a selection box in one of the 2D views, making sure it is the size and in the position that you want the prefab to be in each of the views.
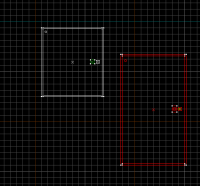
- Press Return or ↵ Enter to insert the prefab. It will be scaled to fit the selection box.
Notice that any inserted prefab is automatically grouped, and therefore the Objects selection mode must be used to move individual objects and access their entity properties.
The Skip tool texture
A prefab typically consists of many objects that you want to move or copy somewhere, and if the prefab happens to be of an odd size, you may end up with components ending up not exactly where you want them. You can prevent this by enveloping the prefab inside a skip tool texture:
- Set the grid size to a the maximum size that you expect to move the prefab in. (Typically you plan the skip brush to be a size of about 4x4x4 grid squares.)
- Create a brush enveloping all the components of the prefab. It's best to select all objects beforehand, because you'll see all the affected volume, since some models may have large bounding boxes. If those are not fully encased, the entire thing may not align on the grid.
- Cover every side of the brush with the skip tool texture.
- Select all the components of the prefab (including the skip brush) and save it.
The positions of the components inside the brush are now relative to the enveloping skip brush, and the even size of the brush makes the movements of every component on par with the Hammer editor's graph. As the brush is covered in a skip tool texture, it will not be compiled with the map.
See also
- Category:Prefabs - a list of prefabs that are already available in the Source SDK
- func_instance - An advanced dynamic alternative to prefabs.
External links
The following sites host custom made prefabs and models:


