WiseTrains: Player Controllable Trains
This tutorial was originally created by wisemx. It was originally posted on SDKnuts.net.
Contents
Introduction
If you’ve used trains in ![]() Half-Life or
Half-Life or ![]() Team Fortress Classic maps you know they’re a lot of fun. We can create trains in
Team Fortress Classic maps you know they’re a lot of fun. We can create trains in ![]() Source with
Source with ![]() Half-Life 2,
Half-Life 2, ![]() Half-Life 2: Deathmatch and
Half-Life 2: Deathmatch and ![]() Counter-Strike: Source. I’ve included two vmf project files, one for HL2/HL2DM and one for CS:S. Everything I’ve created in this project is simply an example, mostly based on the questions I’ve received. Much of what I’ve created here, and the settings I’ve used, are the result of my own tests and from reviewing the SDK code.
Counter-Strike: Source. I’ve included two vmf project files, one for HL2/HL2DM and one for CS:S. Everything I’ve created in this project is simply an example, mostly based on the questions I’ve received. Much of what I’ve created here, and the settings I’ve used, are the result of my own tests and from reviewing the SDK code.
In this project we’ll create two trains the player can get in and control. The reason I've created two identical trains is so you can experiment, see how they react to each other. (I don't imagine you will be creating two trains on the same track.) These trains have the ability to go faster, stop and reverse. (By pressing the USE key.) They will start out parked, and if you back them up far enough they will park again. (At their starting points)
I’ve also created a small tunnel and a small bridge. The reason for both of these is so you can see how the path for the trains can be constructed for your map geometry. If for example you block these trains with a HL2 Buggy in front of the tunnel, they will knock it out of the way.
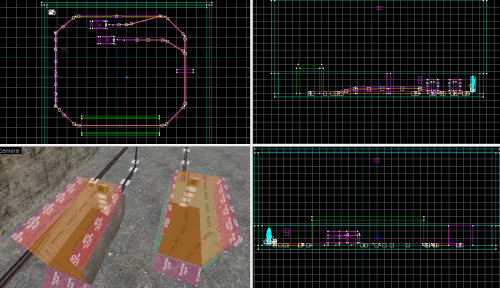
A lot of you may be confused already by what you’ve read in forum posts. “The train has to face East.” “The train has to face West.” “The train has to travel on a flat horizontal path.” (Forget the part about trains only being able to travel on flat paths, as you'll see it's simply not true.) It is true that your train will start out in the wrong direction if you place it on the map in the wrong direction. But what is the proper direction? Look at your map in the top (x/y) 2D viewport. Your trains should start out facing to the right. They don’t have to be in the correct spot, you can build them away from the path. This is handy to help you work on the path and the area around the path, since the train can get in the way.
So what happens if you have your train backwards? Well, it will travel in the direction of your path, backwards. Note that each path_track can be turned, look at them in the top (x/y) 2D viewport, you'll see a yellow direction indicator when they are selected. Leave that for your more creative projects, like a painting floating around in a circle with the picture always facing one direction. If this seems at all confusing don’t let it. Once you get the hang of it path_track's are a lot of fun.
Creation
Path
First, create a very basic design of your train and run the map to see what’s going on. That’s a surefire method of making sure your train will work. So with all of that said it appears the path can be constructed without the train. Correct. The train comes after the track. (Chicken Egg thing, you know.)
So how do you make all of those path_tracks? Simple really. First place one in your map as the starting point. Now give it a name, a helpful name like path01 or track1. Next in the top (x/y) 2D viewport, with that path_track selected hold ⇧ Shift and drag with the mouse, then release. You should have a clone, with a new name and the Next Stop Target of the first path_track should show the name of the clone.

path_track. Place them where you want but make sure you use the same thinking for each. In this example I have all of them level with the top of the illusionary rail. The height of the train is a property called Height above track. Both of these trains are riding 24 units above the track. If I raise or lower the path_track I would need to adjust that number as well.Continue to do this until you have placed all of the path_tracks. It helps to place more of them than you need, for very long distances, in corners and especially going up and down hills. Don’t worry about the height of your path_tracks until you have placed them. You can move them individually later. The best placement of your path_tracks is going to be dependent on your map geometry and the design of your train. I should also mention that you should adjust any settings of that first path_track before you create the clones, if they will all share the same settings.
What settings? Name and Next Stop Target are the most obvious and most important settings. Hammer has done this work for you after you named the initial path_track. Some of the other settings are:
- Path Radius - Your trains won’t use this but if you are using
path_tracks for NPC vehicles this setting gives them some liberty to roam. - Orientation Type - This is important. Your trains will look best if this is set to Face direction of motion, you may want to change this for some of your craftier projects like objects floating around the room.
- New Train Speed - By default this is
0, no change. You can however cause objects to change speed but no faster than the maximum speed specified, as in the case of trains. - Branch Path - This is more useful than you may currently think, but probably not something you’ll be using for your train. An example for this would be two separate paths, side by side but only slightly intersecting, we’ll call one “loop” A, the other “B”.
You could have an object patrolling A and then trigger it to begin following B. I’m not going to cover that in this tutorial but should you need help with such an effect please use the contact page.
The path_tracks also have multiple flags that can be checked. Notice that a path_track can be used once, that the train can teleport to that path_track, etc. Experiment with these flags for your needs.
Train
What about the train? These trains are brush based func_tracktrains. To construct the trains I started with a flat brush 16 units tall, and then I made adjustments to the length and width. You really have to experiment to achieve your needed results. The next part is rather simple; just build a train from brushes. Once the train was built I selected all of the individual parts and turned them into a func_tracktrain with Ctrl+T. The entire train that Gordon starts HL2 out in is a func_tracktrain. The trains surrounding that one are models. The team at Valve really did a superb job on that brush based train. Kudos. (Porter's note: Well, the seats inside them are models but the rest is indeed brushes.) That’s what these are, tiny little brush based func_tracktrain.
Notice that the func_tracktrain has a Name property and it can have a Parent. This means with all of its many features it also has a hierarchy. I didn’t create any wheels for these but you will probably want to, even though they’re just for looks. Run this project and watch these trains go around the track, for simple little creations they look pretty good, even without wheels.
Here are the properties for the func_tracktrain
- Name: Train01
- First Stop Target: TrackSide
- Max Speed: 200 (200 is the fastest speed a player will be able to catch back up to.)
- Initial Speed: 0 (Train can start out moving.)
- Change Velocity: Instantaneously
- Change Angles: Near path_tracks (How it "points" into turns.)
- Distance between the wheels: 50 (This is how long the train will look/act in turns.)
- Height above the track: 24
- Bank angle on turns: 0 (If it were an airplane you might want it to bank.
- Damage on crush: 0
- Move Sound: ambient/machines/train_wheels_loop1.wav
- Start Sound: plats/train_use1.wav
- Stop Sound: plats/ttrain_brake1.wav (No, that's not a typo.)
- Volume: 10
- Flags: HL1 Train, Is unblockable by player
These flags are important for a Player controlled train. If you uncheck HL1 Train it will act odd and can not backup properly. If you uncheck Is unblockable the train will stop dead at times. Passable will make objects pass right through the train. No User control is a train you will control with outputs. No Pitch, Fixed Orientation and Use max are settings you should experiment with, but not on your trains. (Unless for a func_tanktrain. I'll try to cover HL2 Tank Trains later.)

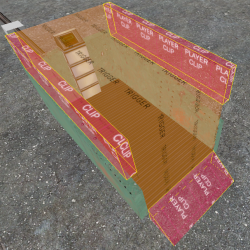
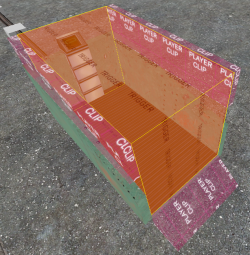
What about the controls? I really had a time figuring this part out. The entity func_traincontrols is used for your train’s controls. And it needs to be a volume where the player will be standing or it will not work. Notice how I filled the entire inside area with a brush textured with the trigger texture. Then by pressing Ctrl+T I converted this brush to a func_traincontrols.
The settings are important, these controls need the name of your train and if the player will be riding in the train when they control it you need to name that train as the Parent.
Here are the settings for the func_traincontrols.
- Parent: Train01
- Train name: Train01
The next part is experimentation. Compile your map and take a ride in your train. Note that there are multiplayer physics problems with HL2DM and CS:S. If you test with the console command developer 1 in HL2DM and CS:S, you will see the Client Stuck error at times when you ride the trains. I’m not sure if this can cause any harm to the servers running your maps, but if you have experienced problems, other than the mentioned error, please let me know. As for the actual workings of the train, they will function in HL2, HL2DM and CS:S.
I made the rails in this project with brushes and converted them to func_illusionary they are not solid. The rails serve no purpose other than appearance.
OK, you’re going to ask about the HL2 Razor Trains, right? I’m not going into that yet but it will be in this series of tutorials, soon. We’ll create bullet trains that come out of no where and go buzzing past.
Last note, get creative with your trains. Add events, outputs, change the speed along the path, anything to make them more fun in your maps. Take a look at this mini map, with a little work it could be made into a HL2 amusement ride with spooks and exciting things to see everywhere. I'm planning on creating a HL2 mod for children, with concepts like this. There won't be any shooting, just things to ride on, fly, fun stuff. I have three young children and they had a lot of fun playing with these trains.
See also
- Example VMF with a CS:S-compatible version.
- Example VMF backup
- WiseTrains: Player Controllable Trains
- WiseTrains2: Automated Trains
- WiseTrains3: HL2 Synchronized Trains
- WiseTrains4: HL2 Trains and Complex paths

