Ru/L4D Level Design/Your First L4D Level
Template:Otherlang2 Template:Finishtranslation:ru
Браш - простая 3D фигура созданная с помощь инструмента Block Hammer'а. Браши используются для создания больших поверхностей в вашем уровне, таких как потолки или полы. Мы создадим простую комнату используя браши.
Создание брашевого пола
- На панели Tool слева выберите Block tool
 .
. - Щелкните левой кнопкой мыши, и не отпуская, переместите курсор мыши в окно 2D проекции Top затем переместите курсор направо и вниз.
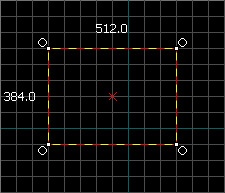
- При перемещении вы увидите пунктирную обводку квадрата или прямоугольника.
- Создайте квадрат 512x512 юнитов и отпустите левую клавишу мыши.
- Нажмите ↵ Enter на вашей клавиатуре для создания нарисованного браша.
Вернитесь в режим выделения, нажатием на иконку Selection tool ![]() на панели Tool или нажмите клавишу Esc.
на панели Tool или нажмите клавишу Esc.
В режиме выделения, при выбранном браше, вы можете изменять размер браша нажатием на левую клавишу мыши по любому из квадратиков, расположенных по краям браша, и перемещением их.
Давайте уменьшим толщину браша (который мы используем в качестве пола) с 64 юнитов по умолчанию до 16. Для того чтобы сделать это, нам нужно сменить размер сетки.
Сетка
Сетка отображается во всех 2D окнах проекции. По умолчанию, все объекты привязываются к сетке. Несмотря на то что вы можете отключить это, лучше не делайте этого так как это предотвращает лики и другие ошибки на вашей карте.
По умолчанию, размер сетки равен 64 юнитам, которую показывают линии каждые 64 юнита. Размер сетки показывается в панели статуса внизу окна Hammer.
- Нажатие на Smaller Grid
 сделает сетку мельче, для более высокой точности. Вы также можете уменьшить размер сетки нажатием на клавишу [
 - Нажатие на Latger Grid
 сделает сетку крупнее, для более легкого перемещения. Вы также можете увеличить размер сетки нажатием на клавишу ]
Для того, чтобы уменьшить сетку до 16 юнитов, нажмите дважды на клавишу [. Посмотрите на Status bar внизу справа окна Hammer и удостоверьтесь в наличии Grid: 16. Если это не так, нажмите на [ или ].
Изменение размера пола
Сейчас сетка должна быть мелкой.
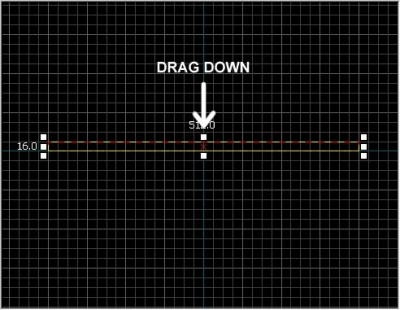
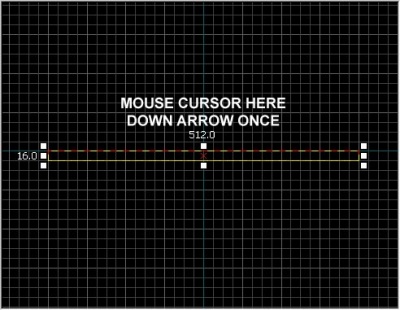
Переключитесь на правое нижнее окно проекции. Оно должно называться Side при наведении на него мышью. Переместите верхний край браша вниз до толщины 16 юнитов.
Перемещение брашей
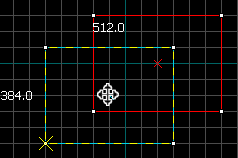
Вы можете перемещать браши после того как Вы их создали. Выберите Selection tool ![]() и направьте мышь на браш одной из 2D окон проекций, держась на расстоянии от угловых маркеров. Указатель примет форму четырех стрелок, направленных во все четыре стороны
и направьте мышь на браш одной из 2D окон проекций, держась на расстоянии от угловых маркеров. Указатель примет форму четырех стрелок, направленных во все четыре стороны ![]() , означающих включение опции перемещения объекта.
, означающих включение опции перемещения объекта.
Кликните и начните двигать браш в одном из 2D окон. Пока кнопка не отпущена, браш будет перемещаться в соответствующую позицию.
Кроме этого, вы можете двигать объекты с помощью стрелок на клавиатуре. Для этого нам нужно установить клавиши, которые планируем использовать в настройках:
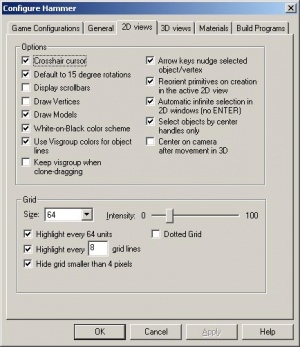
- Нажмите меню Tools, выберите Options, далее Configure Hammer.
- Кликните на 2D Views.
- Там есть много других полезных настроек, но нам пока интересен только пункт Arrow keys nudge selected object/vertex.
- Нажмите OK чтобы подтвердить изменения и выходите из настроек.
Теперь передвинем браш пола на 16 юнитов ниже, установив курсор мыши на окно проекции Side и нажав Down_arrow один раз.
Навигация в 2D вьюпорте
- Вы можете использовать полосы прокрутки для перемещения вида
- Для более быстрого перемещения, зажмите Пробел и кликните левой клавишей мыши для перемещения.
- Используйте колесико для изменения масштаба.
Покрытие текстурами
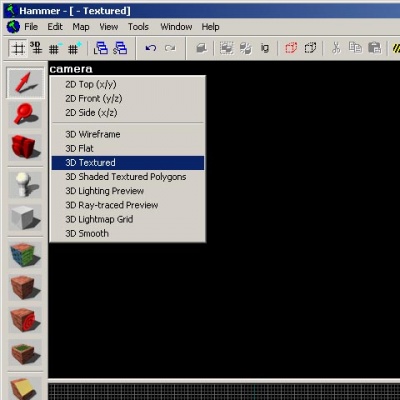
Чтобы смотреть текстуры в 3D вьюпорте, кликните правой клавишей мыши на camera в 3D вьюпорте и выберите 3D Textured.
Навигация в 3D вьюпорте
Перемещения в 3D немного отличаются от перемещений в 2D проекции:
- Удерживая Spacebar и левую кнопку мыши, подвигайте курсором чтобы осмотреться.
- Удерживая Spacebar и правую кнопку мыши подвигайтесь вверх/вниз и вправо/влево.
- Удерживая Spacebar и обе кнопки мыши двигайтесь вперед и назад.
- Кроме этого вы можете использовать W, A, S, и D чтобы двигаться вперед, назад, стрейф влево и стрейф вправо соответственно.
- Z Включает и выключает режим "mouse look". Передвиньте курсор в 3D Camera и нажмите клавишу Z. Теперь вы можете оглядеться вокруг как в игре.
Поместите курсор в окно 3D Camera и взгляните на пол, который только что создали снизу.
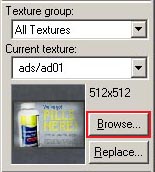
Вы заметите, что на вашем полу стандартная текстура. Возможно вам захочется сменить ее. Чтобы поменять текстуру выберите кнопку Browse на вкладке Texture.
Должно открыться окно Texture Browser.
В поле Filter внизу окна просмотра, вы можете фильтровать текстуры по их имени. В этом уроке введите слово "dev_measure" (со знаком подчеркивания) в поле. Откроется список текстур "разработчика", которые облегчат быстрое создание чего-нибудь.
Теперь, найдите текстуру с именем dev/dev_measuregeneric01b и дважды кликните на ней.
Мы должны вернуться в экран редактора с 4-мя видовыми окнами, при этом выбранная текстура будет отмечена как текущая в Texture секции.
Выберите браш пола (если он еще не выбран), кликнув по нему в видовом окошке Camera. Он должен покраснеть.
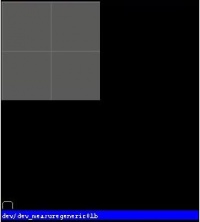
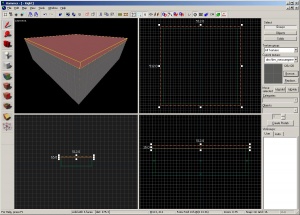
После того как вы выделили браш, кликните на ![]() Apply current texture иконку на Tool секции чтобы применить текущую текстуру на выделенном объекте. Выбранная серая текстура должна появится на выбранном объекте (как показано на рисунке). Не расстраивайтесь, если Вы видите розовую текстуру. Это потому что текущий объект выбран. Щелкните ЛКМ на пустом месте, тем самым убрав выделение и увидите текстуру в оригинальном цвете.
Apply current texture иконку на Tool секции чтобы применить текущую текстуру на выделенном объекте. Выбранная серая текстура должна появится на выбранном объекте (как показано на рисунке). Не расстраивайтесь, если Вы видите розовую текстуру. Это потому что текущий объект выбран. Щелкните ЛКМ на пустом месте, тем самым убрав выделение и увидите текстуру в оригинальном цвете.
Создание стен и потолка
Теперь давайте узнаем как создавать стены и потолок в комнате. Легчайший путь чтобы сделать это, это сделать копию браша пола.
Копирование
Так же, вы можете скопировать текущий brush(созданный пол).
Чтобы клонировать браш:
- Выберите браш, кторый Вы уже создали.
- Передвиньте курсор в правое нижнее окошко просмотра Side.
- Удердживая ⇧ Shift нажмите Up_arrow чтобы создать копию и переместить её на одну позицию в сетке.
Это создаст браш, который является копией уже созданного браша пола.
С этого момента Вы можете изменять размер и габариты созданного браша, удерживая левой кнопкой мыши и перетаскивая бегунки по краям браша, таким образом меняя браш до нужного Вам размера. Создадим стену размером 128 юнитов в высоту и 16 в толщину.
Продублируйте стену 3 раза, чтобы очертить контур пола.
Продублируйте пол один раз и перетащите его вверх, чтобы сделать потолок.
Удаление брашей
Для удаления браша, выберите его с помощью Selection tool ![]() и нажмите клавишу Delete.
и нажмите клавишу Delete.
Групповое выделение
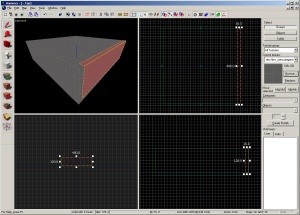
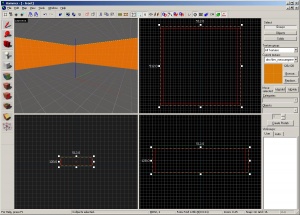
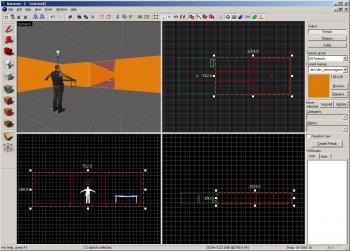
Такую картину Вы увидите в окне камеры, если перетащите её в комнату. Трудно сразу сказать что где, поскольку стены, пол и потолок имеют общую текстуру. Следующим шагом наложим на стену другую текстуру.
Вы можете выделять все стены, удерживая клавишу Ctrl и выделяя желаемые, кликая левой кнопкой мыши в окне камеры. Используйте Spacebar для управления камерой (или переключитесь в режим управления мышью нажатием Z) для поворота камеры, чтобы выделить каждую стену.
После того как Вы выделите все стены, кликните на меню Browse в разделе Texture. На этот раз выберите оранжевую текстуру под названием dev/dev_measuregeneric01, которая находится рядом с текущей. Выберите её двойным кликом и закройте окно поиска.
Используйте ![]() в разделе Tool, чтобы наложить оранжевую текстуру на стены.
в разделе Tool, чтобы наложить оранжевую текстуру на стены.
Сохранение файла
Чтобы сохранить карту, используйте комбинацию клавиш Ctrl+S или опцию Save в меню File.
Необходимо наименовать файл и указать директорию сохранения.
Для этого урока назовите карту "tutorial01" и сохраните её в директорию mapsrc, находящуюся по умолчанию в:
C:\Program Files\Steam\steamapps\common\left 4 dead\sdk_content\mapsrc\
На Вашем ПК директория может находиться в другом месте, в зависимости от местонахождения Steam'а.
Инвентарные карты-образцы
При сохранении Вашей карты Вы могли заметить и другие папки в директории mapsrc. В Left 4 Dead Authoring Tools включены карты-образцы для освоения.
| Directory | Contents |
|---|---|
mapsrc\No Mercy Apartments |
Содержит карту-образец из кампании "Нет Милосердию", которая входит в Left 4 Dead. |
mapsrc\standards |
Демонстрирует карты, которые содержат множество деталей для игры в кооператив и сражение. |
mapsrc\Your_First_L4D_Level_Tutorial |
Содержит завершённые версии всех частей данного руководства. |
mapsrc\zoo |
Карты "стилизованные" под просёлочные и городские типы карт из Left 4 Dead. |
Время от времени, учебник будет отсылать Вас к различным картам из этих директорий.
Размещение объектов
Далее, мы поселим живое существо в Наш уровень:
- Выберите Entity tool
 на Tool панели.
 - Как только Entity tool
 станет доступно, список выбора Entity на панели Object станет активным.
 - Оставьте Categories как Entities.
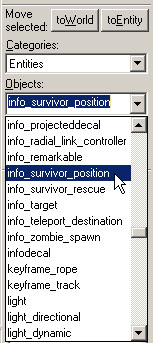
- Кликните стрелку на выпадающем списке Objects и выберите
info_survivor_position. - Теперь перейдите в окошке просмотра Camera на центр внутри вашей комнаты.
- Клик левой кнопкой чтобы разместить нашего персонажа.
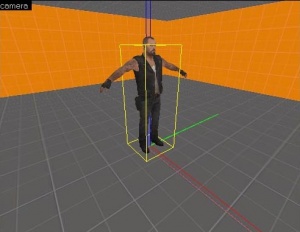
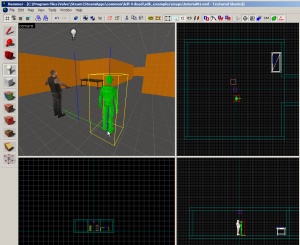
Объект info_survivor_position будет размещён посреди комнаты.
Стандартная модель для info_survivor_position - Фрэнсис. Он - самый высокий персонаж(из Выживших) в Left 4 Dead. Эта модель пригодится вам для проверки и подгонки размеров окружения.
Размещение источников света
Поместим источник света на Нашу карту:
- Снова выберите Entity tool

- Выберите
lightв выпадающем списке Objects на панели Object. - в этот раз, поместите источник света на потолок (над головой Фрэнсиса).
- Вернитесь в режим выбора нажатием на Selection tool
 на панели Tool или нажатием клавиши Esc.
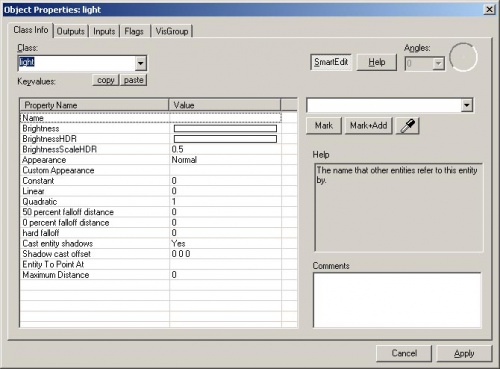
Next we'll change some settings on the light. Bring up the light's properties by double-clicking it in the Camera viewport or by selecting it (left-clicking on it) and then pressing the Alt+↵ Enter keys. This will bring up the Object Properties dialog box.
From the Object Properties, you can change various properties of the entity. For example, you can change the Brightness of this light. Click on the Brightness row under Keyvalues and you will see a set of numbers on the drop down menu on the right side. The default setting for the brightness of a light is 255 255 255 200. The first three numbers represent the RGB values (color) and the last number represents the intensity of the light.
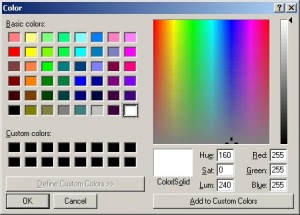
You can click on the Pick Color button to select a color rather than input values for it.
Simply click on the color you want the light to be and click OK.
This will bring you back to the Object Properties dialog box for the light. You should see any changes you made to the brightness on the Brightness row and the drop down field on the right side if the Brightness row is selected.
Click the Apply button to set your changes to the entity and close the dialog box by clicking on the "X" at the upper right side of the window.
Placing a prop_static
Entities also consist of props like furniture, decoration, and complex parts of architecture. There are a variety of different kinds of props. Prop_static entities are props that are static – they don't move, animate, turn on or turn off. There are also prop_dynamic entities that can move, animate, be enabled and disabled. There are also prop_physics entities which the player can interact with and behave physically as they would in the real world.
To place a prop:
- Select on the Entity tool
 again.
 - Go to the Object bar and change the Objects field to
prop_static. - Point to the floor in front of the model of Francis and left-click to place a prop_static. You will see a red cube that represents the
prop_staticbefore a model is attached to it. - Go back into selection mode by clicking on the Selection tool
 in the Tool Bar or by pressing the Esc key.
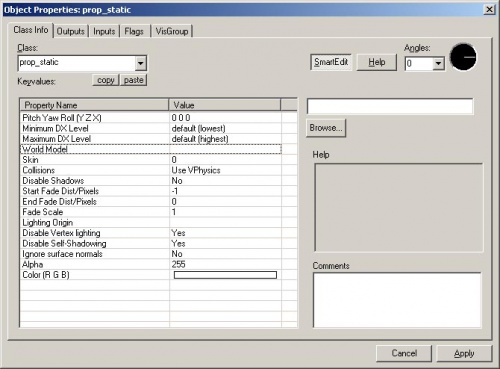
 - Double-click on the red cube to open the properties.
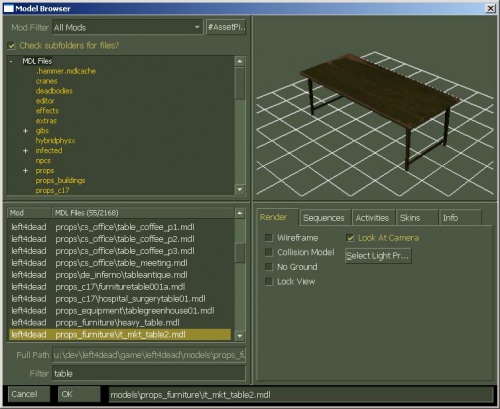
- Double-click on the World Model field to open the Model Browser.
Selecting the model
- In the Filter field at the bottom of the dialog box, type in "
table". This will show all the models that have the word "table" in their name. - Scroll down to the one named:
- "
props_furniture\it_mkt_table2.mdl". - It should look like the image shown.
- "
- Click OK to select it and close the browser and return to the Object Properties dialog box. You should see the name of the model now in the World Model row.
- Click the Apply button to set your changes to the entity.
- Close the Properties box.
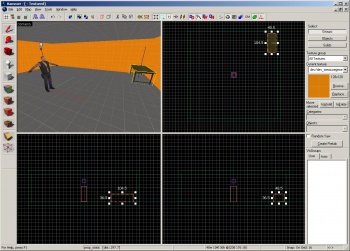
You will see the table that you just placed in the room in any of the viewports in the editor.
Moving entities
You can move entities like our table the same way you can move brushes. Click and drag inside the bounding box of the selected entity to move it around with your mouse or put your mouse over any of the viewports and use the arrow keys on your keyboard to move them around.
Move the table to a corner of our room and set it so that it sits on the floor.
Rotating entities
Next we'll try placing a pump shotgun on the table in our room and rotating it so that it looks like it's in a natural position.
Click on the Entity tool ![]() in the Tool bar.
in the Tool bar.
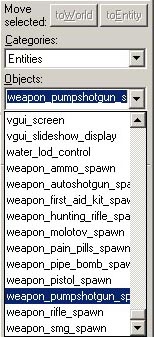
Select weapon_pumpshotgun_spawn from the drop down menu under Objects.
Click on the floor underneath the table prop to place the shotgun entity.
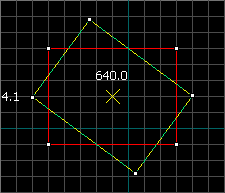
To rotate an object , you simply select the object you wish to rotate using the Selection tool ![]() , then click once on the object. You should see the object surrounded at the corners with circles. Mouse over a circle in any 2D view, then click and drag to rotate the object.
, then click once on the object. You should see the object surrounded at the corners with circles. Mouse over a circle in any 2D view, then click and drag to rotate the object.
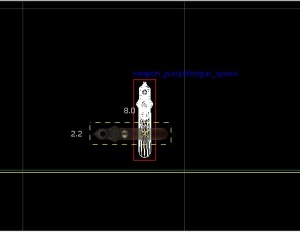
Use your mouse wheel to zoom into the Front viewport and click once inside the bounding box of the pump shotgun model to make its four corners highlight with circles around each one.
Left-click and drag in a counter-clockwise motion to rotate the pump shotgun so that it's lying on its side.
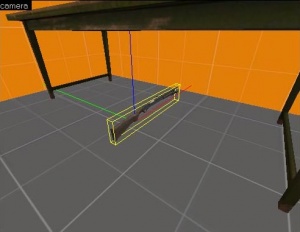
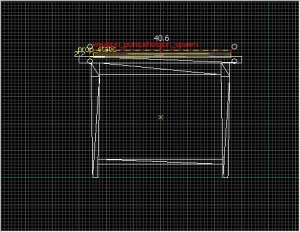
Zoom into the Side viewport and press the [ key 4 times to decrease the grid spacing. Click and drag inside the bounding box of the shotgun to move it to sit on top of the table. You don't have to place it exactly as long it is above the table and not inside it.
In the Top viewport, click inside the bounding box of the shotgun until it's in the rotate mode again. Left-click and drag one of the corners counter-clockwise until the shotgun sits almost parallel to the table.
Now you will have a shotgun that you can pick up from the table.
Adding to your room
Using the duplication, scaling and moving of the brushes you currently have in your room, you can now build a hallway and another room identical to the first.
Make sure to create openings into both rooms from the hallway.
You can also duplicate the light in the first room and move it to the middle of the second room.
After you've finished making your second room and hallway, save the level as "tutorial01.vmf" if you haven't already.
Add a player start
One last thing we'll want to do is add a player start entity to test out the map. This will be where the player will spawn in a simple level.
- Select the Entity tool
 on the Tool Bar.
 - Pick
info_player_startfrom the Objects drop down list. - Now, navigate in the Camera viewport to the center of the room next to the model of Francis.
- Left-click on the floor to place the player_start.
The exact position isn't critical. Just make sure it's in this general location. You can even rotate it another direction if you wish and the player will be facing that way when they spawn.
Running your level in the game
You have saved your map, but you will also need to compile it before it can be played in the game engine.
When a map is compiled, it is converted from the raw .VMF file that you just saved, into the .BSP format used by the game engine. The geometry is processed and the proper lighting and shadows are pre-calculated with several compile programs.
- Open the File menu, and choose Run Map... or press the F9 key.
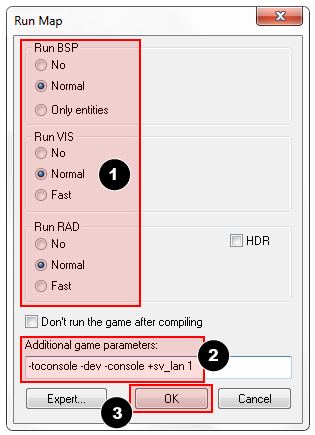
- The Run Map dialog will open.
- This dialog is used to set some basic compile parameters.
- Make sure that Normal is set under the Run BSP, Run VIS, and Run RAD settings.
- Under Additional game parameters:, make sure these settings are present, and type them in if not:
-toconsole -dev -console +sv_lan 1
- Now click the OK button to start the map compile process.
The Compile Process Window will show the progress of the compile. When the compilation is done, the game you are mapping for will automatically launch, and load your map in the engine.
Your level in the game should load up after compiling. It may take a minute or two.
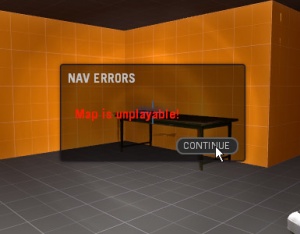
- When the game launches, the "Map is unplayable!" dialog will immediately appear. This is OK because we haven't created a navigation file for our level yet. You'll learn about navigation files later in the tutorial.
- Press the Continue button.
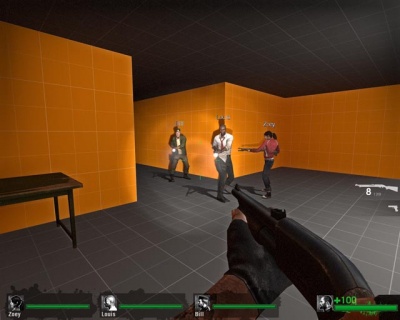
A screen shot of the running map. Note that without a navigation file, the Survivor bots won't respond fully.
The Developer console
Making levels for Left 4 Dead sometimes involves using commands typed into the Developer Console window. The console can also be used to do things like spawn Infected zombies to test your level.
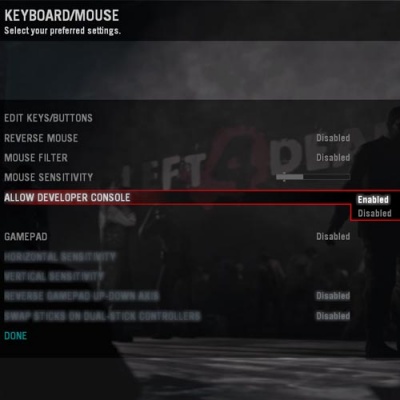
If you haven't already, make sure the console is enabled in the game:
- Press the Esc key in the game.
- Click on Options, then Keyboard/Mouse.
- Click on the Allow Developer Console and select "Enabled".
- Click on the Done Button.
- Click on Return to Game.
Using the developer console:
- Bring down your developer console ` (tilde).
- Type any console command and press the ↵ Enter key.
- Hide the console again with `.
Noclip mode
One console command you'll find constantly useful is noclip mode. This is a mode that let's you fly around the level without being stopped ("clipped") by anything in the level. It's useful to get around large levels quickly.
To enter noclip mode:
- Press ` to enter the console.
- Type
noclipin the console and press ↵ Enter. - Fly around the level.
- Type
noclipagain to leave noclip and walk around the level normally.
Some useful console commands
There are lots of console commands available. Here is a sampling.
- sv_cheats 1
- Turns on cheats. Necessary for many console commands.
- director_stop
- Stops the AI Director (no spawning for common Infected or Specials).
- director_start
- Starts the AI Director (spawning resumes).
- nb_delete_all
- Deletes all existing NPCs (Infected and Survivors).
- map <name of map>
- Loads a map or reloads the level you're in.
- changelevel <name of map>
- Loads a map while continuing the session.
- god 1
- Все выжившие (люди) становятся бессмертными.
- noclip
- Команда позволяет летать сквозь стены.
- z_spawn
- Spawn a common Infected zombie where the cursor is.
- z_spawn smoker
- Команда возрождает Курильщика.
- z_spawn hunter
- Команда возрождает Охотника.
- z_spawn boomer
- Команда возрождает Толстяка.
- z_spawn tank
- Команда возрождает Танка.
- z_spawn witch
- Команда возрождает Ведьму.
- nb_blind 1
- Команда позволяет заражённым не видеть выживших.
- sb_stop 1
- Stop the survivor bot AI -- the Survivors will stop moving.
- director_force_panic_event
- Start a panic event (Infected mob).
- L4D Level Design/Начало работы|:L4D Level Design/Начало работы]]
