Ladders
January 2024
Сначала вернитесь в Hammer, чтобы добавить в нашу карту лестницу.
Создайте tutorial02.vmf
В первую очередь нам нужно создать новую версию карты, что мы использовали в предыдущем разделе.
Откройте файл карты tutorial01.vmf который вы создали ранее в Hammer (если он еще не открыт). Он расположен в папке mapsrc, по умолчанию:
C:\Program Files\Steam\steamapps\common\left 4 dead\sdk_content\mapsrc\
Итак мы сделаем новую рабочую версию и скомпилируем ее:
- Для этого проходим в меню File и выбираем Save As...
- Меняем имя на
tutorial02.vmf.
Создание комнаты
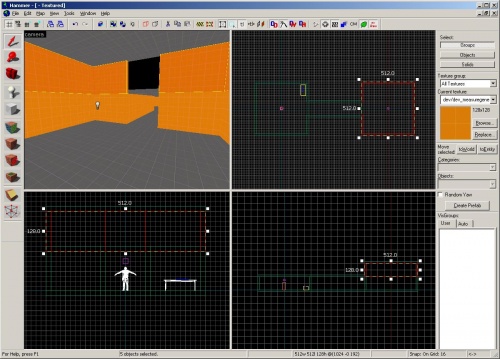
Сначала, выберите потолок второй комнаты, созданной в прошлом уроке.
Передвинте браш на 128 юнитов выше текущего положения.
Выделите браши стены во второй комнате и продублируйте их таким образом, чтобы новый набор стен располагался точно над сделанными ранее.
Теперь, модифицированная вами комната должна выглядеть так:
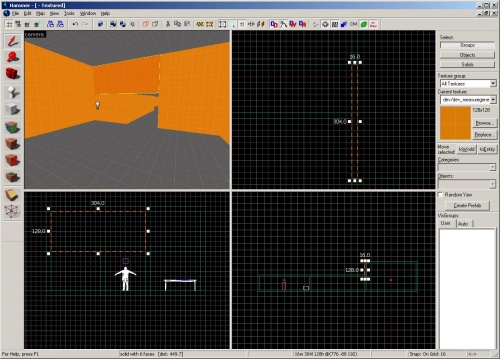
Вы увидите темную дыру ведущую вне наших комнат и коридора. Карта скомпилируются неправильно и не запустится при наличии таких дыр или "щелей" выходящих за границы созданного уровня. Поправим это.
Веберите верхную часть стен со стороны дырки.
Увеличьте размер "заплатки" перемещая мышкой метку на углу.
Creating a ledge
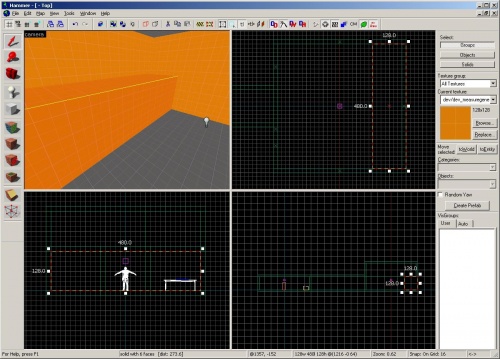
Выберите нижнюю часть задней стены второй комнаты нажатием на нее в окне 3D-вида.
При помощи окна просмотра Сверху, расширьте стену в сторону комнаты так, чтобы ее ширина составляла 128 юнитов.
Снимите выделение с браша нажатием кнопки Esc.
Текстурирование брашей
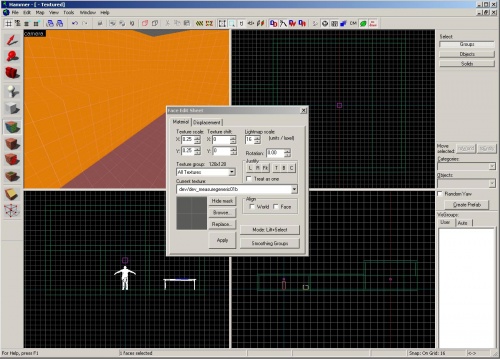
Просто, чтобы показать, как сменить текстуры брашей, давайте покроем весь пол и потолок на нашей карте текстурой dev/dev_measuregeneric01b.
Чтобы редактировать отдельные стороны брашей, нажмите на кнорпку ![]() Texture application mode на панели Tool.
Texture application mode на панели Tool.
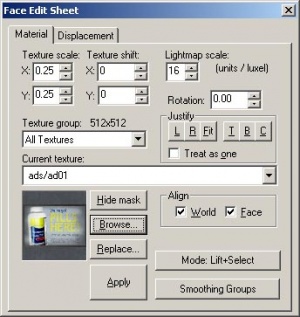
Вы увидите появившееся окно Face Edit Sheet.
Вы можете найти нужную вам текстуру нажатием на кнопку Browse на панели Texture, либо вы можете сделать захват уже использованной текстуры с брашей.
Чтобы захватить текстуру с фейса одного из брашей, просто нажмите ЛКМ на полу, где вы видите серую текстуру.
Вы заметите, что это заменит миниатюру текущей текстуры на панели Face Edit на выбранную вами measuregeneric.
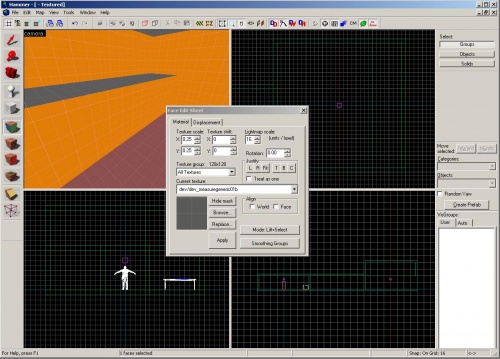
Чтобы применить текстуру на другой фейс, просто нажмите ПКМ на фейсе, у которого хотите заменить текстуру.
Right-click on the top of the ledge you created to give it the same gray texture as the floor.
Создаём модель лестницы
Нажмите на кнопку ![]() Entity Tool и выберите "
Entity Tool и выберите "prop_static" в окне Objects в выпадающем списке выберите Entity если еще не выбрано.
Поместите свой prop_static на заднюю стенку, которую вы только что расширили.
Отмените выделение prop_static нажимая кнопку Esc ,затем щелкните два раза для редактирования свойств.
Нажмите на кнопку World Model.
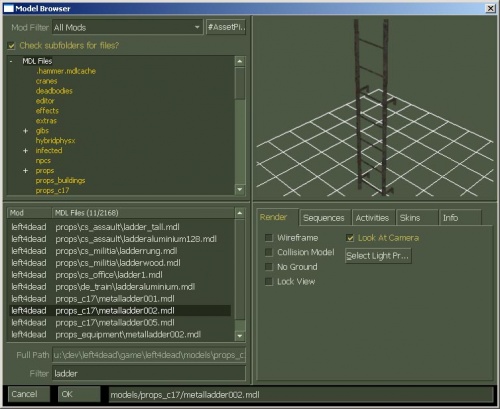
Нажмите на кнопку Browse справа от Object Properties.
Введите "ladder" в поле Filter.
Выберите "props_c17/metalladder002.mdl и нажмите OK.
Нажмите Apply в диалогеObject Properties.
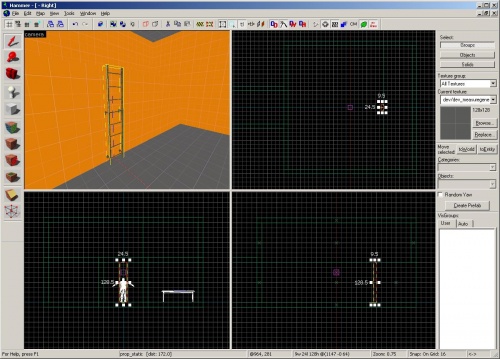
У Вас должна теперь появиться лестница, куда Вы поместили свой prop_static.
Переключаемся обратно Selection tool и поворачиваем, двигаем вашу лестницу так, чтобы она была в середине этой задней стенки и её низ касался пола.
Создание func_ladder
Теперь, когда у вас есть модель лестницы, you will need to place the actual entity that allows players and and other characters to climb it.
Нажмите на кнопку Browse находящуюся на панели Texture.
Напишите "nodraw" в поле filter.
Двойным щелчком выберите текстуру "tools/toolsnodraw" и закройте browser.
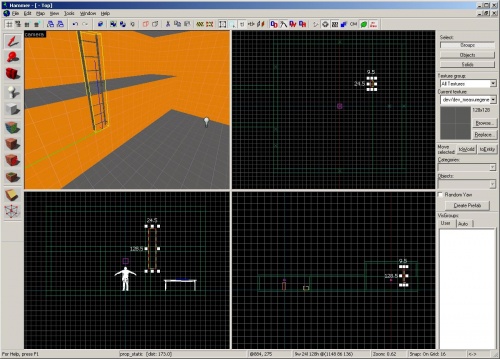
Decrease your grid size to 2 units in order to fit the ladder better by pressing the [ key twice.
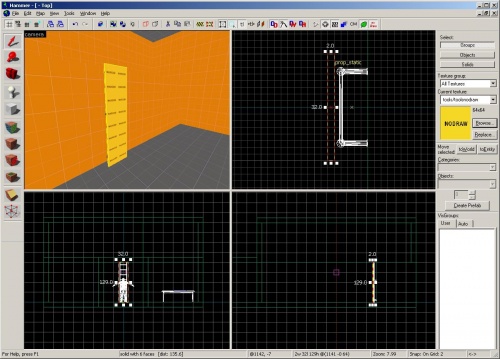
Click ![]() Block Tool and then create a brush in the Top viewport in front of the ladder.
Block Tool and then create a brush in the Top viewport in front of the ladder.
The brush should be approximately 32 units wide, 128 units tall, and 2 units thick. If necessary, resize the brush by dragging the corner handles and drag into place in front of the ladder model as shown in the image.
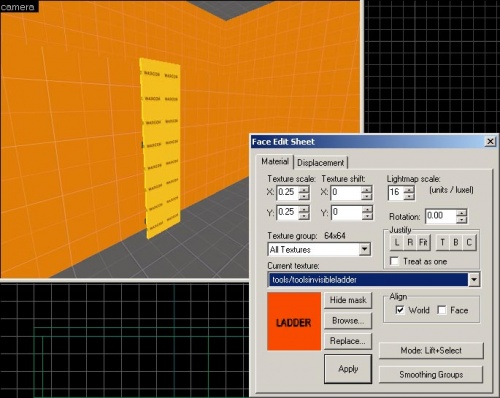
Now, you will need to make one face of the brush (the face that points out from the ladder) a ladder tool texture. To edit individual faces of brushes, click the ![]() Texture application mode button.
Texture application mode button.
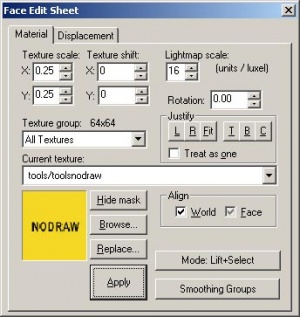
You will see the Face Edit Sheet dialog box appear again.
With this dialog box still appearing, select the face pointing away from the ladder in the Camera viewport by clicking it with the left mouse button.
Click on the Browse button in the Face Edit Sheet dialog box and you will see the Texture browser window appear again.
Type "ladder" into the Filter field.
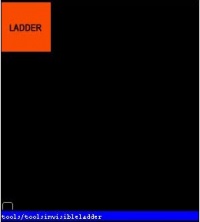
Двойным щелчком выбираем текстуру "tools/toolsinvisibleladder".
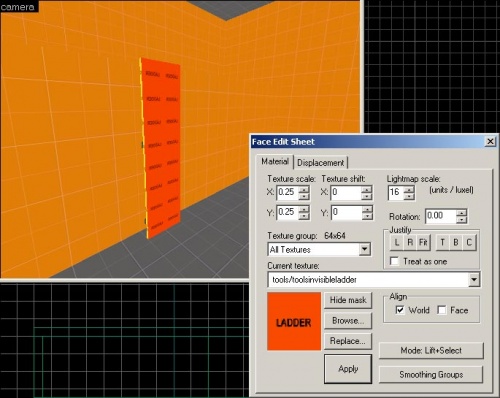
You should see the LADDER texture now occupying the thumbnail in the Face Edit Sheet.
Now click the Apply Button and your selected face should change to the LADDER texture.
Exit the Texture application mode by closing the Face Edit Sheet dialog box.
Select the brush with the LADDER texture on the one face.
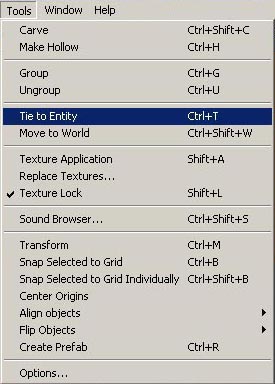
Go to the Tools menu and pick Tie to Entity.
This will make the brush a brush entity. This changes the solid block of geometry we had before into a special brush that can have properties that can be changed to affect the game.
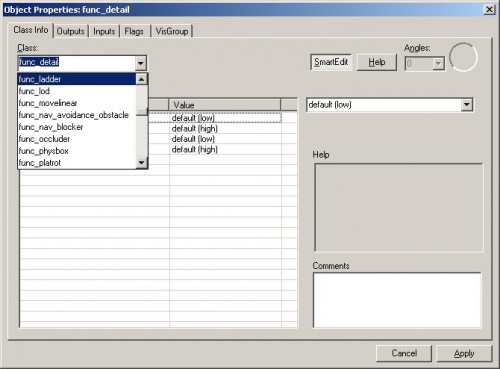
The default brush entity is a func_detail which we will talk about a little later.
We want to make this brush entity a func_ladder. Pull down the drop-down menu choices and select "func_ladder".
Then click on the Apply button to confirm the change and close the Object Properties dialog box.
Compile the level
Now compile the level by pressing the F9 key and then clicking on the OK Button.
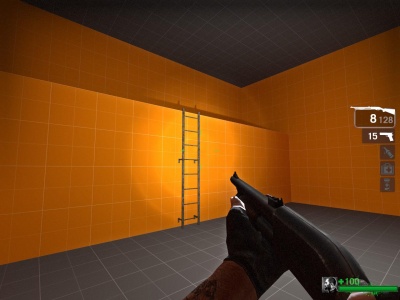
Your ladder look something like this in-game.
You should be able to move up to your ladder and move up it to climb up onto the ledge. If you can't, it's possible it was not created correctly. Try going back to Hammer, deleting your ladder and creating it again.
- L4D Level Design/Your First L4D Level|:L4D Level Design/Your First L4D Level]]
