Ladders
Next we'll return to Hammer to add a ladder to our map.
Create tutorial02.vmf
First thing we'll do is create a new version of the map we used in the previous section.
In Hammer, open the map file tutorial01.vmf that you created earlier (if it's not already open). This should be located in the mapsrc folder, by default:
C:\Program Files\Steam\steamapps\common\left 4 dead\sdk_content\mapsrc\
Now we'll make a new version to work with and compile it:
- Go to File menu and choose Save As...
- Change the name to
tutorial02.vmf.
Building out the room
First, select the ceiling of the second room you created in the first room tutorial.
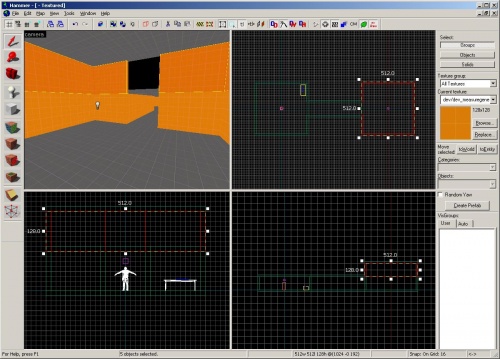
Move the brush 128 units higher than it is.
Select the wall brushes in the second room and duplicate them so that the new set of walls rests on top of the old ones.
You modified room should look like this:
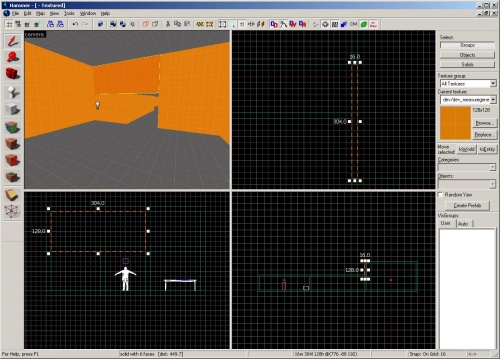
You will now see a hole to the blackness outside our contained rooms and hallway. Maps will not compile correctly or run correctly if there is a hole or "leak" to the outside part of the level. Let's fix that.
Select the upper part of the wall to the side of the hole.
Expand its size to cover the opening by dragging the corner handle.
Creating a ledge
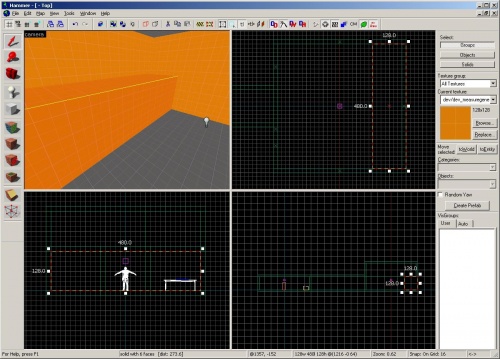
Now select the lower portion of the back wall in the second room by clicking on it in the 3D view.
Using theTop viewport, widen the wall into the room so that it is 128 units wide, forming a ledge.
Deselect the brush by pressing the Esc key.
Texturing a brush face
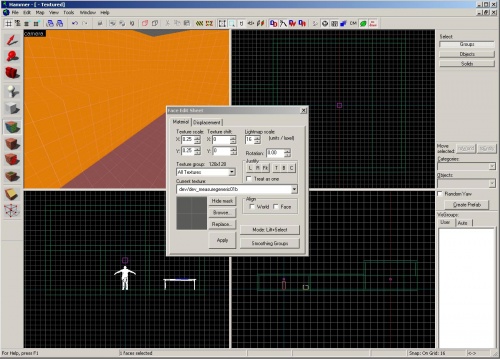
Just to illustrate how to change the texture of a brush face, let's make all of our floors and ceilings the dev/dev_measuregeneric01b texture.
To edit individual faces of brushes, click on the ![]() Texture application mode button on the Tool bar.
Texture application mode button on the Tool bar.
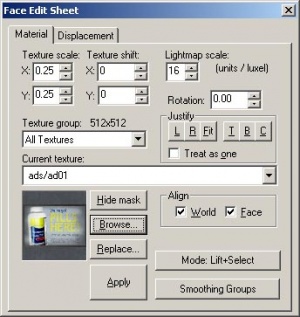
You will see the Face Edit Sheet dialog box appear.
You can browse for the texture just like when you used the Texture bar's Browse to find a texture, or you can lift it from an existing face.
To lift it from an existing face, simply left-click on the floor where you see the gray developer texture.
You'll notice that this will replace the thumbnail with the measuregeneric texture on the Face Edit panel.
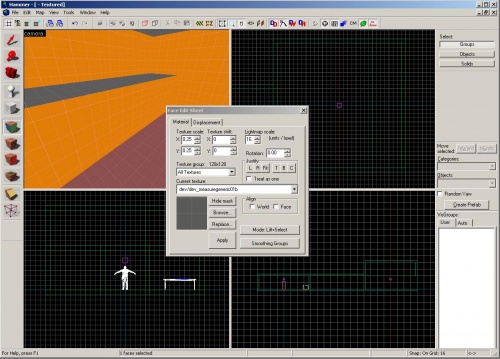
To apply it to another face, simply right-click on the face you want to receive the texture.
Right-click on the top of the ledge you created to give it the same gray texture as the floor.
Placing a Ladder Model
Switch to the ![]() Entity Tool and select "
Entity Tool and select "prop_static" from the Objects drop-down menu on the Entity bar if it isn't already set as this.
Place a prop_static by clicking on the back wall that you just widened.
Deselect the prop_static by pressing the Esc key then double-click on it to bring up its properties.
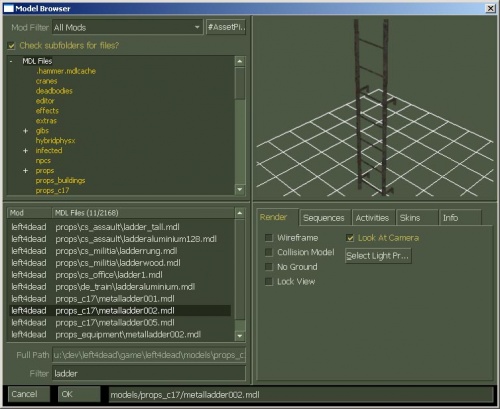
Click on the World Model row.
Click on the Browse on the right of the Object Properties dialog box.
Type "ladder" into the Filter field.
Select "props_c17/metalladder002.mdl and then click OK.
Click Apply on the Object Properties dialog.
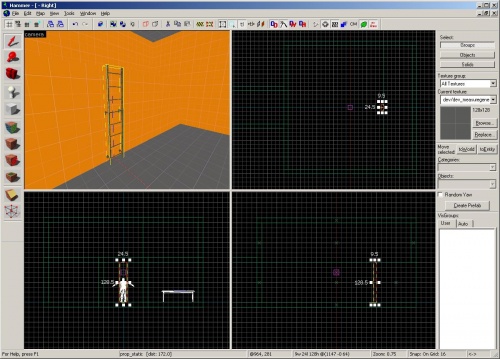
You should now have the ladder where you placed your prop_static.
Switch back to the Selection tool and rotate and move your ladder so that it is in the middle of this back wall and the bottom touches the floor.
Creating a func_ladder
Now that you have the model that shows where your ladder is, you will need to place the actual entity that allows players and and other characters to climb it.
Click on the Browse button on the Texture bar.
Type "nodraw" into the filter.
Double-click on the texture "tools/toolsnodraw" to select it and close the browser.
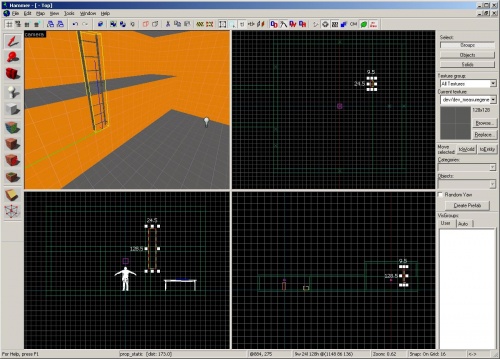
Decrease your grid size to 2 units in order to fit the ladder better by pressing the [ key twice.
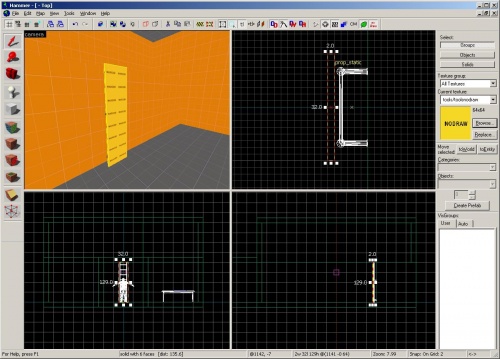
Click ![]() Block Tool and then create a brush in the Top viewport in front of the ladder.
Block Tool and then create a brush in the Top viewport in front of the ladder.
The brush should be approximately 32 units wide, 128 units tall, and 2 units thick. If necessary, resize the brush by dragging the corner handles and drag into place in front of the ladder model as shown in the image.
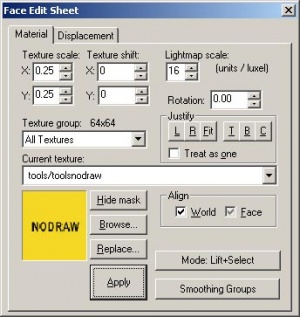
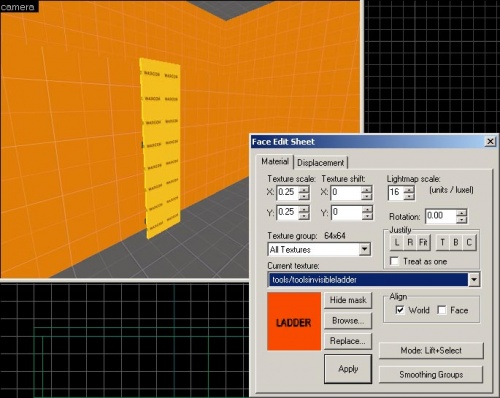
Now, you will need to make one face of the brush (the face that points out from the ladder) a ladder tool texture. To edit individual faces of brushes, click the ![]() Texture application mode button.
Texture application mode button.
You will see the Face Edit Sheet dialog box appear again.
With this dialog box still appearing, select the face pointing away from the ladder in the Camera viewport by clicking it with the left mouse button.
Click on the Browse button in the Face Edit Sheet dialog box and you will see the Texture browser window appear again.
Type "ladder" into the Filter field.
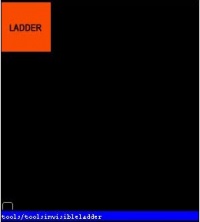
Double-click the texture "tools/toolsinvisibleladder".
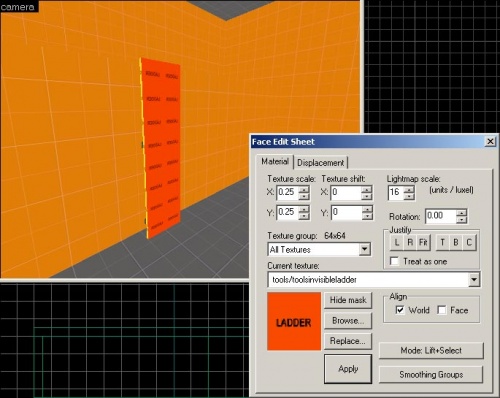
You should see the LADDER texture now occupying the thumbnail in the Face Edit Sheet.
Now click the Apply Button and your selected face should change to the LADDER texture.
Exit the Texture application mode by closing the Face Edit Sheet dialog box.
Select the brush with the LADDER texture on the one face.
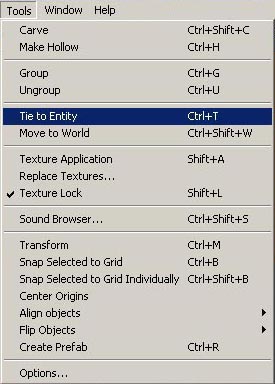
Go to the Tools menu and pick Tie to Entity.
This will make the brush a brush entity. This changes the solid block of geometry we had before into a special brush that can have properties that can be changed to affect the game.
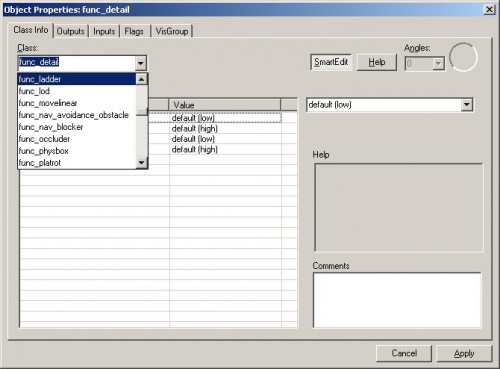
The default brush entity is a func_detail which we will talk about a little later.
We want to make this brush entity a func_ladder. Pull down the drop-down menu choices and select "func_ladder".
Then click on the Apply button to confirm the change and close the Object Properties dialog box.
func_ladder entities. Just note that when generating a navmesh, it will not automatically build navigation for non-func_ladder ladders. You can manually build ladder navigation by using the connsole command nav_build_ladder.Compile the level
Now compile the level by pressing the F9 key and then clicking the OK Button.
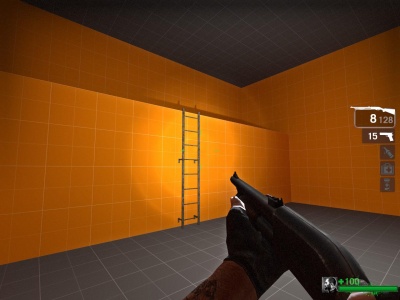
Your ladder should look something like this in-game.
You should be able to move up to your ladder and move up it to climb up onto the ledge. If you can't, it's possible it was not created correctly. Try going back to Hammer, deleting your ladder, and following the steps to for creating it again.
