Zh/L4D Level Design/Your First L4D Level
(译者:ljj)
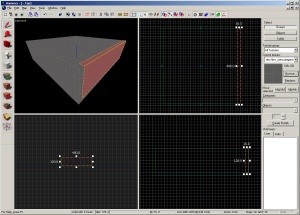
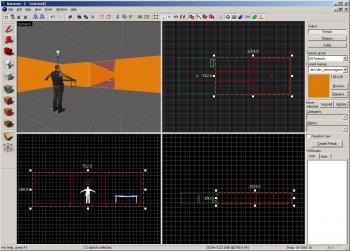
笔刷是使用Hammer的“固体工具”创建的简单3D造型。笔刷用于在地图里创建大多数大型表面,例如天花板和地板。现在我们将使用笔刷来创建一个简单的房间。
创建一个地板笔刷
- 在左侧工具栏选择“固体工具”。
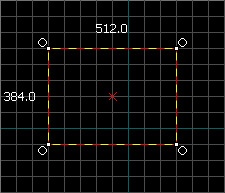
- 现在,在2D俯视图里左键点击并拖动至右下方(如下图所示)。
- 当你拖动时你应该看到一个长方形或正方形的虚线框。
- 创建一个512x512个单位的正方形并放开鼠标左键。
- 在你的键盘上按↵ Enter以创建你刚才画的笔刷。
要返回选择模式,在工具栏里点击“选择”图标或者按Esc键。
在选择了笔刷的选择模式下,你可以通过左键点击出现在笔刷的边界上的任何框,并将它们拖出或拖进来改变笔刷的大小。
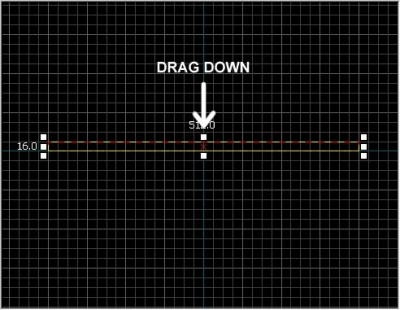
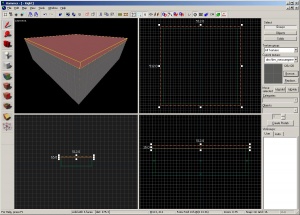
让我们将笔刷的厚度由默认的64个单位减少至16个单位(我们将作为一个地板来使用)。要做到这个,我们需要改变网格的大小。
网格
网格被显示在所有2D视图里面。默认情况下,所有对象都会对齐到网格。尽管你可以关闭它,但是保留它却被认为是很好的行为习惯,因为它防止在你的地图上出现泄漏或者其它错误。
默认网格大小为64个单位,这意味着每个网格线相隔64个单位。当前网格的大小显示在Hammer窗口的底部的状态栏上。
要使网格大小降至16个单位,按[键两次。看下Hammer窗口右下角的状态栏并确认那里显示Grid: 16。如果没有显示的话,按[或]直到显示为止。
调整地板
现在网格应该足够小了。
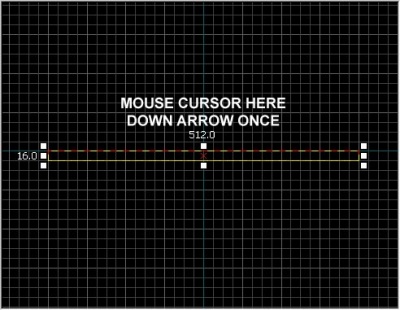
切换到右下方的视图。当你的鼠标在它上方时他应该标记为侧面。拖动笔刷的顶部边框并向下使它有16个单位厚。
移动笔刷
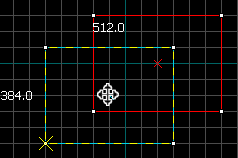
一旦笔刷被创建你可以移动它们。选择Selection tool ![]() 并且鼠标在一个2d视图里的笔刷之上,保持清晰的处理。指针将变成四个箭头指向所有四个方向
并且鼠标在一个2d视图里的笔刷之上,保持清晰的处理。指针将变成四个箭头指向所有四个方向 ![]() ,表明移动对象的选项。
选择工具和鼠标的刷在一个2 d视图,保持清晰的处理。
,表明移动对象的选项。
选择工具和鼠标的刷在一个2 d视图,保持清晰的处理。
单击并拖动移动笔刷以便在任何2d视图里移动笔刷。释放后,笔刷将移动到那个位置。
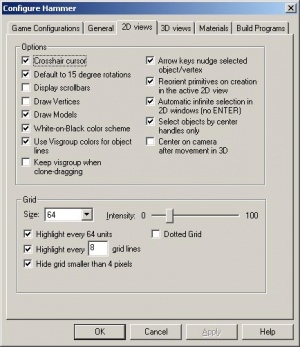
你也可以用箭头(光标)键移动对象。要做到这一点,我们需要在Hammer设置里更改一项设置以便能允许使用方向键:
- 到工具菜单并点击选项以打开配置Hammer对话框。
- 点击2D视图选项卡。
- 这里有其他设置,不过现在,我们只需要标记复选框Arrow keys nudge selected object/vertex。
- 按OK确认更改并关闭选项。
现在让我们通过放置鼠标光标到侧面视图并按下一次下箭头以移动地面笔刷16个单位。
在2D视图里导航
- 您可以使用滚动条来获得视图。
- 更快的方法,按住空格键然后左键点击并拖动以获得。
- 使用鼠标滑轮来放大或缩小。
Texturing
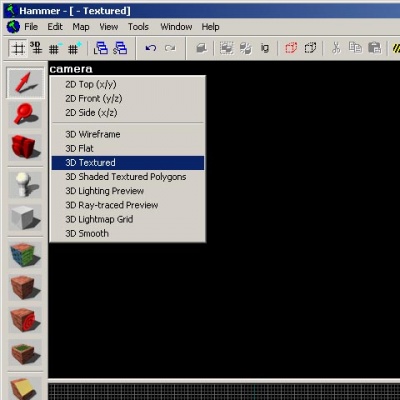
To see textures in the 3D Camera viewport, right-click on the camera text in the 3D Camera viewport and select 3D Textured.
Moving around in 3D is a bit different from the 2D viewports:
- Hold down the Spacebar and left-click and drag to rotate the camera.
- Hold down the Spacebar and right-click and drag to move up/down and left/right.
- Hold down the Spacebar and both right and left-click and drag to move forward and backward.
- You can also use W, A, S, and D to move forward, backward, strafe left and strafe right respectively.
- The Z key toggles on and off "mouse look" mode. Move your mouse cursor over the 3D Camera viewport and press the Z key. You can now move your mouse around as if mouse look was on in the game.
Move up in the 3D Camera viewport and look downward at the floor that you've just created.
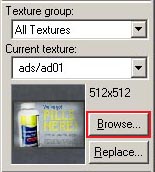
You'll notice there's a default texture on your floor. You'll probably want to change it. To change the current texture, click on the Browse button on the Texture Box.
This will bring up the Texture Browser window.
In the Filter field at the bottom of the browse, you can filter the textures shown based on name. For this tutorial, type in the word "dev_measure" (with the underscore) into the field. This will bring up a listing of "developer" textures that will make it easier to create something quickly.
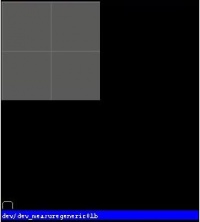
Now, find the texture called dev/dev_measuregeneric01b and double-click on it.
This should bring back the 4 viewports of the editor and place the generic developer texture as the current one in the Texture bar.
Select the floor brush, if it isn't already selected, by clicking on it in the Camera viewport. It should turn red.
After the brush is selected, click on the ![]() Apply current texture icon on the Tool bar to apply the current texture to the selection. The gray developer texture should appear on the floor as shown.
Apply current texture icon on the Tool bar to apply the current texture to the selection. The gray developer texture should appear on the floor as shown.
Creating the walls and ceiling
Now let's go over how to create the walls and ceiling of the room. The easiest way to do this is to duplicate the floor brush.
Duplicating
You can also select an existing brush and duplicate it to create them.
To duplicate:
- Select the floor brush that you've created.
- Move your cursor over the Side viewport.
- Hold the ⇧ Shift key down and press the Up_arrow key to create a duplicate and move it up 1 grid unit.
This will create a brush exactly like the floor on top of the existing floor.
You can now change the size and dimensions of this new brush to create a wall grabbing the corner handles on the brush and dragging it to the size you wish. Let's make the wall 128 units tall and 16 units thick.
Now duplicate the wall 3 more times to outline the floor.
Duplicate the floor brush 1 more time and raise it to become the ceiling.
Deleting brushes
To delete a brush, select it with the Selection tool ![]() and press the Delete key.
and press the Delete key.
Multiple selection
You'll notice that in the Camera viewport, if you navigate inside the room, it's hard to tell what's going on because all of the walls, floor and ceiling are the same texture. Next we'll change the walls to a different texture.
You can select all of the walls by holding down the Ctrl key and clicking on them one at a time in the Camera viewport. You will have to use the Spacebar camera controls (or turn on mouse look with Z) to rotate the camera around so you can select each wall.
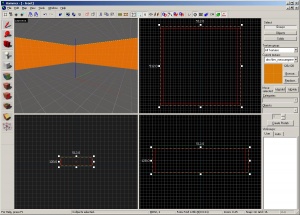
After you have all of the walls selected, click on the Browse button in the Texture bar. This time, select the orange texture next to the current one, labeled dev/dev_measuregeneric01. Double-click it to select it and close the browser window.
Use the ![]() tool on the Tool Bar to apply the orange texture to the walls.
tool on the Tool Bar to apply the orange texture to the walls.
Saving the file
To save a level, you can use Ctrl+S or Save from the File menu.
You will need to give the map a file a name and choose the directory to place it in.
For this tutorial, name the map "tutorial01" and save it into the mapsrc directory, located by default at:
C:\Program Files\Steam\steamapps\common\left 4 dead\sdk_content\mapsrc\
Your directory may be slightly different, depending upon where you have installed Steam.
Included sample maps
When you went to save your map, you may have noticed other directories underneath the mapsrc path. The Left 4 Dead Authoring Tools come with some example maps to help you.
| Directory | Contents |
|---|---|
mapsrc\No Mercy Apartments |
Contains an example map from the "No Mercy" campaign that ships with Left 4 Dead. |
mapsrc\standards |
Examples maps that contain many of the standard pieces for co-op and Versus mode maps. |
mapsrc\Your_First_L4D_Level_Tutorial |
Contains completed versions of all the sections of this tutorial. |
mapsrc\zoo |
"Style guide" maps for rural and urban types of Left 4 Dead maps. |
At times, this tutorial will refer you to different maps in these directories.
Your_First_L4D_Level_Tutorial" is probably the most immediately useful. If you have a hard time completing one of the sections of this tutorial, you can refer to the files in the this directory to give you an idea of what the finished map for that section should look like.Placing entities
Next we'll place an entity in our level:
- Select the Entity tool
 on the Tool Bar.
 - Once the Entity tool
 is enabled, the Entity selection list on the Object bar becomes active.
 - Keep the Categories entry as Entities.
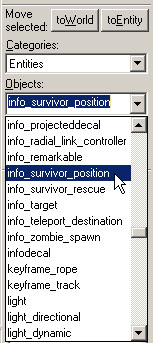
- Click the arrow on the Objects drop down list and select
info_survivor_position. - Now, navigate in the Camera viewport to the middle of the inside of the room.
- left-click on the floor to place the entity.
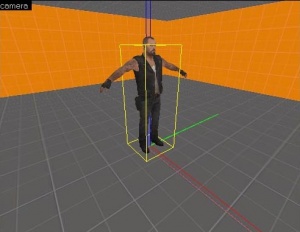
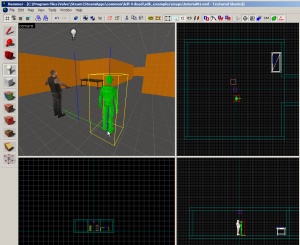
This will place an info_survivor_position entity in the middle of the room.
The model for an info_survivor_position is Francis. He's the tallest character in Left 4 Dead, so this is a good entity to drop down to check your scale.
Placing a light
Now we'll place a source of illumination in the map:
- Select the Entity Tool again
- Select
lightfrom the Objects drop down list on the Object bar. - This time, place the light on the ceiling (above Francis' head).
- Go back into selection mode by clicking on the Selection tool
 in the Tool Bar or by pressing the Esc key.
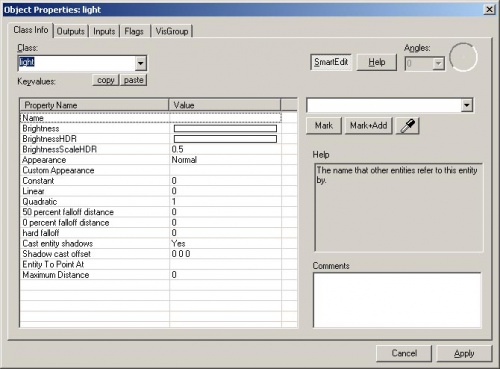
Next we'll change some settings on the light. Bring up the light's properties by double-clicking it in the Camera viewport or by selecting it (left-clicking on it) and then pressing the Alt+↵ Enter keys. This will bring up the Object Properties dialog box.
From the Object Properties, you can change various properties of the entity. For example, you can change the Brightness of this light. Click on the Brightness row under Keyvalues and you will see a set of numbers on the drop down menu on the right side. The default setting for the brightness of a light is 255 255 255 200. The first three numbers represent the RGB values (color) and the last number represents the intensity of the light.
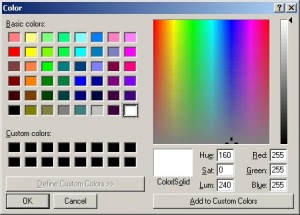
You can click on the Pick Color button to select a color rather than input values for it.
Simply click on the color you want the light to be and click OK.
This will bring you back to the Object Properties dialog box for the light. You should see any changes you made to the brightness on the Brightness row and the drop down field on the right side if the Brightness row is selected.
Click the Apply button to set your changes to the entity and close the dialog box by clicking on the "X" at the upper right side of the window.
Placing a prop_static
Entities also consist of props like furniture, decoration, and complex parts of architecture. There are a variety of different kinds of props. Prop_static entities are props that are static – they don't move, animate, turn on or turn off. There are also prop_dynamic entities that can move, animate, be enabled and disabled. There are also prop_physics entities which the player can interact with and behave physically as they would in the real world.
To place a prop:
- Select on the Entity tool
 again.
 - Go to the Object bar and change the Objects field to
prop_static. - Point to the floor in front of the model of Francis and left-click to place a prop_static. You will see a red cube that represents the
prop_staticbefore a model is attached to it. - Go back into selection mode by clicking on the Selection tool
 in the Tool Bar or by pressing the Esc key.
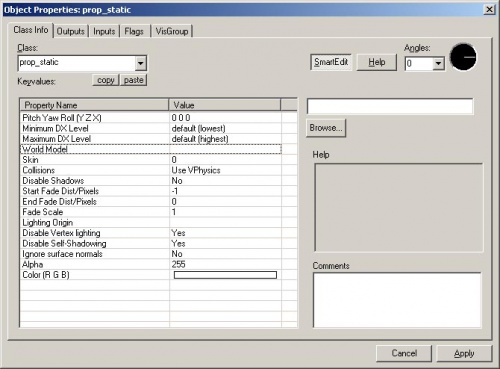
 - Double-click on the red cube to open the properties.
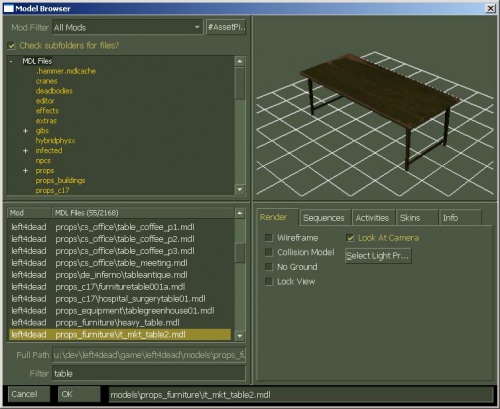
- Double-click on the World Model field to open the Model Browser.
Selecting the model
- In the Filter field at the bottom of the dialog box, type in "
table". This will show all the models that have the word "table" in their name. - Scroll down to the one named:
- "
props_furniture\it_mkt_table2.mdl". - It should look like the image shown.
- "
- Click OK to select it and close the browser and return to the Object Properties dialog box. You should see the name of the model now in the World Model row.
- Click the Apply button to set your changes to the entity.
- Close the Properties box.
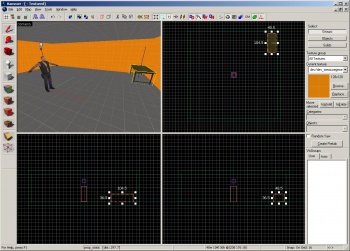
You will see the table that you just placed in the room in any of the viewports in the editor.
Moving entities
You can move entities like our table the same way you can move brushes. Click and drag inside the bounding box of the selected entity to move it around with your mouse or put your mouse over any of the viewports and use the arrow keys on your keyboard to move them around.
Move the table to a corner of our room and set it so that it sits on the floor.
Rotating entities
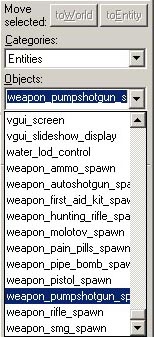
Next we'll try placing a pump shotgun on the table in our room and rotating it so that it looks like it's in a natural position.
Click on the Entity tool ![]() in the Tool bar.
in the Tool bar.
Select weapon_pumpshotgun_spawn from the drop down menu under Objects.
Click on the floor underneath the table prop to place the shotgun entity.
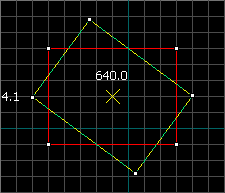
To rotate an object , you simply select the object you wish to rotate using the Selection tool ![]() , then click once on the object. You should see the object surrounded at the corners with circles. Mouse over a circle in any 2D view, then click and drag to rotate the object.
, then click once on the object. You should see the object surrounded at the corners with circles. Mouse over a circle in any 2D view, then click and drag to rotate the object.
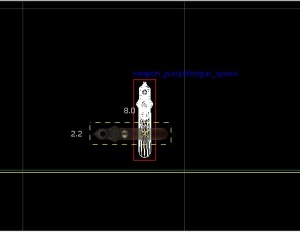
Use your mouse wheel to zoom into the Front viewport and click once inside the bounding box of the pump shotgun model to make its four corners highlight with circles around each one.
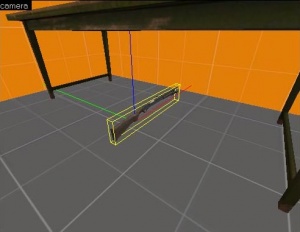
Left-click and drag in a counter-clockwise motion to rotate the pump shotgun so that it's lying on its side.
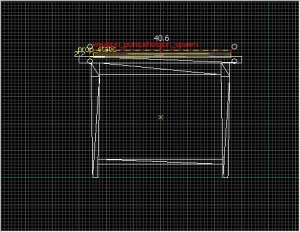
Zoom into the Side viewport and press the [ key 4 times to decrease the grid spacing. Click and drag inside the bounding box of the shotgun to move it to sit on top of the table. You don't have to place it exactly as long it is above the table and not inside it.
In the Top viewport, click inside the bounding box of the shotgun until it's in the rotate mode again. Left-click and drag one of the corners counter-clockwise until the shotgun sits almost parallel to the table.
Now you will have a shotgun that you can pick up from the table.
Adding to your room
Using the duplication, scaling and moving of the brushes you currently have in your room, you can now build a hallway and another room identical to the first.
Make sure to create openings into both rooms from the hallway.
You can also duplicate the light in the first room and move it to the middle of the second room.
After you've finished making your second room and hallway, save the level as "tutorial01.vmf" if you haven't already.
Add a player start
One last thing we'll want to do is add a player start entity to test out the map. This will be where the player will spawn in a simple level.
- Select the Entity tool
 on the Tool Bar.
 - Pick
info_player_startfrom the Objects drop down list. - Now, navigate in the Camera viewport to the center of the room next to the model of Francis.
- Left-click on the floor to place the player_start.
The exact position isn't critical. Just make sure it's in this general location. You can even rotate it another direction if you wish and the player will be facing that way when they spawn.
Running your level in the game
You have saved your map, but you will also need to compile it before it can be played in the game engine.
When a map is compiled, it is converted from the raw .VMF file that you just saved, into the .BSP format used by the game engine. The geometry is processed and the proper lighting and shadows are pre-calculated with several compile programs.
- Open the File menu, and choose Run Map... or press the F9 key.
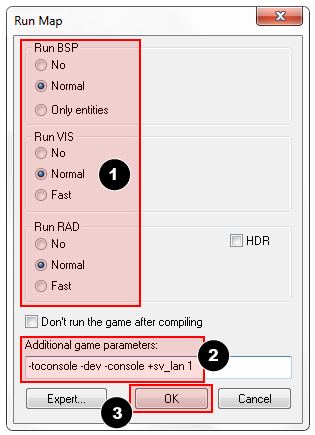
- The Run Map dialog will open.
- This dialog is used to set some basic compile parameters.
- Make sure that Normal is set under the Run BSP, Run VIS, and Run RAD settings.
- Under Additional game parameters:, make sure these settings are present, and type them in if not:
-toconsole -dev -console +sv_lan 1
- Now click the OK button to start the map compile process.
The Compile Process Window will show the progress of the compile. When the compilation is done, the game you are mapping for will automatically launch, and load your map in the engine.
Your level in the game should load up after compiling. It may take a minute or two.
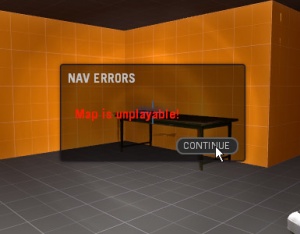
- When the game launches, the "Map is unplayable!" dialog will immediately appear. This is OK because we haven't created a navigation file for our level yet. You'll learn about navigation files later in the tutorial.
- Press the Continue button.
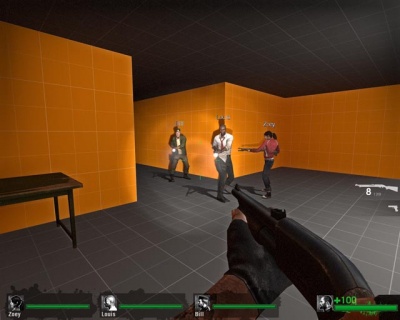
A screen shot of the running map. Note that without a navigation file, the Survivor bots won't respond fully.
The Developer console
Making levels for Left 4 Dead sometimes involves using commands typed into the Developer Console window. The console can also be used to do things like spawn Infected zombies to test your level.
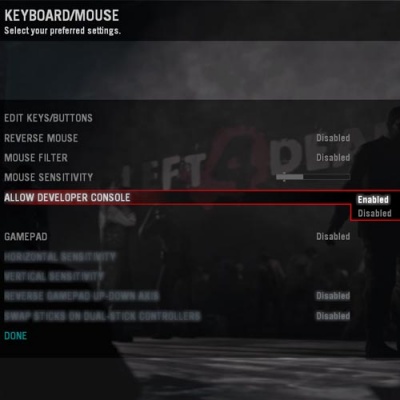
If you haven't already, make sure the console is enabled in the game:
- Press the Esc key in the game.
- Click on Options, then Keyboard/Mouse.
- Click on the Allow Developer Console and select "Enabled".
- Click on the Done Button.
- Click on Return to Game.
Using the developer console:
- Bring down your developer console ` (tilde).
- Type any console command and press the ↵ Enter key.
- Hide the console again with `.
Noclip mode
One console command you'll find constantly useful is noclip mode. This is a mode that let's you fly around the level without being stopped ("clipped") by anything in the level. It's useful to get around large levels quickly.
To enter noclip mode:
- Press ` to enter the console.
- Type
noclipin the console and press ↵ Enter. - Fly around the level.
- Type
noclipagain to leave noclip and walk around the level normally.
Some useful console commands
There are lots of console commands available. Here is a sampling.
- sv_cheats 1
- Turns on cheats. Necessary for many console commands.
- director_stop
- Stops the AI Director (no spawning for common Infected or Specials).
- director_start
- Starts the AI Director (spawning resumes).
- nb_delete_all
- Deletes all existing NPCs (Infected and Survivors).
- map <name of map>
- Loads a map or reloads the level you're in.
- changelevel <name of map>
- Loads a map while continuing the session.
- god 1
- Turns on god mode for all Survivors. The Survivors are invulnerable.
- noclip
- Allows you to fly through the world.
- z_spawn
- Spawn a common Infected zombie where the cursor is.
- z_spawn smoker
- Spawn a Smoker.
- z_spawn hunter
- Spawn a Hunter.
- z_spawn boomer
- Spawn a Boomer.
- z_spawn tank
- Spawn a Tank.
- z_spawn witch
- Spawn a Witch.
- nb_blind 1
- Make the infected blind to the player.
nb_blind 1 isn't fool proof. If you bump into an infected, they will attack. If a mob is spawned, they will come after you.- sb_stop 1
- Stop the survivor bot AI -- the Survivors will stop moving.
- director_force_panic_event
- Start a panic event (Infected mob).
