Ru/L4D Level Design/Elevators: Difference between revisions
| Line 26: | Line 26: | ||
{{Note|Лифт был помещён in its own user VisGroup. Выберите вкладку '''Auto''' на панели '''VisGroups''' и снимите галочку '''Auto'''. Затем, Переключитесь обратно на вкладку '''User''' и поставьте галочку '''Elevator''' чтобы видеть только лифт и его связанные энити.}} | {{Note|Лифт был помещён in its own user VisGroup. Выберите вкладку '''Auto''' на панели '''VisGroups''' и снимите галочку '''Auto'''. Затем, Переключитесь обратно на вкладку '''User''' и поставьте галочку '''Elevator''' чтобы видеть только лифт и его связанные энити.}} | ||
== | == Добавляем этажи для лифта == | ||
Для того чтобы указать точки остановки лифта, вам потребуется разместить энити info_elevator_floor. | |||
Выберите '''Entity Tool''' на панели слева от окон проекции и выберите "info_elevator_floor" из выпадающего списка '''Objects''' справа. | |||
Поместите два экземпляра в окне проекции '''Camera''' прямо под лифтом. | |||
С помощью окон проекции '''Side''' или '''Front''', поместите их так, чтобы один был в том месте, где находится '''Top floor position''' энтити '''func_elevator''', а второй – там, где B'''ottom floor position''' той же энтити '''func_elevator'''. | |||
[[Image:l4d_hammer_elevator_03.jpg|thumb|left|500px|caption|Энтитя info_elevator_floor назначает нашему func_elevator конечные точки.]]{{clr}} | |||
Откройте окно свойств нижнего info_elevator_floor, нажав {{key|Alt}}+{{key|Enter}}. | |||
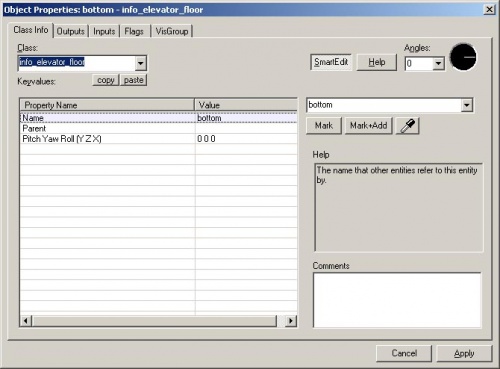
[[Image:l4d_hammer_elevator_04.jpg|thumb|left|500px|caption|Свойства info_elevator_floor.]]{{clr}} | |||
Поменяйте поле '''Name''' на "bottom". | |||
Выделите верхний info_elevator_floor, и поменяйте '''Name''' на "top". | |||
== Controlling the elevator == | == Controlling the elevator == | ||
Revision as of 02:46, 25 February 2010
Left 4 Dead имеет уникальную систему для создания лифтов, которые помогают Выжившим перемещаться вверх и\или вниз. Nav-сетка должна быть полностью соединена на всей карте, начиная от того места, где игроки начинают играть и вплоть до того места, куда им надо прийти. Поэтому для лифтов области nav-сетки необходимо соединять вертикально.
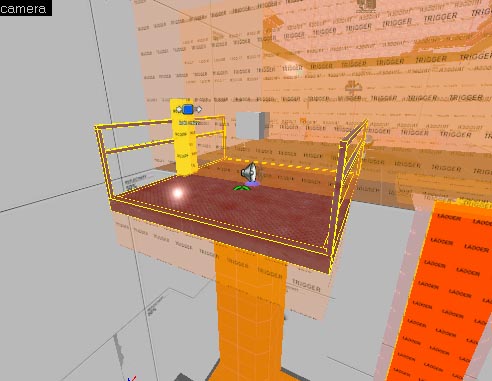
Для создания лифта используется браш-энтити, которая называется func_elevator. Вы также можете использовать модельку лифта, parent’ом, которой будет невидимый func_elevator или модельку с собственной анимацией, которая также будет связана с невидимым func_elevator.
Пример func_elevator есть в карте tutorial_standards.vmf.
Создайте брашевый лифт
Создайте браш или несколько брашей, которые будут энтитей func_elevator.
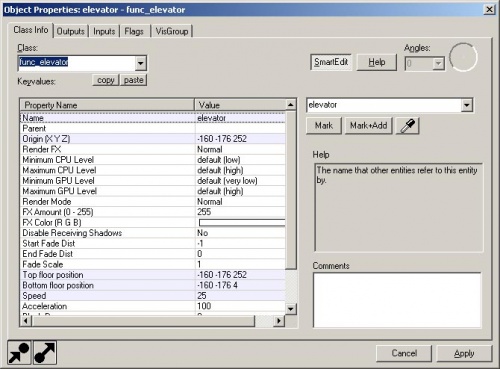
Выделите их и нажмите Ctrl+T чтобы превратить их в энити. Выберите "func_elevator" из выпадающего списка.
Поменяйте имя на желаемое вами. (поле Name)
Поменяйте 3-ю цифру в Bottom floor position , это будет нижняя точка спуска лифта, а так же в Top floor position на любое значение – соответственно, это верхняя точка (В окне проекции Front или Side есть специальные вспомогательные «указатели», потянув за которые, вы легко можете изменить эту 3-ю цифру).
Измените значение скорости (Speed) (unit’ы в секунду).
Добавляем этажи для лифта
Для того чтобы указать точки остановки лифта, вам потребуется разместить энити info_elevator_floor.
Выберите Entity Tool на панели слева от окон проекции и выберите "info_elevator_floor" из выпадающего списка Objects справа.
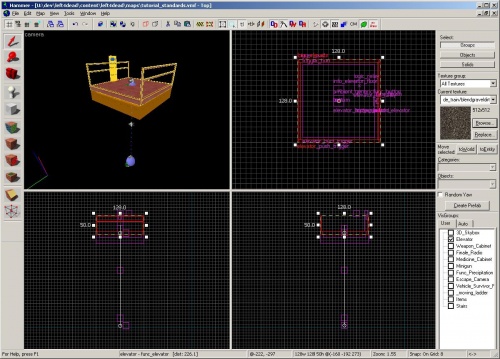
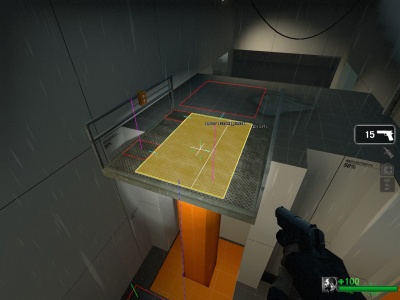
Поместите два экземпляра в окне проекции Camera прямо под лифтом.
С помощью окон проекции Side или Front, поместите их так, чтобы один был в том месте, где находится Top floor position энтити func_elevator, а второй – там, где Bottom floor position той же энтити func_elevator.
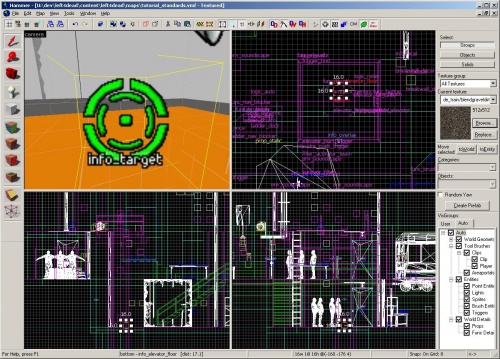
Откройте окно свойств нижнего info_elevator_floor, нажав Alt+↵ Enter.
Поменяйте поле Name на "bottom".
Выделите верхний info_elevator_floor, и поменяйте Name на "top".
Controlling the elevator
Now, you'll need something to send an input to the func_elevator to tell it to move.
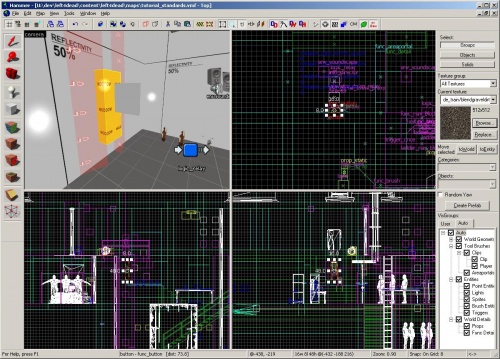
In the tutorial_standards map, there is a func_button that the survivors can press.
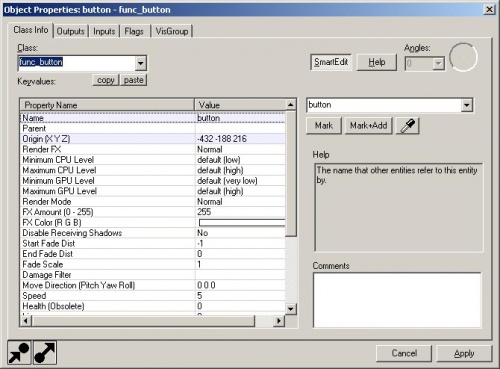
To create a func_button, create a brush and use Ctrl+T to tie it to an entity. Choose "func_button" from the drop down menu.
There are several properties that depend on how you want your button to work, but for now, simply leave them all as default but change the Name to "button".
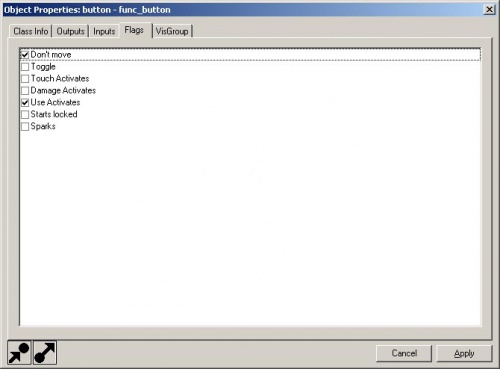
Switch to the Flags tag in the Object Properties and select the following checkboxes:
- Don't move
- Use Activates
This means that the survivors can press it with +use and the button won't move when pressed.
Now switch to the Outputs tab.
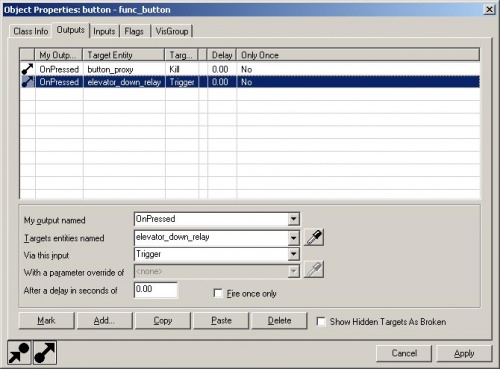
Add a new output by clicking on the Add... button near the bottom of the window.
- Change the My output field to "OnPressed".
- Change the Target entities field to "elevator_down_relay".
- Change the Via this input field to "Trigger".
Now we need to create the elevator_down_relay entity that will relay the messages we want sent when the button is pressed.
In the Entity Tool, select "logic_relay" from the Objects drop-down field.
Place a logic_relay near the func_button.
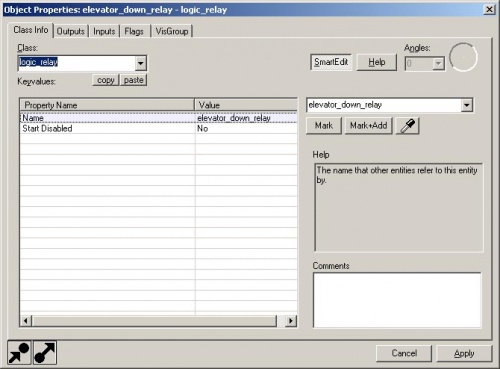
Open its properties with Alt+↵ Enter.
Change the name to "elevator_down_relay" to match the output we are sending from the func_button.
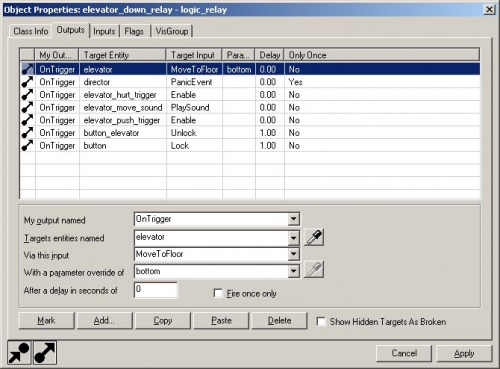
Switch to the Outputs tab and add a new output with the following fields:
- My output named: OnTrigger
- Targets entities named: elevator
- Via this input: MoveToFloor
- With a parameter override of: bottom
- After a delay in seconds of: 0
This will send the elevator down when the relay is triggered which we trigger when a survivor presses the button.
Depending on the setting for your elevator, you might need to tell the elevator to move to the other position. Look at the func_button on the func_elevator in tutorial_standards.vmf for an example.
Editing the nav for a func_elevator requires you to put the elevator in each position it can be in, placing a nav_mark_walkable (M) on it and building incremental nav (B).
- L4D Level Design/Clip-браши|:L4D Level Design/Clip-браши]]
