Portal 2 Puzzle Maker/Getting Started: Difference between revisions
Egalogalis (talk | contribs) (Created page with "== EDITING CHAMBER SURFACES == -WALL MANIPULATION To edit a chamber surface simply select it with a left mouse click and drag at it's sides where the double arrow symbol appea...") |
Thunder4ik (talk | contribs) m (Unicodifying, replaced: [[Image: → [[File: (3)) |
||
| (25 intermediate revisions by 12 users not shown) | |||
| Line 1: | Line 1: | ||
== | {{stub}} | ||
{{todo|Add images, introduction}} | |||
== Introduction == | |||
=== Open Puzzle Maker=== | |||
Follow the following screenshots. | |||
[[File:Portal2 test chambers.jpg|left|thumb|First step.]] | |||
[[File:Portal2 create test chambers.jpg|left|thumb|Finally open Puzzle Maker.]] | |||
{{clr}} | |||
=== Editing surfaces === | |||
To edit a chamber surface, select one or more tiles using your mouse, then click and drag at the edge of the selection, where the resizing cursor appears. You can also use keyboard commands; press the {{key|-}} button to pull the surface inwards, and the {{key|+}} button to push it away. | |||
Drag-select surfaces on different planes to select a whole volume. This volume can be resized by dragging the circular handle. While having a volume selected, press {{key|+}} to fill it out and {{key|-}} to carve it away. | |||
=== Surface Portalability === | |||
- | To change surface portalability, select the surfaces you want to change and press {{key|O}} or {{key|P}}. This will switch between the standard white panel and the non-portable dark gray panel. | ||
To | == Placing and manipulating items == | ||
=== Placing items === | |||
To open the item palette, move your mouse cursor to the far left side of the screen. This panel lists every item available in the editor. To place an item, just left click it at the item panel and move your mouse to where you want to place the item, then release the mouse button. Some items have different sorts of sliders and handles used to fine-tune their position. | |||
[[File:Puzzlemaker items.jpg|thumb|right|Item list.]] <br style="clear:both;" /> | |||
=== Item properties === | |||
To edit an item's properties, right click it to bring up the item editing pop-up. Keep in mind that not all items have any settings to change. | |||
=== Connecting items === | |||
To connect two items, select an item, press {{key|K}}, then select the item you want to connect it to. To disconnect them again, right click one of the items and hit remove connections then left click the connection you want to remove | |||
A button can be connected to multiple items and will trigger all of them at once. Connecting multiple buttons to one item, on the other hand, requires all of the buttons enabled to trigger the item effect. | |||
== Video tutorial == | |||
- | * Watch it [http://www.youtube.com/watch?gl=GB&hl=en&client=mv-google&v=_jG9iv6wVNg&nomobile=1 here] | ||
{{puzzlemaker-navbox}} | |||
Latest revision as of 00:22, 7 January 2024
Introduction
Open Puzzle Maker
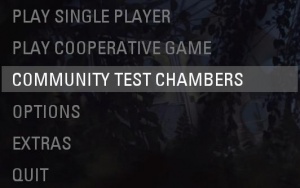
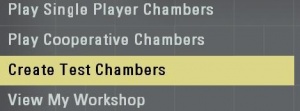
Follow the following screenshots.
Editing surfaces
To edit a chamber surface, select one or more tiles using your mouse, then click and drag at the edge of the selection, where the resizing cursor appears. You can also use keyboard commands; press the - button to pull the surface inwards, and the + button to push it away.
Drag-select surfaces on different planes to select a whole volume. This volume can be resized by dragging the circular handle. While having a volume selected, press + to fill it out and - to carve it away.
Surface Portalability
To change surface portalability, select the surfaces you want to change and press O or P. This will switch between the standard white panel and the non-portable dark gray panel.
Placing and manipulating items
Placing items
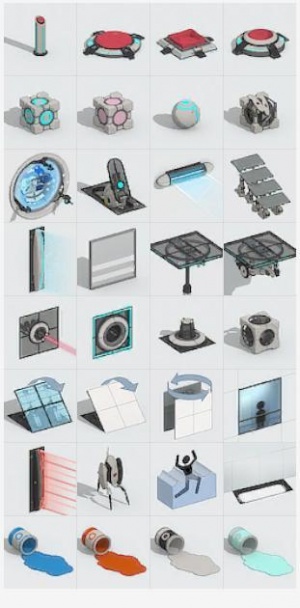
To open the item palette, move your mouse cursor to the far left side of the screen. This panel lists every item available in the editor. To place an item, just left click it at the item panel and move your mouse to where you want to place the item, then release the mouse button. Some items have different sorts of sliders and handles used to fine-tune their position.
Item properties
To edit an item's properties, right click it to bring up the item editing pop-up. Keep in mind that not all items have any settings to change.
Connecting items
To connect two items, select an item, press K, then select the item you want to connect it to. To disconnect them again, right click one of the items and hit remove connections then left click the connection you want to remove
A button can be connected to multiple items and will trigger all of them at once. Connecting multiple buttons to one item, on the other hand, requires all of the buttons enabled to trigger the item effect.
Video tutorial
- Watch it here
| ||||||||||||||||||||||||||||||


