Ru/L4D Level Design/Level Organization: Difference between revisions
m (obsolete language category) |
|||
| (8 intermediate revisions by 6 users not shown) | |||
| Line 1: | Line 1: | ||
{{lang|L4D Level Design|Level Organization}}{{translate}} | |||
{{L4D level intro menu:ru}} | {{L4D level intro menu:ru}} | ||
| Line 15: | Line 16: | ||
Find the metal staircase in the level shown here: | Find the metal staircase in the level shown here: | ||
[[ | [[File:l4d_hammer_stairs_standards_01.jpg|thumb|left|500px|caption|Selecting the standard metal staircase.]]{{clr}} | ||
Select it by left-clicking on it. | Select it by left-clicking on it. | ||
| Line 33: | Line 34: | ||
The '''Paste Special Dialog''' Box will appear: | The '''Paste Special Dialog''' Box will appear: | ||
[[ | [[File:l4d_hammer_paste_special_01.jpg|thumb|left|300px|caption|The Paste Special dialog box.]]{{clr}} | ||
If you leave the fields as default settings and click '''OK''', the stairs will be pasted into your map in the exact position they were located in the map you copied them from. | If you leave the fields as default settings and click '''OK''', the stairs will be pasted into your map in the exact position they were located in the map you copied them from. | ||
| Line 41: | Line 42: | ||
Hammer allows you to combine objects together to make editing a bit easier. For example, you can combine light entities, the prop_static for the light source, and an env_sprite to represent the glow of the light. | Hammer allows you to combine objects together to make editing a bit easier. For example, you can combine light entities, the prop_static for the light source, and an env_sprite to represent the glow of the light. | ||
[[ | [[File:l4d_hammer_group_01.jpg|thumb|left|500px|caption|Selecting the light group used in the starting room.]] | ||
In tutorial_standards.vmf, find the light group in the starting room: | In tutorial_standards.vmf, find the light group in the starting room: | ||
| Line 53: | Line 54: | ||
Similarly, you can select a group and ungroup the objects that form it by pressing {{key|Ctrl}}+{{key|U}] or by using '''Tools > Ungroup''' | Similarly, you can select a group and ungroup the objects that form it by pressing {{key|Ctrl}}+{{key|U}] or by using '''Tools > Ungroup''' | ||
[[ | [[File:l4d_hammer_group_02.jpg||Selecting '''Group''' from the '''Tools''' menu.]] | ||
[[ | [[File:l4d_hammer_ungroup_01.jpg||Selecting '''Ungroup''' from the '''Tools''' menu.]] | ||
{{clr}}{{clr}} | {{clr}}{{clr}} | ||
[[ | [[File:l4d_hammer_objects_01.jpg|thumb|right|500px|caption|Selecting individual objects that in a group.]] | ||
=== Selection modes === | === Selection modes === | ||
[[ | [[File:Hammer selectionmodetoolbar.jpg]] | ||
You'll notice on the '''Selection Mode''' panel in Hammer, there are three ways to select: | You'll notice on the '''Selection Mode''' panel in Hammer, there are three ways to select: | ||
| Line 72: | Line 73: | ||
Switch to '''Objects''' mode and now select just the light underneath the light group that was just selected. Even though the light is in the larger group, since we're in '''Objects''' mode, only the light is selected.{{clr}} | Switch to '''Objects''' mode and now select just the light underneath the light group that was just selected. Even though the light is in the larger group, since we're in '''Objects''' mode, only the light is selected.{{clr}} | ||
[[ | [[File:l4d_hammer_solids_01.jpg|thumb|right|500px|caption|Selecting individual brushes in a brush entity.]] | ||
Some of these components (<code>func_detail</code>, <code>func_brush</code>, etc.) maybe be made up of multiple ''solids'' which are brushes created and then combined into a single object. | Some of these components (<code>func_detail</code>, <code>func_brush</code>, etc.) maybe be made up of multiple ''solids'' which are brushes created and then combined into a single object. | ||
| Line 85: | Line 86: | ||
== Visgroups == | == Visgroups == | ||
[[ | [[File:l4d_hammer_visgroups_01.jpg|thumb|right|400px|caption|Selecting the staircase, the railing and the catwalk.]] | ||
Hammer also allows you to place objects into ''visgroups''. Visgroups are sets of objects that you turn on/off to help you organize your level and to help you edit your level without having to see everything in it all at once. | Hammer also allows you to place objects into ''visgroups''. Visgroups are sets of objects that you turn on/off to help you organize your level and to help you edit your level without having to see everything in it all at once. | ||
| Line 91: | Line 92: | ||
In '''Objects''' mode, select the staircase again but this time also select the railing and the catwalk that are connected to the staircase.{{clr}} | In '''Objects''' mode, select the staircase again but this time also select the railing and the catwalk that are connected to the staircase.{{clr}} | ||
Now, click on the [[ | Now, click on the [[File:l4d_hammer_visgroups_02.jpg]] dotted red cube on the top toolbar. | ||
[[ | [[File:l4d_hammer_visgroups_03.jpg|thumb|right|300px|caption|The Visgroup dialog box.]] | ||
This will bring up the '''Visgroup''' dialog box. | This will bring up the '''Visgroup''' dialog box. | ||
| Line 103: | Line 104: | ||
When you click '''OK''', you'll notice that the stairs, railing, and catwalk are gone from your views. This means that they are now hidden in the visgroup "Stairs".{{clr}} | When you click '''OK''', you'll notice that the stairs, railing, and catwalk are gone from your views. This means that they are now hidden in the visgroup "Stairs".{{clr}} | ||
[[ | [[File:l4d_hammer_visgroups_04.jpg|thumb|right|500px|caption|The staircase, railing and catwalk are now hidden in a visgroup.]] | ||
By clicking on the checkbox to the left of "Stairs" in your '''VisGroups''' panel, you can toggle on and off the stairs, railing, and catwalk. | By clicking on the checkbox to the left of "Stairs" in your '''VisGroups''' panel, you can toggle on and off the stairs, railing, and catwalk. | ||
| Line 109: | Line 110: | ||
You can now hide these objects when you want to continue editing and it may help to see things better.{{clr}} | You can now hide these objects when you want to continue editing and it may help to see things better.{{clr}} | ||
[[ | [[File:l4d_hammer_visgroups_05.jpg|thumb|right|200px|caption|The Auto VisGroups tab.]] | ||
'''Auto visgroups''' are also very helpful. | '''Auto visgroups''' are also very helpful. | ||
| Line 125: | Line 126: | ||
{{NavBar|:L4D Level Design/Уровни с открытыми пространствами|Основные статьи по созданию уровней для Left 4 Dead|L4D Level Design/Стандарты}} | {{NavBar|:L4D Level Design/Уровни с открытыми пространствами|Основные статьи по созданию уровней для Left 4 Dead|L4D Level Design/Стандарты}} | ||
{{ACategory|Left 4 Dead}} | |||
{{ACategory|Level Design}} | |||
Latest revision as of 02:50, 22 August 2024
This page either contains information that is only partially or incorrectly translated, or there isn't a translation yet.
If this page cannot be translated for some reason, or is left untranslated for an extended period of time after this notice is posted, the page should be requested to be deleted.
Also, please make sure the article complies with the alternate languages guide.
By now, you may have noticed a vmf file included in this tutorial called "tutorial_standards.vmf". Open Hammer and open this file.
This file contains a lot of examples of how Valve did things in the original Left 4 Dead levels.
Make sure you have "tutorial_standards.bsp" and "tutorial_standards.nav" in your left4dead\mapsrc\standards directory and load it up to see some of these examples.
Copy/Paste
Copy/Paste works similar with other programs. Use Ctrl+C to copy a brush or entity and Ctrl+V to paste it.
A great feature that Hammer has is that you can copy and paste parts of levels from one file to another. For example, you can copy the staircase in the tutorial_standards.vmf to your own map.
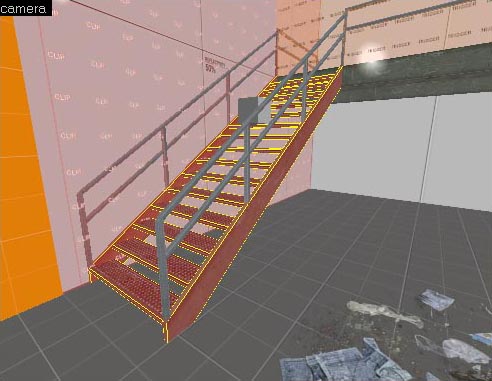
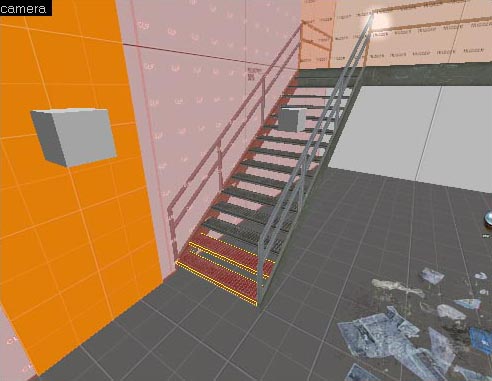
Find the metal staircase in the level shown here:
Select it by left-clicking on it.
Copy it by pressing Ctrl+C or by using Edit > Copy.
Open the map you want to paste it into.
Position your mouse over the window and the place where you want to paste it.
Paste it by pressing Ctrl+V or by using Edit > Paste.
You can now move it around or edit just like it was created in your level.
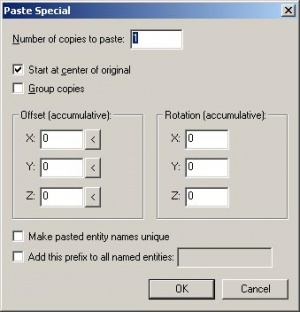
You can also paste special. Try using it by pressing Ctrl+⇧ Shift+V or by using Edit > Paste Special.
The Paste Special Dialog Box will appear:
If you leave the fields as default settings and click OK, the stairs will be pasted into your map in the exact position they were located in the map you copied them from.
Groups/Objects/Solids
Hammer allows you to combine objects together to make editing a bit easier. For example, you can combine light entities, the prop_static for the light source, and an env_sprite to represent the glow of the light.
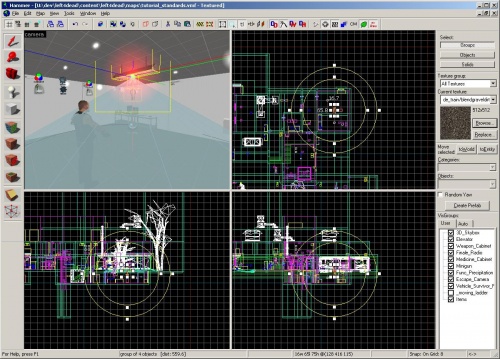
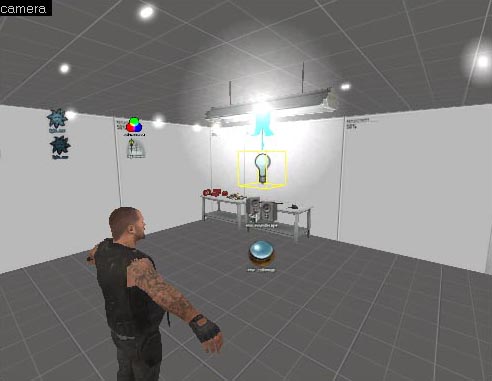
In tutorial_standards.vmf, find the light group in the starting room:
Select it by left-clicking on any of the entities that are part of the group.
You can then duplicate this group or copy/paste it throughout your level.
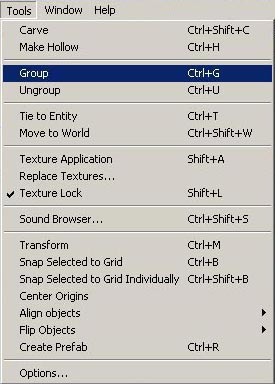
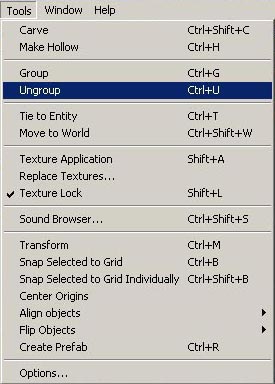
To group objects together, simply select all the objects you want combined and press Ctrl+G or use Tools > Group.
Similarly, you can select a group and ungroup the objects that form it by pressing Ctrl+{{key|U}] or by using Tools > Ungroup
Selection modes
File:Hammer selectionmodetoolbar.jpg
You'll notice on the Selection Mode panel in Hammer, there are three ways to select:
- Groups
- Objects
- Solids
You just found out what a Group is – where you combine different kinds of objects together. An Object is a single component of a level such as a world brush or a func_detail. It could also be an entity such as a light, a prop_static, or a door.
Switch to Objects mode and now select just the light underneath the light group that was just selected. Even though the light is in the larger group, since we're in Objects mode, only the light is selected.
Some of these components (func_detail, func_brush, etc.) maybe be made up of multiple solids which are brushes created and then combined into a single object.
For example, you can have all of the stairs in the staircase example in tutorial_standards.vmf as a single func_detail. If you wanted to remove a few steps, you can switch to Solids mode and select the steps you want to remove.
Switch to Solids mode now and select the bottom two steps of the staircase. Even though the steps are part of a whole func_detail object, we can select individual steps because we're in Solids mode.
You can then delete these solids or duplicate them to make more stairs.
Visgroups
Hammer also allows you to place objects into visgroups. Visgroups are sets of objects that you turn on/off to help you organize your level and to help you edit your level without having to see everything in it all at once.
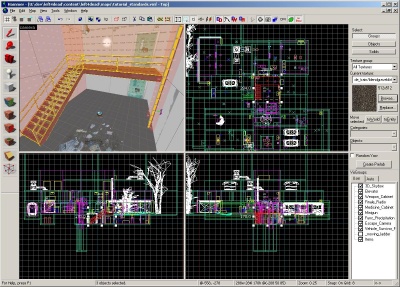
In Objects mode, select the staircase again but this time also select the railing and the catwalk that are connected to the staircase.
Now, click on the ![]() dotted red cube on the top toolbar.
dotted red cube on the top toolbar.
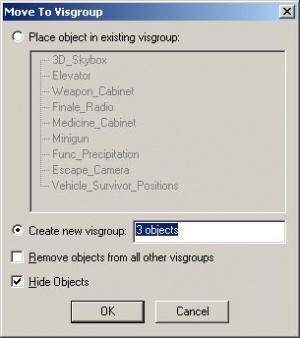
This will bring up the Visgroup dialog box.
You can place the objects into an existing group by clicking on the button next to "Place object in existing visgroup" and selecting the visgroup you want to add it to. You can also create a new visgroup by typing a new name in the box and clicking OK.
The new visgroup was called "Stairs" in this example.
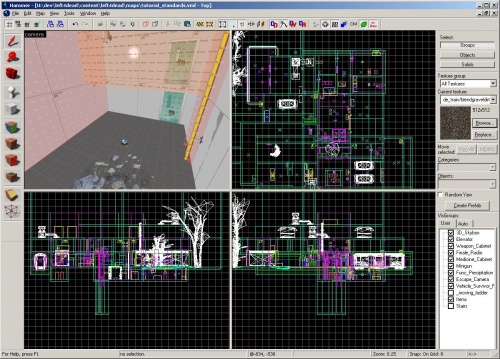
When you click OK, you'll notice that the stairs, railing, and catwalk are gone from your views. This means that they are now hidden in the visgroup "Stairs".
By clicking on the checkbox to the left of "Stairs" in your VisGroups panel, you can toggle on and off the stairs, railing, and catwalk.
You can now hide these objects when you want to continue editing and it may help to see things better.
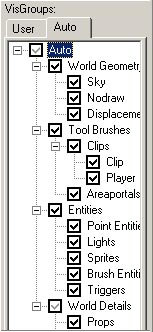
Auto visgroups are also very helpful.
Click on the Auto tab in the VisGroups panel and you will see the visgroups that Hammer automatically creates for you.
By clicking on the box next to each of these categories, you can hide or reveal any of these categories of objects.
For example, move around the Camera viewport of the tutorial_standards level with all the auto visgroups on. Then, turn off Brush Entities and Clips and see what a difference it is.
- L4D Level Design/Уровни с открытыми пространствами|:L4D Level Design/Уровни с открытыми пространствами]]
