Particle Editor (Source 2)
Layout
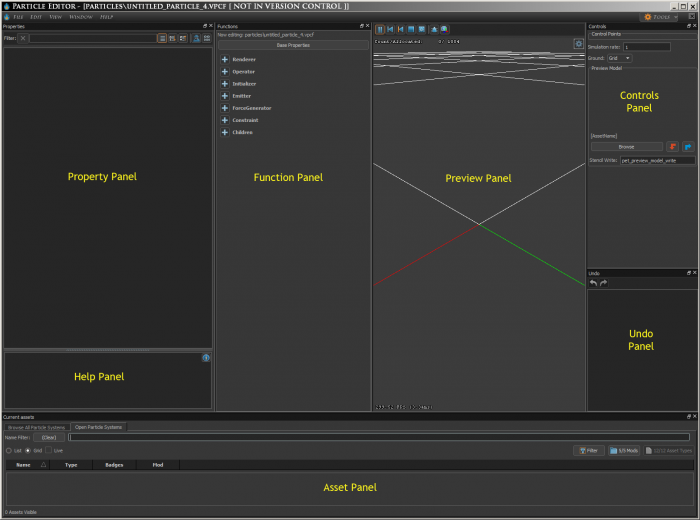
The Particle Editor's basic layout features three primary editing panels and four secondary panels, which are detailed below.
Panels behave here as they do elsewhere in the Tools - panel edges can be dragged/resized and toggled on and off as users see fit.
Property Panel
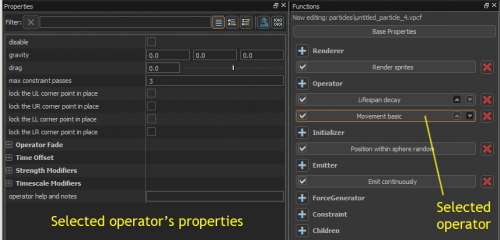
Each Function has a set of associated Properties, which can be edited in the Property Panel. Properties are used to define the specific parameters of each Function's behavior.
Property data comes in the following forms:
- Scalar: A floating-point number, sometimes between 0 and 1 and sometimes not.
- Vector: A set of three floating-point numbers. These floats are often referred to as x, y, and z.
- Boolean: A checkbox defining a parameter simply as on or off.
- Enumerated list: A list of predefined options.
- Color: Color!
- Asset reference: A field pointing to another asset, such as a vtex (texture) file or child effect. In a few cases, such as "fallback replacement definition", there's no file chooser, so you just enter a path to a file, starting at /particles. (Example: "particles/abilities/conjure_fallback.vpcf")
Note that scalars and vectors are the only kinds of data that Control Points can carry.
Function Panel
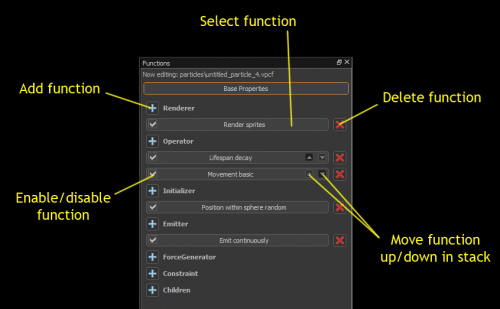
The Function Panel holds the effect's Functions, which define particles' behavior. Functions can be added, removed, temporarily disabled, and re-ordered.
The final entry, "Children", isn't a Function type per se, but rather holds a list of references to child effects (if any.)
For more information on Functions, see Particle Functions.
Preview Panel
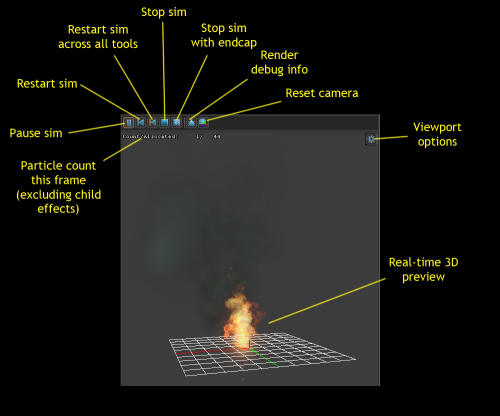
The Preview Panel provides a real-time preview of your effect.
Control Buttons
- Pause/Play sim: Pauses the real-time preview (or plays if currently paused.)
- Restart sim: Immediately kills all particles and starts fresh.
- Restart sim across all tools: Like "Restart sim", but in every open Workshop Tool (such as Hammer.)
- Stop sim: Stops particle emission but allows particles to decay "naturally".
- Stop sim with endcap: Stops emission and triggers endcap effects if any are set up.
- Render debug info: Toggle rendering of debug geometry indicating bounding boxes and the like.
- Reset camera: Useful if you've lost your effect while navigating through the preview space.
Navigation controls for the Preview panel are similar to those in other tool 3D viewports:
Hold right-mouse-button ![]() to move the camera around and use WASD to move.
to move the camera around and use WASD to move.
W Move the camera forward S Move the camera back A Moves the camera left D Moves the camera right
Pressing Z enters "fly" mode without the requirement of holding the right-mouse-button. WASD is still used to control movement.
This method is useful when working on a piece of geometry that you want to focus on and move around rapidly.
Alt+ 
Rotate around the center of the screen ⇧ Shift+A Reset the center point on selected geometry Alt+ 
Zoom Alt+ 
Camera look movement
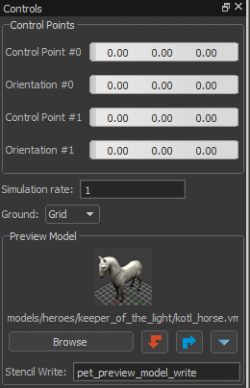
Controls Panel
The Controls Panel provides some handy tools to help you work:
- Control Points: Manually position control points in space, emulating hand-placed points in Hammer. (Note that these Control Points are temporary and only exist in the Particle Editor - they will NOT get saved with the effect.)
- Simulation rate: Slow down (values between 0 and 1) or speed up (values higher than 1) simulation playback.
- Ground: Choose grid, plane geometry, or none. Note that plane geometry is necessary to preview particle collision constraints!
- Preview Model: Render a model in the center of your scene. Useful for tuning effect scale and distances.
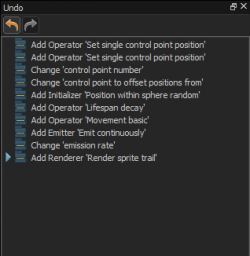
Undo Panel
The Undo Panel holds the undo/redo stack, which enables users to instantly jump across items in the effect's recent history.
| ||||||||||||||||||||||||||||||||
