Image Subrect Editor

![]() Image Subrect Editor is a tool in Source 2 used for making Hotspots. Hotspots are predefined sections of a texture used to apply materials to Hammer geometry fast and easy.
Image Subrect Editor is a tool in Source 2 used for making Hotspots. Hotspots are predefined sections of a texture used to apply materials to Hammer geometry fast and easy.
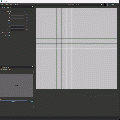
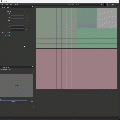
1. Viewport
The viewport is where rectangles are drawn to specify what parts of the texture can get applied to hammer geometry.
- In Create mode, click dragging in the viewport will draw a rectangle.
- In Adjust mode, click dragging on an existing rectangle will move it. You can also move edges and corners.
- Clicking an existing rectangle will select that rectangle, allowing you to change it's properties. You can hold ⇧ Shift to select multiple rectangles and hold Ctrl to deselect rectangles.
- The grid size can be changed with [ to make it smaller and ] to make it bigger. These options are also under "Edit." Grid visibility can also be toggled here.
- Holding Alt will let you adjust the rectangles as you were in Adjust mode.
Drawing rectangles in the Subrect Editor (Click to See Gif!)
Adjusting rectangles in the Subrect Editor (Click to See Gif!)


2. Rectangle Properties
There are two modes: Create and Adjust.
- Create will allow you to draw new rectangles across the texture.
- Adjust lets you change the size of previously drawn rectangles.
There are two options available to change on selected rectangles.
- "Allow Rotation" allows that rectangle to be rotated when applying the hotspot in Hammer.
- "Allow Tiling" (not in
 ) will tile that rectangle when applied to faces in hammer.
"Inset X/Y" fields are what hammer will use as the default inset. Fast Texture Tool will use these values when selecting a rectangle. Insets are also useful for when your trim texture has a bevel. More inset the rectangle, the thinner the bevel.

3. Active Material
You can choose a material to reference in the viewport. This is useful for creating rectangles for a trimsheet.
When a material is selected, you can then change the preview to any texture the currently selected material uses.

TODO
Create section specifying use in Material Editor and Hammer
| ||||||||||||||||||||||||||||||||