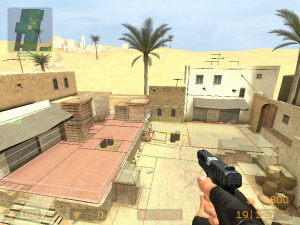
Navigation Mesh Editing
This page is about creating and editing the NAV file for a map in-game.
For a list of commands, see Navigation Mesh Commands.
Limitations
- ...if bots are active. To prevent this, execute bot_kick before editing and reload the map before adding bots. You may want to nav_analyze anyway, which also reloads the map.
- ...if func_nav_blocker entities receive BlockNav or UnblockNav inputs.
A new navigation mesh <game>/maps/<mapname>.nav for a map can be generated by using the nav_generate command while the map is loaded which requires sv_cheats 1. Depending on the size and complexity of the map, this may take a few minutes to a few hours, but mostly about 5 minutes. Large forests are an example for structures that may take a long time to compute a .nav for. In this case you may want to create the navigation mesh manually and with less precision, i.e. without carving out every tree. This could also be achieved by compiling a map with less detail, generating the nav mesh and keeping it for the original map.
You can then upload the created .nav file to your server.
It is recommended that map creators create navigation meshes before releasing their map to the public.
What is computed during generation
The following steps occur during Navigation Mesh generation:
- Starting at a player spawn point, walkable space is sampled by "flood-filling" outwards from that spot, searching for adjacent walkable points
- Rectangular Navigation Areas are constructed from the sampled data
- Hiding and Sniper spots are computed
- Encounter Spots and Approach Points are computed (this can take awhile)
- Initial Encounter areas are computed
To see the current navigation mesh, type nav_edit 1. To turn the mesh editor off, type nav_edit 0. You will need to have sv_cheats 1 to be able to view the navigation mesh.
Explicitly marking walkable areas (i.e: "There's no mesh upstairs")
Some maps that have very steep stairs, ramps, or hills may confuse the generation system, resulting in the Navigation Mesh not covering the entire map. To solve this, you can manually place additional walkable markers that tell the generator to search outwards from that point during its sampling phase.
To add one or more walkable markers, first aim your view towards a known walkable spot in your map, then type nav_mark_walkable in the console. When you are finished placing markers, type nav_generate_incremental (followed by nav_clear_selected_set) or nav_generate to re-generate the mesh.
You can remove all previously placed walkable markers using the nav_clear_walkable_marks command.
Quickly generating meshes for testing
The analysis phase of the generator can be quite time consuming. To skip it, type nav_quicksave 1 in the console.
 Note:"Quicksaving" skips the analysis phase, and the resultant nav mesh will be missing important data required by the CS Bots and Hostages higher-level planning and attention systems. While useful for testing, editing, and tuning a nav mesh, be sure to do a full analyze (ie: nav_analyze with nav_quicksave 0) before publishing your nav file to others.
The automated Navigation Mesh generator does a reasonable job of constructing a mesh, allowing you to start using Bots and Hostages on custom maps easily.
However, careful hand-tuning of the Navigation Mesh can noticeably improve the performance of Bots. In addition, manually decorating the mesh with Place names allows the Bots to tell others where events occur, enhances the Counter-Strike radar and includes Place names in all radio messages.
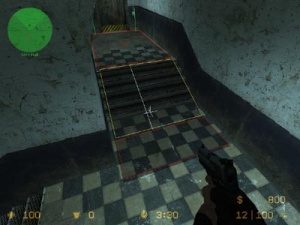
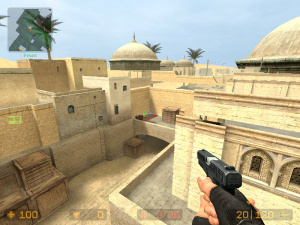
To enable the editor, type nav_edit 1 in the console (type nav_edit 0 to disable it).
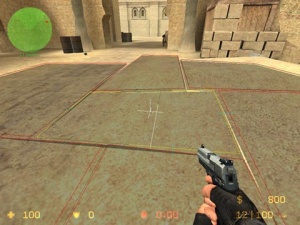
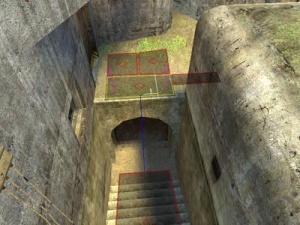
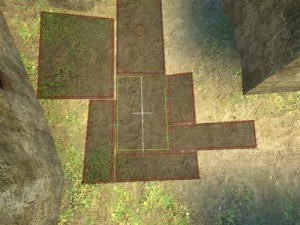
- The white cross in the center of your view is the cursor.
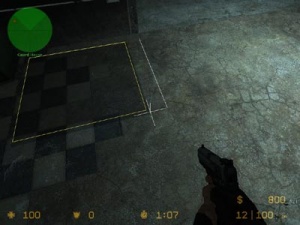
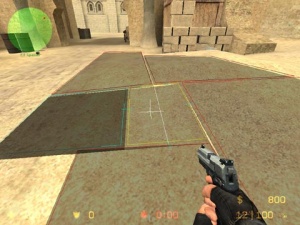
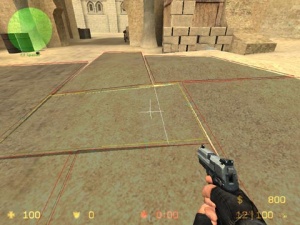
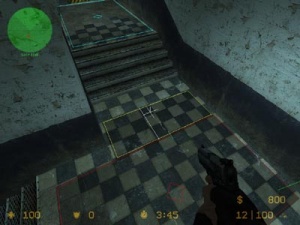
- The navigation area you are pointing at is the selected area or highlighted area and is shown with a yellow outline.
- Navigation areas that can be reached from the selected area are shown in red.
- The white line in the selected area denotes where the area will be split if the nav_split command is executed.
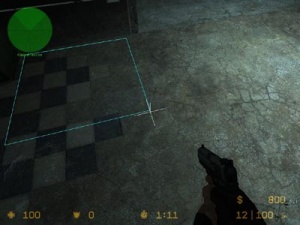
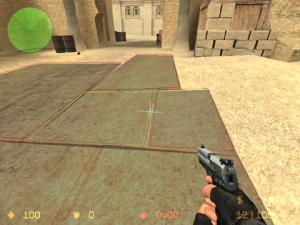
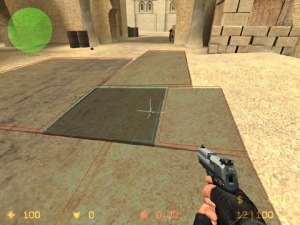
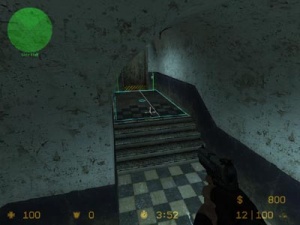
- Exactly one area can be marked (or unmarked) by pointing at it and invoking nav_mark and is shown with a cyan outline. This is used for many other commands that need two operands, being the marked and the selected area.
- Areas that are part of the current selected set have a white tint. To clear any selection, invoke nav_clear_selected_set.
Creating a new area
This can be done with the commands nav_begin_area and nav_end_area.
Delete
To delete an area, aim your cursor at it so that it is highlighted and execute nav_delete. Alternatively you can mark an area or select a set of areas to delete multiple areas.
Connect two areas
The connections between areas define whether one can move from one area to another.
Usually these connections are bidirectional, meaning one can move back and forth between two areas at will. However, sometimes the connection is one way, as in the case of ledges that can be jumped down, but not back up. One-way links can also be useful for forcing bots to travel a specific direction, perhaps to set up for a tricky jump.
To make a one-way connection from area A to area B (meaning you can move from A to B):
- Mark area A: Place your cursor on it and execute nav_mark.
- Aim at area B and execute nav_connect.
To make a bidirectional connection, repeat the above steps reversing the roles of A and B.
Disconnect two areas
To remove all connections between the areas A and B:
- Mark area A: Place your cursor on it and execute nav_mark.
- Aim at area B and execute nav_disconnect.
Split
Splitting divides an area into two bidirectionally connected areas.
Merge
Merging two areas reduces the area count.
Both areas must be the same size along the edge to be merged. It is not required that the two areas are adjacent.
The resulting area will retain all of the connections of the original two areas, and inherit properties (i.e: Place names, etc) from the marked area.
Splice
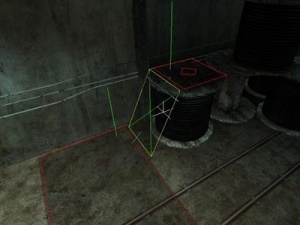
Splicing creates a new area between two existing areas. Splicing is a powerful tool, and can be used to easily create sloped areas, as shown in the example below.
Selected Sets
While nav_mark allows you to mark at most one area, Selected Sets allow you to select multiple areas and operate on them. Adding or removing areas to the selected set does not manipulate them in the first place. The advantage of using selected sets is that it makes it a lot easier to do the same operation on multiple areas at once such as marking them with area attributes or moving them, see below.
There are multiple ways to add and remove areas to the selected set:
- To clear any selection, invoke nav_clear_selected_set.
- To add or remove single areas from the selected set, point at an area and invoke nav_add_to_selected_set or nav_remove_from_selected_set. If any selected set exists, nav_mark toggles the selected state of the area that is pointed at.
- To add or remove areas by looking at them, point at an area and invoke nav_begin_selecting. From now on until nav_end_selecting is invoked, every (!) area that the player points at is added to the selected set.
The commands nav_begin_deselecting and nav_end_deselecting work analogously except that areas are removed from the selected set. - To select connected areas, point at an area and invoke nav_flood_select to add the area that was pointed at to the selected set as well as all areas that can be reached from it in terms of outgoing and ingoing connections. This means that if there is a path from area A to area B then flood selecting at A yields the same result as flood selecting at B even though the path from A to B might be one-way.
- To add areas in a sphere around yourself, position yourself appropriately and invoke nav_select_radius <distance> to add all areas to the selected set that are at most <distance> units away from yourself. After the invokation, the game prints the number of areas that have been added to the selected set. Passing a negative distance behaves like passing a positive one.
 Tip:To select the entire nav mesh, you can use nav_select_radius 999999. Note that nav_flood_select doesn't necessarily select the entire nav mesh but you can compare the number of areas that these two commands add to an empty set - if the numbers are equal you know that the nav mesh contains no orphaned areas.
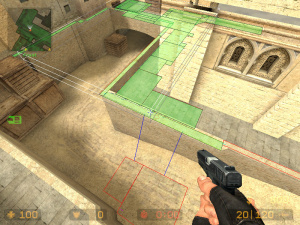
- To select areas using a rectangle, invoke nav_begin_drag_selecting at one corner of it. From now on, the game shows a quboid with a fixed height of 32 units between the point that the player looked at when the previous command was executed and the current point that the player looks at. All areas that touch this quboid are drawn with a green tint. All green areas are added to the selected set when nav_end_drag_selecting is invoked.
The commands nav_begin_drag_deselecting and nav_end_drag_deselecting work analogously but with a red tint.
Moving
The areas of a selected set can be shifted with the mouse pointer by invoking nav_begin_shift_xy and nav_end_shift_xy.
To shift them by exact coordinates, use nav_shift <x> <y> <z>.
Area Attributes
Area attributes influence the behavior of bots to act in specific ways. Each area can have any combination of attributes. Most area attributes are required to be set manually, but a portion of attributes are set automatically and cannot be set manually.
Base attributes
These are the attributes that exist since ![]() Counter-Strike: Source.
Counter-Strike: Source.
- To set or to clear an attribute from the highlighted area or all areas of a selected set, invoke nav_mark_attribute <ATTRIBUTE> or nav_clear_attribute <ATTRIBUTE>. The game will list all available attributes in the console while typing.
- To toggle an attribute for an area, aim at it and execute the corresponding command, e.g. nav_jump.
- The attribute is shown as yellow text for duration of
nav_show_area_infoseconds (default 0.5) when pointing at a nav area.
| Attribute | Value | Toggle Command | Text / Visuals | Effect |
|---|---|---|---|---|
| CROUCH | 1 | nav_crouch | CROUCH blue diagonal | Forces bots to crouch when moving through this area. |
| JUMP | 2 | nav_jump | JUMP green X | Tells bots to jump in order to reach the higher connected area and that this area is not usable as a hiding/sniping spot. |
| PRECISE | 4 | nav_precise | PRECISE green + | Prevents bots from skipping this area and stops bots from avoiding obstacles. The precise attribute can help in places where bots can easily fall off, like catwalks with no railing, or when setting up specific routes for a jump. |
| NO_JUMP | 8 | nav_no_jump | NO_JUMP red rhombus ♢ | Forces bots not to jump. This is useful to prevent excessive jumping. However, bots can get stuck if jumping is required to keep going. |
| STOP | 16 | nav_stop | STOP red octagon | Tells bots to stand still for a short moment when entering this area. Useful to slow bots down to line up tricky jumps more accurately. |
| RUN | 32 | nav_run | RUN two blue arrows | Tells bots explicitly to run in this area. |
| WALK | 64 | nav_walk | WALK one green arrow | Tells bots explicitly to walk silently in this area. |
| AVOID | 128 | nav_avoid | AVOID two red triangles | Tells bots not to use the area unless the normal route has become too dangerous. (only in |
| TRANSIENT | 256 | nav_transient | TRANSIENT dashed outline | Unknown effect, probably unimplemented. Description from |
| DONT_HIDE | 512 | nav_dont_hide | DONT_HIDE | Tells bots not to use this area as a hiding spot. |
| STAND | 1024 | nav_stand | STAND | Tells bots not to crouch while hiding in this area. |
| NO_HOSTAGES | 2048 | nav_no_hostages | NO_HOSTAGES | Tells hostage NPCs not to use this area. Only effective in |
| STAIRS | 4096 | - | STAIRS green lines | |
| NO_MERGE | 8192 | - | not indicated | Used during navmesh generation |
| OBSTACLE_TOP | 16384 | - | OBSTACLE | Used during navmesh generation |
| CLIFF | 32768 | - | CLIFF | Used during navmesh generation |
| State | Shown text / Visuals | Description |
|---|---|---|
| Blocked by navblocker | BLOCKED cyan rectangle | Tells bots not to use this area. This is only set automatically by the game. Example cases include:
Furthermore, there are the related console commands nav_debug_blocked, nav_update_blocked, nav_check_floor, nav_select_blocked_areas. |
| Bocked other means | BLOCKED blue rectangle | This type of blocking is usally applied automatically during round start over areas that are blocked by some solid brushes. It gets cleared automatically when solid brush above it is disabled/killed.
In |
| Damaging | DAMAGING blue rectangle | Tells bots not to avoid this area. This attribute is only set automatically by the game. Example cases include:
ent_create trigger_hurt. The spawned trigger_hurt will cause the area to have DAMAGING state. |
| Obstructed | OBSTRUCTED blue rectangle | This type of blocking is usally automatically applied by heavy(how heavy it needs to be[Clarify]) prop_physics or func_nav_avoidance_obstacle (both based on AABB). In |
| Underwater | UNDERWATER | Applied automatically to nav areas underwater when navmesh is loaded. |
Left 4 Dead 1&2
In ![]() Left 4 Dead and
Left 4 Dead and ![]() Left 4 Dead 2, an alternate set of area attributes named "Spawn Attributes" is available with a very different implementation. Spawn Attributes are identified not by shapes but color, and their attribute names use the color white rather than yellow. The attributes's roles are also different, commonly assisting the "Director" over player AI decision-making.
Left 4 Dead 2, an alternate set of area attributes named "Spawn Attributes" is available with a very different implementation. Spawn Attributes are identified not by shapes but color, and their attribute names use the color white rather than yellow. The attributes's roles are also different, commonly assisting the "Director" over player AI decision-making.
z_debug 1 is required to view Spawn Attributes.
Team Fortress 2
![]() Team Fortress 2 has fittingly named "TF attributes", a simpler implementation of "Spawn Attributes" from
Team Fortress 2 has fittingly named "TF attributes", a simpler implementation of "Spawn Attributes" from ![]() Left 4 Dead and
Left 4 Dead and ![]() Left 4 Dead 2 which tends to assist the game logic in a general sense, such as blocking nav areas when a capture point is captured. These attributes can be set and cleared via the command tf_mark. Use tf_show_mesh_decoration 1 to display all TF attributes at once, coloring all nav areas with a specific color even if not hovered over.
Left 4 Dead 2 which tends to assist the game logic in a general sense, such as blocking nav areas when a capture point is captured. These attributes can be set and cleared via the command tf_mark. Use tf_show_mesh_decoration 1 to display all TF attributes at once, coloring all nav areas with a specific color even if not hovered over.
| Collapse(Exclusionary) processing order | |
|---|---|
| TF_NAV_WITH_<Nth>_POINT |
|
| TF_NAV_BLOCKED_<X>_POINT_CAPTURE |
|
After changing the nav mesh, use nav_analyze to generate data used by bots. It will reload the map upon completion.
bot_moveto, to direct puppet bots to move to a particular point.
Place names (callouts)
Once a nav mesh is generated, Place names can be assigned to nav areas to label regions of the map. For instance, if there is a prominent house in the map, all of the nav areas in the house can be tagged with the House place name.
Place names have multiple uses:
- In the top left of the screen, each player sees his current place, which is the place name of the closest nav area.
- The chat displays the place of players using a radio command. This is also the case when they throw grenades. Example:
- ChicagoTed @ Apartment (RADIO): Fire in the hole!
 Bots use them to announce from where they are reporting in.
 When using the ping tool, the place name is shown with it.
Adding Place names
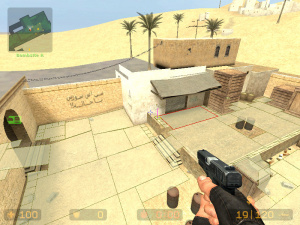
| Nav Area Color | Nav Area... |
|---|---|
| red | has no place name |
| green | has the current place name |
| blue | has a place name, but not the current |
To add or change the name of a location, you need to turn on the place name editor. Make sure nav_edit is set to 1, then type
- nav_toggle_place_mode.
When the place name editor is enabled for the first time, all nav areas should turn red. To select a place name that should be assigned to some areas, type
- nav_use_place <place name>,
for example nav_use_place Bedroom.
For a list of all available place names, execute nav_use_place with no argument.
Next, aim your cursor at an area you want to label with that place name and toggle the Place Painting Mode by executing
- nav_toggle_place_painting.
Look around carefully! While Place Painting is active, each area that you point at with your crosshair will be tagged with the current place name that you selected and turn green in color. To stop painting, invoke the same command again.
You can change the place name you are painting with by typing nav_use_place <new place name>. Notice that after changing the place name, all areas that are already painted with a different name will turn blue and areas painted with the name you just changed to will turn green.
- To select the place name that is assigned to a specific nav area, point at it and invoke nav_place_pick.
- Bind nav_toggle_place_painting and/or nav_place_pick to mouse buttons.
When you are finished editing place names, exit the place mode with nav_toggle_place_mode.
There are several additional commands that provide tools for picking, flood-filling, replacing, and so on. For a complete reference, see Place name Commands.
Common mesh problems and solutions
Extraneous areas on stairs and ramps
The automatic generation system tends to build areas that hang off the side of stairs and ramps. These should be removed to force the bots to take the stairs or ramp straight-on.
Railings
Railings can be a problem for the current bot navigation system, this includes jump-down links that must pass over railings, they should be avoided unless necessary. The bots will eventually make these jumps, but they are not terribly elegant while doing so.
Preventing excessive jumping
Use the nav_no_jump command to flag the area to disable jumping. (only in ![]()
![]() )
)
Dealing with rotating doors
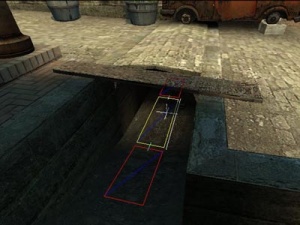
Clip off the nav area to leave an empty space in the nav mesh to allow for the rotating door. You may have to remake the nav square if deleting part of an existing one doesn't work.
Bots will sometimes try to walk through the opened door brush from one nav area to another and get stuck. Either removing the adjacent nav area or configuring the areas and connections so the bots have to walk around the opened door should prevent this.
Advanced editing techniques
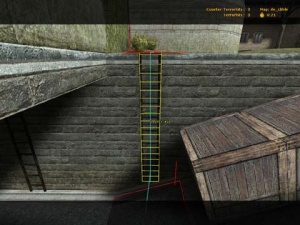
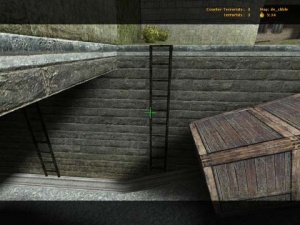
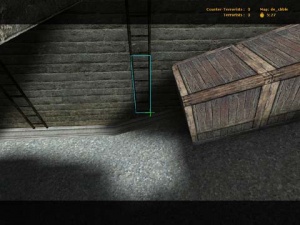
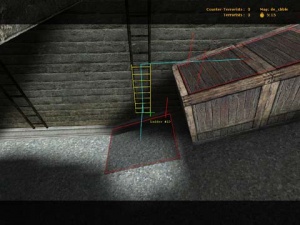
Ladders
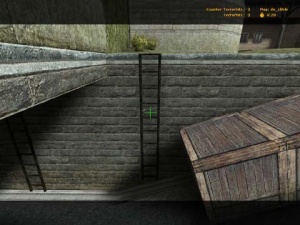
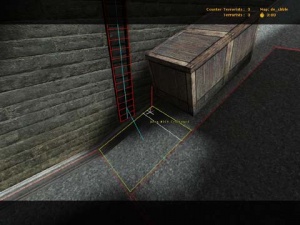
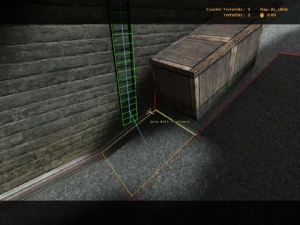
For ladders, there is a slightly different type of nav area that must be built manually on climbable surfaces. Your editing cursor will turn green when pointing at one. But once created, nav areas on ladders behave the same as every other nav area in terms of selecting and connecting.
- Creation using nav_build_ladder
- Creation using nav_begin_area and nav_end_area
If nav_build_ladder isn't what you need, you can manually create a ladder. This can be useful to get bots to start going up the ladder, and jump off halfway up, onto the crate:
- Reversing Ladders
Sometimes a ladder will be created facing the wrong way and show up red. The ladder is drawn in green if it is facing you. To change its orientation, simply point at it and use nav_ladder_flip.
Obstacle avoidance and precision movement
Use nav_precise, nav_walk, and nav_stop to disable local obstacle avoidance behaviors and control bot movement.
The WALK and STOP attributes are only used in ![]() Counter-Strike: Source and
Counter-Strike: Source and ![]() Counter-Strike: Global Offensive.
Counter-Strike: Global Offensive.
Controlling where bots can hide
Use nav_dont_hide or nav_mark_attribute DONT_HIDE to prevent bots from hiding in certain areas. This can be used to force the creation of hiding spots during the analysis phase.
Setting up sniper spots
Mark an area using nav_walk and execute nav_make_sniper_spots. This will break the area into small sub-areas which are used internally by the navigation mesh to encourage sniping.
Lining up tricky jumps and narrow doorways
Arranging nav areas to force specific paths.
- If the bots are getting hung up on the sides of a door or window, you can carve out a narrow path through the middle of the opening.
- The highest a bot will try to jump is 58 units. If the top of a jump is 59 or more units above the bottom, bots will give up as soon as they jump. If this happens in a spot that the bots can actually jump up to, use nav_corner_lower to lower the upper nav area slightly.
Aerial movement
Bots will attempt to move on a nav area regardless if they are on the ground. This mechanism can be exploited by utilizing nav areas in the air to produce aerial movement in bots. For example, areas can be manipulated to produce an L-shaped path where the middle area (preferably marked with PRECISE) is low enough for the bot to "touch" the area and move on it. When touching the area, the bot will turn to go to the next area, hence the bot performing to air strafes.
Import and Export areas
|
File format: "Selected Nav Areas"
{
"version" "1"
"<NavAreaID>" <NavArea>
"<NavAreaID>" <NavArea>
"<NavAreaID>" <NavArea>
// ...
}
// <NavAreaID> is an integer.
// <NavArea>:
{
// corner coordinates:
"NorthWest" <Vector>
"NorthEast" <Vector>
"SouthWest" <Vector>
"SouthEast" <Vector>
// connections, all four optional:
"North" <Connections>
"East" <Connections>
"South" <Connections>
"West" <Connections>
"Place" "<string>"
"Attributes" "<integer>"
}
// <Vector>:
{
"x" "<float>"
"y" "<float>"
"z" "<float>"
}
// <Connections>:
{
"0" "<NavAreaID>"
"1" "<NavAreaID>"
"2" "<NavAreaID>"
// ...
}
|
Example: "Selected Nav Areas"
{
"version" "1"
"4640"
{
"NorthWest"
{
"x" "-850.000000"
"y" "1225.000000"
"z" "-0.164574"
}
"NorthEast"
{
"x" "-725.000000"
"y" "1225.000000"
"z" "-5.690256"
}
"SouthWest"
{
"x" "-850.000000"
"y" "1450.000000"
"z" "-4.490265"
}
"SouthEast"
{
"x" "-725.000000"
"y" "1450.000000"
"z" "-3.990265"
}
"North"
{
"0" "4765"
"1" "4780"
}
"East"
{
"0" "4641"
}
"West"
{
"0" "4431"
"1" "4432"
}
"Place" "OutsideLong"
"Attributes" "1032"
}
}
|
Nav areas can be imported and exported through nav_save_selected and nav_merge_mesh respectively. The former exports nav areas in a selected set to a KeyValues text file, while nav_merge_mesh imports nav areas from a specified file – and selects them (not in ![]() ).
).
Avoid loading a nav mesh on top of itself. To get rid of the duplicate mesh, one can delete the entire nav mesh and import again. When a nav area is imported, it may receive a different ID than in the text file.
The text file used by these commands can be edited to force custom nav area shapes such as skewed faces or diagonal connections that otherwise would be impossible to make.
See also
Left 4 Dead
- Left 4 Dead Navigation Meshes
- L4D Level Design/Nav Meshes
- L4D Level Design/Nav Flow
- L4D Level Design/Advanced Nav Editing
Team Fortress 2
External links
- Official forums for the bot system (down) - Archived version.
- Waypointing for CS:S Bots/Hostages (Edit Life)
