Portal 2 Puzzle Maker/Logic Gates: Difference between revisions
No edit summary |
|||
| Line 15: | Line 15: | ||
=== OR gate === | === OR gate === | ||
An OR gate is activated when at least one of its inputs is activated. We use laser relay to | An OR gate is activated when at least one of its inputs is activated. We use laser relay to achieve this. Each input is connected to a laser emitter pointing at the relay, this way you can have up to 5 inputs in a 1x1x1 cube : place the relay on the floor and each laser emitter on the walls and ceiling. | ||
* If there are too many components connected to your relay and you need to connect more | * If there are too many components connected to your relay and you need to connect more just build an other OR gate and connect the relay of the first gate to one of the laser of the second gate. | ||
* Another method is to use a redirection cube (no dropper) aimed at a laser catcher connected to the desired output. Link your inputs (up to | * Another method is to use a redirection cube (with no dropper) aimed at a laser catcher connected to the desired output. Link your inputs (up to five) to lasers directed at the cube. Should you wish to have more than four inputs, simply add an extra cube to the chain. | ||
[[Image:Or-gate.png|center|200px|thumb|A simple example of a OR gate. Click for a larger view.]] | [[Image:Or-gate.png|center|200px|thumb|A simple example of a OR gate. Click for a larger view.]] | ||
Revision as of 03:57, 17 July 2012
It is possible to make some basic logic gates on the Puzzle maker.
Prefer To Watch
Watch it here.
Logic gates
Logic gates are used to merge multiple signals onto a unique one. It has n inputs, like buttons or laser reciever and one output, you can then connect this output to a door, a laser field or something else.
AND gate
An AND gate is activated when all of its inputs are activated. A good thing for us is that AND gates are implemented by default in the game, you just have to connect all of your inputs to the output.
OR gate
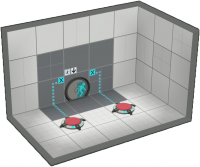
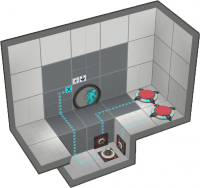
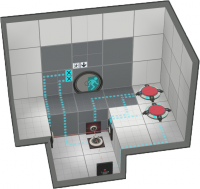
An OR gate is activated when at least one of its inputs is activated. We use laser relay to achieve this. Each input is connected to a laser emitter pointing at the relay, this way you can have up to 5 inputs in a 1x1x1 cube : place the relay on the floor and each laser emitter on the walls and ceiling.
- If there are too many components connected to your relay and you need to connect more just build an other OR gate and connect the relay of the first gate to one of the laser of the second gate.
- Another method is to use a redirection cube (with no dropper) aimed at a laser catcher connected to the desired output. Link your inputs (up to five) to lasers directed at the cube. Should you wish to have more than four inputs, simply add an extra cube to the chain.
XOR gate
- XOR gates are particularly useful in adders and related circuits, and can be made in a single 1x1 pit.
A XOR gate is activated when an even number of its inputs are activated (most of the time there are only two inputs). Again we use laser relay to build this door. Each button is connected to the laser emiter of its side, but the two emiter at the top are activated by default. Then both relay are connected to the output. So we basicaly have an OR gate and a NAND gate.
Latches
To make a latch first place a button. Connect this button to a laser emitter lined up with a laser catcher. Wire the laser catcher to a second laser emitter with it's beam lined up on a laser relay. On the other side of the relay place another laser emitter and connect it to the relay. Finally connect all the components you wish to connect to your latch to the relay.
Comment: Is the first laser and catcher really necessary? I've created a latch by placing two lasers facing a relay, wiring the relay to one and the input to the other. Works like a charm.
If there are too many components that you want to connect to your relay make a laser emitter lined up with a laser catcher or relay. Wire the emitter to the relay from the latch and then connect the components you need to attach to the latch to the laser catcher or relay depending on what you placed.
Resetable Latches
Create a basic latch but extend the laser that is power by the relay two blocks back and place a moving panel between the relay and the laser. Next connect the panel to a reset button and the relay
Another approach is to feed the reset line through an inverter (laser which is "Start enabled"), then feed this into the same laser which the relay output connects to. Using this trick, and by playing with the heights of the lasers, a resetable latch can be made in a single 1x1 pit.
Delayers
Basic Delayers
Basic delayers or uncontrollable delayers are created by placing an excursion funnel with a box button at the end of it. Place a box dropper above the excursion funnel, make sure that "auto drop first cube" and "auto respawn cube" are disabled. The length of the delay is changed by how far away the box dropper is from the button.
Advanced Delayers
Advanced delayers or controllable delayers are very complex. First create four raised blocks on one side place two laser catchers and on the other two laser emitters. Place a button, the one that you want to start the delay, and connected it to the first laser. The laser catcher that faces the first laser should be connected to the second laser emitter. The second laser emitter should be set to on by default, so that when the laser gets powered it turns off, this creates a NOT gate. Now create a basic latch (non-resetable) and connect the input to the button you are using at the start of the delay. The output should be connected to a basic delayer, as detailed above, the delayer should have a one block space between the button and the dropper. Next create the item you want to use as you output and connect the box button from the basic delayer to it and also connect the second laser catcher. To control the length of the delay change the button "on" time.
| ||||||||||||||||||||||||||||||


