Checkpoint Rooms
Contents
Creating a Checkpoint Room
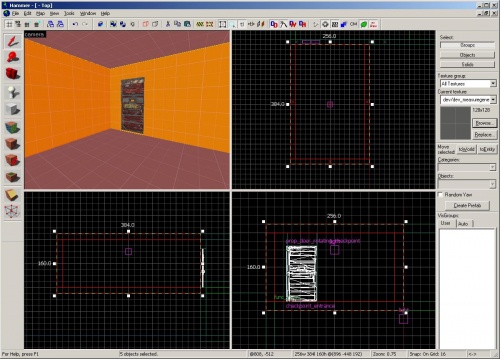
Now, let's create the checkpoint room. Using the duplication of brushes technique you used in the first tutorial, create a room on the other side of the checkpoint door with these dimensions:
- 256 Units Wide
- 384 Units Long
- 128 Units Tall
func_detail brush that was used for the platform or your level will "leak" to the outside. All of your outer walls, floors and ceilings need to be regular world (non-entity) brushes.Also, remember to duplicate one of the lights into this new room so it will be lit.
Now, we need a brush entity called an info_changelevel.
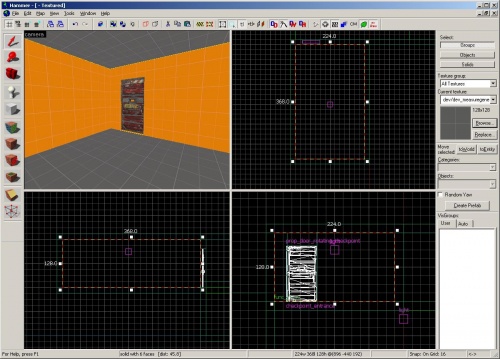
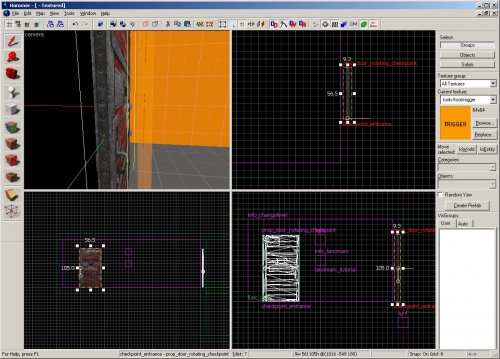
Go to the ![]() Block Tool and draw a brush that fits inside your newest room.
Block Tool and draw a brush that fits inside your newest room.
Click on the Browse button on the Texture bar to bring up the Texture Browser.
Type "trigger" in the Filter drop-down field.
Select the texture "tools\toolstrigger"
Double-click on the texture to make it the current texture.
Click on the ![]() Apply Texture on the Tool Bar to apply it to the brush.
Apply Texture on the Tool Bar to apply it to the brush.
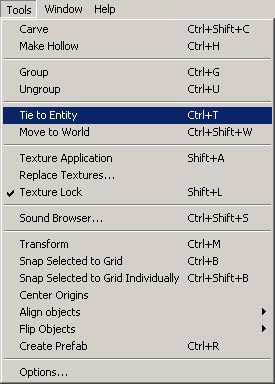
With the brush still selected, select Tools > Tie to Entity (or press CTRL+T).
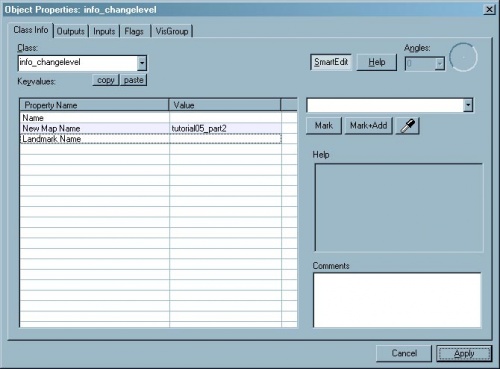
This will bring up the Object Properties dialog box.
In the Class drop-down menu, choose "info_changelevel" and click Apply.
Click on the New Map Name row and change add the text "tutorial05_part2" in the field at the right.
Click on Apply and close the dialog box.
info_changelevel is a brush entity that will transition the players and the prop_physics entities inside it to the destination level (given in the New Map Name field).Click on the ![]() Entity Tool and select "
Entity Tool and select "info_landmark" from the Objects drop-down menu.
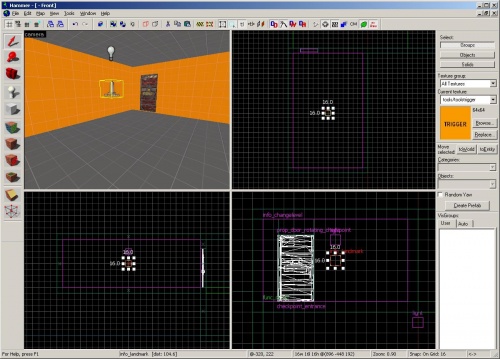
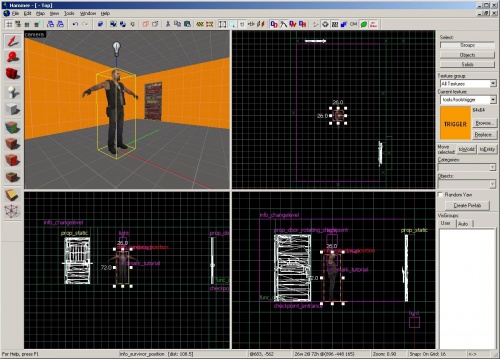
Place it in the middle of your new room. Make sure you snap the entity to the exact middle as shown in the image.
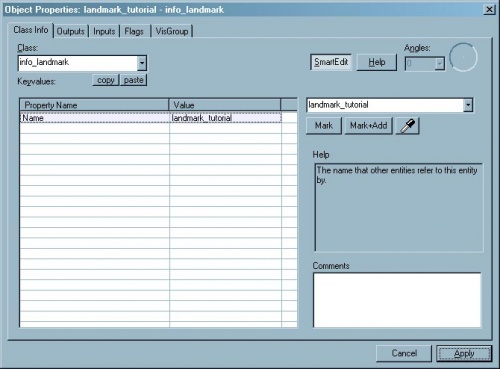
Open up the Object Properties for the info_landmark (Alt+↵ Enter).
Change the Name to "landmark_tutorial". Click Apply and close the dialog box.
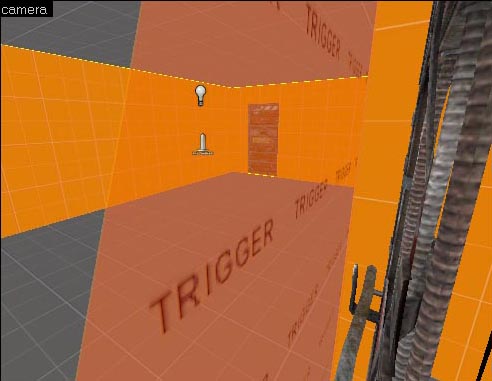
info_landmark is an entity that exists in both the level that the player starts in and the level that the player transitions to. The info_landmark must be in the exact relative position to the surrounding world geometry in both levels. So, you can move the info_landmark in the destination level, but you must move the geometry around it as well for the transition to work. A common mistake is to assume the positions are relative to the grid, it is infact relative only to the surrounding geometry. Therefor it is not required for your maps to begin exactly on the grid where the previous map left off.Go back and click on the info_changelevel brush that you just created and bring up its Object Properties (you'll need to move in the Camera viewport to see the trigger texture on the brush to select it).
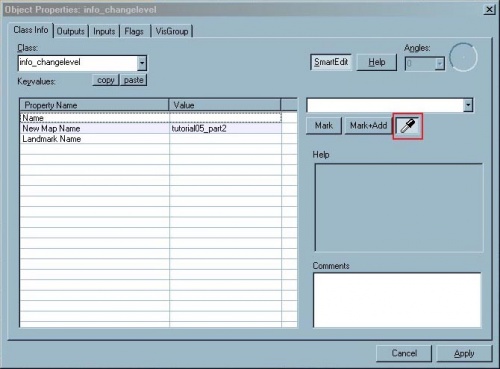
Click on the Landmark Name row and you'll see an eye dropper icon on the right side, next to the Mark and Mark+Add buttons. Click on the eye dropper icon.
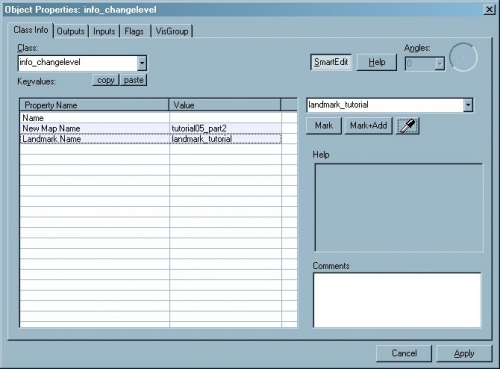
With the dialog box still up, you can navigate in the Camera viewport to see the info_landmark. If you click on the info_landmark with the eye-dropper enabled, it will grab the name of the info_landmark and place it in the Landmark Name field for you.
Create the exit
Just to get the next checkpoint area in the level that we'll be transitioning into set up, we'll place another checkpoint door that will be the exit in the next level.
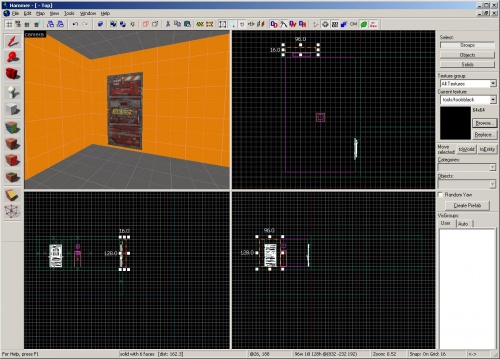
Duplicate the checkpoint door you placed as the checkpoint entrance in this level and place it in the right wall of the checkpoint room. Rotate it so that it will be exited out through that wall.
Before we cut out the hole for it, let's edit its properties to be the exit door.
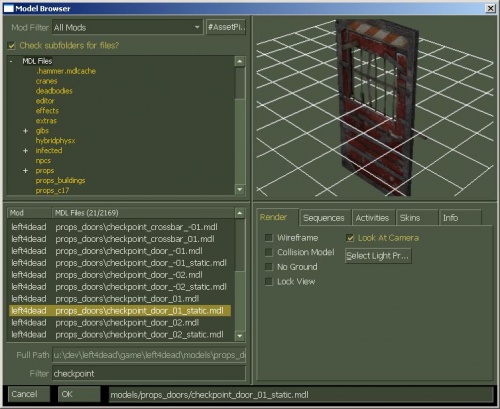
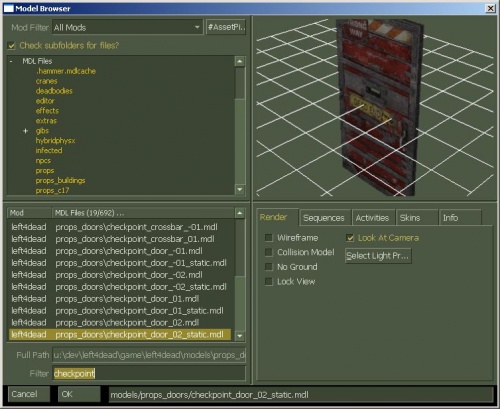
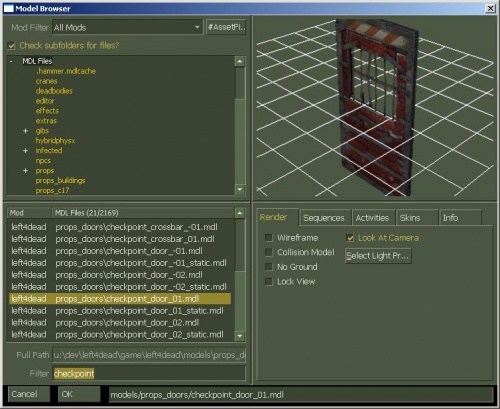
Click on the World Model row and click on the Browse button on the right side. Find the model "checkpoint_door_01_static.mdl" and click on the OK button.
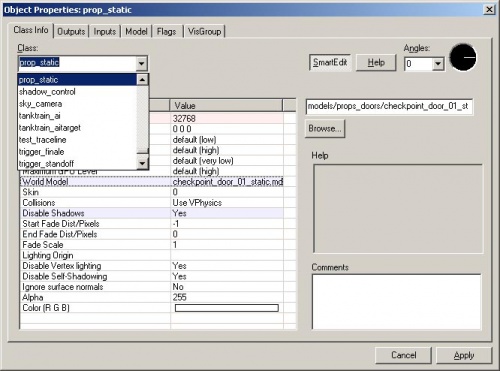
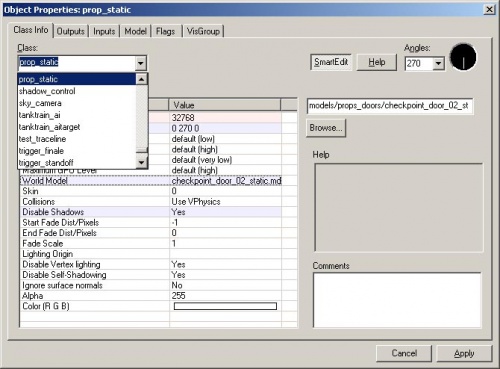
Change the Class to a prop_static since the door doesn't have to function like a real door.
Click on Apply and the close the dialog box.
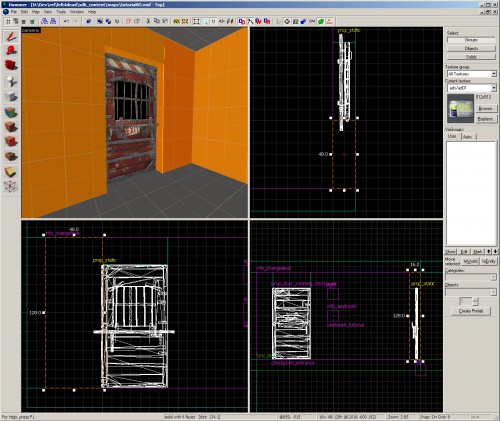
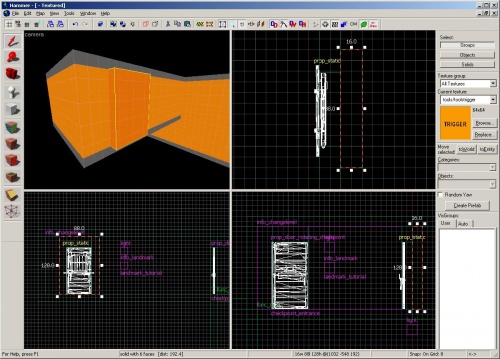
Using the ![]() Clipping Tool just like we did for the first checkpoint door, cut out a hole for this checkpoint door so that it looks like this image.
Clipping Tool just like we did for the first checkpoint door, cut out a hole for this checkpoint door so that it looks like this image.
Note the connected wall next to the door should be 48 units in length!
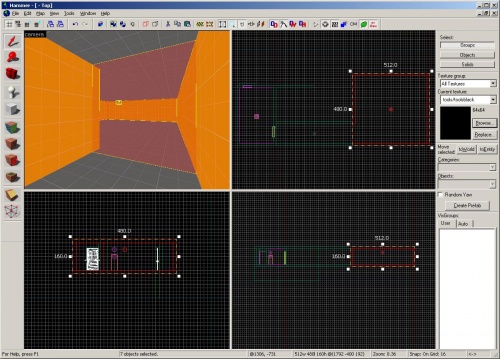
Now, we have our checkpoint room, but there's still a leak to the outside world where this door is. We will need to seal it.
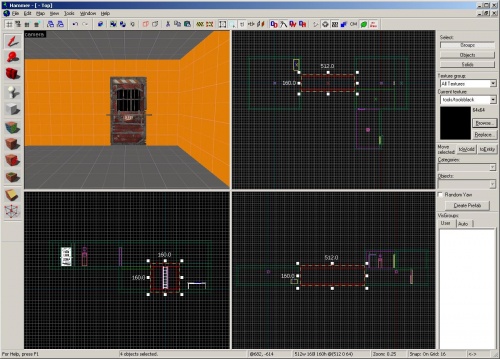
Duplicate the wall that the door is set in and move it behind the door so that it completely closes off the hole that the door creates.
Click on the Browse button in the Texture bar and type "tools" in the Filter drop-down field.
Find the texture "tools/toolsblack" and double-click on it to close the browser and make it the current texture.
Click on the ![]() Apply current texture icon to make the brush black. This is so that the player won't be able to see out of the window in the checkpoint door.
Apply current texture icon to make the brush black. This is so that the player won't be able to see out of the window in the checkpoint door.
Save your level with Ctrl+S.
You've now created a checkpoint room that will lead to another level called "tutorial05_part2". Now, we'll need to make that level so that we can test the transition.
Creating a Destination Level
First, make sure you've saved your work on tutorial05.vmf by choosing File > Save, or press Ctrl+S.
Next, we'll make the destination level based on the current one.
Do File > Save As... and change the name the file "tutorial05_part2.vmf".
Select the info_survivor_position in the starting room.
Move him to the middle of the checkpoint room.
Scroll out so that you can see your whole map in the Top viewport.
Select the hallway that you created in the first tutorial. You can left-click and drag across the center of the hallway and press ↵ Enter to select all the brushes there.
Move the hallway so that it lines up outside the checkpoint door on the bottom right side of the level. You can move the brushes by using the arrow keys or by left-clicking and dragging inside the selection box to the position you want the brushes to be in.
Then, move the hallway up so that the floor matches the floor of the checkpoint room.
Now, let's get rid of the parts of the first level that we don't need.
Select the first room and then press the Delete key.
Select the second room but don't include the shared wall with the checkpoint. If you select too much, just hold down Ctrl and click on any object to de-select. When you're done, press the Delete key.
Now, we need to move the black brush that we used to seal the first level so that it seals this level.
Select the black brush.
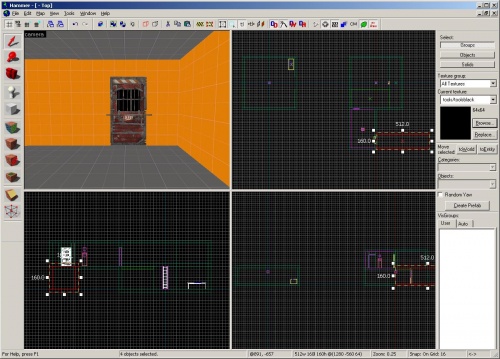
Move it and shape it to cover the other doorway of the checkpoint room.
Duplicate the wall, ceiling and floor brushes from the hallway to make a new room at the end.
You'll need to make it these exact dimensions for the pre-generated navigation file to work:
- Width: 512
- Length: 480
Add a light to the middle of the room. You can duplicate the light in the checkpoint room and move it over.
Go to the checkpoint room and click on the door that led into the room from the previous level.
Press Alt+↵ Enter to bring up the properties.
Click on the World Model row and click on the Browse button.
Select the model "checkpoint_door_02_static.mdl"
Click on OK.
Change the Class to a "prop_static" since this door will no longer need to open or close.
Click on Apply to make the changes appear.
Select the other door in the checkpoint room – the one that will lead out of it.
Press Alt+↵ Enter to open the properties.
Click on the World Model row and click on the Browse button.
Select the model "checkpoint_door_01.mdl"
Click on OK.
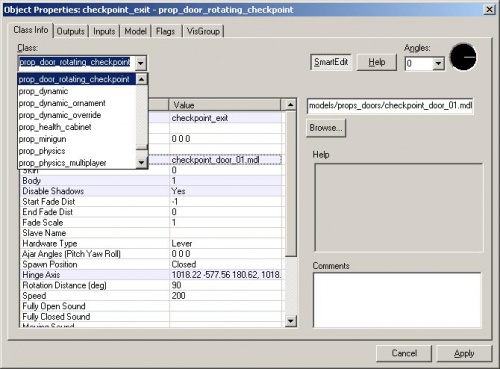
Change the Class to a "prop_door_rotating_checkpoint"
Click on the Apply button to update the properties.
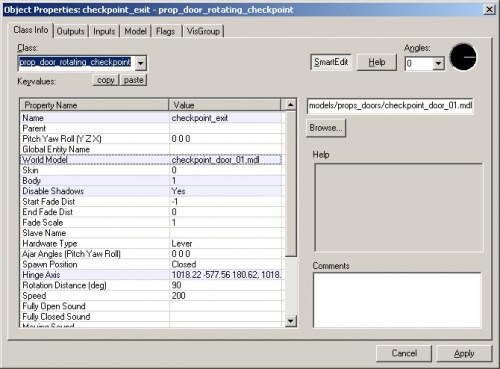
Change the following fields:
- Name: "checkpoint_exit"
- Body: "1"
- Disable Shadows: "Yes"
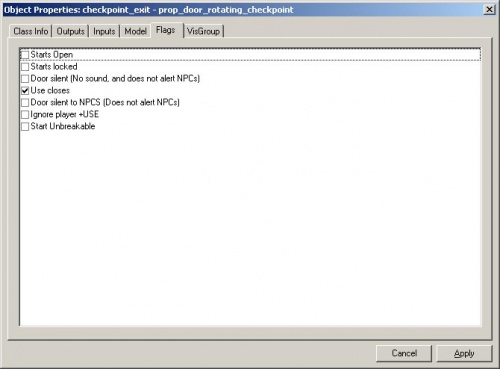
Now, click on the Flags tab and check the "Use closes" box.
Click Apply again and close the properties box.
Keep the door selected.
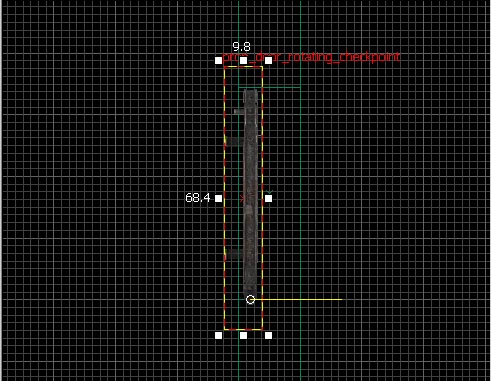
In the Top viewport, move the origin of the door model to the bottom part where it touches the wall.
This will make the door rotate on this axis.
In the Camera viewport, move just inside the door and look back into the checkpoint room to select the info_changelevel that you have leftover from the previous level.
Press the Delete key to remove it.
Compile the maps
tutorial05_part2
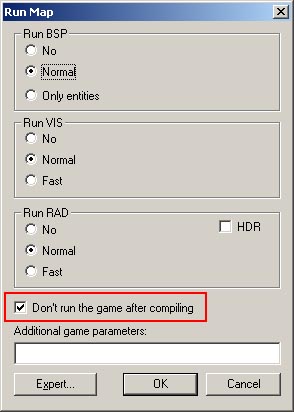
Press F9 to open the Run Map, but this time click the "Don't run the game after compiling" checkbox. Then press OK. This will compile the level, but won't run the game afterwards.
tutorial05
When the level is done compiling, open up "tutorial05.vmf" again.
Press F9 and uncheck the "Don't run the game after compiling" checkbox and press OK. This will start you in the tutorial05 map and allow us to test the transition to the tutorial05_part2 map.
