ActBusy Script Editor: Difference between revisions
Kwp17pitts (talk | contribs) No edit summary |
Kwp17pitts (talk | contribs) (→Interface: Organized Menu Documentation) |
||
| Line 11: | Line 11: | ||
The first window on the left is the properties window. On the right is the Sequence Picker window. | The first window on the left is the properties window. On the right is the Sequence Picker window. | ||
'''File''' | {{Note|The file menu is pretty self explanitory}} | ||
<table class="wikitable"> | |||
<tr> | |||
<th>'''File'''</th> | |||
<th>'''Edit'''</th> | |||
<th>'''ActBusy'''</th> | |||
<th>'''View'''</th> | |||
</tr> | |||
<tr> | |||
<th>[[File:MaterialEditor FileMenu.jpg]]</th> | |||
<th>[[File:MaterialEditor EditMenu.jpg]]</th> | |||
<th>[[File:ActBusyEditor ActBusyMenu.jpg]]</th> | |||
<th>[[File:ActBusyEditor ViewMenu.jpg]]</th> | |||
</tr> | |||
<tr> | |||
<td> | |||
*'''Open...''' | |||
*'''Save''' | |||
*'''Save As...''' | |||
*'''Close''' | |||
*'''Recent''' | |||
*'''Clear Recent''' | |||
*'''Exit''' | |||
</td> | |||
<td> | |||
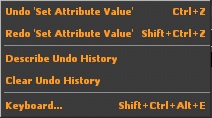
*'''Undo''' | |||
Shortcut keys {{key|Ctrl}} + {{key|Z}} | |||
''' | *'''Redo''' | ||
Shortcut keys {{key|Shift}} + {{key|Ctrl}} + {{key|Z}} | |||
*'''Describe Undo History''' | |||
{{Confirm|What does this do??}} | |||
''' | *'''Clear Undo History''' | ||
*'''Keyboard''' | |||
Shortcut keys {{key|Shift}} + {{key|Ctrl}} + {{key|Alt}} + {{key|E}} | |||
See setting key bindings | |||
</td> | |||
<td> | |||
*'''Create ActBusy''' | |||
*'''Delete ActBusy''' | |||
</td> | |||
<td> | |||
;*'''Properties''' | ;*'''Properties''' | ||
:Shows the Properties Window If Checked | :Shows the Properties Window If Checked | ||
| Line 52: | Line 66: | ||
;*'''Default Layout''' | ;*'''Default Layout''' | ||
:Resets the layout to the defualt view | :Resets the layout to the defualt view | ||
</td> | |||
</tr> | |||
</table> | |||
== Setting Key Bindings == | == Setting Key Bindings == | ||
Revision as of 21:29, 19 January 2012
For help, see the VDC Editing Help and Wikipedia cleanup process. Also, remember to check for any notes left by the tagger at this article's talk page.
Overview
The Actbusy Script Editor is an engine tool available in ![]() Alien Swarm and later. To use it, run your game or mod with -tools -nop4 on the command line and select 'Actbusy Script Editor' from the Tools menu. Make sure that sv_lan is set to 1 in the console located in the lower-left corner (sv_lan 1).
Alien Swarm and later. To use it, run your game or mod with -tools -nop4 on the command line and select 'Actbusy Script Editor' from the Tools menu. Make sure that sv_lan is set to 1 in the console located in the lower-left corner (sv_lan 1).
Interface
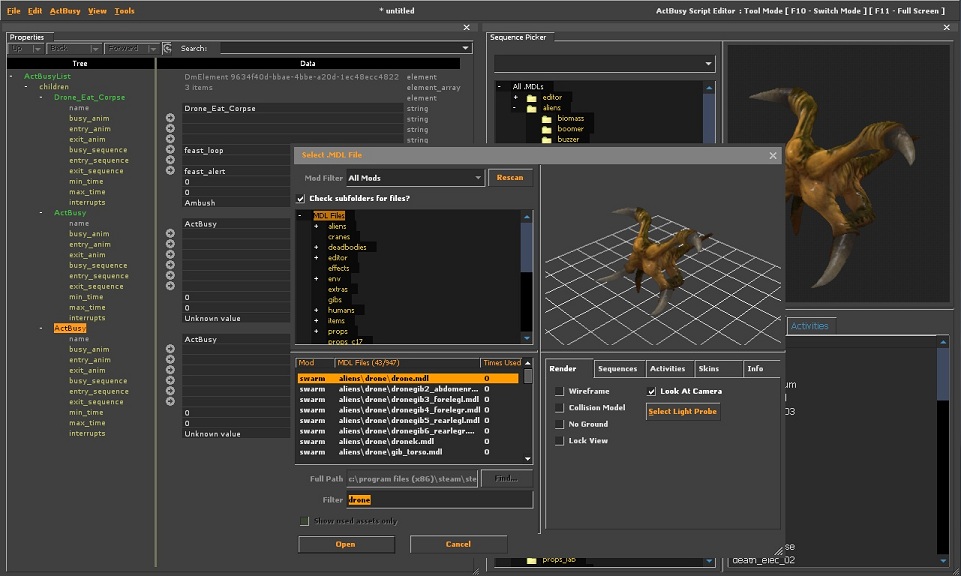
The first window on the left is the properties window. On the right is the Sequence Picker window.
Setting Key Bindings
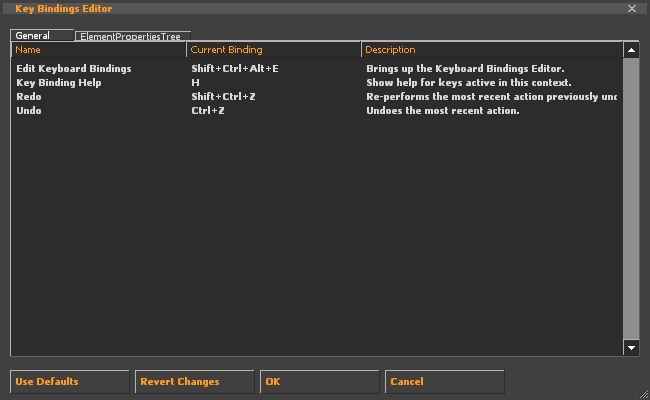
to set key bindings click Edit -> Key Bindings
the Key Bindings Editor window will appear
Creating ActBusy Events
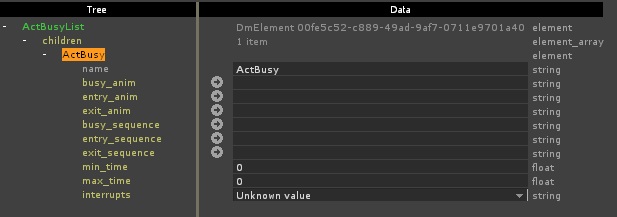
first click ActBusy -> Create ActBusy
click the + symbol next to children
the Properties window should look like this
Selecting Animations
Click ![]() next to one of the fallowing
next to one of the fallowing
- busy_anim
- entry_anim
- exit_anim
- busy_sequence
- entry_sequence
- exit_sequence
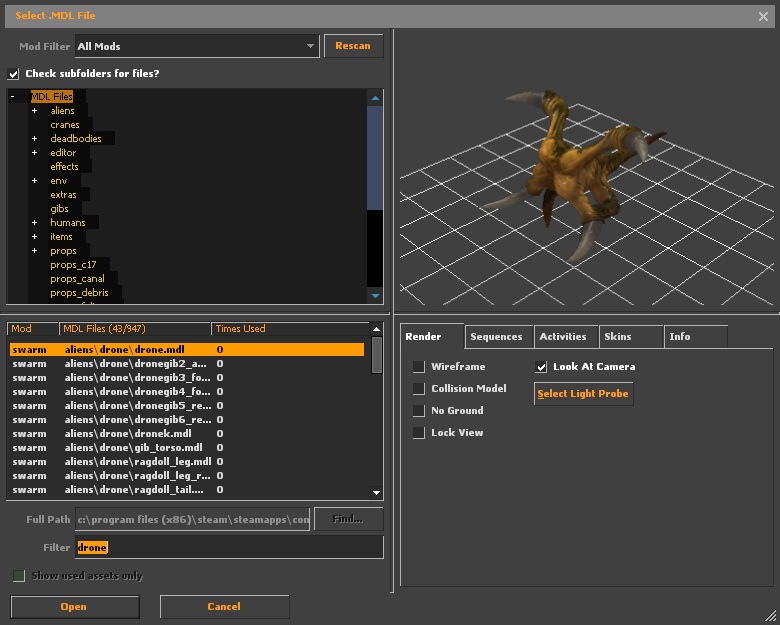
The Select MDL File Window Opens
pick the desired performing character model
then click "open"
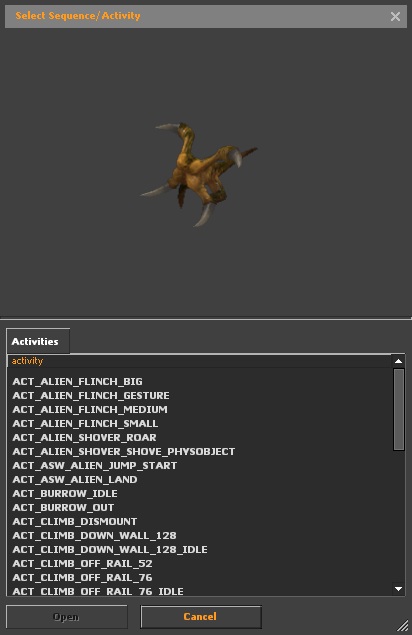
The Select Sequence/Activity Window Opens
Select the approprate animation and click "open"
Repeat for the rest
Setting Interrupts
Click the box next to interrupts
This drop down will show
See Also
| |||||||||||||||||||||||||||||

