Template:Archived Page History/Skybox (2D)/en: Difference between revisions
m (→Adding sky to a map: Included link to skybox optimisation page) |
(Changed first sentences, avoiding "A 2D Skybox is a skybox". Creation: 6 VMTs are required, not necessarily 6 VTFs.) |
||
| Line 1: | Line 1: | ||
[[Image:Skybox_Template.jpg|256 px|right]] | [[Image:Skybox_Template.jpg|256 px|right]] | ||
{{ | {{Language subpage}} | ||
{{subpage|[[Skybox Basics]]}} | |||
{{for|information about Skyboxes in {{gldsrc|4}}, see [[Skybox (GoldSrc)]]}} | |||
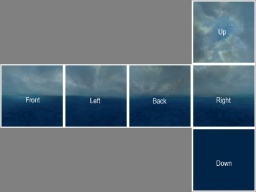
The '''2D Skybox''' of a {{source|4}} map is a static 360° background image that is rendered only through skybox tool textures. This image is composed of six [[VMT|materials]] that are drawn like the insides of an infinitely large cube that surrounds the map. | |||
As opposed to a [[3D Skybox]], it lacks geometrical depth, consisting only of textures without using the {{ent|sky_camera}} entity to display any 3D geometry. | |||
__TOC__ | |||
== Adding sky to a map == | == Adding sky to a map == | ||
Simply texture a [[world brush]] (not a [[brush entity]]) with the '''<code>[[tool textures|tools/toolsskybox]]</code>''' or (if you are mapping for the [[Orange box]]) the '''<code>[[tool textures|tools/toolsskybox2d]]</code>''' material. | {| style=float:right | ||
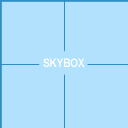
| [[File:Toolsskybox.gif|thumb|<tt>toolsskybox</tt> for 2D and 3D skyboxes]] | |||
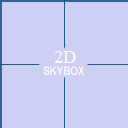
| [[File:Toolsskybox2d.gif|thumb|<tt>toolsskybox2d</tt> for 2D skyboxes]] | |||
|} | |||
Simply texture a [[world brush]] (not a [[brush entity]]) with the '''<code>[[tool textures#skybox|tools/toolsskybox]]</code>''' or (if you are mapping for the [[Orange box]]) the '''<code>[[tool textures#skybox2d|tools/toolsskybox2d]]</code>''' material. | |||
In-game, the skybox will be seen ''through'' each surface that <code>toolsskybox</code> is applied to. | In-game, the skybox will be seen ''through'' each surface that <code>toolsskybox</code> is applied to. | ||
| Line 16: | Line 23: | ||
== Changing the displayed skybox == | == Changing the displayed skybox == | ||
[[Image:Sky_change.png|right|200px]] | [[Image:Sky_change.png|right|200px]] | ||
The skybox for a map can be set in Hammer's [[worldspawn|Map Properties]] dialog. With the correct map opened, follow these steps: | |||
# Go to the [[Hammer Map Menu|Map menu]] | # Go to the [[Hammer Map Menu|Map menu]] | ||
# Choose '''Map Properties...''' from the drop down list | # Choose '''Map Properties...''' from the drop down list | ||
# In the Object Properties window, select the '''Skybox Texture Name''' field. | # In the Object Properties window, select the '''Skybox Texture Name''' field. | ||
# Replace the | # Replace the value with the name of the skybox you wish to display. See [[Sky List]] for a list of available skies per game. To use a custom sky, see below. | ||
In-game, the current skybox can be changed with the cheat console variable <span id=sv_skyname></span> {{code|sv_skyname <skyname>}}. | |||
{{clr}} | {{clr}} | ||
| Line 33: | Line 39: | ||
== Creating a Custom 2D Skybox Texture == | == Creating a Custom 2D Skybox Texture == | ||
# Prepare your image files. You need six images | # Prepare your image files. You don't necessarily need six images, as you can use an image for multiple sides, for example one for the top, one for the bottom and one for all four sides. | ||
# [[Creating a Material|Convert them to VTF.]] Make sure that you enable "Clamp S" and "Clamp T" flags or you'll see seams when running with lower texture detail. | # [[Creating a Material|Convert them to VTF.]] Make sure that you enable "Clamp S" and "Clamp T" flags or you'll see seams when running with lower texture detail. | ||
# Create | # Create the following six [[VMT]] text files in the directory {{path|\materials\skybox\}}. Note that character case does not matter except for the skyname. | ||
#* {{mono|<skyname>BK.vmt}} | |||
#* {{mono|<skyname>DN.vmt}} | |||
#* {{mono|<skyname>FT.vmt}} | |||
#* {{mono|<skyname>LF.vmt}} | |||
#* {{mono|<skyname>RT.vmt}} | |||
#* {{mono|<skyname>UP.vmt}} | |||
Use the following template for each: | |||
{{CodeBlock| | |||
sky | |||
Now, in [[Hammer]], go to Map > Map Properties > Skybox Texture Name and type in | { | ||
[[$basetexture]] <VTF> | |||
[[$hdrcompressedtexture]] <VTF> | |||
[[$nofog]] 1 | |||
[[$nomip]] 1 | |||
[[$ignorez]] 1 | |||
} | |||
}} | |||
Now, in [[Hammer]], go to ''Map'' > ''Map Properties'' > ''Skybox Texture Name'' and type in {{mono|<skyname>}}, without any side tags. | |||
== Creating a Skybox with XBlah's Modding Tool == | == Creating a Skybox with XBlah's Modding Tool == | ||
Revision as of 08:11, 14 August 2023
The 2D Skybox of a ![]() Source map is a static 360° background image that is rendered only through skybox tool textures. This image is composed of six materials that are drawn like the insides of an infinitely large cube that surrounds the map.
Source map is a static 360° background image that is rendered only through skybox tool textures. This image is composed of six materials that are drawn like the insides of an infinitely large cube that surrounds the map.
As opposed to a 3D Skybox, it lacks geometrical depth, consisting only of textures without using the sky_camera entity to display any 3D geometry.
Adding sky to a map
Simply texture a world brush (not a brush entity) with the tools/toolsskybox or (if you are mapping for the Orange box) the tools/toolsskybox2d material.
In-game, the skybox will be seen through each surface that toolsskybox is applied to.
toolsskybox Brushes do not need to be box-shaped.
Changing the displayed skybox
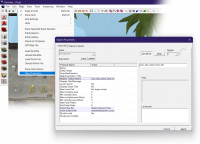
The skybox for a map can be set in Hammer's Map Properties dialog. With the correct map opened, follow these steps:
- Go to the Map menu
- Choose Map Properties... from the drop down list
- In the Object Properties window, select the Skybox Texture Name field.
- Replace the value with the name of the skybox you wish to display. See Sky List for a list of available skies per game. To use a custom sky, see below.
In-game, the current skybox can be changed with the cheat console variable sv_skyname <skyname>.
Skybox Lighting
Creating a Custom 2D Skybox Texture
- Prepare your image files. You don't necessarily need six images, as you can use an image for multiple sides, for example one for the top, one for the bottom and one for all four sides.
- Convert them to VTF. Make sure that you enable "Clamp S" and "Clamp T" flags or you'll see seams when running with lower texture detail.
- Create the following six VMT text files in the directory

\materials\skybox\. Note that character case does not matter except for the skyname.- <skyname>BK.vmt
- <skyname>DN.vmt
- <skyname>FT.vmt
- <skyname>LF.vmt
- <skyname>RT.vmt
- <skyname>UP.vmt
Use the following template for each:
Now, in Hammer, go to Map > Map Properties > Skybox Texture Name and type in <skyname>, without any side tags.
Creating a Skybox with XBlah's Modding Tool
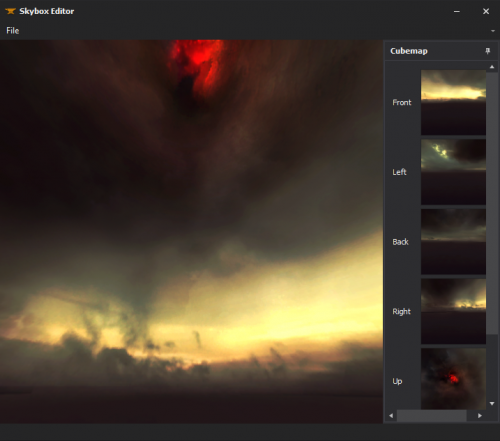
LDR Skyboxes can be created straight from image files with the ![]() XBLAH's Modding Tool using an intuitive interface, that creates all the required vtfs and vmts. All you have to do is select each cubemap face, preview it, and save. It has a built in 3D previewer to check if the skybox is seamless, and supports the regular square skyboxes and the clamped ones.
XBLAH's Modding Tool using an intuitive interface, that creates all the required vtfs and vmts. All you have to do is select each cubemap face, preview it, and save. It has a built in 3D previewer to check if the skybox is seamless, and supports the regular square skyboxes and the clamped ones.
This can be accessed within the tool through Materials > Skybox Editor.
See also
- light_environment, env_sun and shadow_control entities define the skybox lighting settings, which are emitted from the toolsskybox texture into the map.
- Skybox Optimization - A tutorial on how to optimize brushwork skybox.
- Sky List - A list of skybox textures (with the values that Valve used)
- Sky Writer - A tool to render 3ds Max scenes directly into Source as HDR skies
| Environment articles: | |
|---|---|
| Skies and environment maps | |
| Terrain and displacement mapping | Displacements • Creating Holes in Displacements • Digital Elevation Models • Creating custom terrain with Worldmachine |
