两站升降机
For help, see the VDC Editing Help and Wikipedia cleanup process. Also, remember to check for any notes left by the tagger at this article's talk page.
You can help by finishing the translation.
Also, please make sure the article tries to comply with the alternate languages guide.| 概括性的地图制作系列 讨论你的想法——帮助我们写你需要的文章和想法 |
|---|
|
弹药 | 生物 | 蚁狮 | 光束和激光 | 线缆和绳子 | 动态的天空与云雾 | 颜色理论 | 战斗 | 联合军 | 门 | 尘土、雾、烟 | 升降机 | 关卡转换 | 环境光效、太阳、天气、室外 | 爆炸 | 火焰 | 植被 | 玻璃和窗户 | 梯子 | 光效 | 优化 | 物理 | 视网膜扫描仪 | 声效和音乐 | 特效 | 地形 | 火车 | 机枪塔 | 水 | 僵尸 |
本项目演示了:
- 一个简单的四楼电梯
- 一个东西但是更高级的版本
- 高级的效果,通过使用 env_sprite, func_brush, func_button, func_tracktrain, logic_relay, path_track, prop_dynamic 和 trigger_multiple 实体
- 一个 func_movelinear 的预览版来用于演示类似的效果
- 电梯里有每个楼层的按钮.
- 每层都有功能性的门和按钮.
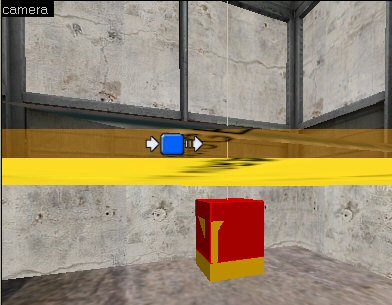
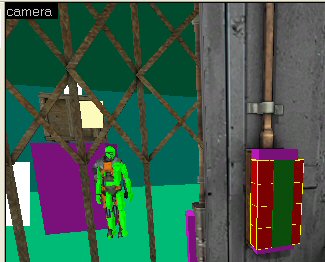
Developer 1 的情况下测试升降机。(如下所示, 在 info_player_start 实体的旁边, 电梯内部的图片里面.)
这篇文章所用的实体是 brush-based(基于固体的) ( func_tracktrain 和 func_movelinear.)
项目中的这个用了两个返回自身的输出:
OnFullyOpen, crate_lift, Close, 3.0
OnFullyClosed, crate_lift, Open, 3.0
...一个 logic_auto 在地图开始就启用他:
OnMapSpawn, crate_lift, Open, 0.0
在其最初启动之后 func_movelinear 会触发自身。 func_movelinear 可以轻松地被按钮和触发器控制。
一个在HL2中制作电梯的方法是使用 func_tracktrain。 有些人可能会说让这玩意儿正常工作会很困难, 但是如果你过程正确的话就可以不用管这些。
一个这样的技巧是利用一次性的 path_track 来生成电梯。 在这之后他再不会被使用。 在现在这个四层电梯的情况下,另一个 path_track 和第一个在同样的大体区域,并且将会被使用而不是每次电梯都会返回1楼.
在电梯开始工作后,这里需要三项调整。
- 第一个 path_track 的位置
- 替代掉它的替代品 path_track 的位置
- 轨道属性之上的 func_tracktrain 高度。
通过调整这三个对象,可以让电梯在准确的位置启动或者停止。
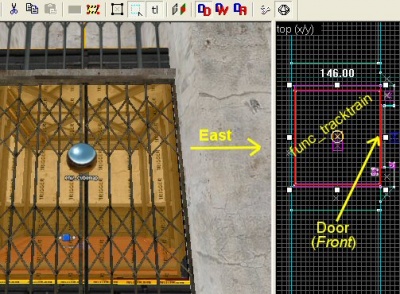
记住 func_tracktrain 实体必须面朝东(east)创建, 或者说是2D顶视图的右边。
但是准确的来讲,哪里是东? 东和Hammer顶视图的右边是一个方向。
-t---
注意下图的电梯前端是如何朝东的,或者右边。
Also, the func_tracktrain doesn’t have to be built in place.
It will spawn in position at the First Stop Target specified in its properties.
In this project the elevator, func_tracktrain, has as its First Stop Target path_track_01 and the flags Fire once and Teleport to THIS path track have been checked for the path_track.
It will only be used once, after that path_track_01a will be the first path_track.
Notice their position in this image:
path_track_01, the first path_track, is shown in red.
Its substitute is 5 units lower.
This really is a fast and easy way to force the elevator to spawn, start and stop in the exact positions as needed.
The first path_track is created once the func_tracktrain for the elevator has been created.
The remaining path_tracks are all clones of the first created by selecting a path_track and then holding <Shift> while the clone is dragged with the mouse, the very same method that may be used for copying anything else in Hammer.
Once the first path_track is created, a name should be given to it right away. As the clones are created, Hammer will name the others automatically and set the Next Stop Target property as well.
All necessary path_tracks can be created in a matter of seconds.
Building the elevator should be done once the initial func_tracktrain is functional. Create the initial func_tracktrain and the path_tracks and then test the map.
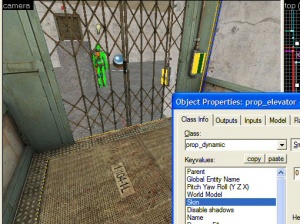
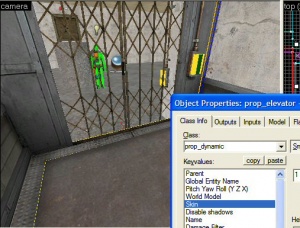
For this project the dynamic elevator and prop doors will be used. This elevator has two skins. The second skin will be used for this project because it looks less like a freight elevator. The prop is: models/props_lab/freightelevator.mdl
The doors for the elevator are models/props_lab/elevatordoor.mdl. Both the doors and the elevator are prop_dynamic entities.
An elevator can be created entirely as one func_tracktrain instead of being parented to one like this project.
How the doors will function must also be decided. Will they move up and down with the elevator, or will each floor have doors?
func_tracktrain can be used in this same manner to create elevators, trains, boats, effects, etc. What is created and how it is done is up to the person making it.
One nice addition for the elevator is a trigger_multiple placed on the inside. Parent this to the func_tracktrain or the elevator. This can be used to sense when the player has entered or exited the elevator. To illustrate this, one has been created for this project with a single Output.
OnEndTouch, prop_door*, SetAnimation, close
When the Player exits the elevator, the prop doors will close. Notice the asterisk. (prop_door*) This will cause each of the 4 prop doors to be closed because they are named prop_door1, prop_door2, prop_door3 and prop_door4.
Each floor has a button to open the elevator doors by way of a func_button:
OnPressed, prop_door1, SetAnimation, open
In the more advanced sample file below the elevator can be called from each floor. Leaving the elevator will cause these doors to close, pressing the button on the outside wall will open the doors, when the elevator starts each time the doors will close.
Everything on this elevator works very well but the simple elevator has a shortcoming: Neither of these elevators is designed to go backwards. Careful consideration should be used when deciding what the elevator will do and what it takes to achieve the design in mind. This elevator can be made to go backwards with a variety of methods, the func_tracktrain can be made to go backwards, each path_track can have an alternate path and the amount of logic_relays can be doubled.
There are elevators which acted exactly like this one in Detroit. They would start from the first floor and collect passengers as they went to the top, then they would return to the lower levels to start all over again. Just how much detail and time is put into the elevator is of course up to the developer.
Should all of the floors be the same height to make it easier on creating the path for the elevator? This is likely false. To illustrate that, these 4 floors were intentionally made with different heights. The first floor is the only tricky part; each remaining path_track is simple to get in place.
There isn't necessarily a right or wrong way to create these elevators, if it’s working the way desired, without errors, then it’s right.
Notice the differences between the two sample vmf’s below. Each uses the same elevator and surroundings. One is simple and stops on each floor. This is done by adding an Output to each path_track to stop the func_tracktrain and in this case another Output to pen the doors.
The more advanced version below doesn’t do that. Each path_track has a logic_relay it triggers. The trick is to have the elevator buttons enable or disable the logic_relays. A logic_relay that is disabled won’t do anything when it’s triggered.
Inside the elevator four func_button entities have been created, as shown below.
These buttons are textured with nodraw and each one is parented to the elevator.
For each button is a env_sprite, a really cheap way to create buttons but effective.
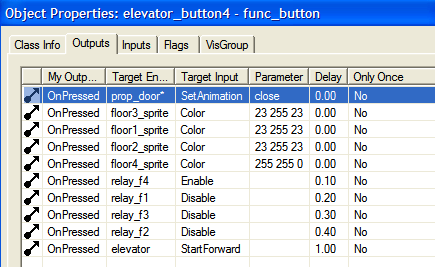
When the player presses any of the 4 buttons the sprite color is changed, a series of logic_relays are either enabled or disabled, the door animation is changed and the elevator is told to start forward. Shown below are the Outputs for button #4.
Each button has the same amount of Outputs, only different according to which floor is picked.
One thing not done for the simple elevator in this project is the addition of a feature that allows the user to call the elevator to a floor from outside of the elevator. This can be done by applying the outputs from these buttons to their respective floors.
The more advanced elevator below can be called from each floor, and the player spawns on Floor 3 to illustrate this.
Another consideration for the elevator would be custom materials for the buttons.
Notice one additional feature of this elevator, on the outside. Clip brushes for the columns on each side of the elevator have been created. These are not necessary but they add a nice touch to the map.
Clips like this can also be used from inside the elevator, to make it smother for the player and NPCs.
The sample projects below can be used to further guide anyone toward their desired path related to the items discussed in this article.
