|
|
| Line 1: |
Line 1: |
| {{subst:#if:|||{{LAuto/t}}
| | {{wip}}{{translating}} |
| | |
| --- DON'T JUST BLINDLY DELETE THIS PART. DO REPLACE THE LINKS AND CATEGORIES. THE PICTURE SHOWS HOW TO USE IT ! ---
| |
| | |
| SEARCH FOR:
| |
| \[\[(?!#|File(?:[ _]talk)?:|Image(?:[ _]talk)?:|Media:|Template(?:[ _]talk)?:|MediaWiki(?:[ _]talk)?:|Talk:|Category[ _]talk:|Project[ _]talk:|Valve[ _]Developer[ _]Community[ _]talk:|Help[ _]talk:|User(?:[ _]talk)?:|c:|commons:|Dictionary:|Google:|GoogleGroups:|IMDB:|M:|Meta:|Metawikipedia:|MW:|SdkBug:|SourceForge:|Steampowered:|W:|Wiki:|WikiBooks:|Wikipedia:|Wikiquote:|Wiktionary:|WP:)(:?(?:Category|Category|Help|Project|Valve[ _]Developer[ _]Community|Special|)(?:[^\|\]]+))(\|?.*?)\]\]
| |
| | |
| REPLACE WITH:
| |
| {{subst:LAuto|$1$2}}
| |
| | |
| }}{{wip}}{{translating}}
| |
| {{LanguageBar}} | | {{LanguageBar}} |
|
| |
|
|
| |
|
| {{Int level design}} | | {{Int level design}} |
| This tutorial will cover the more advanced lighting techniques used in {{src|4}} maps. If you are new to lighting in [[Valve Hammer Editor|Hammer]], you may want to read the [[Adding Light|basic light tutorial]] first. To begin the tutorial all the possible ways to create light will be covered and then onto all the settings related to playing with lighting. This will then be followed by a set of more in depth mini articles on how to use and take advantage of the lighting you’ve been introduced to.
| | 本教程将介绍在 {{src|4}} 地图中使用的高级光照。如果你是需要在 [[Valve Hammer Editor|Hammer]] 编辑器中创建光源的新手, 则可能需要先阅读 [[Adding Light|基础光照教程]] 。本教程首先将涵盖所有创建光源的可能方法,然后介绍与调节光源相关的所有设置。接下来将是一系列更深入的教程小节,来讲解如何充分利用你已所知的光源。 |
|
| |
|
| ==Light entities== | | ==灯光实体== |
| This is a list of entities that cast physical light in some form or another.
| | 以下是能够以某种形式投射物理光线的实体列表。 |
|
| |
|
| {{category header}} | | {{category header}} |
| {{category newcolumn}} | | {{category newcolumn}} |
|
| |
|
| [[File:int_light.jpg|thumb|150px|right|example of "light" entity]] | | [[File:int_light.jpg|thumb|150px|right|"light"实体示例]] |
| ==={{ent|light}}=== | | ==={{ent|light}}=== |
| [[File:Light.png|link=light|left]] | | [[File:Light.png|link=light|left]] |
|
| |
|
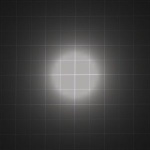
| A static, invisible, omni-directional light source. Able to set up with patterns given effects but cannot move locations. Light is cast in all directions from the origin of the entity. The brightness depends upon the falloff values you set up. This light entity is the simplest of all lights and is used commonly.
| | 一个静态的、本体不可见的全向光源。可配置预设光效模式,但无法移动位置。光线从实体原点向所有方向投射,亮度取决于设定的衰减值。该光源是所有光源中最基础的类型,应用十分广泛。 |
| {{note|It can be turned on and off through the [[Inputs and Outputs|I/O system]], but this will increase the complexity of your [[lightmap]]s, as pre-compiled values must be stored for each on/off combination and cost more memory.}} | | {{note|它可以通过 [[Inputs and Outputs|I/O 系统]] 打开和关闭,但这会增加 [[Lightmap|光照贴图]] 的复杂度, 因为必须为每个开关组合存储预编译值,因此会占用更多内存。}} |
|
| |
|
| {{category cell}} | | {{category cell}} |
|
| |
|
| [[File:int_spot.jpg|thumb|150px|right|example of "light_spot" entity]] | | [[File:int_spot.jpg|thumb|150px|right|"light_spot"实体示例]] |
| ==={{ent|light_spot}}=== | | ==={{ent|light_spot}}=== |
| [[File:light_spot.gif|link=light_spot|left]] | | [[File:light_spot.gif|link=light_spot|left]] |
|
| |
|
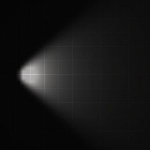
| A static, directional form of the light entity. This light can be pointed in any direction and contains controls for the shape and properties of the light cone. It can also be turned on and off through the [[Inputs and Outputs|I/O system]], though a switchable light_spot may cause lightmap errors. The controls of the light make it the easiest to mimic real-world light sources, and is recommended for common use.
| | light 实体的静态定向形式。此光源可以指向任何方向,并包含对光锥的形状和属性的控件。它也可以通过 [[Inputs and Outputs|I/O 系统]] 打开和关闭, 但需注意可开关的light_spot可能导致光照贴图错误。此光源的控件使之成为模拟真实光源最便捷的选择,推荐常规场景使用。 |
| {{note|When using this entity, it may be necessary to turn the brightness value up significantly to achieve visible results. Streetlights, for example, may need brightnesses of 3000-4000.}} | | {{note|使用此实体时,通常需要大幅提高亮度值才能获得可见效果。例如,用于路灯时可能需要将亮度设为3000-4000。}} |
|
| |
|
| {{category cell}} | | {{category cell}} |
|
| |
|
| [[File:int_envlight.jpg|thumb|A Hammer and an in-game representation.]] | | [[File:int_envlight.jpg|thumb|Hammer里和游戏里的表现]] |
| ==={{ent|light_environment}}=== | | ==={{ent|light_environment}}=== |
| [[File:light_environment.png|link=light_environment|left]] | | [[File:light_environment.png|link=light_environment|left]] |
| [[File:toolsskybox.gif|thumb|left|The [[Tool_textures#Sky_and_fog|skybox]] texture.]] | | [[File:toolsskybox.gif|thumb|left|[[Tool_textures#Sky_and_fog|天空盒]]纹理。]] |
|
| |
|
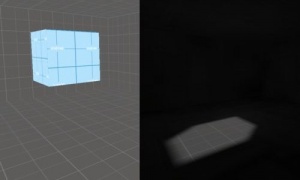
| A directional light cast in only one direction, commonly used for sunlight. The direction is decided by the values entered into the entity. The key is that the light is only cast from the <code>tools/toolsskybox</code> texture. The first key value, Brightness, controls direct lighting. This approximates direct sunlight. The second key value, Ambient, controls indirect lighting from the sky. This is the diffuse light that is cast on every face that can "see" the sky. Basically the color and brightness of the shadow the light leaves.
| | 一种仅朝单一方向投射光线的定向平行光源,常用于模拟阳光。其光照方向由实体参数值决定,关键在于,光线仅从 <code>tools/toolsskybox</code> 天空盒纹理投射。第一个键值亮度(Brightness)用于直接控制光照强度,用于模拟直射阳光的效果。第二个键值环境光(Ambient)控制来自天空的间接光照强度,表现为所有能"看到"天空的表面上投射的漫反射光。本质上决定了光源所产生的阴影区域的色彩和亮度。 |
|
| |
|
| If you don't want to come up with your own values for this entity, the values used in the {{src|4}} games for each skybox are listed in the [[Sky List]].
| | 如果你不想为实体设定自定义参数值,可以参考 {{src|4}} 系列游戏中的各天空盒所使用的预设值,具体数值详见 [[Sky List|天空盒列表]]。 |
|
| |
|
| Normally, only one light_environment entity is required per level. If multiple light_environment entities are placed, [[VRAD]] uses the [[keyvalue]]s from the first found light_environment to calculate the lighting.
| | 通常,每个关卡只需放置一个 light_environment 实体。如果放置了多个 light_environment 实体,[[VRAD]] 会使用第一个找到的 light_environment 的 [[keyvalue|键值]] 来计算光照。 |
|
| |
|
| {{category cell}} | | {{category cell}} |
|
| |
|
| [[File:int_point.jpg|thumb|225px|right|example of "point_spotlight" entity]] | | [[File:int_point.jpg|thumb|225px|right|"point_spotlight"实体示例]] |
| ==={{ent|point_spotlight}} and {{ent|npc_spotlight}}=== | | ==={{ent|point_spotlight}} 和 {{ent|npc_spotlight}}=== |
|
| |
|
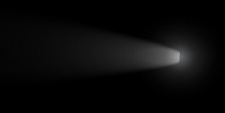
| A straight beam of light used for a spotlight effect. The visual effects include a flare around the light source, a beam along the direction it’s pointing, and a {{ent|light_dynamic}} where the beam touches the ground. While incapable of moving on its own, the light or its target may be tied to a moving entity. Alternatively, [[npc_spotlight]] can be used to produce the same visual effect while being controlled precisely and fluently by an [[NPC]]'s intelligence. This dynamic lighting source is expensive to render and should be used sparingly.
| | 一种用于聚光灯效果的直线光束光源。其视觉效果包含:光源周围的光晕特效、沿照射方向延伸的光束,以及光束接触地面时生成的 {{ent|light_dynamic}} 。该光源本身虽无法自主移动,但可通过绑定到移动实体或target来实现移动。此外,使用 [[npc_spotlight]] 实体在 [[NPC]] 智能控制下可产生相同的视觉效果,且能实现精准流畅的动态操控。需注意:此类动态光源渲染开销较高,应谨慎使用。 |
|
| |
|
| {{category end}} | | {{category end}} |
|
| |
|
| ==Related items== | | ==相关实体== |
| This is a list of all the topics related to lighting itself but don't emit light. While none of these emit any physical light they're all essential to creating effects with it. If it’s controlling the lighting of entities or controlling an [[npc antlion|antlion's]] shadow they all fall under lighting effects.
| | 以下是与光照效果相关但本身不发光的实体列表。虽然这些实体不产生实际光线,但对实现光影效果至关重要。无论是控制实体受光表现,还是操控 [[npc antlion|蚁狮]] 的阴影效果,均属于光照效果范畴。 |
|
| |
|
| {{category header}} | | {{category header}} |
| {{category newcolumn}} | | {{category newcolumn}} |
|
| |
|
| [[File:int_sun.jpg|thumb|right|The env_sun effect.]] | | [[File:int_sun.jpg|thumb|right|env_sun的效果。]] |
| ==={{ent|env_sun}}=== | | ==={{ent|env_sun}}=== |
| [[File:Env sun(gmod).png|link=env_sun|left]] | | [[File:Env sun(gmod).png|link=env_sun|left]] |
|
| |
|
| Often misinterpreted as a light that creates lighting like the sun it is instead an effect that places a flare in the sky that looks and acts like the sun. Casting no light at all it is often used with a light_environment to create its lighting effect.
| | 这个效果常被误认为是类似太阳的发光体,但实际上它只是在天空中添加一个模拟太阳外观与行为的光晕特效。该实体完全不投射光线,通常需要配合 light_environment 实体共同实现太阳的光照效果。 |
|
| |
|
| {{category cell}} | | {{category cell}} |
|
| |
|
| ==={{ent|env_sprite}}=== | | ==={{ent|env_sprite}}=== |
| One entity that also does not cast light is env_sprite. Env_sprite is mainly used for light glows and even as glares and other various extreme glows. In {{hl2ep1|4}}, a map near the end of the game uses env_sprite to simulate strong amounts of light in a large area filled with light. This is how env_sprite can be used to act as light pouring in from an area like outside of a dark place and even can be used for a more HDR friendly lighting technique. That map name near the end of {{hl2ep1|4}} is called ep1_c17_06_d.
| | 另一个不产生实际光照的实体是 env_sprite。该实体主要用于创建光源辉光(light glows)、眩光效果(glares)及其他各类高强度光效。在 {{hl2ep1|4}} 接近尾声的某关卡中,开发者运用 env_sprite 在充满光源的广阔区域内模拟出强烈光照效果——具体实现于地图 ep1_c17_06。这种技术既能模拟黑暗区域外倾泻而入的光线,又可作为更兼容HDR渲染的光照技术方案。 |
|
| |
|
| {{category cell}} | | {{category cell}} |
| Line 82: |
Line 72: |
| [[File:shadow_control.png|link=shadow_control|left]] | | [[File:shadow_control.png|link=shadow_control|left]] |
|
| |
|
| Used to control all the [[Lighting#Dynamic Shadows|dynamic shadows]] cast within the game. Shadows cast by any movable object (such as NPCs and physics entities) fall into this category. Used to line up the shadows angles so they appear correct with lighting. The one-directional nature may be a problem, but the use of triggers to control it may help. In {{l4d|4}}, {{portal2|4}}, and {{as|4}}, the direction of a shadow is calculated on a per-entity basis, dictated by the closest light to the entity. This does not exist in {{Src06|4}}, {{src07|4}} and {{src13|4}} mods unless you apply [[Dynamic RTT shadow angles in Source 2007]] to your mod.
| | 该实体用于控制游戏中所有 [[Lighting#Dynamic Shadows|动态阴影]] 的投射。任何可移动物体(如NPC和物理实体)投射的阴影均属此范畴,其核心功能是校准阴影角度以确保与光照方向一致。虽然单一方向投射的特性可能会造成问题,但可通过触发器动态控制来优化。在 {{l4d|4}}, {{portal2|4}},和 {{as|4}} 的引擎中,阴影方向采用逐实体计算机制——根据距离实体最近的光源动态确定。但该功能在 {{Src06|4}}, {{src07|4}} 及 {{src13|4}} 的模组中并不存在,除非你将 [[Dynamic RTT shadow angles in Source 2007|Source 2007引擎动态RTT阴影角度控制]] 应用于你的模组。 |
|
| |
|
| {{code|shadow_control}} is designed for use with {{ent|light_environment}}, and is therefore of very limited use with <code>light</code>, <code>light_spot</code>, <code>light_dynamic</code>, or other lighting entities. | | {{code|shadow_control}} 是为配合 {{ent|light_environment}} 的使用而设计的,因此其与 <code>light</code>, <code>light_spot</code>, <code>light_dynamic</code>,或其他光源实体一起使用时作用极其有限。 |
| * {{code|shadow_control}} calculates shadows from only one light source, and only one shadow_control per environment will work, so an object may cast only one dynamic shadow. | | * {{code|shadow_control}} 仅计算来自一个光源的阴影,且每个场景只能有一个 shadow_control 生效,因此一个物体最多只能投射一个动态阴影。 |
| * {{code|shadow_control}} calculates shadows only from 'parallel' light rays (e.g., the Sun or Moon), not rays radiating from a point source (e.g., a light bulb). | | * {{code|shadow_control}} 仅计算来自“平行”光线(例如太阳或月亮)的阴影,不计算来自点光源(例如light)的放射状光线产生的阴影。 |
| * {{code|shadow_control}} has no effect on [[lightmap]]s (and vice versa). | | * {{code|shadow_control}} 对 [[lightmap|光照贴图]] 的阴影没有影响(反之亦然)。 |
| * {{code|shadow_control}} are deprecated (and not used) in {{csgo|4}}, instead {{code|[[env_cascade_light]]}} is used. | | * {{code|shadow_control}} 在 {{csgo|4}} 中已被弃用(且不再使用),取而代之的是 {{code|[[env_cascade_light]]}} 实体。 |
| Dynamic shadows do not blend well with subtle lightmap shadows.
| | 动态阴影与细腻的光照贴图阴影融合效果不佳。 |
| * Movable objects (such as most entity models) never cast lightmap shadows, but do cast dynamic shadows (when <code>shadow_control</code> is enabled). Only [[Brush|world brushes]] and <code>prop_static</code>s never cast dynamic shadows (though they do cast lightmap shadows). | | * 可移动物体(例如大多数实体模型)从不投射光照贴图阴影,但会投射动态阴影 (当启用 <code>shadow_control</code> 时)。只有 [[Brush|世界几何体]] 和 <code>prop_static</code> 从不投射动态阴影(但它们会投射光照贴图阴影)。 |
| * Lightmap Scale does not affect dynamic shadow detail/diffusion (lightmap scale equivalent would be 1 luxel/unit). | | * 光照贴图缩放比例 (Lightmap Scale) 不影响动态阴影的细节/柔化程度(动态阴影相当于固定为 1 luxel/单位 的光照贴图分辨率)。 |
| * Dynamic shadows and lightmap shadows from the same light source do not merge, but overlap or "double-up". | | * 来自同一光源的动态阴影和光照贴图阴影不会合并,而是会重叠或者“双重出现”。 |
| * Dynamic shadows are only received by brushes. | | * 动态阴影只能被世界几何体(Brush)接收。 |
| See also {{ent|info_no_dynamic_shadow}}.
| | 另请参阅 {{ent|info_no_dynamic_shadow}} 实体。 |
|
| |
|
| {{category cell}} | | {{category cell}} |
|
| |
|
| ===[[VRAD]]=== | | ===[[VRAD]]=== |
| It is the part of the compiling process that will generate all your lighting effects, it’s also one of the longest parts of a compile and can often be the one you need to run the most. With no way to estimate lighting effects apart from experience, it can often be tiresome to compile enough time to get a lighting effect right. The topic of how to compile Rad well is tackled later. For now familiarization with its features and setup should be a priority.
| | RAD光照编译是编译过程中的关键环节,负责生成场景中的所有光照效果。它不仅是编译过程中最耗时的阶段,通常也是需要反复执行最频繁的环节。由于光照效果除经验积累外无法预先精确估算,往往需要通过多次枯燥的编译调试才能达到理想效果(可以通过使用 {{hammerpp|4}} 来简化此过程)。关于如何优化RAD编译的专题将在后续讨论,当前应优先掌握其核心功能和参数配置。 |
|
| |
|
| {{category end}} | | {{category end}} |
|
| |
|
| ==Techniques== | | ==技巧== |
| This covers how to use the mentioned items to create effective lighting. Before, a lot of practical knowledge was covered. But knowledge is useless unless it's utilized well. The next few sections are specifics about how to use all the information to create better lighting in your maps.{{clr}}
| | 本节将指导如何运用前述实体实现高效光照。前文已系统阐述了大量实践知识,但唯有付诸实践方能发挥其价值。后续章节将着重探讨如何综合运用这些技术要点,在你的地图设计中提升光照效果的质量和表现能力。{{clr}} |
|
| |
|
| ===Color temperature=== | | ===色温=== |
| While the [[RGB]] color of the ''Brightness'' setting of every light entity is preset to <code>255 255 255</code>, very few forms of real life lighting are actually white in color. Depending on the "blackbody temperature" of the light emitted, it will emit a color somewhere between orange "red" (referred to as "warm", although its temperature is actually lower) and ultra violet "blue" (referred to as "cool"), as shown accurately [http://www.techmind.org/colour/coltemp.html on this scale]. You can use [[Wikipedia:Color_temperature|this article]] as a reference to where on the scale your light source should end up, or you can use Valve map standards, where the RGB value for a common tungsten light bulb is a "warm" <code>254 216 146</code>, a common fluorescent light is a "cool" <code>159 237 215</code>, and usual Combine lighting is an icy <code>147 226 240</code>.
| | 虽然所有光源实体(light entity)的亮度参数(''Brightness'') 的 [[RGB]] 颜色值预设为 <code>255 255 255</code>(纯白),但现实中极少会有光源可以发出纯白色的光。根据光源发出的“黑体温度(blackbody temperature)”不同,其发出的光线将呈现介于橙色“红”光(通常称为“暖色(warm)”,尽管其实际温度较低)与紫外“蓝”光(通常称为“冷色(cool)”)之间的某种色调,如此 [http://www.techmind.org/colour/coltemp.html 色温标尺] 所示。你可以参考 [[Wikipedia:Color_temperature|维基百科 “色温”条目]] 来确定光源在色温标尺上的目标位置,或直接采用 Valve 地图制作标准中的常用 RGB 值,常见的白炽灯泡(钨丝灯)为“暖色”,RGB 值为 <code>254 216 146</code>,常见的荧光灯为“冷色”,RGB 值为 <code>159 237 215</code>,联合军的常用灯光则为冰冷的 <code>147 226 240</code>。 |
|
| |
|
| ===Lighting psychology=== | | ===照明心理学=== |
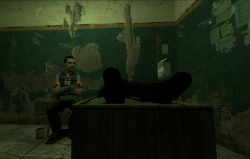
| [[File:Lighting-greentinge.jpg|thumb|250px|There are many color combinations to be found. Here, a delicate green tinge gives a sickly appearance.]] | | [[File:Lighting-greentinge.jpg|thumb|250px|色彩组合千变万化。这里,一抹精致的绿调呈现出病态的观感。]] |
|
| |
|
| It has been proven that cooler lighting in the "blackbody temperature" spectra (see above) will stress players, making them feel uneasy and sometimes even sick, while warmer lighting will not.
| | 经证实,“黑体温度”辐射光谱(参见上文)中色温较高的冷色调照明会引发玩家的心理压力,使其产生不安甚至生理不适感;而暖色调照明则无此影响。 |
|
| |
|
| This subconscious emotional response to lighting can be utilized to deliver purposely lighted environments that will set the mood of the player. It can be as simple as choosing between using fluorescent lights (for horror settings) or glowing light bulbs (for safe environments).
| | 这种对光照的潜意识情绪反应可被用于构建具有特定情绪导向的光照环境。其应用可简至选择荧光灯(营造恐怖场景)或白炽灯泡(塑造安全区域)。 |
|
| |
|
| For instance, in the first map of {{hl2|4}} there is a corridor that a civil protection guard will escort the player through when he is being brought in for interrogation (or what-not). Examination of the lighting will reveal that Valve has kept the psychological effects in mind while setting it. The corridor starts off with a standard tungsten lamp (with a warm glow), directly followed by a fluorescent light (with an uneasy glow). This combination is at most very rare in real life, because it would require that the architect would suddenly change his mind while designing the corridor, or the electrician running out of light fixtures. It is more likely that Valve (or the Combine) wanted to achieve the effect that one would be walking from a safe environment to an unsafe one.
| | 例如,在 {{hl2|4}} 的第一张地图中, 当玩家被国民护卫队押送至审讯区时,会经过一条走廊(或者其他的什么)。分析其照明设计可发现Valve对心理效应的精准把控——走廊起始处采用标准钨丝灯(散发温暖光晕),紧接着却突变为荧光灯(释放令人不安的冷光)。这种组合在现实中极为罕见(除非建筑师中途更改设计或电工用尽灯具),实则暗示Valve(或联合军)意图制造"从安全领域步入危险地带"的心理过渡。 |
|
| |
|
| In the cell before the one the player enters, he may bear witness to an unsettling scene involving a citizen explaining his predicament. Here there is a tungsten light hanging from the ceiling. This is probably because a fluorescent light would clash too much with the small, cubic room. (Fluorescent lights are usually used for corridors and large areas.) However, off to the side, is a ''disembodied'' [[light_spot]], whose sole purpose is to provide the mood lighting for the scene.
| | 在玩家进入的牢房前,他可能会目睹一个令人不安的场景,囚室内正上演市民倾诉困境的压抑场景。此处天花板悬挂钨丝灯。这可能是因为荧光灯会与立方体小房间产生巨大的冲突感(荧光灯通常用于走廊及开阔区域)。在侧面,有一个无形的 [[light_spot]],其唯一作用正是为场景注入情绪张力。 |
|
| |
|
| Apart from the above direct effects, using [[Color Theory in Level Design|color theory]] can also aid in setting the mood of the environment through indirect half subconscious association. Taking fluorescent lights as an example, they have a cold uneasy feeling in general, so the soft unnatural blue glow can conjure up feelings of cold emptiness and isolation.
| | 除上述直接影响外,运用 [[Color Theory in Level Design|色彩理论]] 还能通过间接的潜意识联想塑造环境氛围。以荧光灯为例:其冷调幽光天然携带不安感,这种非自然的淡蓝辉光可唤起冰冷、虚无与孤立的情绪联想。 |
|
| |
|
| The color isn't the only effect though. The spacing and brightness of the light and what isn't lit, carries much weight too. Bright rooms feel safer because what's there is directly visible and easy to work with, but on the other hand sporadically dotted lights will amplify or create an uneasy feeling because the user has so much hidden or not quite visible to them. Along the same lines, if every corner of a room is lit except one, that corner will be perceived as holding a potential threat, or other hidden stuff, and will therefore often draw the exploring players attention.
| | 色彩并非唯一影响因素。光源的排布密度、亮度及未照亮区域同样至关重要。明亮的房间感觉更安全,因为其中的一切都清晰可见、易于应对;但另一方面,零星散布的点状光源会放大或制造一种不安感,因为玩家有太多被隐藏的或者难以看清的地方。同理,如果一个房间的所有角落都被照亮,唯独一个角落是暗的,那个角落就会被视为潜在的威胁或者其他隐藏的东西,反而会吸引探索玩家的注意。 |
|
| |
|
| Using this knowledge is up to the level designer. Horror maps and kids games alike can be augmented by it, and accidentally creating a spooky kids game is a sure way to lose the pay check for the work. Lighting doesn't just make things be seen, it defines how they appear to everyone.
| | 如何运用这些原理取决于关卡设计师。无论是恐怖地图还是儿童游戏皆可受惠于此——但倘若意外将儿童游戏做得阴森而恐怖,则注定会失去这项工作的薪水。光照不仅赋予物体可见性,更决定了它们在所有观察者眼中的情感呈现。 |
|
| |
|
| ===Creating a believable light source=== | | ===创造合理的光源=== |
| Creating a believable light source can often be a challenge. Simply placing a light entity in a map does nothing to explain where that light came from or why it's there. A believable light source is one that appears like it should be there and sits comfortably within the environment. Often a good light is made up of multiple entities. Commonly there are two: One for the light and one for its source, often a lamp (made from a prop_static or a [[func_detail]] with an appropriate texture).
| | 在游戏场景中创造合理的光源往往颇具挑战。仅在场景中放置一个光源实体并不能解释光线从何而来或为何存在。合理的光源需符合环境逻辑且位置合理,通常需要多个实体协作才能实现。最常见的是双实体组合:一个是光源实体,负责实际照明,另一个是视觉实体,通常表现为灯具(由具有适当纹理的prop_static或 [[func_detail]] 构成)。 |
|
| |
|
| [[File:Light_decklight01_on.jpg|thumb|125px|right|A common lamp.]] | | [[File:Light_decklight01_on.jpg|thumb|125px|right|A common lamp.]] |
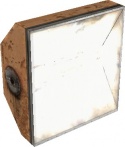
| The first step is to determine what light sources are available. Look for textures or models that would be emitting light. Filtering by the word "light" or "lamp" in either the model or texture browser, works well. Now pick one that fits the feel of the room (i.e. industrial lights for an industrial scene) and place that model or texture in the room. For this example pick the light shown on the right and place it with a prop_static.
| | 第一步是确定有哪些可用的光源。寻找会发光的纹理或模型。在模型或纹理浏览器中通过关键词 “light”(灯)或 “lamp”(灯具)进行筛选,效果很好。现在选择一个符合房间氛围的(例如,工业场景用工业灯),并将该模型或纹理放置在房间中。在本示例中,选择右侧展示的灯,并使用 prop_static 放置它。 |
|
| |
|
| Now that there's something that looks like it would emit light, the next step is to create the light it's emitting. Look at the source that has been chosen and ask yourself if the light emitted is going to be colored by tinted glass, and if the source is focusing/shading the light into a directed light source. Use the assorted light entities and set its properties accordingly to create the effect. With the given example the light is going to be focused in one direction, so pick a light_spot. Next, this is an intense light, so give it a brightness of 1000. Now look at its color. The glass is not tinted, and while the light emitted is intense, a flood light in the real world will gain its intensity through using very reflective surfaces on its inside to focus the light, so the temperature is also close enough to justify leaving the values at <code>255 255 255</code>. Now line it up compared to the prop_static, and alter the angles and focus of the light so that it appears to come from the prop_static.
| | 现在有了看起来会发光的东西,下一步就是创建它所发出的光。观察选定的光源,思考发出的光是否会因有色玻璃而变色,以及光源本身是否会将光线聚焦/遮挡形成定向光源。使用各种光源实体,并相应地设置其属性来创建效果。在给定的示例中,灯光将会聚焦在一个方向上,因此选择 light_spot 。其次,这是一个强光源,所以将其亮度(brightness)设为 1000。现在观察它的颜色。玻璃没有着色,虽然发出的光很强,但现实中探照灯会通过内部使用高反光表面来聚焦光线以获得强度,因此色温也足够接近,可以保留颜色值在 <code>255 255 255</code>(纯白)。现在将其与 prop_static 对齐,调整灯光的角度和聚焦范围,使其看起来像是从 prop_static 发出的。 |
|
| |
|
| Now there’s a light lined up to its source, there may be a problem though. If the aligned light source has ended up inside the boundaries of the model/brush used for the source, it is going to block the light emitted (only lighting up props). To prevent this, go into the properties of the prop_static, and make sure that it has "Disable shadows" set to "Yes". (If the light source is a brush, tie it to a [[func_brush]] and alter its properties in the same way. This prevent the light from being blocked by the light source itself.
| | 现在光源已经与其模型对齐了,但可能还存在一个问题。如果对齐的光源最终位于光源模型/实体的边界内部,它将会阻挡发出的光线(只能照亮道具)。为防止这种情况,进入 prop_static 的属性,确保将“禁用阴影”(Disable shadows)设置为“是”(Yes)。(如果光源是 [[Brush|世界几何体]] ,将其绑定到一个 [[func_brush]] 上,并以相同方式修改其属性)。这样可以防止光源被自身模型阻挡。 |
|
| |
|
| Now that you have a working setup, a good idea is to group them (and perhaps also turn this group into a prefab for insertion into other maps) so that they always stay together. Now if you need more lights, you can copy this group.
| | 现在你有了一个可用的设置,一个好主意是将它们编组(并且还可以将这个组制作成预制件(prefab)以便插入到其他地图中),这样它们就能始终保持在一起。现在如果需要更多灯光,就可以复制这个组。 |
|
| |
|
| Another way to create a high quality light source that portrays real life better but doesn't compromise on performance, is combination of a light and light_spot. Position the light_spot as described above, but position the light around 50 units away from the model that is the light's source. Make this light have a brightness of approximately 50, and be the same color as the light_spot. This will often create a more correct form of glow on surfaces that the light_spot often lacks.{{clr}}
| | 另一种创建高质量光源的方法,能更好地模拟现实效果且不影响性能,是组合使用 light 和 light_spot 。像上面描述的那样放置 light_spot ,但将 light 放置在距离作为光源的模型约 50 单位(units)的位置。将这个 light 的亮度设为大约 50,颜色与 light_spot 相同。这通常能在 light_spot 不能照亮的表面上创建出更正确的辉光效果。{{clr}} |
|
| |
|
| ===Static versus dynamic=== | | ===静态与动态=== |
| There are many advantages, performance wise, of using static light sources over dynamic ones. Static lights carry no additional processing weight so their use is essential to fast rendering maps. Dynamic lights can carry a lot of rendering weight and can be expensive to use in your map. Its important to know where and when to use each type of light and avoid using the wrong type.
| | 在性能方面,使用静态光源相比动态光源具有诸多优势。静态光源不会增加额外的处理负担,因此对实现快速渲染地图至关重要。而动态光源可能带来巨大的渲染开销,在地图中过度使用代价高昂。掌握不同类型光源的适用场景,避免错误地使用至关重要。 |
|
| |
|
| Firstly, static lights are calculated during the VRAD compile process; therefore, there are next to no calculations done in-game—it merely needs to render the pre-calculated light, which is a fast process. The common static light entities are <code>light</code>, <code>light_spot</code>, and <code>light_environment</code>, but there are conditions that can change this. The problem that comes with static lights is the fact that they are static. While static lighting allows very precise and detailed lighting for little processing cost, no special effects can be given, because it isn't going to change.
| | 首先,静态光源是在VRAD编译过程中计算的;因此,在游戏运行时几乎无需进行任何计算——它只需要渲染预先计算好的光照,这是一个很快的过程。常见的静态光源实体包括 <code>light</code> 、<code>light_spot</code> 和 <code>light_environment</code> ,但在某些条件下也可能发生变化。静态光源带来的问题在于其固定不变的特性。虽然静态光照能以极低的处理成本实现非常精确和细致的照明效果,但无法实现任何特效,因为它不能发生变化。 |
|
| |
|
| Dynamic lighting, on the other hand, comes in two flavors. There are the switchable lights and the true dynamically calculated lights. Each has its own processing weight but both are expensive to render and should be used sparingly.
| | 另一方面,动态光照分为两种类型。一种是可开关光源(switchable lights),另一种是纯动态计算光源(true dynamically calculated lights)。每种类型都有其自身的处理负担,但两者渲染代价都很高昂,应谨慎使用。 |
|
| |
|
| Switchable lights are the same as static lights in that they use lightmap information compiled during RAD. A light is set as being switchable by one of three things: giving it a name, giving it a style, or giving it a pattern. Regular lights that don't support dynamic effects are the lights generally used as switchable lights, including <code>light</code> and <code>light_spot</code> but '''not''' <code>light_environment</code>. Switchable lights use a set of two lightmaps, on and off. Switchable lights alternate or blend between the two lightmaps, allowing partial brightness while keeping it to just two lightmaps. This gives all the benefits of the static lighting but allows it to change and be partially dynamic. Say you have two switchable lights shining on the same face, how many lightmaps are needed?
| | 可开关光源(switchable lights)与静态光源在本质上相同,因为它们都使用在RAD编译过程中生成的光照贴图(lightmap)信息。将一个光源设置为可开关的方式有以下三种之一:为其指定名称(name)、赋予其样式(style) 或设置其模式(pattern)。通常用作可开关光源的是那些不支持动态效果的标准光源,包括 <code>light</code> 和 <code>light_spot</code> ,但不包括 <code>light_environment</code> 。可开关光源使用两组光照贴图:一组对应开启状态,一组对应关闭状态。它们通过在这两组光照贴图之间切换或混合来实现亮度变化(例如渐变效果),同时始终保持仅需两组贴图。这既保留了静态光源的所有优势,又允许光源状态发生改变并实现部分动态效果。那么问题来了:假设有两个可开关光源同时照射在同一个表面上,需要多少组光照贴图? |
|
| |
|
| * Light 1 & 2 ON | | * 灯 1 & 2 开 |
| * Light 1 ON, 2 OFF | | * 灯 1 开, 2 关 |
| * Light 1 OFF, 2 ON | | * 灯 1 关, 2 开 |
| * Light 1 & 2 OFF | | * 灯 1 & 2 关 |
|
| |
|
| That's four states in total. You add a third switchable light and it goes up to eight lightmaps. Herein lies the problem with switchable lights—it becomes expensive in lightmaps to create all the possible states. So expensive, in fact, that there is a hard-coded limit that means you can only have two switchable lights affecting the same face. There is a slight solution though: lights with identical names will all be given the same lightmap, so you can have 50 switchable lights with the same name shining on the same face; however, you cannot have more than 32 light source names. Because of the extra lightmaps required, switchable lights increase the amount of time it takes RAD to run, increase file size, and use system resources when they alternate between states; however, a switchable light sitting in a specific state has no more runtime cost than a static light.
| | 那么总共会有四种状态。如果再添加第三个可开关光源,光照贴图数量将增加到八组。这就是可开关光源的问题所在——为了创建所有可能的状态组合,所需的光照贴图会变得非常昂贵。事实上,其开销如此之大,以至于存在一个硬编码限制(hard-coded limit):同一表面上最多只能有两个可开关光源产生影响。不过有一个折中方案:具有相同名称的光源将共享同一组光照贴图。因此,你可以让 50 个同名的可开关光源照射在同一表面上;然而,光源名称组的数量最多不能超过 32 个。由于需要额外的光照贴图,可开关光源会增加 RAD 编译所需的时间,增大文件体积,同时在状态切换时消耗系统资源。但是,一个稳定在特定状态(不进行切换)的可开关光源,其运行时开销不比静态光源高。 |
|
| |
|
| True dynamic lighting is something that has to be built into the entity itself, most often recognized by the Parent property within the entity. The entities with the built-in dynamic effect are <code>light_dynamic</code> and <code>point_spotlight</code>. You can also enable arbitrary dynamic entities to shed dynamic light with the <code>[[EF_BRIGHTLIGHT]]</code> or <code>[[EF_DIMLIGHT]]</code> [[Effect flags|effect flags]]. <code>point_spotlight</code> is special in that it has a flag that can enable it as dynamic or static. This flag is set to dynamic by default, which can often catch you off-guard. The rendering process done for dynamic lights is run entirely within the game at runtime. This means it has little to no effect on the RAD compile or file size, but it will slow down your map. Dynamic lights should be used even more sparingly than switchable lights. The system slowdown caused by dynamic lights is generally consistent as the light needs to be rendered continuously. Such entities should only be used when the source of the light is moving. If the light itself is not meant to move, then it shouldn't be a true dynamic light. If it’s merely meant to turn on and off, a switchable light should be used instead. If used improperly, the costs of dynamic lighting will outweigh its benefits. Another downside to dynamic light is that, to simplify calculations, it doesn’t run processes like reflection and diffusion, resulting in harsher- and simpler-looking lights.
| | 纯动态计算光源(True dynamic lighting) 是指其动态效果必须内置于实体本身,最常见的识别办法是通过实体内的 Parent(父级)属性来识别。具有内置动态效果的实体是 <code>light_dynamic</code> 和 <code>point_spotlight</code> 。你也可以通过设置 [[Effect flags|效果flags]] 中的 [[EF_BRIGHTLIGHT]] 或 [[EF_DIMLIGHT]] flags,使任意动态实体投射动态光。<code>point_spotlight</code> 比较特殊,它有一个flags可以将其启用为动态或静态。此flags默认设置为动态,这常常会让人措手不及。动态光源的渲染过程完全在游戏运行时进行。这意味着它对 RAD 编译过程或文件大小几乎没有影响,但会拖慢你的地图运行速度。动态光源的使用应比可开关光源更加谨慎。动态光源导致的系统减速通常是持续性的,因为光源需要持续渲染。此类实体应仅用于光源本身需要移动的情况。如果光源本身不打算移动,那么它就不应该是一个真正的动态光。如果它仅仅是为了开启和关闭,那么应该使用可开关光源(switchable light)代替。如果使用不当,动态光照的成本将超过其收益。动态光的另一个缺点是,为了简化计算,它不运行反射和漫射等过程,这会导致光照效果看起来更刺眼、更简单。 |
|
| |
|
| Static lights are easy on the engine and give great detail, but dynamic lights represent the possibility for movement and change. The easiest way to tell what effect the dynamic lights are having is to test your map with the <code>+[[Showbudget]]</code> command. This allows you to figure out when an effect is too much and lighting effects are slowing down your map. Good use of dynamic lights can improve your map, but they can be a costly effect.{{clr}}
| | 静态光源引擎负担轻且细节表现佳,而动态光源则提供了运动与变化的可能性。判断动态光源影响的最简单方法是使用 <code>+[[Showbudget]]</code> 命令测试地图。这使你能够实时监测特效是否过度,以及光照效果是否在拖慢地图运行速度。合理运用动态光源可以提升地图效果,但它们本质上是一种代价高昂的特效。{{clr}} |
|
| |
|
| ===Quick and effective RAD=== | | ===快速高效RAD编译=== |
| The RAD compile process can be quite long, so frequently compiling can easily slow development progress to a crawl. There are a number of strategies you can employ to tackle this:
| | RAD 编译过程可能相当漫长,频繁编译很容易拖慢开发进度。你可以采用以下几种方法来解决这个问题: |
| * Turn off RAD for the majority of your compiles, and only turn it on specifically when you want to tweak and test your lighting. | | * 在大多数编译中关闭 RAD,仅在需要调整和测试光照时专门开启它。 |
| * Use the [[Hammer Cordon Usage|Cordon]] tool, so you are never compiling more of the level than you need to. (If you are using a [[light_environment]], make sure that you copy it so that there is one within the cordon boundary.) | | * 使用 [[Hammer Cordon Usage|警戒线]] 工具,确保只编译你需要修改的区域。(如果使用了 [[light_environment]],请复制一份环境光实体,确保其位于分区边界内。) |
| * Make multiple changes at once. Rather than tweaking just one section of lights in the map, can you tweak multiple sets in different parts of the level, and then compile all your changes at once. | | * 一次性进行多项修改。与其只调整地图中某一部分的光照,不如尝试调整地图不同区域的多组光照,然后一次性编译所有更改。 |
| * Standardize your lighting. Choose RGB and brightness values for each type of light in your level (e.g. fluorescents, or spotlights, etc), and make each instance of that type of light have the same values to start with. Then instead of coming up with light values for each light in your level, you need only slightly tweak the light values to get the effect you need (e.g. a larger room might need a larger light of a particular type). | | * 标准化你的光照。为地图中每种类型的光源(例如荧光灯、聚光灯等)选定统一的 RGB 值和亮度值,让该类型的每个光源实例都使用相同的初始值。这样就不必为地图中的每个光源单独设定数值,只需根据具体需求微调光源数值即可(例如,较大的房间可能需要使用更大的同类型光源)。 |
| * Make use of any spare computer you have in your house. Install the SDK on those computers and use them to do your lighting compiles. Then you can continue doing other edits to the level, while you wait for the results of the lighting compile. | | * 利用家中任何闲置的电脑。在这些电脑上安装 SDK,并用它们来进行光照编译。这样你就可以在等待光照编译结果的同时,继续对地图进行其他编辑。 |
| **Using a program like [https://www.dropbox.com Dropbox] or [https://sparkleshare.org/ SparkleShare] can automate synchronizing your map files, and make this easier. | | * 使用像 [https://www.dropbox.com Dropbox] 或 [https://sparkleshare.org/ SparkleShare] 这样的程序可以自动同步地图文件,使这个过程更加容易。 |
|
| |
|
| ==Conclusion== | | ==结论== |
| This covers the base of all lighting effects that can be found in standard Source games.
| | 这涵盖了在标准 Source 引擎游戏中可找到的所有光照效果的基础知识。 |
|
| |
|
| ==See also== | | ==另请参见== |
| * [[Lighting]] | | * [[Lighting|光照]] |
| * [[Advanced Lighting]] | | * [[Advanced Lighting|高级光照]] |
|
| |
|
| [[Category:Lighting]] | | [[Category:Lighting|光照]] |
| [[Category:Level Design]] | | [[Category:Level Design|关卡设计]] |
This page is actively undergoing a major edit.As a courtesy, please do not edit this while this message is displayed.
If this page has not been edited for at least several hours to a few days, please remove this template. This message is intended to help reduce edit conflicts; please remove it between editing sessions to allow others to edit the page.
The person who added this notice will be listed in its edit history should you wish to contact them.
This page is being translated.You can help by finishing the translation.
If this page cannot be translated for some reason, or is left untranslated for an extended period of time after this notice is posted, the page should be requested to be deleted.
Also, please make sure the article complies with the
alternate languages guide.(en)
本教程将介绍在  起源 地图中使用的高级光照。如果你是需要在 Hammer 编辑器中创建光源的新手, 则可能需要先阅读 基础光照教程 。本教程首先将涵盖所有创建光源的可能方法,然后介绍与调节光源相关的所有设置。接下来将是一系列更深入的教程小节,来讲解如何充分利用你已所知的光源。
灯光实体
以下是能够以某种形式投射物理光线的实体列表。
|
一个静态的、本体不可见的全向光源。可配置预设光效模式,但无法移动位置。光线从实体原点向所有方向投射,亮度取决于设定的衰减值。该光源是所有光源中最基础的类型,应用十分广泛。
 注意:它可以通过 I/O 系统 打开和关闭,但这会增加 光照贴图 的复杂度, 因为必须为每个开关组合存储预编译值,因此会占用更多内存。 注意:它可以通过 I/O 系统 打开和关闭,但这会增加 光照贴图 的复杂度, 因为必须为每个开关组合存储预编译值,因此会占用更多内存。 |
|
light 实体的静态定向形式。此光源可以指向任何方向,并包含对光锥的形状和属性的控件。它也可以通过 I/O 系统 打开和关闭, 但需注意可开关的light_spot可能导致光照贴图错误。此光源的控件使之成为模拟真实光源最便捷的选择,推荐常规场景使用。
 注意:使用此实体时,通常需要大幅提高亮度值才能获得可见效果。例如,用于路灯时可能需要将亮度设为3000-4000。 注意:使用此实体时,通常需要大幅提高亮度值才能获得可见效果。例如,用于路灯时可能需要将亮度设为3000-4000。 |
|
一种仅朝单一方向投射光线的定向平行光源,常用于模拟阳光。其光照方向由实体参数值决定,关键在于,光线仅从 tools/toolsskybox 天空盒纹理投射。第一个键值亮度(Brightness)用于直接控制光照强度,用于模拟直射阳光的效果。第二个键值环境光(Ambient)控制来自天空的间接光照强度,表现为所有能"看到"天空的表面上投射的漫反射光。本质上决定了光源所产生的阴影区域的色彩和亮度。
如果你不想为实体设定自定义参数值,可以参考  起源 系列游戏中的各天空盒所使用的预设值,具体数值详见 天空盒列表。 起源 系列游戏中的各天空盒所使用的预设值,具体数值详见 天空盒列表。
通常,每个关卡只需放置一个 light_environment 实体。如果放置了多个 light_environment 实体,VRAD 会使用第一个找到的 light_environment 的 键值 来计算光照。
|
|
一种用于聚光灯效果的直线光束光源。其视觉效果包含:光源周围的光晕特效、沿照射方向延伸的光束,以及光束接触地面时生成的 light_dynamic 。该光源本身虽无法自主移动,但可通过绑定到移动实体或target来实现移动。此外,使用 npc_spotlight 实体在 NPC 智能控制下可产生相同的视觉效果,且能实现精准流畅的动态操控。需注意:此类动态光源渲染开销较高,应谨慎使用。
|
相关实体
以下是与光照效果相关但本身不发光的实体列表。虽然这些实体不产生实际光线,但对实现光影效果至关重要。无论是控制实体受光表现,还是操控 蚁狮 的阴影效果,均属于光照效果范畴。
|
这个效果常被误认为是类似太阳的发光体,但实际上它只是在天空中添加一个模拟太阳外观与行为的光晕特效。该实体完全不投射光线,通常需要配合 light_environment 实体共同实现太阳的光照效果。
|
|
另一个不产生实际光照的实体是 env_sprite。该实体主要用于创建光源辉光(light glows)、眩光效果(glares)及其他各类高强度光效。在  半衰期2:第一章 接近尾声的某关卡中,开发者运用 env_sprite 在充满光源的广阔区域内模拟出强烈光照效果——具体实现于地图 ep1_c17_06。这种技术既能模拟黑暗区域外倾泻而入的光线,又可作为更兼容HDR渲染的光照技术方案。 半衰期2:第一章 接近尾声的某关卡中,开发者运用 env_sprite 在充满光源的广阔区域内模拟出强烈光照效果——具体实现于地图 ep1_c17_06。这种技术既能模拟黑暗区域外倾泻而入的光线,又可作为更兼容HDR渲染的光照技术方案。
|
|
该实体用于控制游戏中所有 动态阴影 的投射。任何可移动物体(如NPC和物理实体)投射的阴影均属此范畴,其核心功能是校准阴影角度以确保与光照方向一致。虽然单一方向投射的特性可能会造成问题,但可通过触发器动态控制来优化。在  求生之路, 求生之路,  传送门2,和 传送门2,和  异形丛生 的引擎中,阴影方向采用逐实体计算机制——根据距离实体最近的光源动态确定。但该功能在 异形丛生 的引擎中,阴影方向采用逐实体计算机制——根据距离实体最近的光源动态确定。但该功能在  起源2006, 起源2006,  起源2007 及 起源2007 及  起源2013 的模组中并不存在,除非你将 Source 2007引擎动态RTT阴影角度控制 应用于你的模组。 起源2013 的模组中并不存在,除非你将 Source 2007引擎动态RTT阴影角度控制 应用于你的模组。
shadow_control 是为配合 light_environment 的使用而设计的,因此其与 light, light_spot, light_dynamic,或其他光源实体一起使用时作用极其有限。
shadow_control 仅计算来自一个光源的阴影,且每个场景只能有一个 shadow_control 生效,因此一个物体最多只能投射一个动态阴影。shadow_control 仅计算来自“平行”光线(例如太阳或月亮)的阴影,不计算来自点光源(例如light)的放射状光线产生的阴影。shadow_control 对 光照贴图 的阴影没有影响(反之亦然)。shadow_control 在  反恐精英:全球攻势 中已被弃用(且不再使用),取而代之的是 反恐精英:全球攻势 中已被弃用(且不再使用),取而代之的是 env_cascade_light 实体。
动态阴影与细腻的光照贴图阴影融合效果不佳。
- 可移动物体(例如大多数实体模型)从不投射光照贴图阴影,但会投射动态阴影 (当启用
shadow_control 时)。只有 世界几何体 和 prop_static 从不投射动态阴影(但它们会投射光照贴图阴影)。
- 光照贴图缩放比例 (Lightmap Scale) 不影响动态阴影的细节/柔化程度(动态阴影相当于固定为 1 luxel/单位 的光照贴图分辨率)。
- 来自同一光源的动态阴影和光照贴图阴影不会合并,而是会重叠或者“双重出现”。
- 动态阴影只能被世界几何体(Brush)接收。
另请参阅 info_no_dynamic_shadow 实体。
|
|
RAD光照编译是编译过程中的关键环节,负责生成场景中的所有光照效果。它不仅是编译过程中最耗时的阶段,通常也是需要反复执行最频繁的环节。由于光照效果除经验积累外无法预先精确估算,往往需要通过多次枯燥的编译调试才能达到理想效果(可以通过使用  Hammer++ 来简化此过程)。关于如何优化RAD编译的专题将在后续讨论,当前应优先掌握其核心功能和参数配置。 Hammer++ 来简化此过程)。关于如何优化RAD编译的专题将在后续讨论,当前应优先掌握其核心功能和参数配置。
|
技巧
本节将指导如何运用前述实体实现高效光照。前文已系统阐述了大量实践知识,但唯有付诸实践方能发挥其价值。后续章节将着重探讨如何综合运用这些技术要点,在你的地图设计中提升光照效果的质量和表现能力。
色温
虽然所有光源实体(light entity)的亮度参数(Brightness) 的 RGB 颜色值预设为 255 255 255(纯白),但现实中极少会有光源可以发出纯白色的光。根据光源发出的“黑体温度(blackbody temperature)”不同,其发出的光线将呈现介于橙色“红”光(通常称为“暖色(warm)”,尽管其实际温度较低)与紫外“蓝”光(通常称为“冷色(cool)”)之间的某种色调,如此 色温标尺 所示。你可以参考 维基百科 “色温”条目 来确定光源在色温标尺上的目标位置,或直接采用 Valve 地图制作标准中的常用 RGB 值,常见的白炽灯泡(钨丝灯)为“暖色”,RGB 值为 254 216 146,常见的荧光灯为“冷色”,RGB 值为 159 237 215,联合军的常用灯光则为冰冷的 147 226 240。
照明心理学
色彩组合千变万化。这里,一抹精致的绿调呈现出病态的观感。
经证实,“黑体温度”辐射光谱(参见上文)中色温较高的冷色调照明会引发玩家的心理压力,使其产生不安甚至生理不适感;而暖色调照明则无此影响。
这种对光照的潜意识情绪反应可被用于构建具有特定情绪导向的光照环境。其应用可简至选择荧光灯(营造恐怖场景)或白炽灯泡(塑造安全区域)。
例如,在  半衰期2 的第一张地图中, 当玩家被国民护卫队押送至审讯区时,会经过一条走廊(或者其他的什么)。分析其照明设计可发现Valve对心理效应的精准把控——走廊起始处采用标准钨丝灯(散发温暖光晕),紧接着却突变为荧光灯(释放令人不安的冷光)。这种组合在现实中极为罕见(除非建筑师中途更改设计或电工用尽灯具),实则暗示Valve(或联合军)意图制造"从安全领域步入危险地带"的心理过渡。
在玩家进入的牢房前,他可能会目睹一个令人不安的场景,囚室内正上演市民倾诉困境的压抑场景。此处天花板悬挂钨丝灯。这可能是因为荧光灯会与立方体小房间产生巨大的冲突感(荧光灯通常用于走廊及开阔区域)。在侧面,有一个无形的 light_spot,其唯一作用正是为场景注入情绪张力。
除上述直接影响外,运用 色彩理论 还能通过间接的潜意识联想塑造环境氛围。以荧光灯为例:其冷调幽光天然携带不安感,这种非自然的淡蓝辉光可唤起冰冷、虚无与孤立的情绪联想。
色彩并非唯一影响因素。光源的排布密度、亮度及未照亮区域同样至关重要。明亮的房间感觉更安全,因为其中的一切都清晰可见、易于应对;但另一方面,零星散布的点状光源会放大或制造一种不安感,因为玩家有太多被隐藏的或者难以看清的地方。同理,如果一个房间的所有角落都被照亮,唯独一个角落是暗的,那个角落就会被视为潜在的威胁或者其他隐藏的东西,反而会吸引探索玩家的注意。
如何运用这些原理取决于关卡设计师。无论是恐怖地图还是儿童游戏皆可受惠于此——但倘若意外将儿童游戏做得阴森而恐怖,则注定会失去这项工作的薪水。光照不仅赋予物体可见性,更决定了它们在所有观察者眼中的情感呈现。
创造合理的光源
在游戏场景中创造合理的光源往往颇具挑战。仅在场景中放置一个光源实体并不能解释光线从何而来或为何存在。合理的光源需符合环境逻辑且位置合理,通常需要多个实体协作才能实现。最常见的是双实体组合:一个是光源实体,负责实际照明,另一个是视觉实体,通常表现为灯具(由具有适当纹理的prop_static或 func_detail 构成)。
第一步是确定有哪些可用的光源。寻找会发光的纹理或模型。在模型或纹理浏览器中通过关键词 “light”(灯)或 “lamp”(灯具)进行筛选,效果很好。现在选择一个符合房间氛围的(例如,工业场景用工业灯),并将该模型或纹理放置在房间中。在本示例中,选择右侧展示的灯,并使用 prop_static 放置它。
现在有了看起来会发光的东西,下一步就是创建它所发出的光。观察选定的光源,思考发出的光是否会因有色玻璃而变色,以及光源本身是否会将光线聚焦/遮挡形成定向光源。使用各种光源实体,并相应地设置其属性来创建效果。在给定的示例中,灯光将会聚焦在一个方向上,因此选择 light_spot 。其次,这是一个强光源,所以将其亮度(brightness)设为 1000。现在观察它的颜色。玻璃没有着色,虽然发出的光很强,但现实中探照灯会通过内部使用高反光表面来聚焦光线以获得强度,因此色温也足够接近,可以保留颜色值在 255 255 255(纯白)。现在将其与 prop_static 对齐,调整灯光的角度和聚焦范围,使其看起来像是从 prop_static 发出的。
现在光源已经与其模型对齐了,但可能还存在一个问题。如果对齐的光源最终位于光源模型/实体的边界内部,它将会阻挡发出的光线(只能照亮道具)。为防止这种情况,进入 prop_static 的属性,确保将“禁用阴影”(Disable shadows)设置为“是”(Yes)。(如果光源是 世界几何体 ,将其绑定到一个 func_brush 上,并以相同方式修改其属性)。这样可以防止光源被自身模型阻挡。
现在你有了一个可用的设置,一个好主意是将它们编组(并且还可以将这个组制作成预制件(prefab)以便插入到其他地图中),这样它们就能始终保持在一起。现在如果需要更多灯光,就可以复制这个组。
另一种创建高质量光源的方法,能更好地模拟现实效果且不影响性能,是组合使用 light 和 light_spot 。像上面描述的那样放置 light_spot ,但将 light 放置在距离作为光源的模型约 50 单位(units)的位置。将这个 light 的亮度设为大约 50,颜色与 light_spot 相同。这通常能在 light_spot 不能照亮的表面上创建出更正确的辉光效果。
静态与动态
在性能方面,使用静态光源相比动态光源具有诸多优势。静态光源不会增加额外的处理负担,因此对实现快速渲染地图至关重要。而动态光源可能带来巨大的渲染开销,在地图中过度使用代价高昂。掌握不同类型光源的适用场景,避免错误地使用至关重要。
首先,静态光源是在VRAD编译过程中计算的;因此,在游戏运行时几乎无需进行任何计算——它只需要渲染预先计算好的光照,这是一个很快的过程。常见的静态光源实体包括 light 、light_spot 和 light_environment ,但在某些条件下也可能发生变化。静态光源带来的问题在于其固定不变的特性。虽然静态光照能以极低的处理成本实现非常精确和细致的照明效果,但无法实现任何特效,因为它不能发生变化。
另一方面,动态光照分为两种类型。一种是可开关光源(switchable lights),另一种是纯动态计算光源(true dynamically calculated lights)。每种类型都有其自身的处理负担,但两者渲染代价都很高昂,应谨慎使用。
可开关光源(switchable lights)与静态光源在本质上相同,因为它们都使用在RAD编译过程中生成的光照贴图(lightmap)信息。将一个光源设置为可开关的方式有以下三种之一:为其指定名称(name)、赋予其样式(style) 或设置其模式(pattern)。通常用作可开关光源的是那些不支持动态效果的标准光源,包括 light 和 light_spot ,但不包括 light_environment 。可开关光源使用两组光照贴图:一组对应开启状态,一组对应关闭状态。它们通过在这两组光照贴图之间切换或混合来实现亮度变化(例如渐变效果),同时始终保持仅需两组贴图。这既保留了静态光源的所有优势,又允许光源状态发生改变并实现部分动态效果。那么问题来了:假设有两个可开关光源同时照射在同一个表面上,需要多少组光照贴图?
- 灯 1 & 2 开
- 灯 1 开, 2 关
- 灯 1 关, 2 开
- 灯 1 & 2 关
那么总共会有四种状态。如果再添加第三个可开关光源,光照贴图数量将增加到八组。这就是可开关光源的问题所在——为了创建所有可能的状态组合,所需的光照贴图会变得非常昂贵。事实上,其开销如此之大,以至于存在一个硬编码限制(hard-coded limit):同一表面上最多只能有两个可开关光源产生影响。不过有一个折中方案:具有相同名称的光源将共享同一组光照贴图。因此,你可以让 50 个同名的可开关光源照射在同一表面上;然而,光源名称组的数量最多不能超过 32 个。由于需要额外的光照贴图,可开关光源会增加 RAD 编译所需的时间,增大文件体积,同时在状态切换时消耗系统资源。但是,一个稳定在特定状态(不进行切换)的可开关光源,其运行时开销不比静态光源高。
纯动态计算光源(True dynamic lighting) 是指其动态效果必须内置于实体本身,最常见的识别办法是通过实体内的 Parent(父级)属性来识别。具有内置动态效果的实体是 light_dynamic 和 point_spotlight 。你也可以通过设置 效果flags 中的 EF_BRIGHTLIGHT 或 EF_DIMLIGHT flags,使任意动态实体投射动态光。point_spotlight 比较特殊,它有一个flags可以将其启用为动态或静态。此flags默认设置为动态,这常常会让人措手不及。动态光源的渲染过程完全在游戏运行时进行。这意味着它对 RAD 编译过程或文件大小几乎没有影响,但会拖慢你的地图运行速度。动态光源的使用应比可开关光源更加谨慎。动态光源导致的系统减速通常是持续性的,因为光源需要持续渲染。此类实体应仅用于光源本身需要移动的情况。如果光源本身不打算移动,那么它就不应该是一个真正的动态光。如果它仅仅是为了开启和关闭,那么应该使用可开关光源(switchable light)代替。如果使用不当,动态光照的成本将超过其收益。动态光的另一个缺点是,为了简化计算,它不运行反射和漫射等过程,这会导致光照效果看起来更刺眼、更简单。
静态光源引擎负担轻且细节表现佳,而动态光源则提供了运动与变化的可能性。判断动态光源影响的最简单方法是使用 +Showbudget 命令测试地图。这使你能够实时监测特效是否过度,以及光照效果是否在拖慢地图运行速度。合理运用动态光源可以提升地图效果,但它们本质上是一种代价高昂的特效。
快速高效RAD编译
RAD 编译过程可能相当漫长,频繁编译很容易拖慢开发进度。你可以采用以下几种方法来解决这个问题:
- 在大多数编译中关闭 RAD,仅在需要调整和测试光照时专门开启它。
- 使用 警戒线 工具,确保只编译你需要修改的区域。(如果使用了 light_environment,请复制一份环境光实体,确保其位于分区边界内。)
- 一次性进行多项修改。与其只调整地图中某一部分的光照,不如尝试调整地图不同区域的多组光照,然后一次性编译所有更改。
- 标准化你的光照。为地图中每种类型的光源(例如荧光灯、聚光灯等)选定统一的 RGB 值和亮度值,让该类型的每个光源实例都使用相同的初始值。这样就不必为地图中的每个光源单独设定数值,只需根据具体需求微调光源数值即可(例如,较大的房间可能需要使用更大的同类型光源)。
- 利用家中任何闲置的电脑。在这些电脑上安装 SDK,并用它们来进行光照编译。这样你就可以在等待光照编译结果的同时,继续对地图进行其他编辑。
- 使用像 Dropbox 或 SparkleShare 这样的程序可以自动同步地图文件,使这个过程更加容易。
结论
这涵盖了在标准 Source 引擎游戏中可找到的所有光照效果的基础知识。
另请参见
![]() 起源 地图中使用的高级光照。如果你是需要在 Hammer 编辑器中创建光源的新手, 则可能需要先阅读 基础光照教程 。本教程首先将涵盖所有创建光源的可能方法,然后介绍与调节光源相关的所有设置。接下来将是一系列更深入的教程小节,来讲解如何充分利用你已所知的光源。
起源 地图中使用的高级光照。如果你是需要在 Hammer 编辑器中创建光源的新手, 则可能需要先阅读 基础光照教程 。本教程首先将涵盖所有创建光源的可能方法,然后介绍与调节光源相关的所有设置。接下来将是一系列更深入的教程小节,来讲解如何充分利用你已所知的光源。
![]() 半衰期2 的第一张地图中, 当玩家被国民护卫队押送至审讯区时,会经过一条走廊(或者其他的什么)。分析其照明设计可发现Valve对心理效应的精准把控——走廊起始处采用标准钨丝灯(散发温暖光晕),紧接着却突变为荧光灯(释放令人不安的冷光)。这种组合在现实中极为罕见(除非建筑师中途更改设计或电工用尽灯具),实则暗示Valve(或联合军)意图制造"从安全领域步入危险地带"的心理过渡。
半衰期2 的第一张地图中, 当玩家被国民护卫队押送至审讯区时,会经过一条走廊(或者其他的什么)。分析其照明设计可发现Valve对心理效应的精准把控——走廊起始处采用标准钨丝灯(散发温暖光晕),紧接着却突变为荧光灯(释放令人不安的冷光)。这种组合在现实中极为罕见(除非建筑师中途更改设计或电工用尽灯具),实则暗示Valve(或联合军)意图制造"从安全领域步入危险地带"的心理过渡。
