Template:Chapters: Difference between revisions

From Valve Developer Community
Jump to navigation Jump to search
mNo edit summary
No edit summary
 
(14 intermediate revisions by 2 users not shown)
Line 1: Line 1:
{{Uselangflags|en=1|vi=1}}
{{split|Why are several games within a single big template ? The content should just be on their game pages, example: "Template:Chapters/Half Life 2"}}
{{Todo|Split each game to a subpage, example: "Template:Chapters/Half Life 2".}}
{{Doc}}
{{Doc}}
<includeonly><onlyinclude>
{{Table
{{Table
| align = center
| align = center
| {{tr
| class = mw-collapsible {{#switch:{{{state|}}}|collapsed=mw-collapsed|#default=}}
| id = mw-customcollapsible-{{{{{game|hl2}}}|name|nt=0}}
| style = min-width: 770px; <!-- weird because the original width is 762px; but if its seamless then dont touch it -->
|1= {{tr
|bgcolor={{{{{game|hl2}}}|col}} <!-- game color is too intense as background, so overlay 60 % black below -->
|bgcolor={{{{{game|hl2}}}|col}} <!-- game color is too intense as background, so overlay 60 % black below -->
| {{th
| {{th
|colspan = 99 <!--may vary per game, 99 is ok -->
|colspan = 99 <!--may vary per game, 99 is ok -->
|bgcolor = rgba(0,0,0,.7) <!-- 60 % black -->
|bgcolor = rgba(0,0,0,.7) <!-- 60 % black -->
|{{#switch: {{{type}}} |#default
|1=<!--
IMPORTANT: For now, this is how it centers it correctly, if there are translations, REPLACE IT HERE TO CENTER THE TITLE
--><span style="float: left; user-select:none; color: transparent">{{Chapters/strings|TOGGLE}}</span><span>{{#switch: {{{type}}}
|#default
|chapters={{Chapters/strings|ChaptersTitle1}}|missions={{Chapters/strings|MissionsTitle1}}|camp|campaign|campaigns={{Chapters/strings|CampaignsTitle1}}}} {{{{{game|hl2}}}|2}} {{#switch: {{{type}}}
|chapters={{Chapters/strings|ChaptersTitle1}}|missions={{Chapters/strings|MissionsTitle1}}|camp|campaign|campaigns={{Chapters/strings|CampaignsTitle1}}}} {{{{{game|hl2}}}|2}} {{#switch: {{{type}}}
|#default
|#default
|chapters={{Chapters/strings|ChaptersTitle2}}|missions={{Chapters/strings|MissionsTitle2}}|camp|campaign|campaigns={{Chapters/strings|CampaignsTitle2}}}}
|chapters={{Chapters/strings|ChaptersTitle2}}|missions={{Chapters/strings|MissionsTitle2}}|camp|campaign|campaigns={{Chapters/strings|CampaignsTitle2}}}}</span><span class="mw-customtoggle-{{{{{game|hl2}}}|name|nt=0}}" style="float: right; user-select:none;">{{Chapters/strings|TOGGLE}}</span>
}}
}}
}}
}}
Line 25: Line 28:
|hl|hl1|hls = {{Chapters/Half-Life}}
|hl|hl1|hls = {{Chapters/Half-Life}}
|hlop4|hlof = {{Chapters/Half-Life: Opposing Force}}
     |hld|decay = {{Chapters/Half-Life: Decay}}
     |hld|decay = {{Chapters/Half-Life: Decay}}
    |hlbs = {{Chapters/Half-Life: Blue Shift}}
      
      
<!-- Source -->
<!-- Source -->
Line 32: Line 37:
|hl2ep1|ep1|episodic = {{Chapters/Half-Life 2: Episode One}}
|hl2ep1|ep1|episodic = {{Chapters/Half-Life 2: Episode One}}
|hl2ep2|ep2 = {{Chapters/Half-Life 2: Episode Two}}
|hl2ep2|ep2 = {{Chapters/Half-Life 2: Episode Two}}
|bms = {Chapters/Black Mesa (Source)}}
|l4d|left4dead= {{Chapters/Left 4 Dead}}
|l4d2|left4dead2= {{Chapters/Left 4 Dead 2|state1={{{state1|}}}}}
|portal = {{Chapters/Portal}}
|portal2|p2 = {{Chapters/Portal 2}}
    <!-- Source (third-party) -->
   
|bms = {{Chapters/Black Mesa (Source)}}
|portalrev = {{Chapters/Portal: Revolution}}
|postal3|p3 = {{Chapters/Postal 3}}
<!-- Source 2 -->
<!-- Source 2 -->
<!-- --------------------- TODO: Split (see the split info) --------------------- -->
|hla = {{Chapters/Half-Life: Alyx}}
|hlop4|hlof = <!-- Half-Life: Opposing Force -->
{{tr|align = center
| {{td|width = 25%|font-size = 0.95em| '''[[Half-Life: Opposing Force/Boot Camp|{{Chapters/strings|Boot Camp}}]]'''<!-- <br>{{code|bm_c0a0a}} -->}}
  {{td|width = 25%|font-size = 0.95em| '''[[Half-Life: Opposing Force/Incoming|{{Chapters/strings|Incoming}}]]'''<!-- <br>{{code|bm_c1a0a}} -->}}
  {{td|width = 25%|font-size = 0.95em| '''[[Half-Life: Opposing Force/Welcome To Black Mesa|{{Chapters/strings|Welcome To Black Mesa}}]]'''<!-- <br>{{code|bm_c1a1a}} -->}}
  {{td|width = 25%|font-size = 0.95em| '''[[Half-Life: Opposing Force/"We Are Pulling Out"|{{Chapters/strings|We Are Pulling Out}}]]'''<!-- <br>{{code|bm_c1a2a}} -->}}
}}
{{tr|align = center
| {{td|width = 25%|font-size = 0.95em| '''[[Half-Life: Opposing Force/Missing In Action|{{Chapters/strings|Missing In Action}}]]'''<!-- <br>{{code|bm_c1a3a}} -->}}
  {{td|width = 25%|font-size = 0.95em| '''[[Half-Life: Opposing Force/Friendly Fire|{{Chapters/strings|Friendly Fire}}]]'''<!-- <br>{{code|bm_c1a4a}} -->}}
  {{td|width = 25%|font-size = 0.95em| '''[[Half-Life: Opposing Force/We Are Not Alone|{{Chapters/strings|We Are Not Alone}}]]'''<!-- <br>{{code|bm_c2a1a}} -->}}
  {{td|width = 25%|font-size = 0.95em| '''[[Half-Life: Opposing Force/Crush Depth|{{Chapters/strings|Crush Depth}}]]'''<!-- <br>{{code|bm_c2a2a}} -->}}
}}
{{tr|align = center
| {{td|width = 25%|font-size = 0.95em| '''[[Half-Life: Opposing Force/Vicarious Reality|{{Chapters/strings|Vicarious Reality}}]]'''<!-- <br>{{code|bm_c2a3a}} -->}}
  {{td|width = 25%|font-size = 0.95em| '''[[Half-Life: Opposing Force/Pit Worm's Nest|{{Chapters/strings|Pit Worm's Nest}}]]'''<!-- <br>{{code|bm_c2a4a}} -->}}
  {{td|width = 25%|font-size = 0.95em| '''[[Half-Life: Opposing Force/Foxtrot Uniform|{{Chapters/strings|Foxtrot Uniform}}]]'''<!-- <br>{{code|bm_c2a4e}} -->}}
  {{td|width = 25%|font-size = 0.95em| '''[[Half-Life: Opposing Force/"The Package"|{{Chapters/strings|The Package}}]]'''<!-- <br>{{code|bm_c2a5a}} -->}}
}}
{{tr|align = center
| {{td|width = 25%|font-size = 0.95em| '''[[Half-Life: Opposing Force/Worlds Collide|{{Chapters/strings|Worlds Collide}}]]'''<!-- <br>{{code|bm_c3a1a}} -->}}
  {{td|width = 25%|font-size = 0.95em| '''[[Half-Life: Opposing Force/Conclusion|{{Chapters/strings|Conclusion}}]]'''<!-- <br>{{code|bm_c3a2a}} -->}}
}}
|hlbs = <!-- Half-Life: Blue Shift -->
{{tr|align = center
| {{td|width = 25%|font-size = 0.95em| '''{{cow|Half-Life:_Blue_Shift_storyline#Hazard_Course_.28optional.29|{{Chapters/strings|Hazard Course}}|icon=hide}}'''<!-- <br>{{code|bm_c0a0a}} -->}}
  {{td|width = 25%|font-size = 0.95em| '''{{cow|Half-Life:_Blue_Shift_storyline#Chapter_1:_Living_Quarters_Outbound|{{Chapters/strings|LQO}}|icon=hide}}'''<!-- <br>{{code|bm_c1a0a}} -->}}
  {{td|width = 25%|font-size = 0.95em| '''{{cow|Half-Life:_Blue_Shift_storyline#Chapter_2:_Insecurity|{{Chapters/strings|Insecurity}}|icon=hide}}'''<!-- <br>{{code|bm_c1a1a}} -->}}
  {{td|width = 25%|font-size = 0.95em| '''{{cow|Half-Life:_Blue_Shift_storyline#Chapter_3:_Duty_Calls|{{Chapters/strings|Duty Calls}}|icon=hide}}'''<!-- <br>{{code|bm_c1a2a}} -->}}
}}
{{tr|align = center
| {{td|width = 25%|font-size = 0.95em| '''{{cow|Half-Life:_Blue_Shift_storyline#Chapter_4:_Captive_Freight|{{Chapters/strings|Captive Freight}}|icon=hide}}'''<!-- <br>{{code|bm_c1a3a}} -->}}
  {{td|width = 25%|font-size = 0.95em| '''{{cow|Half-Life:_Blue_Shift_storyline#Chapter_5:_Focal_Point|{{Chapters/strings|Focal Point}}|icon=hide}}'''<!-- <br>{{code|bm_c1a4a}} -->}}
  {{td|width = 25%|font-size = 0.95em| '''{{cow|Half-Life:_Blue_Shift_storyline#Chapter_6:_Power_Struggle|{{Chapters/strings|Power Struggle}}|icon=hide}}'''<!-- <br>{{code|bm_c2a1a}} -->}}
  {{td|width = 25%|font-size = 0.95em| '''{{cow|Half-Life:_Blue_Shift_storyline#Chapter_7:_A_Leap_Of_Faith|{{Chapters/strings|A Leap of Faith}}|icon=hide}}'''<!-- <br>{{code|bm_c2a2a}} -->}}
}}
{{tr|align = center
| {{td|width = 25%|font-size = 0.95em| '''{{cow|Half-Life:_Blue_Shift_storyline#Chapter_8:_Deliverance|{{Chapters/strings|Deliverance}}|icon=hide}}'''<!-- <br>{{code|bm_c1a3a}} -->}}
  {{clr}}
}}
|hla = <!-- Half-Life: Alyx -->
{{tr|align = center
| {{td|width = 25%|font-size = 0.95em| [[File:HLA - Chapter 1.jpg|160px|Chapter 1: Entanglement|link=Entanglement_(Half-Life:_Alyx)]]<br>'''[[Entanglement_(Half-Life:_Alyx)|{{Chapters/strings|Entanglement (HLA)}}]]'''<br>{{code|ep2_outland_01}} }}
  {{td|width = 25%|font-size = 0.95em| [[File:HLA - Chapter 2.jpg|160px|Chapter 2: The Quarantine Zone|link=The Quarantine Zone]]<br>'''[[The Quarantine Zone|{{Chapters/strings|The Quarantine Zone}}]]'''<br>{{code|ep2_outland_02}} }}
  {{td|width = 25%|font-size = 0.95em| [[File:HLA - Chapter 3.jpg|160px|Chapter 3: Is Or Will Be|link=Is Or Will Be]]<br>'''[[Is Or Will Be|{{Chapters/strings|Is Or Will Be}}]]'''<br>{{code|ep2_outland_05}} }}
  {{td|width = 25%|font-size = 0.95em| [[File:HLA - Chapter 4.jpg|160px|Chapter 4: Superweapon|link=Superweapon]]<br>'''[[Superweapon|{{Chapters/strings|Superweapon}}]]'''<br>{{code|ep2_outland_06a}} }}
}}
{{tr|align = center
| {{td|width = 25%|font-size = 0.95em| [[File:HLA - Chapter 5.jpg|160px|Chapter 5: The Northern Star|link=The Northern Star]]<br>'''[[The Northern Star|{{Chapters/strings|The Northern Star}}]]'''<br>{{code|ep2_outland_01}} }}
  {{td|width = 25%|font-size = 0.95em| [[File:HLA - Chapter 6.jpg|160px|Chapter 6: Arms Race|link=Arms Race (HL:A chapter)]]<br>'''[[Arms Race (HL:A chapter)|{{Chapters/strings|Arms Race}}]]'''<br>{{code|ep2_outland_02}} }}
  {{td|width = 25%|font-size = 0.95em| [[File:HLA - Chapter 7.jpg|160px|Chapter 7: Jeff|link=Jeff]]<br>'''[[Jeff|{{Chapters/strings|Jeff}}]]'''<br>{{code|ep2_outland_05}} }}
  {{td|width = 25%|font-size = 0.95em| [[File:HLA - Chapter 8.jpg|160px|Chapter 8: Captivity|link=Captivity]]<br>'''[[Captivity|{{Chapters/strings|Captivity}}]]'''<br>{{code|ep2_outland_06a}} }}
}}
{{tr|align = center
| {{td|width = 25%|font-size = 0.95em| [[File:HLA - Chapter 9.jpg|160px|Chapter 9: Revelations|link=Revelations]]<br>'''[[Revelations|{{Chapters/strings|Revelations}}]]'''<br>{{code|ep2_outland_01}} }}
  {{td|width = 25%|font-size = 0.95em| [[File:HLA - Chapter 10.jpg|160px|Chapter 10: Breaking and Entering|link=Breaking and Entering]]<br>'''[[Breaking and Entering|{{Chapters/strings|Breaking and Entering}}]]'''<br>{{code|ep2_outland_02}} }}
  {{td|width = 25%|font-size = 0.95em| [[File:HLA - Chapter 11.jpg|160px|Chapter 11: Point Extraction|link=Point Extraction]]<br>'''[[Point Extraction|{{Chapters/strings|Point Extraction}}]]'''<br>{{code|ep2_outland_05}} }}
}}
|portal = <!-- Portal -->
{{tr|align = center
| {{td|width = 25%|font-size = 0.95em| [[File:Portal GamepadUI - Chapter 1.png|160px|Testchamber 00|link=https://half-life.fandom.com/wiki/Portal_storyline#Test_Chamber_00]]<br>'''[https://half-life.fandom.com/wiki/Portal_storyline#Test_Chamber_00  {{Chapters/strings|Testchamber|number=00}}]'''}}
  {{td|width = 25%|font-size = 0.95em| [[File:Portal GamepadUI - Chapter 2.png|160px|Testchamber 04|link=https://half-life.fandom.com/wiki/Portal_storyline#Test_Chamber_04]]<br>'''[https://half-life.fandom.com/wiki/Portal_storyline#Test_Chamber_04  {{Chapters/strings|Testchamber|number=04}}]'''}}
  {{td|width = 25%|font-size = 0.95em| [[File:Portal GamepadUI - Chapter 3.png|160px|Testchamber 08|link=https://half-life.fandom.com/wiki/Portal_storyline#Test_Chamber_08]]<br>'''[https://half-life.fandom.com/wiki/Portal_storyline#Test_Chamber_08  {{Chapters/strings|Testchamber|number=08}}]''' }}
  {{td|width = 25%|font-size = 0.95em| [[File:Portal GamepadUI - Chapter 4.png|160px|Testchamber 10|link=https://half-life.fandom.com/wiki/Portal_storyline#Test_Chamber_10]]<br>'''[https://half-life.fandom.com/wiki/Portal_storyline#Test_Chamber_10  {{Chapters/strings|Testchamber|number=10}}]''' }}
}}
{{tr|align = center
| {{td|width = 25%|font-size = 0.95em| [[File:Portal GamepadUI - Chapter 5.png|160px|Testchamber 13|link=https://half-life.fandom.com/wiki/Portal_storyline#Test_Chamber_13]]<br>'''[https://half-life.fandom.com/wiki/Portal_storyline#Test_Chamber_13  {{Chapters/strings|Testchamber|number=13}}]'''}}
  {{td|width = 25%|font-size = 0.95em| [[File:Portal GamepadUI - Chapter 6.png|160px|Testchamber 14|link=https://half-life.fandom.com/wiki/Portal_storyline#Test_Chamber_14]]<br>'''[https://half-life.fandom.com/wiki/Portal_storyline#Test_Chamber_14  {{Chapters/strings|Testchamber|number=14}}]''' }}
  {{td|width = 25%|font-size = 0.95em| [[File:Portal GamepadUI - Chapter 7.png|160px|Testchamber 15|link=https://half-life.fandom.com/wiki/Portal_storyline#Test_Chamber_15]]<br>'''[https://half-life.fandom.com/wiki/Portal_storyline#Test_Chamber_15  {{Chapters/strings|Testchamber|number=15}}]''' }}
  {{td|width = 25%|font-size = 0.95em| [[File:Portal GamepadUI - Chapter 8.png|160px|Testchamber 16|link=https://half-life.fandom.com/wiki/Portal_storyline#Test_Chamber_16]]<br>'''[https://half-life.fandom.com/wiki/Portal_storyline#Test_Chamber_16  {{Chapters/strings|Testchamber|number=16}}]''' }}
}}
{{tr|align = center
| {{td|width = 25%|font-size = 0.95em| [[File:Portal GamepadUI - Chapter 9.png|160px|Testchamber 17|link=https://half-life.fandom.com/wiki/Portal_storyline#Test_Chamber_17]]<br>'''[https://half-life.fandom.com/wiki/Portal_storyline#Test_Chamber_17  {{Chapters/strings|Testchamber|number=17}}]''' }}
  {{td|width = 25%|font-size = 0.95em| [[File:Portal GamepadUI - Chapter 10.png|160px|Testchamber 18|link=https://half-life.fandom.com/wiki/Portal_storyline#Test_Chamber_18]]<br>'''[https://half-life.fandom.com/wiki/Portal_storyline#Test_Chamber_18  {{Chapters/strings|Testchamber|number=18}}]''' }}
  {{td|width = 25%|font-size = 0.95em| [[File:Portal GamepadUI - Chapter 11.png|160px|Testchamber 19|link=https://half-life.fandom.com/wiki/Portal_storyline#Test_Chamber_19]]<br>'''[https://half-life.fandom.com/wiki/Portal_storyline#Test_Chamber_19  {{Chapters/strings|Testchamber|number=19}}]''' }}
}}
|portal2|p2 = <!-- Portal 2 -->
{{tr|align = center
| {{td|width = 25%|font-size = 0.95em| [[File:Chapter_Thumbnails_-_Portal_2_-_Chapter_1.png|160px|Chapter 1: The Courtesy Call|link=https://theportalwiki.com/wiki/Story#Chapter_1:_The_Courtesy_Call_(Act_1)_/_Chapter_2:_The_Cold_Boot_(Act_2)]]<br>'''{{portalwiki|Story#Chapter_1:_The_Courtesy_Call_(Act_1)_/_Chapter_2:_The_Cold_Boot_(Act_2)|{{Chapters/strings|The Courtesy Call}}|icon=hide}}''' }}
  {{td|width = 25%|font-size = 0.95em| [[File:Chapter_Thumbnails_-_Portal_2_-_Chapter_2.png|160px|Chapter 2: The Cold Boot|link=https://theportalwiki.com/wiki/Story#Chapter_3:_The_Return_/_Chapter_4:_The_Surprise]]<br>'''{{portalwiki|Story#Chapter_1:_The_Courtesy_Call_(Act_1)_/_Chapter_2:_The_Cold_Boot_(Act_2)|{{Chapters/strings|The Cold Boot}}|icon=hide}}''' }}
  {{td|width = 25%|font-size = 0.95em| [[File:Chapter_Thumbnails_-_Portal_2_-_Chapter_3.png|160px|Chapter 3: The Return|link=Point Insertion]]<br>'''{{portalwiki|Story#Chapter_3:_The_Return_/_Chapter_4:_The_Surprise|{{Chapters/strings|The Return}}|icon=hide}}''' }}
  {{td|width = 25%|font-size = 0.95em| [[File:Chapter_Thumbnails_-_Portal_2_-_Chapter_4.png|160px|Chapter 4: The Surprise|link=Point Insertion]]<br>'''{{portalwiki|Story#Chapter_3:_The_Return_/_Chapter_4:_The_Surprise|{{Chapters/strings|The Surprise}}|icon=hide}}''' }}
}}
{{tr|align = center
| {{td|width = 25%|font-size = 0.95em| [[File:Chapter_Thumbnails_-_Portal_2_-_Chapter_5.png|160px|Chapter 5: The Escape|link=https://theportalwiki.com/wiki/Story#Chapter_5:_The_Escape]]<br>'''{{portalwiki|Story#Chapter_5:_The_Escape|{{Chapters/strings| The Escape}}|icon=hide}}''' }}
  {{td|width = 25%|font-size = 0.95em| [[File:Chapter_Thumbnails_-_Portal_2_-_Chapter_6.png|160px|Chapter 6: The Fall|link=https://theportalwiki.com/wiki/Story#Chapter_6:_The_Fall_(Act_3)]]<br>'''{{portalwiki|Story#Chapter_6:_The_Fall_(Act_3)|{{Chapters/strings|The Fall}}|icon=hide}}''' }}
  {{td|width = 25%|font-size = 0.95em| [[File:Chapter_Thumbnails_-_Portal_2_-_Chapter_7.png|160px|Chapter 7: The Reunion|link=https://theportalwiki.com/wiki/Story#Chapter_7:_The_Reunion]]<br>'''{{portalwiki|Story#Chapter_7:_The_Reunion|{{Chapters/strings|The Reunion}}|icon=hide}}''' }}
  {{td|width = 25%|font-size = 0.95em| [[File:Chapter_Thumbnails_-_Portal_2_-_Chapter_8.png|160px|Chapter 8: The Itch|link=https://theportalwiki.com/wiki/Story#Chapter_8:_The_Itch_(Act_4)]]<br>'''{{portalwiki|Story#Chapter_8:_The_Itch_(Act_4)|{{Chapters/strings|The Itch}}|icon=hide}}''' }}
}}
{{tr|align = center
| {{td|width = 25%|font-size = 0.95em| [[File:Chapter_Thumbnails_-_Portal_2_-_Chapter_9.png|160px|Chapter 9: The Part Where He Kills You|link=https://theportalwiki.com/wiki/Story#Chapter_9:_The_Part_Where_He_Kills_You]]<br>'''{{portalwiki|Story#Chapter_9:_The_Part_Where_He_Kills_You|{{Chapters/strings|TPWHKY}}|icon=hide}}''' }}
  {{td|width = 25%|font-size = 0.95em| [[File:Chapter_Thumbnails_-_Portal_2_-_Co-op.png|160px|Co-op|link=https://theportalwiki.com/wiki/Cooperative_Testing_Initiative#Courses]]<br> '''{{portalwiki|Cooperative_Testing_Initiative#Courses|{{Chapters/strings|Coop}}|icon=hide}}''' }}
}}
|portalrev = <!-- Portal: Revolution -->
{{tr|align = center
| {{td|width = 25%|font-size = 0.95em| [[File:Chapter_Thumbnails_-_Portal_rev_-_Chapter_1.jpg|160px|Chapter 1: The Human Resource|link=]]<br>'''The Human Resource''' }}
  {{td|width = 25%|font-size = 0.95em| [[File:Chapter_Thumbnails_-_Portal_rev_-_Chapter_2.jpg|160px|Chapter 2: The Default Route|link=]]<br>'''The Default Route''' }}
  {{td|width = 25%|font-size = 0.95em| [[File:Chapter_Thumbnails_-_Portal_rev_-_Chapter_3.jpg|160px|Chapter 3: The Surface|link=]]<br>'''The Surface''' }}
  {{td|width = 25%|font-size = 0.95em| [[File:Chapter_Thumbnails_-_Portal_rev_-_Chapter_4.jpg|160px|Chapter 4: The Diversion|link=]]<br>'''The Diversion''' }}
}}
{{tr|align = center
| {{td|width = 25%|font-size = 0.95em| [[File:Chapter_Thumbnails_-_Portal_rev_-_Chapter_5.jpg|160px|Chapter 5: The Cutting Room Floor|link=]]<br>'''The Cutting Room Floor''' }}
  {{td|width = 25%|font-size = 0.95em| [[File:Chapter_Thumbnails_-_Portal_rev_-_Chapter_6.jpg|160px|Chapter 6: The Climb|link=]]<br>'''The Climb''' }}
  {{td|width = 25%|font-size = 0.95em| [[File:Chapter_Thumbnails_-_Portal_rev_-_Chapter_7.jpg|160px|Chapter 7: The Collision|link=]]<br>'''The Collision''' }}
  {{td|width = 25%|font-size = 0.95em| [[File:Chapter_Thumbnails_-_Portal_rev_-_Chapter_8.jpg|160px|Chapter 8: The Remote Execution|link=]]<br>'''The Remote Execution''' }}
}}
|postal3|p3 = <!-- Postal 3 -->
{{td|width = 18%|align = center|bgcolor = #868886|color=#000|font-size = 0.95em|colspan=5| '''The Pre-Path''' }} {{tr|align = center
| {{td|width = 25%|font-size = 0.95em| Paradise Dream Bridge }}
  {{td|width = 25%|font-size = 0.95em| Porn World }}
  {{td|width = 25%|font-size = 0.95em| Diseased Cat Roundup }}
  {{td|width = 25%|font-size = 0.95em| Jen Walcott's Bodyguard }}
{{tr|align = center
| {{td|width = 25%|font-size = 0.95em| Cash Mart Robbery }}
}}
{{td|width = 18%|align = center|bgcolor = #F0B100|color=#000|font-size = 0.95em|colspan=12| '''The Good Path''' }} {{tr|align = center
| {{td|width = 25%|font-size = 0.95em| Police Academy }}
  {{td|width = 25%|font-size = 0.95em| Patrol Mission 1 }}
  {{td|width = 25%|font-size = 0.95em| Save Uwe Boll's Career }}
  {{td|width = 25%|font-size = 0.95em| Arcade Shootout }}
}}
{{tr|align = center
| {{td|width = 25%|font-size = 0.95em| Homeland Insecurity }}
  {{td|width = 25%|font-size = 0.95em| Police Monkey Lab Assault }}
  {{td|width = 25%|font-size = 0.95em| Patrol Mission 2 }}
  {{td|width = 25%|font-size = 0.95em| Eco Zealot HQ Assault }}
}}
{{tr|align = center
| {{td|width = 25%|font-size = 0.95em| Police Gay Rodeo }}
  {{td|width = 25%|font-size = 0.95em| The 'Motorcade' }}
  {{td|width = 25%|font-size = 0.95em| Police Daveland }}
  {{td|width = 25%|font-size = 0.95em| Apocalypse Again }}
}}
{{td|width = 18%|align = center|bgcolor = #a70000|color=#FFF|font-size = 0.95em|colspan=12| '''The Insane Path''' }} {{tr|align = center
| {{td|width = 25%|font-size = 0.95em| Meet the Zealots }}
  {{td|width = 25%|font-size = 0.95em| The Champ Whisperer }}
  {{td|width = 25%|font-size = 0.95em| Segway Repo Man }}
  {{td|width = 25%|font-size = 0.95em| Slave "Boy" Escort }}
}}
{{tr|align = center
| {{td|width = 25%|font-size = 0.95em| Monkey Test Lab Assault }}
  {{td|width = 25%|font-size = 0.95em| Krotchy Meal Toy Delivery }}
  {{td|width = 25%|font-size = 0.95em| Mexican Viagra Courier }}
  {{td|width = 25%|font-size = 0.95em| Prisoner Without A Clue }}
}}
{{tr|align = center
| {{td|width = 25%|font-size = 0.95em| Battle Damage Krotchy }}
  {{td|width = 25%|font-size = 0.95em| Gay Rodeo }}
  {{td|width = 25%|font-size = 0.95em| Champ Rescue }}
  {{td|width = 25%|font-size = 0.95em| Daveland }}
}}
}}
|l4d|left4dead= <!-- Left 4 Dead -->
{{tr|align = center
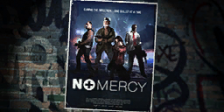
| {{td|width = 25%|font-size = 0.95em| [[File:C8_nomercy.png|224px|No Mercy|link=https://left4dead.fandom.com/wiki/No_Mercy]]<br>'''{{l4dwiki|{{Chapters/strings|NM}}|icon=hide}}''' }}
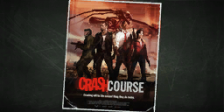
  {{td|width = 25%|font-size = 0.95em| [[File:C9_crashcourse.png|224px|Crash Course|link=https://left4dead.fandom.com/wiki/Crash_Course]]<br>'''{{l4dwiki|{{Chapters/strings|CC}}|icon=hide}}''' }}
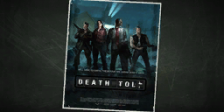
  {{td|width = 25%|font-size = 0.95em| [[File:C10_deadtoll.png|224px|Death Toll|link=https://left4dead.fandom.com/wiki/Death_Toll]]<br>'''{{l4dwiki|{{Chapters/strings|DT}}|icon=hide}}''' }}
  {{td|width = 25%|font-size = 0.95em| [[File:C11_deadair.png|224px|Dead Air|link=https://left4dead.fandom.com/wiki/Dead_Air]]<br>'''{{l4dwiki|{{Chapters/strings|DA}}|icon=hide}}''' }}
}}
{{tr|align = left|bgcolor = rgba(0,0,0,.4)
| {{td|width = 25%|font-size = 0.95em| {{Chapters/strings|NM maps}} }}
  {{td|width = 25%|font-size = 0.95em| {{Chapters/strings|CC maps}} }}
  {{td|width = 25%|font-size = 0.95em| {{Chapters/strings|DT maps}} }}
  {{td|width = 25%|font-size = 0.95em| {{Chapters/strings|DA maps}} }}
}}
{{tr|align = center
| {{td|width = 25%|font-size = 0.95em| [[File:C12_bloodharvest.png|224px|Blood Harvest|link=https://left4dead.fandom.com/wiki/Blood_Harvest]]<br>'''{{l4dwiki|{{Chapters/strings|BH}}|icon=hide}}''' }}
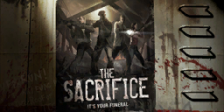
  {{td|width = 25%|font-size = 0.95em| [[File:C7_thesacrifice.png|224px|The Sacrifice|link=The Sacrifice]]<br>'''[[The Sacrifice|{{Chapters/strings|TS}}]]''' }}
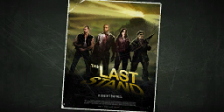
  {{td|width = 18%|font-size = 0.95em| [[File:C14_thelaststand.png|224px|{{Chapters/strings|TLS1 popup}}|link=https://left4dead.fandom.com/wiki/The_Last_Stand]]<br>'''{{l4dwiki|{{Chapters/strings|TLS1}}|icon=hide}}''' }}
}}
{{tr|align = left|bgcolor = rgba(0,0,0,.4)
| {{td|width = 25%|font-size = 0.95em| {{Chapters/strings|BH maps}} }}
  {{td|width = 25%|font-size = 0.95em| {{Chapters/strings|TS maps}} }}
  {{td|width = 25%|font-size = 0.95em| {{Chapters/strings|TLS1 maps}} }}
}}
|l4d2|left4dead2= <!-- Left 4 Dead 2 -->
{{tr|align = center
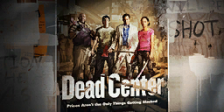
| {{td|width = 18%|font-size = 0.95em| [[File:C1_deadcenter.png|224px|Dead Center|link=https://left4dead.fandom.com/wiki/Dead_Center]]<br>'''{{l4dwiki|{{Chapters/strings|DC1}}|icon=hide}}''' }}
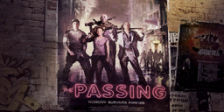
  {{td|width = 18%|font-size = 0.95em| [[File:C6_thepassing.png|224px|The Passing|link=https://left4dead.fandom.com/wiki/The_Passing]]<br>'''{{l4dwiki|{{Chapters/strings|TP1}}|icon=hide}}''' }}
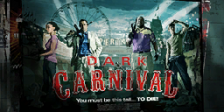
  {{td|width = 18%|font-size = 0.95em| [[File:C2_darkcanival.png|224px|Dark Carnival|link=https://left4dead.fandom.com/wiki/Dark_Carnival]]<br>'''{{l4dwiki|{{Chapters/strings|DC2}}|icon=hide}}''' }}
  {{td|width = 18%|font-size = 0.95em| [[File:C3_swampfever.png|224px|Swamp Fever|link=https://left4dead.fandom.com/wiki/Swamp_Fever]]<br>'''{{l4dwiki|{{Chapters/strings|SF}}|icon=hide}}''' }}
}}
{{tr|align = left|bgcolor = rgba(0,0,0,.4)
| {{td|width = 18%|font-size = 0.95em| {{Chapters/strings|DC1 maps}} }}
  {{td|width = 18%|font-size = 0.95em| {{Chapters/strings|TP1 maps}} }}
  {{td|width = 18%|font-size = 0.95em| {{Chapters/strings|DC2 maps}} }}
  {{td|width = 18%|font-size = 0.95em| {{Chapters/strings|SF maps}} }}
}}
{{tr|align = center
| {{td|width = 18%|font-size = 0.95em| [[File:C4_hardrain.png|224px|Hard Rain|link=https://left4dead.fandom.com/wiki/Hard_Rain]]<br>'''{{l4dwiki|{{Chapters/strings|HR}}|icon=hide}}''' }}
  {{td|width = 18%|font-size = 0.95em| [[File:C5_theparish.png|224px|The Parish|link=https://left4dead.fandom.com/wiki/The_Parish]]<br>'''{{l4dwiki|{{Chapters/strings|TP2}}|icon=hide}}''' }}
  {{td|width = 18%|font-size = 0.95em| [[File:C13_coldstream.png|224px|Cold Stream|link=https://left4dead.fandom.com/wiki/Cold_Stream]]<br>'''{{l4dwiki|{{Chapters/strings|CS}}|icon=hide}}''' }}
}}
{{tr|align = left|bgcolor = rgba(0,0,0,.4)
| {{td|width = 18%|font-size = 0.95em| {{Chapters/strings|HR maps}} }}
  {{td|width = 18%|font-size = 0.95em| {{Chapters/strings|TP2 maps}} }}
  {{td|width = 18%|font-size = 0.95em| {{Chapters/strings|CS maps}} }}
}} {{td|width = 18%|align = center|bgcolor = rgba(49, 124, 41, .2)|font-size = 0.95em|colspan=4| {{Chapters/strings|l4dOG}} }}
{{tr|align = center
| {{td|width = 18%|font-size = 0.95em| [[File:C8_nomercy.png|224px|No Mercy|link=https://left4dead.fandom.com/wiki/No_Mercy]]<br>'''{{l4dwiki|{{Chapters/strings|NM}}|icon=hide}}''' }}
  {{td|width = 18%|font-size = 0.95em| [[File:C9_crashcourse.png|224px|Crash Course|link=https://left4dead.fandom.com/wiki/Crash_Course]]<br>'''{{l4dwiki|{{Chapters/strings|CC}}|icon=hide}}''' }}
  {{td|width = 18%|font-size = 0.95em| [[File:C10_deadtoll.png|224px|Death Toll|link=https://left4dead.fandom.com/wiki/Death_Toll]]<br>'''{{l4dwiki|{{Chapters/strings|DT}}|icon=hide}}''' }}
  {{td|width = 18%|font-size = 0.95em| [[File:C11_deadair.png|224px|Dead Air|link=https://left4dead.fandom.com/wiki/Dead_Air]]<br>'''{{l4dwiki|{{Chapters/strings|DA}}|icon=hide}}''' }}
}}
{{tr|align = left|bgcolor = rgba(0,0,0,.4)
| {{td|width = 18%|font-size = 0.95em| {{Chapters/strings|NM maps}} }}
  {{td|width = 18%|font-size = 0.95em| {{Chapters/strings|CC maps}} }}
  {{td|width = 18%|font-size = 0.95em| {{Chapters/strings|DT maps}} }}
  {{td|width = 18%|font-size = 0.95em| {{Chapters/strings|DA maps}} }}
}}
{{tr|align = center
|
  {{td|width = 18%|font-size = 0.95em| [[File:C12_bloodharvest.png|224px|Blood Harvest|link=https://left4dead.fandom.com/wiki/Blood_Harvest]]<br>'''{{l4dwiki|{{Chapters/strings|BH}}|icon=hide}}''' }}
  {{td|width = 18%|font-size = 0.95em| [[File:C7_thesacrifice.png|224px|The Sacrifice|link=The Sacrifice]]<br>'''[[The Sacrifice|{{Chapters/strings|TS}}]]''' }}
  {{td|width = 18%|font-size = 0.95em| [[File:C14_thelaststand.png|224px|{{Chapters/strings|TLS2 popup}}|link=https://left4dead.fandom.com/wiki/The_Last_Stand_(Left_4_Dead_2)]]<br>'''{{l4dwiki|The Last Stand (Left_4_Dead_2)|{{Chapters/strings|TLS2}}|icon=hide}}''' }}
}}
{{tr|align = left|bgcolor = rgba(0,0,0,.4)
| {{td|width = 18%|font-size = 0.95em| {{Chapters/strings|BH maps}} }}
  {{td|width = 18%|font-size = 0.95em| {{Chapters/strings|TS maps}} }}
  {{td|width = 18%|font-size = 0.95em| {{Chapters/strings|TLS2 maps}} }}
}}
}}<!-- END OF SWITCH -->
}}<!-- END OF TABLE -->
</onlyinclude></includeonly>

Latest revision as of 04:22, 29 May 2025

English (en)Deutsch (de)Esperanto (eo)Español (es)Français (fr)Suomi (fi)Hrvatski (hr)Magyar (hu)Italiano (it)日本語 (ja)한국어 (ko)Nederlands (nl)Polski (pl)Português (pt)Português do Brasil (pt-br)Русский (ru)Slovenčina (sk)Svenska (sv)Türkçe (tr)Українська (uk)Tiếng Việt (vi)中文 (zh)中文(臺灣) (zh-tw)
Curly brackets white.pngTemplate Documentation [view] [edit]
Icon-translate.png Available doc translations
View
Page history
Icon-translate.png
This template uses a strings subpage
Please follow the format on this subpage(s) to add translations.
Number of strings:90
Approximate status of translation:English (en) 100% Deutsch (de) 57.78% Español (es) 22.22% Hrvatski (hr) 65.56% Русский (ru) 88.89% Tiếng Việt (vi) 6.67% 中文 (zh) 96.67% 
Gnome app science.png
This template uses a Testcases subpage
You can test how this page looks with it's different skins and parsers.
This template is used to list all game chapters, campaign or missions. Chapters name (and titlebar itself) are also translated automatically, but users can add new translations on the strings subpage.

Parameters

Parameter Description Value Preview
None Default appearance
(By default its expanded, for the documentation, its collapsed)
N/A
{{{game}}} Game name, uses anything that are based off {{Software}} template.
| game = hl
{{{type}}} Changes the title bar to Chapters, campaigns or missions.
| type = chapters
| type = camp
| type = missions
{{{state}}} ~ {{{state<?>}}} Collapses the chapters.
(<?>: Unknown amount of states, used in "Template:Chapters/<game name>")
| state = collapsed

| state1 = collapsed