Urban Flight
Some information on this page may contain plot spoilers. Continue reading at your own risk.
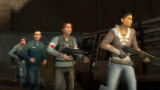
Urban Flight is the fourth chapter of ![]() Half-Life 2: Episode One.
Half-Life 2: Episode One.
Introduction
Having reached the surface, Gordon Freeman and Alyx Vance continue their flight through the urban ruin of the devastated City 17.
Halfway through the chapter, the protagonists enter a hospital.
Maps
In chronological order (i. e. as you play through them):
- ep1_c17_01 - the start of the chapter, navigating the streets.
- ep1_c17_02 - the Antlion Guard fight and navigating the trip-mined building.
- ep1_c17_02b - meeting Barney and entering the hospital.
- ep1_c17_02a - getting through the hospital.
Architecture
Streets
Urban Flight is quite similar to Anticitizen One (in fact, down to reusing parts of its maps) but much worse in terms of ongoing devastation.
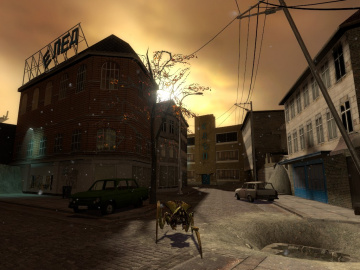
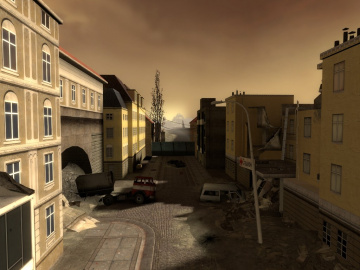
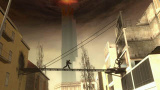
The streets are frequently barricaded with wooden boards and sheet metal or cut off with debris and collapsed buildings. Some of the 'citizen tech' remains, such as mechanised drawbridges and impromptu watchtowers.
The skyline is emptier than seen during the streetwars in ![]() Half-Life 2. There's no highrises in the background, at most a few faraway flat cards with composite images of ruins.
Half-Life 2. There's no highrises in the background, at most a few faraway flat cards with composite images of ruins.
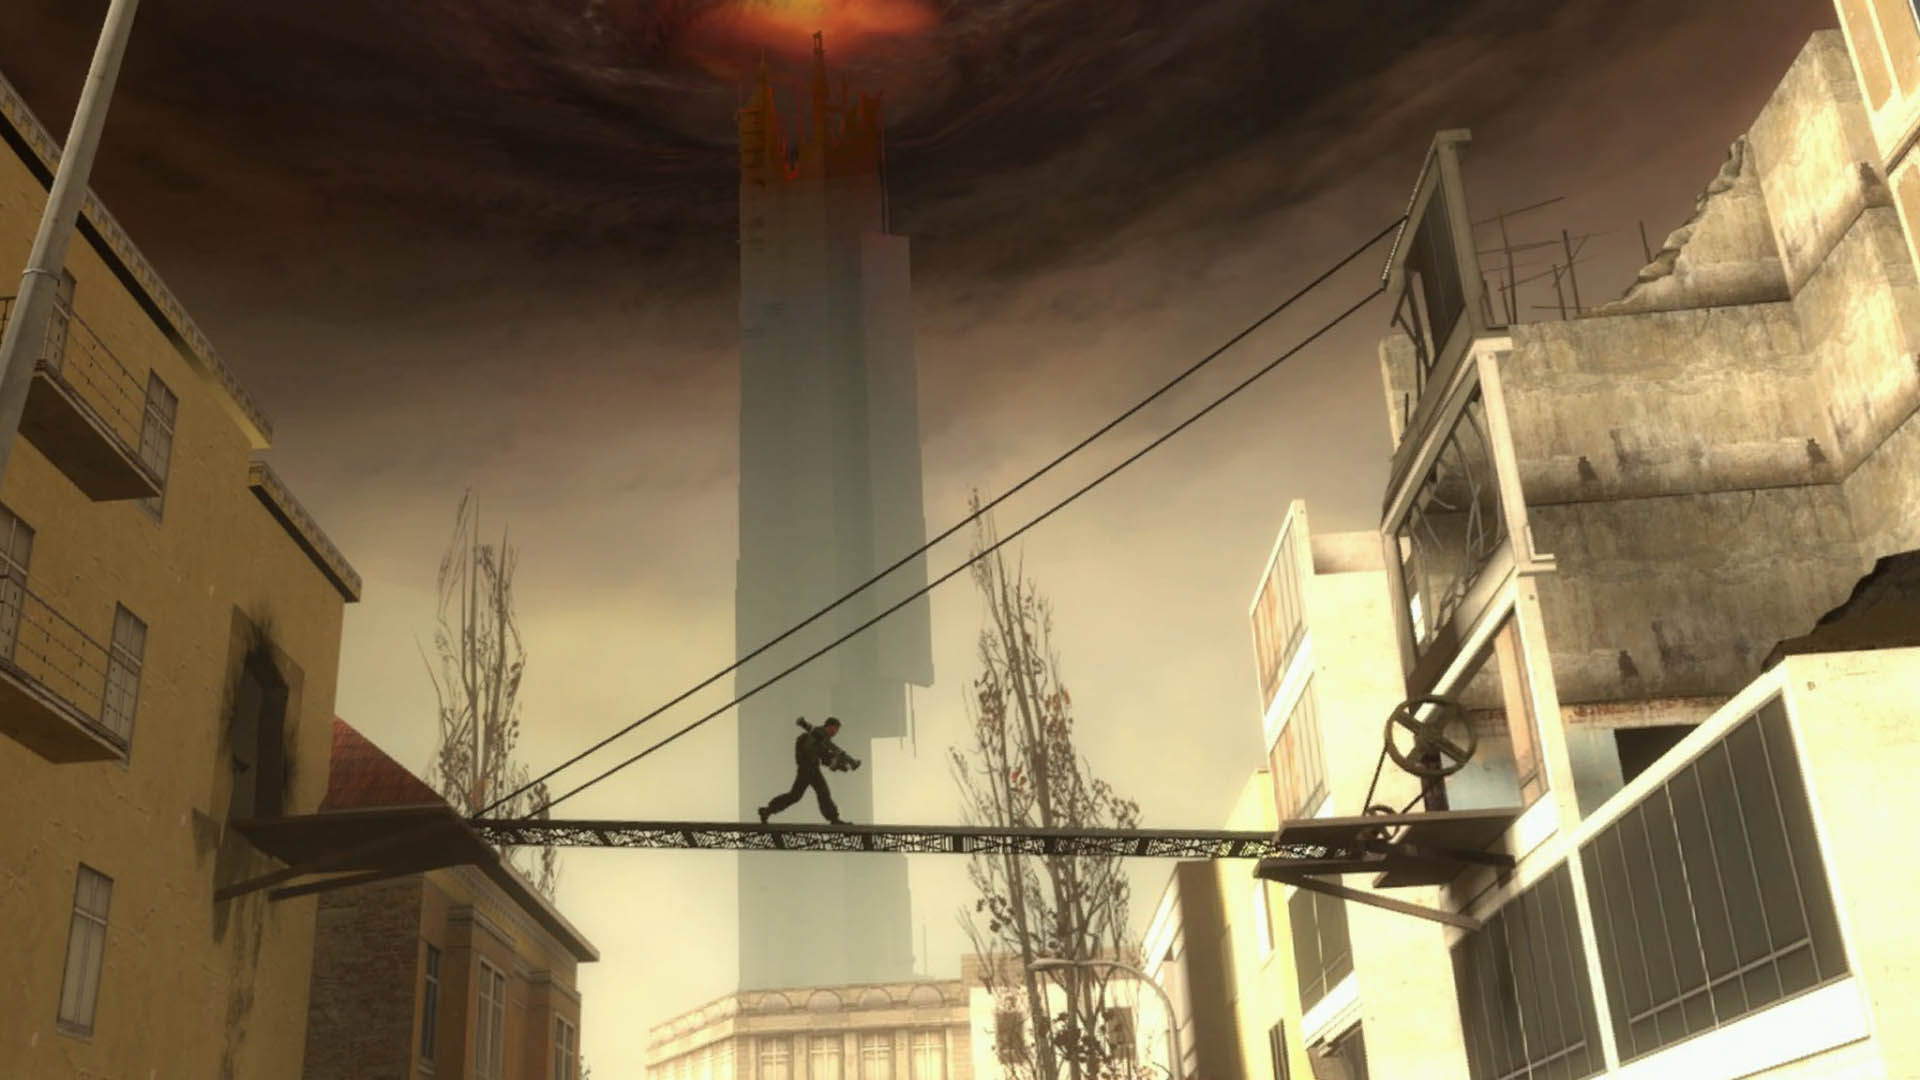
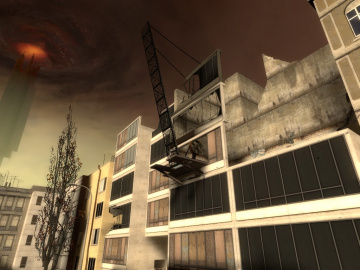
The burning Citadel is still looming over the streets, its cables are gone.
Hospital
The hospital was based on referencing older European hospitals, World War II photos, avoiding contemporary examples. see 'hospitalart' commentary.
This space is characterised by high archways, tilework in white, beige and green colors, white and yellow plaster in the corridors, and red doors. The color scheme was inspired by a hospital in Chornobyl.
The patient rooms consist of two spaces, the one with the bed and the adjacent personal bathroom. The baths are often encased in a tile border. Fluorescent lamps are wall-mounted above the bed, alongside a power outlet. All patient rooms have a bluish-green stripe painted alongside the walls above the bed.
The windows in the hallways are often small, barred or covered in a wire mesh, and placed above head height. In fact, most corridors and all patient rooms seem to lack windows entirely (which is unusual). Thus the lighting is often solely artificial, coming from fluorescent lamps, or some fires (usually not in the open but tucked away behind locked doors and collapsed walkways).
The surgery rooms use white and green tilework, white vents, and cold fluorescent light. Episode One has several surgery-related models:
models/props_c17/hospital_surgerytable01models/props_c17/hospital_surgerylight01models/props_c17/hospital_shelf01models/props_c17/hospital_ivstand01models/props_c17/hospital_cart01)
There are often computer monitors and electronic consoles put in these rooms to monitor patient vitals (obviously, none functioning now). All in all, the game represents a normal surgery room from the second half of the XX century.
The hallways and patient rooms should all have handrails placed along the walls about 36 units above the floor. There are special models for these, the models/props_c17/hospital_railing series.
Environment
Streets
Ash is falling down continuously, the sky is reddish and beige, the clouds gathering in a vortex above the Citadel are dark red. The sun is visibile, but as a broad bright smear in the sky; the horizon is shaded with a band of a yellowish fog.
The colors of the environment are dull, faded, made to feel dusty, and conform to the background of the red and yellow shades. The plaster on the buildings usually uses warm tones, red, terracota, yellow; there's some brick walls and some stone facades, all showing damage, and the sunlight tints it in dull pinkish hue.
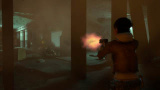
Very few people are left in the city. You only encounter groups of rebels a couple of times; you never get a full squad following you. The streets are desolate, the interiors are dark, cramped and infested.
The Combine is losing its grip on the city. This is evident in the scene where the Antlion Guard fighting the Combine APC; it destroys it practically without effort. Rarely the Combine Soldiers manage to pull off an ambush or an organized strike; the encounters feel almost accidental. In ep1_c17_01, a couple of soldiers are interrupted while placing SLAMs, ending in a fire spreading through the building.
As such, Combine fortifications are infrequent, the Smart Walls usually stand in small isolated clusters. However, there are still some active forcefields and locks and Emplacement Guns.
Antlion burrows are encountered in the first two maps.
Hospital
The indoors environment shows a bit less devastation than the streets, it's fairly well lit with working lamps. The side corridors all end in conveniently collapsed dead ends; occasionally, a broken ceiling can provide additional illumination.
- This is a good way to avoid monotony.
The Combine has been fighting necrotics here while setting up traps; as such, the place is often decorated with gory detail, dried blood, overturned and broken furniture, some ash and soot.
A few points still held by the Combine are set up with active forcefields, computer interfaces, spotlights and cables.
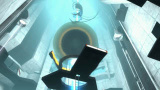
The basement with the electrified puzzle shares its style with Lowlife: bare concrete and rusty pipes, collapsed floor and, of course, it's flooded. It is naturally lit through the narrow windows, providing a soft, filling lighting from one side of the room, with the glowing exit sign clearly visible.
NPC's
Numerous Combine Soldiers which often make their entrace via rappelling from rooftops. Some Elites are placed in the hospital.
Several City scanners.
A single Sniper serves as a mandatory 'puzzle' enemy.
Roller Mines are encountered in the first map, being useful against the soldiers and the sniper after being reprogrammed by Alyx.
Antlions make appearance in the first half of the chapter, with a lone Guard among them.
Zombies of all types along with Zombines, both in the streets and in the hospital. Same goes for all types of Headcrabs.
Sentry Turrets, guarding the hospital exit.
A Combine Gunship is seen a couple times before entering the hospital, where it serves as a boss.
A Combine Dropship is encountered along with the first soldiers in this chapter, also deploying Rollermines in the process (the second and last such dropship, after Sandtraps).
Several Barnacles inhabit a section of the hospital and the mined building.
Hopper Mines are used both as an environmental hazard against the player and as a potential tool for the player.
Among allies, Rebels are seen at a few points, wielding SMGs and RPGs. Barney is also there, giving us one of his crowbars.
A Strider, an Advisor, and Dr. Kleiner also appear, all scripted.
Trivia
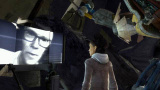
- Kleiner replaces Dr. Breen on the Breencast monitors, giving us an important story update.
- While the soldiers weren't able to rappel down walls in
 Half-Life 2 (only rappelling straight down from edges), this feature actually debuted in
  Half-Life 2: Lost Coast before Episode One. Unlike HL2, where soldiers and metrocops need a spawnflag for rapelling, the new setup uses a scripted_sequence and doesn't rely on special flags or AI states.
- At the end of the ep1_c17_01, the Citadel Core becomes critical again. Green lightnings begin striking the Citadel on occasion.
- The Antlion Guard that fights the Combine APC cannot lose. There's a special script setting his health to maximum every second until the APC is destroyed.
- There is a hidden stash with a Supply Crate in the first map. It is meant to be signed with a Lambda spray logo, but the decal entity is placed too far from the wall and is never rendered in the game.
- The tripmines placed by the soldiers in the first maps are both referred to as SLAMs in their entity names and the Orange Box Prima Guide. They appear to be copy-pasted from Nova Prospekt, where they were also internally called SLAMs.
- There are numerous 'Dr. Breen's Private Reserve' vending machines inside the hospital, hinting it may have been operating as normal during the Combine reign.
Reference
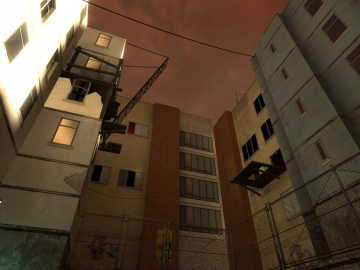
Streets

The starting vista.
One of the streets.

Ditto.
Ditto, with the skyline being almost devoid of standing buildings.
A Rebel drawbridge.
Ditto.
An interior of a destroyed building.
A Combine armory in one of the tenement buildings.
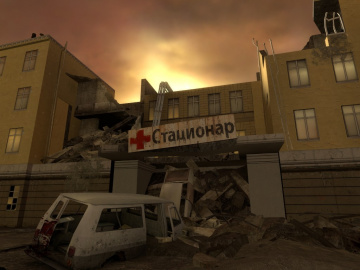
The hospital entrance, collapsed.
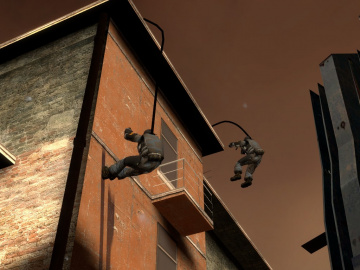
Combine Soldiers rappelling from a roof.


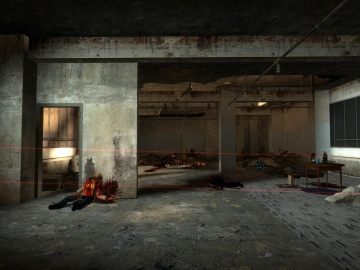
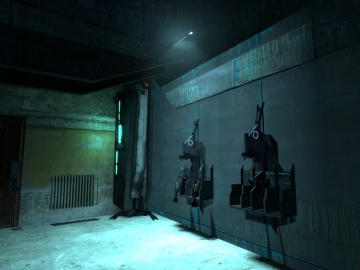
Hospital
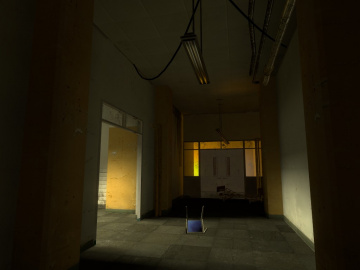
A hallway in the beginning of the hospital section.
Another, with light casting from the narrow windows on the right wall.

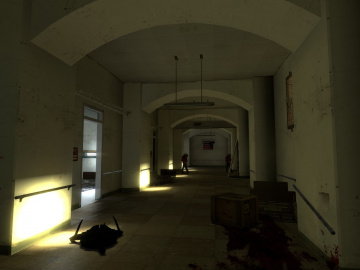
Ditto, with more light from a Combine spotlight and spilling from a patient's room.

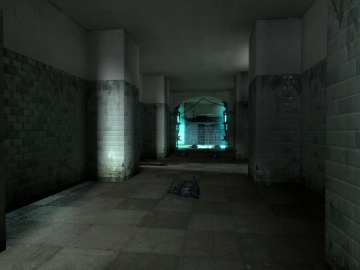
A hallway with an exit sign.
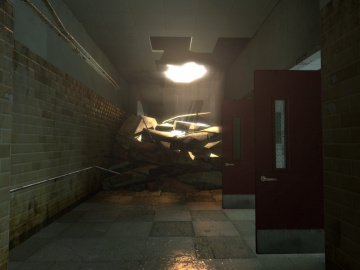
A hallway with a collapsed ceiling and light coming through.
A hallway with green tiles.
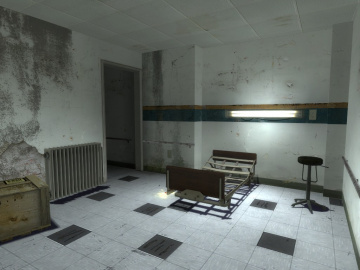
A patient's room.

A grim surgery room.
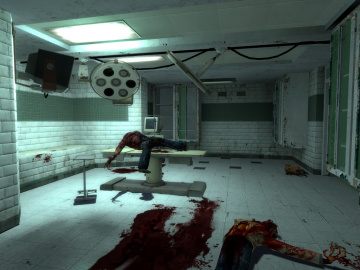
Ditto.

A collapsed room.
A collapsed room.
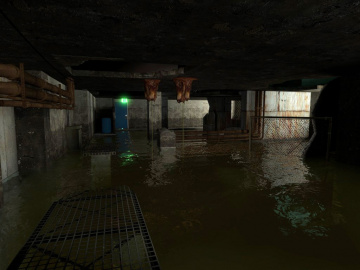
The flooded basement.


See also
| Toggle chapters |
||||||||||||||||||||||||||||||||||||||||||||||||||||||||||||||||||||||||||||||||||||||||||||||||||
|---|---|---|---|---|---|---|---|---|---|---|---|---|---|---|---|---|---|---|---|---|---|---|---|---|---|---|---|---|---|---|---|---|---|---|---|---|---|---|---|---|---|---|---|---|---|---|---|---|---|---|---|---|---|---|---|---|---|---|---|---|---|---|---|---|---|---|---|---|---|---|---|---|---|---|---|---|---|---|---|---|---|---|---|---|---|---|---|---|---|---|---|---|---|---|---|---|---|---|
 Undue Alarm ep1_citadel_00
|
 Direct Intervention ep1_citadel_03
|
 Lowlife ep1_c17_00
|
 Urban Flight ep1_c17_01
|
|||||||||||||||||||||||||||||||||||||||||||||||||||||||||||||||||||||||||||||||||||||||||||||||
 Exit 17 ep1_c17_05
|
||||||||||||||||||||||||||||||||||||||||||||||||||||||||||||||||||||||||||||||||||||||||||||||||||