Hammer Overview
This page either contains information that is only partially or incorrectly translated, or there isn't a translation yet.
If this page cannot be translated for some reason, or is left untranslated for an extended period of time after this notice is posted, the page should be requested to be deleted.
Also, please make sure the article complies with the alternate languages guide.
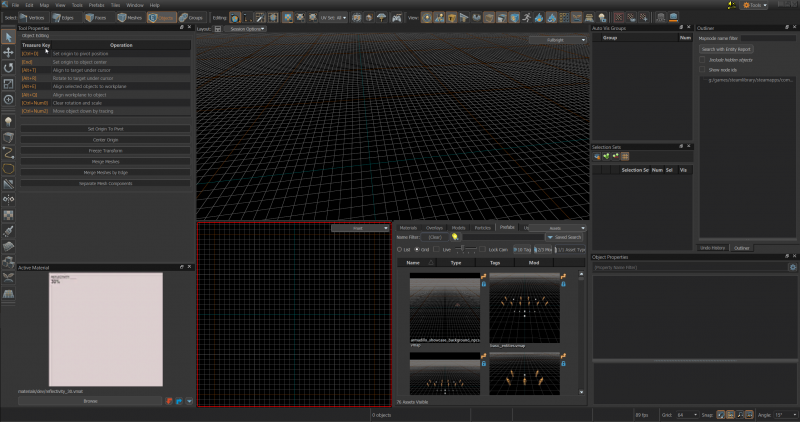
Большинство элементов редактора Hammer могут быть перемещены или настроены в соответствии с предпочтением пользователя. Основные окна редактирования не могут быть перемещены, но они имеют множество вариантов размещения.
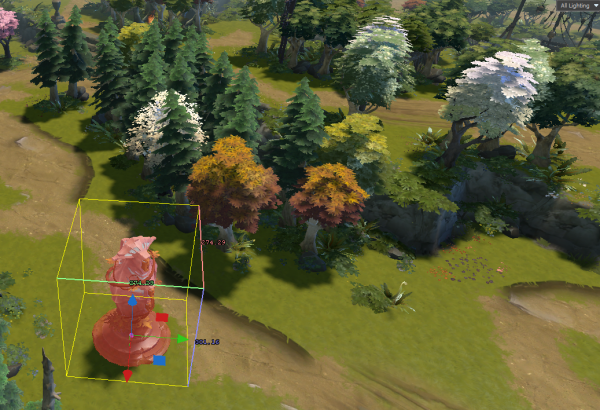
Окно 3D вида
В этом окне отображается ваша карта в 3D, чтобы узнать как перемещаться в нем прочтите статью Перемещение в пространстве. Большая часть вашей работы будет сделана в этом окне.
Вы можете регулировать освещение в данном окне переключаясь между All Lighting (F6) и Fullbright (F5).
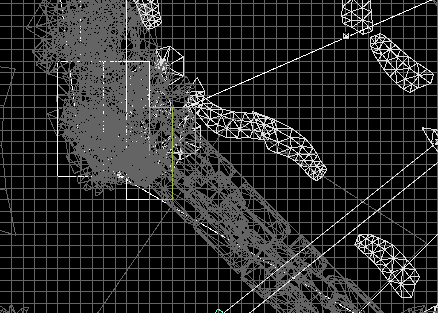
Окно 2D вида
2D Окно просмотра, позволяет видеть карту в трёх проекциях - сверху, спереди и сбоку, это полезно, когда Вы хотите увидеть объект с определенной точки зрения или работать над созданием геометрии карты.
- Ctrl+Пробел переключение между видом: сверху, спереди, сбоку
- Ctrl+A+Пробел переключение между видом: сверху, спереди, область будет размещена так, что выделенный объект, будет находиться в её центре.
Персонализация интерфейса
Практически любую панель можно перевести в плавающий вид или закрыть, используя маленькие кнопки в правом верхнем углу панели. Небольшую иконку с перекрывающимися окнами можно использовать, что-бы перевести панель в режим плавающего вида. После того как панель переведена в режим плавающего вида, её размер может быть изменен или она может быть вставлена в редактор на свое или же другое место. Так же вы можете закрыть панель, нажав на "X".
This overview assumes a default Hammer layout.
Инструменты
Covers the various tools for accomplishing tasks in Hammer. When a tool is active, the Tool Properties pane to the right shows its unique properties and commands.
Tools are globally accessible. This means that if you hit the key associated with another tool, e.g. ⇧ Shift+S for Selection Tool, you will be switched to that tool from whichever one you were in.
Выделение (Selection Tool)
The Selection Tool is the default tool when Hammer is started and is the most basic way to select geometry elements (vertices, edges, faces, meshes), objects, and groups. Once a selection is made it can be manipulated via the various other tools available.
- ⇧ Shift+S - Выделить
Смещение (Translate Tool)
The Translate Tool allows movement of a selection along the X, Y, or Z axis. Drag the gizmo's red arrow for X-axis movement, green arrow for Y-axis movement, or blue arrow for Z-axis movement. You can also grab the colored squares to translate the object along two axes at once. Translation distance is dictated by grid size but can be overridden by holding Ctrl while translating the selection.
- T - Сместить
- Ctrl+
 - While translating a selection this temporarily disables grid snapping
 - [ and ] - Change grid size in power of two increments
Вращение (Rotate Tool)
The Rotate Tool allows rotation of models along any axis. The gizmo will change to red, green, and blue circles and dragging any of these will rotate the object along the desired axis. It is possible to rotate along multiple axes by dragging the yellow sphere in the center of the gizmo (hidden until hovering the pointer over it). The angle at which that rotation snaps is determined by the value provided for Angle at the bottom right of Hammer.
- R - Вращать
- Ctrl+
 - While rotating this temporarily disables the angle snap settings
 - Angle - Bottom right of the Hammer window defines snap angle
Масштабирование (Scale Tool)
Масштабирование позволяет изменять масштаб геометрий и модели. Инструмент состоит из манипулятора в сочетаний с красным кубом, зелёным и синим. Перемещение красного куба масштабирует геометрию по оси X, зелёный куб масштабирует по оси Y и синий по оси Z. Вы можете масштабировать по двум осям сразу, перетаскивая их. Так же возможно масштабировать сразу три куба одновременно, двигая пурпурный куб, который является манипулятором всех трёх кубов.
- E - Масштаб
Центр вращения (Pivot Tool)
Центр вращения позволяет менять центр вращения объекта. Различные инструменты используют эту точку для понимания, как работать с выбранным объектом. Например, если начать вращать куб, у которого точка поворота находится в центре, куб будет вращаться на месте. Переместив точку поворота куба в его угол заставит куб поворачиваться вокруг этого конкретного угла. Перемещение точки поворота это временная настройка, если только Вы не используете Set Origin To Pivot (сделать центром объекта). Отменив выделение и выделив объект заново центр вращения вернется в начальное положение.
- Insert - Войти/Выйти из центра вращения
- End - Вернуть центр вращения в начальное положение
- Set Origin To Pivot - Применимо только к сетке, однако может быть использована для сохранения центра вращения на будущее
Объекты (Entity Tool)
The Entity Tool allows placement of any type of entity class in your map. These include things like lights, player spawn locations, AI spawn locations, logic relays, props, etc.
- ⇧ Shift+E - Создать объект
- Alt+↵ Enter - Opens properties for a placed entity
Элементы (Block Tool)
The Block Tool will create basic meshes. The most commonly used mesh is usually the 'block', hence the name of the tool. The usual workflow is to place basic geometry in the world and then use the more precise geometry editing tools (translate, rotate, scale) to hone in on the desired shape of the geometry.
Some of the other geometric shapes have presets to modify ahead of time to get different shapes. For example, the cylinder can make quick columns, arch can create arched doorways or spiral staircases, and so on.
- ⇧ Shift+B - Создать элемент
- Esc - Отменить создание
- ↵ Enter или Space - Принять создание
Вырезка (Clipping Tool)
The Clipping Tool will slice geometry in a variety of ways. Cuts must be made in the 2D viewport and must be confirmed with ↵ Enter, otherwise the change is discarded. The Clipping Tool has three different modes that determine whether it keeps the geometry on one side of the cut, the other side of the cut, or both sides of the cut. Cycle through these by repeating the shortcut key.
- ⇧ Shift+X - Вырезать
- ↵ Enter - Подтвердить вырезку
Симметрия (Mirror Tool)
The Mirror Tool allows mirroring of a selection across a user-defined axis. In the 2D view, click and drag a line to choose which axis it will use to mirror.
- ⇧ Shift+F - Отразить
Наложение текстур (Texture Projection Tool)
The Texture Projection Tool is used to do basic UV mapping. Can be useful for complex geometry that needs fine tuning. There are more automated methods for UV mapping covered in other parts of the documentation.
- ⇧ Shift+P - Наложить текстуру
Paint Tool
The Paint Tool allows blending of materials on displacement geometry (often referred to as terrain but not limited to ground type materials).
- ⇧ Shift+V
Деформирование (Displacement Tool)
The Displacement Tool is a method to sculpt geometry inside Hammer using displacements as a base. One usage case for this tool is to build rolling hills for a terrain-based map.
- ⇧ Shift+D - Деформировать
Россыпь объектов (Asset Spray Tool)
The Asset Spray Tool is a work-in-progress, unsupported tool that allows any asset to be "painted" onto surfaces in the world.
Плиточный редактор (Tile Editor)
The Tile Editor allows the easy creation of custom maps using a set of predefined tiles that link together to form a playable gameplay space. In Tile Editor, you can paint terrain, water, paths, trees, plants, and even place shops, barracks and other gameplay objects. See the Tile Editor introduction for details.
Пути (Path Tool)
The Path Tool is the tool for making paths. You can use this to make prop based splines for curved geometry. There's a few types of rope you can add: Generic Path, Static Cable, Trajectory Path, move_Keyframed, move_rope, move_track, and path_particle_rope. The path_particle_rope uses particles as rope. Set it from selecting a particle from the asset browser.
- ⇧ Shift+P - Path Tool
Физика (Physics Simulation)
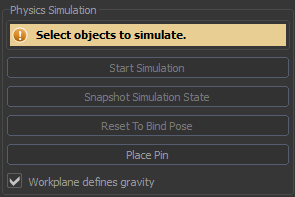
Physics Simulation allows you to use the prop_physics abilities in the editor. Open the menu, select a prop_physics and click Start Simulation or press Space.
- ⇧ Shift+C - Меню симуляции физики
- Space - Включить/отключить симуляцию.
 - On the currently simulated objects, click dragging an object will move it around.
Режимы выбора (Selection Modes)
Режим выбора определяет элемент, который может быть выбран. Допустимыми режимами выделения являются: вершины, ребра, грани, сети, объекты, группы, кости и навигация.
Selection modes are covered in more detail in Basic Construction.
- 1 Вершины (Vertices)
- 2 Рёбра (Edges)
- 3 Грани (Faces)
- 4 Сети (Meshes)
- 5 Объекты (Objects)
- 6 Группы (Groups)
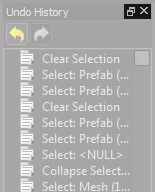
Отмена действий (Undo History)
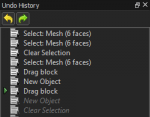
Каждое действие сделанное в Hammer отобразиться в Undo History. Нажатие на изменение вернет карту в предыдущее состояние. Бывают случаи когда вам надо отменить несколько действий, в таком случае использование комбинации Ctrl+Z является долгим и не рациональным, и проще использовать Undo History.
- Ctrl+Z - Отмена действия
История команд (Command History)
Любое действие Hammer отображается как команда в панели Command History . Repeat Commands может быть применено к выбранной команде (или к нескольким выбранным командам), для повторения нужных действий.
Более подробно можно ознакомиться в данной статье: История команд.
- ⇧ Shift+G - Повторить команду
Планировщик (Outliner)
The Планировщик pane provides a view of all the objects in a map. Objects can be selected here much like in the 2D or 3D view. Basic searches can be run via the Mapnode name filter field. Advanced filtering options are located under the Entity filter options checkbox, which allows searching of entities by various class and/or any key/value combinations.
Видовые группы (Selection Sets)
Видовые группы pane displays all the objects in the map. The Auto selection set is generated automatically and contains all the objects in a map. Custom selection sets can be defined via the New Selection Set button. You can use the buttons to the left of a category to hide or show objects en masse.
It may be desirable to place an entire region of a map in a selection set to easily toggle on/off. This would be accomplished via a new custom selection set to help keep the map more organized. This is especially useful in very complex or large maps.
To add objects to an existing selection set, simply select what you would like to add and press the Key combination. Choose the existing set from the drop-down menu and click OK.
- Ctrl+R - Создать видовую группу
Свойства объекта (Object Properties)
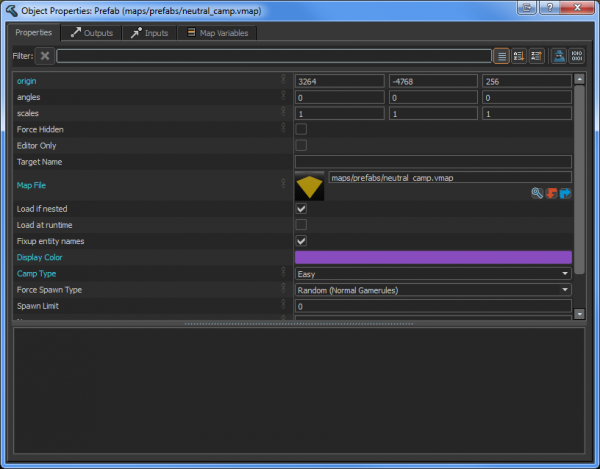
В панели Object Properties отображаются различные свойства, которые могут быть изменены в данном объекте. Object Properties contains everything that defines a particular entity, and also includes the Input and Output tabs of the logic system.
- Alt+↵ Enter - открывает окно Свойство объекта (Object Properties)
Используемый материал (Active Material)
Отображает текущий используемый материал. Материал будет накладываться автоматически на созданную геометрию. Нажмите Browse, если хотите сменить его. When in Faces selection mod, right-clicking a face and choosing Lift Material Under Cursor from the drop-down menu will make it the active material.
- Ctrl+M - Lift material under the cursor and make it the new active material
- ⇧ Shift+T - Применить используемый материал к выделенному полигону
Вкладки ресурсов (Assets Tabs)
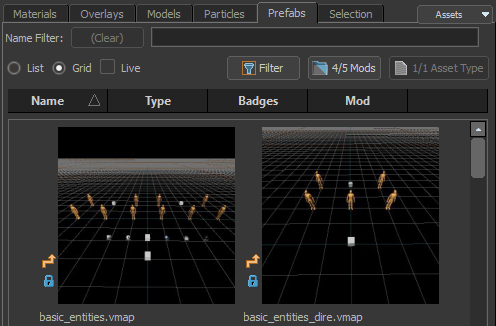
Аналогично настройке Обзора ресурсов, содержит вкладки для каждого из различных типов фрагментов содержимого используемого на карте: Материалы (Materials), Наклейки (Decals), Модели (Models), Частицы (Particles), Заготовки (Prefabs), and Видовые группы (Selection).
Полезные настройки
- Tools -> Options -> View 3D
- Радиус видимости (Backplane Distance): измените это значение, чтобы настроить дальность отображения геометрии карты в окне 3D вида. Это поможет повысить производительность отображения на больших сложных картах.
- Forward Speed Max: Adjusts how quickly the camera moves through the 3D viewport.
- Toggle Grid Navigation Preview: Displays Dota 2's navigation grid inside of Hammer highlighting pathable and unpathable regions.
- Tools -> Options -> Key Bindings can be used to see a list of all Hammer commands
- Note: This only shows commands that have hotkeys associated with them.
- Use the filter field to search for a particular context (e.g. "ToolSelection") or a particular command (e.g. "merge").
- F1 will open a help menu that shows all the command categories.
 -> All Commands does the same as above.
- Either search through the categories or use the filter field to search for a command.
Далее: Basic Construction
