Advanced Lighting: Difference between revisions
(→-textureshadows: Add link to textureshadows page) |
Kestrelguy (talk | contribs) m (grammar check) |
||
| Line 1: | Line 1: | ||
{{ | {{lang|Advanced_Lighting}} | ||
== Light Entities == | |||
=== {{ent|light_dynamic}} === | |||
| | |||
}} | |||
== Light | |||
=== | |||
An invisible light source that can change and move over time. Its position can change and it can be aimed at moving objects. Dynamic lights are recalculated continuously, which means they have a higher processing cost but are much more flexible than static lighting. Use this type of light sparingly, because it is the most expensive light for the engine to render. | An invisible light source that can change and move over time. Its position can change and it can be aimed at moving objects. Dynamic lights are recalculated continuously, which means they have a higher processing cost but are much more flexible than static lighting. Use this type of light sparingly, because it is the most expensive light for the engine to render. | ||
{{note|This entity actually consists of two lights, a cone | {{note|This entity actually consists of two lights, a cone-shaped light and a spot world light. Some values may affect one and not the other.}}{{clr}} | ||
=== [[Glowing Textures|Glowing textures]] === | === [[Glowing Textures|Glowing textures]] === | ||
[[Image:glow_selfillum.jpg|thumb|256px|right|A self-illuminating texture.]] | [[Image:glow_selfillum.jpg|thumb|256px|right|A self-illuminating texture.]] | ||
In a few cases it’s possible to make the texture itself appear bright or even to emit light, doing so requires the use of a .vmt or .rad file and is beyond the scope of this article. Doing so can save the mapper the effort of trying to create an even lighting effect across a surface that’s meant to be the light source. | In a few cases it’s possible to make the texture itself appear bright or even to emit light, but doing so requires the use of a <code>.vmt</code> or <code>.rad</code> file and is beyond the scope of this article. Doing so can save the mapper the effort of trying to create an even lighting effect across a surface that’s meant to be the light source. | ||
Click on the Glowing Textures link above for more information. | Click on the Glowing Textures link above for more information. | ||
{{clr}} | {{clr}} | ||
=== | === {{ent|env_particlelight}} === | ||
[[image:int_particle.jpg|thumb|150px|right|A red light.]] | [[image:int_particle.jpg|thumb|150px|right|A red light.]] | ||
A normal light that lights only the particles created by an | A normal light that lights only the particles created by an {{ent|env_smokestack}} and lights nothing else. Useful for enhancing lighting in areas with steam and such.{{clr}} | ||
=== | === {{ent|env_projectedtexture}} === | ||
[[Image:Shadowmapping_filter1_res4096.jpg|thumb|256px|right|A very small scene demonstrating | [[Image:Shadowmapping_filter1_res4096.jpg|thumb|256px|right|A very small scene demonstrating an <code>env_projectedtexture</code> with the "framebuffer fix," "Clipping fix," and "Grain fix." The depth texture resolution is set at 4096 and the grain/filter is at 1. Created with Hammer using only stock ''Half-life 2'' content.]] | ||
Similar to a light_dynamic, this is an invisible projective light source that can change and move over time. Its position, field-of-view and range can change and it can be aimed at moving objects. | Similar to a <code>light_dynamic</code>, this is an invisible projective light source that can change and move over time. Its position, field-of-view and range can change and it can be aimed at moving objects. <code>env_projectedtexture</code>s are unique due to the fact that they cast real dynamic shadows from any geometry (brush or model) onto both brushes and models (even themselves), unlike render-to-texture shadows. This system is used for the player's flashlight in Source engine games. | ||
<code>env_projectedtexture</code> is the most expensive light source in the engine. None of the lighting is done during map compilation, and all calculations are done real-time. Having more than one or two will drastically hurt performance on older video cards. Also, note that, when used on {{src07|2}} and earlier engine versions without the [[env_projectedtexture/fixes|fixes found here]], the shadows will be very "grainy," low-resolution, and unable to have a parent. These issues have been fixed in newer engine iterations like {{src09|2}}; however, you are limited to rendering only one projected texture at a time (including the player's flashlight). | |||
{{note|The farther you cast the shadow, the less detailed the shadow map will be due to the perspective projection. Lower FOV, higher NearZ and closer proximity to the shadow casters (as it's not wasting any space rendering nothing) often give best results. When shadows start to lose detail, the most obvious defect is light bleeding, the shadow will "be pulled" away from the caster(s).}}{{clr}} | {{note|The farther you cast the shadow, the less detailed the shadow map will be due to the perspective projection. Lower FOV, higher NearZ, and closer proximity to the shadow casters (as it's not wasting any space rendering nothing) often give best results. When shadows start to lose detail, the most obvious defect is light bleeding, and the shadow will "be pulled" away from the caster(s).}}{{clr}} | ||
== Related | == Related Entities == | ||
=== | ==={{ent|info_lighting}}=== | ||
[[Image:info_lighting.png|left]] | [[Image:info_lighting.png|left]] | ||
This is an entity used to specify the origin from which another entity is lit. Sometimes due to drastic changes in light over short distances or complex shadows a model can appear to be lit incorrectly. By using this entity the model will be lit as though it were stationed at this location. | This is an entity used to specify the origin from which another entity is lit. Sometimes due to drastic changes in light over short distances or complex shadows a model can appear to be lit incorrectly. By using this entity the model will be lit as though it were stationed at this location. | ||
One common example is the HL2 static Ladder props; when used in dark areas they may appear to glow, which can be corrected by inserting an info_lighting, naming it and specifying that name in the properties for the Ladder prop.{{clr}} | One common example is the HL2 static Ladder props; when used in dark areas they may appear to glow, which can be corrected by inserting an {{ent|info_lighting}}, naming it, and specifying that name in the properties for the Ladder prop.{{clr}} | ||
{{tip|It is generally better to use -staticproplighting when compiling instead of tweaking the lighting origin. See below.}} | {{tip|It is generally better to use -staticproplighting when compiling instead of tweaking the lighting origin. See below.}} | ||
=== | ==={{ent|env_lightglow}}=== | ||
[[image:env_lightglow.jpg|thumb|150|right|The light glow effect]] | [[image:env_lightglow.jpg|thumb|150|right|The light glow effect]] | ||
Used to create a bright almost flare that will fade out at specified distances. Generally used to transition dark tunnels to bright outsides. Used as a precursor to the [[HDR]] effect to fake a change in exposure of the light. Some | Used to create a bright almost-flare that will fade out at specified distances. Generally used to transition dark tunnels to bright outsides. Used as a precursor to the [[HDR]] effect to fake a change in exposure of the light. Some {{tf2|2}} maps use this to simulate bloom from regular light sources as well, but it is recommended that you use {{ent|env_sprite}} instead.{{confirm}}{{clr}} | ||
=== | ==={{ent|info_no_dynamic_shadow}}=== | ||
[[image:int_nody.jpg|thumb|225px|right|An example in use]] | [[image:int_nody.jpg|thumb|225px|right|An example in use]] | ||
This forces a particular brush face to not receive any of the dynamic shadows created by physics entities or NPC’s. It’s used rarely but may be needed to hide incorrect or bad shadows that create an artificial look.{{clr}} | This forces a particular brush face to not receive any of the dynamic shadows created by physics entities or NPC’s. It’s used rarely but may be needed to hide incorrect or bad shadows that create an artificial look.{{clr}} | ||
=== | === {{ent|env_tonemap_controller}} === | ||
Used to control the exposure of the [[HDR]] lighting effects. Can be given inputs to control more effects. It | Used to control the exposure of the [[HDR]] lighting effects. Can be given inputs to control more effects. It's common to have a {{ent|logic_auto}} to do the initial settings on loading the map. | ||
=== [[Hammer Smoothing Groups Dialog|Smoothing groups]] === | === [[Hammer Smoothing Groups Dialog|Smoothing groups]] === | ||
[[Image:Smoothing groups smoothing example.jpg|thumb|400px|right|The cylinder on the left is not smoothed.<br> The cylinder in the middle is smoothed with a light map of 16.<br> The cylinder on the right is smoothed with a light map of 8.]] | [[Image:Smoothing groups smoothing example.jpg|thumb|400px|right|The cylinder on the left is not smoothed.<br> The cylinder in the middle is smoothed with a light map of 16.<br> The cylinder on the right is smoothed with a light map of 8.]] | ||
Used to smooth lighting between faces. Found in the [[Hammer_Face_Edit_Dialog|face edit dialog]], the groups allow the lighting of a face to be smoothed between other faces | Used to smooth lighting between faces. Found in the [[Hammer_Face_Edit_Dialog|face edit dialog]], the groups allow the lighting of a face to be smoothed between other faces to produce rounded effects with lighting. A classic example is when making a cylinder: If no smoothing groups are set, each face on the brush will catch light separately and will be lit separately. This will create a very obvious effect of separating each face. If they are all placed in the same smoothing group, the light will be blurred between the faces creating a much smoother rounder look on the pillar. | ||
{{tip|Smoothing groups have virtually no effect on performance, apart from adding extra time for VRAD to compile, so use them on your final compile.}}{{clr}} | {{tip|Smoothing groups have virtually no effect on performance, apart from adding extra time for VRAD to compile, so use them on your final compile.}}{{clr}} | ||
=== [[Lightmap | === [[Lightmap]]s === | ||
A lightmap is the lighting data of each face. The stored light is then added to the face giving it brightness. The lightmap's scale refers to the number of texture pixels per light pixel (luxel). Smaller values mean more luxels, thus a better quality but larger BSP size and compile times. | A lightmap is the lighting data of each face. The stored light is then added to the face giving it brightness. The lightmap's scale refers to the number of texture pixels per light pixel (luxel). Smaller values mean more luxels, thus a better quality but larger BSP size and compile times. | ||
| Line 71: | Line 67: | ||
== Compile Options == | == Compile Options == | ||
{{src07|4}} added three additional options you can use when compiling to improve the realism during compile. To access these, open Expert mode in the Run Map dialog and select "HDR Full compile -final (slow!)"; then, select the "$light_exe" line in the list below that. In the Parameters field, append the options you wish to use, as shown below. | |||
{{Note|These considerably increase compile time, so it is recommended that you save them for the last few stages of your map.}} | |||
=== -staticproppolys === | === <code>-staticproppolys</code> === | ||
Normally, VRAD creates shadows under static props based on the collision mesh, since collision meshes are usually much simpler but still close enough to the prop's shape. This is usually sufficient, but some props may have oversimplified collision | Normally, VRAD creates shadows under static props based on the collision mesh, since collision meshes are usually much simpler but still close enough to the prop's shape. This is usually sufficient, but some props may have oversimplified collision meshes—or none at all—causing VRAD to create unnatural shadows. This option allows you to override this for certain props and force VRAD to use the polygon mesh instead. This is also necessary if you need to use <code>-textureshadows</code> (see below). Simply append ''-staticproppolys'' to the $light_exe Parameters list (see above). | ||
===<code>[[Texture Shadows|-textureshadows]]</code>=== | |||
=== [[Texture Shadows|-textureshadows]] === | |||
Not all props have their "holes" defined solely by geometry. Mesh fences, for example, use textures with alpha channels. These are not normally recognized by VRAD, so if you use them you will have to either disable shadows from them (which sometimes produces decent results) or add this option, which forces VRAD to take alpha channels into account as well, just like with brushes. | Not all props have their "holes" defined solely by geometry. Mesh fences, for example, use textures with alpha channels. These are not normally recognized by VRAD, so if you use them you will have to either disable shadows from them (which sometimes produces decent results) or add this option, which forces VRAD to take alpha channels into account as well, just like with brushes. | ||
To make -textureshadows work, you need to create a custom RAD file for your map listing which props you want this option to affect. Extract the lights.rad file from the game in question using [[GCFScape]] or Crafty, place it in the game folder, and give it a new name. Then, open it in any text editor and append the line | To make <code>-textureshadows</code> work, you need to create a custom RAD file for your map listing which props you want this option to affect. Extract the {{ent|lights.rad}} file from the game in question using [[GCFScape]] or Crafty, place it in the game folder, and give it a new name. Then, open it in any text editor and append the line <code>forcetextureshadow [full path of prop]</code> to the file for each model you want this to affect. You will also need to have <code>-staticproppolys</code> enabled for this to work. Finally, append ''-lights [name of your custom RAD file] -textureshadows'' to the $light_exe Parameters list (see above). | ||
=== -staticproplighting === | === <code>-staticproplighting</code> === | ||
Unlike the other two, this option affects the lighting ''received'' by props. Props are generally lit based on the lighting levels at their origin (see [[#info_lighting|info_lighting]] above), which can lead to unnatural lighting if a light source is aimed at only one side of the prop or if the prop is half in shadow and halfway in light. This option forces VRAD to calculate the lighting level at each vertex instead. Of these three options, this one will probably affect compile time the most, but is usually a necessary step in making the map's props look convincing. | Unlike the other two, this option affects the lighting ''received'' by props. Props are generally lit based on the lighting levels at their origin (see <code>[[#info_lighting|info_lighting]]</code> above), which can lead to unnatural lighting if a light source is aimed at only one side of the prop or if the prop is half in shadow and halfway in light. This option forces VRAD to calculate the lighting level at each vertex instead. Of these three options, this one will probably affect compile time the most, but it is usually a necessary step in making the map's props look convincing. | ||
Simply append | Simply append <code>-staticproplighting</code> to the $light_exe Parameters list (see above). | ||
{{warning|This will disable | {{warning|This will disable {{ent|info_lighting}} entities on static props that don't use [[bump map]]s!}} | ||
{{note| | {{note|{{ent|light_spot}} will cause vertex lighting even without this parameter.}} | ||
{{note|This will cause some props, such as pine trees, to try to cast shadows on ''themselves'', creating an unrealistic look. To fix this, under the prop's properties, set the value for ''Disable Self-Shadowing with vertex lighting'' to "Yes."}} | {{note|This will cause some props, such as pine trees, to try to cast shadows on ''themselves'', creating an unrealistic look. To fix this, under the prop's properties, set the value for ''Disable Self-Shadowing with vertex lighting'' to "Yes."}} | ||
{{note|Props that use [[bump map]]s or [[phong materials]] cannot be vertex-lit. This limitation does not extend to the | {{note|Props that use [[bump map]]s or [[phong materials]] cannot be vertex-lit. This limitation does not extend to the {{csgobranch|4}}.}}<br> | ||
{{todo| | {{todo| What happens to props that get bumpmaps or phong materials ''after'' the maps have been compiled with -staticproplighting?}} | ||
{{warning|Make sure the prop has no shared UV space, otherwise the lighting might look unrealistic.}} | {{warning|Make sure the prop has no shared UV space, otherwise the lighting might look unrealistic.}} | ||
== Techniques == | == Techniques == | ||
=== Lightmap | === Lightmap Optimization === | ||
Lightmaps store nearly all the lighting information in Source [[BSP]]s, and their efficient use equates directly to efficient lighting. They are the key contributor to BSP file size: efficient usage is a must for anyone wanting their map to be downloaded off the cuff | Lightmaps store nearly all the lighting information in Source [[BSP]]s, and their efficient use equates directly to efficient lighting. They are the key contributor to BSP file size: efficient usage is a must for anyone wanting their map to be downloaded off the cuff and is preferable for everybody. | ||
Lightmap scale is the basic component of optimization. It determines how detailed lighting information will be for a given face (you can see the effects [[#Lightmaps|above]]). The more information stored, the bigger the file size. Small lightmap scales allow for fine details but come at the cost of a bigger file, and lag if very high density lightmap is overused. Large lightmap scales create fuzzier lighting but lead to smaller files. Determining when a face needs a detailed lightmap and when it doesn't is therefore the task. | Lightmap scale is the basic component of optimization. It determines how detailed lighting information will be for a given face (you can see the effects [[#Lightmaps|above]]). The more information stored, the bigger the file size. Small lightmap scales allow for fine details but come at the cost of a bigger file, and lag if very high density lightmap is overused. Large lightmap scales create fuzzier lighting but lead to smaller files. Determining when a face needs a detailed lightmap and when it doesn't is therefore the task. | ||
This can mostly be done by eye from a compiled map. Look for the faces that receive high contrast shadows or specific details, as they are often the best candidates for low (i.e. detailed) lightmap scales. Faces with slow blends or lighting that only slightly differs across them on the other hand can safely have their scale raised. | This can mostly be done by eye from a compiled map. Look for the faces that receive high contrast shadows or specific details, as they are often the best candidates for low (i.e., detailed) lightmap scales. Faces with slow blends or lighting that only slightly differs across them on the other hand can safely have their scale raised. | ||
{{note|Remember to take into account the size of a face, too. Moving a large face even one point up or down can have very large effects{{confirm}}. Don't be afraid to split the face into segments if you need to.}}{{clr}} | {{note|Remember to take into account the size of a face, too. Moving a large face even one point up or down can have very large effects{{confirm}}. Don't be afraid to split the face into segments if you need to.}}{{clr}} | ||
| Line 111: | Line 105: | ||
[[Image:intlight_lightmaps.jpg|thumb|250px|right|A working example.]] | [[Image:intlight_lightmaps.jpg|thumb|250px|right|A working example.]] | ||
For a working example look to the hallway shown on the right. One side shows the in-game compiled version and the other side shows the lightmaps as displayed in Hammer. The lightmap view is easy to access: left click on the word Camera in the top left of your 3D view, and from the drop down select 3D Lightmap Grid. In this view, yellow faces have smaller than default scales, white faces are at the default, and blue are larger. | For a working example, look to the hallway shown on the right. One side shows the in-game compiled version and the other side shows the lightmaps as displayed in Hammer. The lightmap view is easy to access: left click on the word "Camera" in the top left of your 3D view, and from the drop down select 3D Lightmap Grid. In this view, yellow faces have smaller-than-default scales, white faces are at the default, and blue are larger. | ||
The hallway we are looking at has wall mounted lights and a few ceiling lights as well. In the picture it's clear to see where the lightmap scale has been increased and decreased. The front of the pillar has an increased lightmap because of the light source on its face, to catch all the detail. This is not such a major problem as the pillar is a small thin face and the only area with a lower scale. The floor and a few of the walls along the edge have been scaled up, as looking at the in-game rendering little to no detail or change is seen in the lightmap; they are excellent candidates, the floor especially so with its large size. The other faces have been left at the default resolution as they all have some play of shadows or changes in brightness. While not detailed or essential enough to warrant a smaller scale, increasing the scale would only serve to create poor looking lighting as the lack of detail would show. | The hallway we are looking at has wall mounted lights and a few ceiling lights as well. In the picture it's clear to see where the lightmap scale has been increased and decreased. The front of the pillar has an increased lightmap because of the light source on its face, to catch all the detail. This is not such a major problem as the pillar is a small thin face and the only area with a lower scale. The floor and a few of the walls along the edge have been scaled up, as looking at the in-game rendering little to no detail or change is seen in the lightmap; they are excellent candidates, the floor especially so with its large size. The other faces have been left at the default resolution as they all have some play of shadows or changes in brightness. While not detailed or essential enough to warrant a smaller scale, increasing the scale would only serve to create poor looking lighting as the lack of detail would show. | ||
| Line 117: | Line 111: | ||
While technically possible to decrease the entire scales across the entire map for crisp shadows, the compile time and filesize expense almost always outweighs the benefit. Finding the balance between increasing and decreasing the lightmaps may take a few lighting compiles and some guesswork, but performed correctly can both enhance your map and reduce its file size.{{clr}} | While technically possible to decrease the entire scales across the entire map for crisp shadows, the compile time and filesize expense almost always outweighs the benefit. Finding the balance between increasing and decreasing the lightmaps may take a few lighting compiles and some guesswork, but performed correctly can both enhance your map and reduce its file size.{{clr}} | ||
=== Shadow | === Shadow Creation === | ||
[http://www.interlopers.net/tutorials/27738 Creating shadows from translucent materials with -TextureShadows] (External Link) | [http://www.interlopers.net/tutorials/27738 Creating shadows from translucent materials with -TextureShadows] (External Link) | ||
{{todo|Move the info here}} | {{todo|Move the info here}} | ||
=== Shadow | === Shadow Creation: Alternative Method === | ||
{{note|This is obsolete with the introduction of new lighting parameters in | {{note|This is obsolete with the introduction of new lighting parameters in {{src07|4}}.}} | ||
Some props appear to allow static light to pass through it, but have a [[collision mesh]] that swallows the prop whole (most, if not all fence props in the | Some props appear to allow static light to pass through it, but have a [[collision mesh]] that swallows the prop whole (most, if not all, fence props in the {{hl2|2}} series are a good example of this). This results in a large, unrealistic shadow. A workaround for this is to create a {{ent|func_brush}} from the material, disable the shadows, and utilize the <code>[[Tool_textures#blocklight|toolsblocklight]]</code> tool texture. This can be easy or difficult, depending on the size of the prop. Basically, you must draw brushes of <code>toolsblocklight</code> where light would normally be blocked on the brush/prop. | ||
[[Image:blocklight_1.jpg|thumb|400px|left|In this example, the material ''metaltruss024a'' is used without | [[Image:blocklight_1.jpg|thumb|400px|left|In this example, the material ''metaltruss024a'' is used without Block Light.]] [[Image:blocklight_3.jpg|thumb|400px|right|In-game. The material casts no shadow, even though realistically only the truss should be hindering the light.]]{{clr}} | ||
By creating the trusses out of Block Light material, you can "fake" the shadows. | |||
[[Image:blocklight_2.jpg|thumb|400px|left|This time, | [[Image:blocklight_2.jpg|thumb|400px|left|This time, <code>toolsblocklight</code> is used over the actual trusses.]] | ||
[[Image:blocklight_4.jpg|thumb|400px|right|In-game.]]{{clr}} | [[Image:blocklight_4.jpg|thumb|400px|right|In-game.]]{{clr}} | ||
== See | == See Also == | ||
* [[Lighting]] | * [[Lighting]] | ||
* [[Intermediate Lighting]] | * [[Intermediate Lighting]] | ||
* | * {{ent|Info_lighting_relative}} | ||
[[Category:Level Design]] | [[Category:Level Design]] | ||
Revision as of 15:16, 8 May 2022
Light Entities
light_dynamic
An invisible light source that can change and move over time. Its position can change and it can be aimed at moving objects. Dynamic lights are recalculated continuously, which means they have a higher processing cost but are much more flexible than static lighting. Use this type of light sparingly, because it is the most expensive light for the engine to render.
Glowing textures
In a few cases it’s possible to make the texture itself appear bright or even to emit light, but doing so requires the use of a .vmt or .rad file and is beyond the scope of this article. Doing so can save the mapper the effort of trying to create an even lighting effect across a surface that’s meant to be the light source.
Click on the Glowing Textures link above for more information.
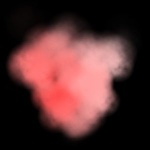
env_particlelight
A normal light that lights only the particles created by an env_smokestack and lights nothing else. Useful for enhancing lighting in areas with steam and such.
env_projectedtexture
Similar to a light_dynamic, this is an invisible projective light source that can change and move over time. Its position, field-of-view and range can change and it can be aimed at moving objects. env_projectedtextures are unique due to the fact that they cast real dynamic shadows from any geometry (brush or model) onto both brushes and models (even themselves), unlike render-to-texture shadows. This system is used for the player's flashlight in Source engine games.
env_projectedtexture is the most expensive light source in the engine. None of the lighting is done during map compilation, and all calculations are done real-time. Having more than one or two will drastically hurt performance on older video cards. Also, note that, when used on ![]() Source 2007 and earlier engine versions without the fixes found here, the shadows will be very "grainy," low-resolution, and unable to have a parent. These issues have been fixed in newer engine iterations like
Source 2007 and earlier engine versions without the fixes found here, the shadows will be very "grainy," low-resolution, and unable to have a parent. These issues have been fixed in newer engine iterations like ![]() Source 2009; however, you are limited to rendering only one projected texture at a time (including the player's flashlight).
Source 2009; however, you are limited to rendering only one projected texture at a time (including the player's flashlight).
Related Entities
info_lighting
This is an entity used to specify the origin from which another entity is lit. Sometimes due to drastic changes in light over short distances or complex shadows a model can appear to be lit incorrectly. By using this entity the model will be lit as though it were stationed at this location.
One common example is the HL2 static Ladder props; when used in dark areas they may appear to glow, which can be corrected by inserting an info_lighting, naming it, and specifying that name in the properties for the Ladder prop.
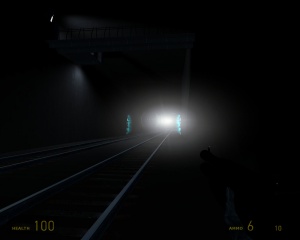
env_lightglow
Used to create a bright almost-flare that will fade out at specified distances. Generally used to transition dark tunnels to bright outsides. Used as a precursor to the HDR effect to fake a change in exposure of the light. Some ![]() Team Fortress 2 maps use this to simulate bloom from regular light sources as well, but it is recommended that you use env_sprite instead.[confirm]
Team Fortress 2 maps use this to simulate bloom from regular light sources as well, but it is recommended that you use env_sprite instead.[confirm]
info_no_dynamic_shadow
This forces a particular brush face to not receive any of the dynamic shadows created by physics entities or NPC’s. It’s used rarely but may be needed to hide incorrect or bad shadows that create an artificial look.
env_tonemap_controller
Used to control the exposure of the HDR lighting effects. Can be given inputs to control more effects. It's common to have a logic_auto to do the initial settings on loading the map.
Smoothing groups
Used to smooth lighting between faces. Found in the face edit dialog, the groups allow the lighting of a face to be smoothed between other faces to produce rounded effects with lighting. A classic example is when making a cylinder: If no smoothing groups are set, each face on the brush will catch light separately and will be lit separately. This will create a very obvious effect of separating each face. If they are all placed in the same smoothing group, the light will be blurred between the faces creating a much smoother rounder look on the pillar.
Lightmaps
A lightmap is the lighting data of each face. The stored light is then added to the face giving it brightness. The lightmap's scale refers to the number of texture pixels per light pixel (luxel). Smaller values mean more luxels, thus a better quality but larger BSP size and compile times.
Compile Options
![]() Source 2007 added three additional options you can use when compiling to improve the realism during compile. To access these, open Expert mode in the Run Map dialog and select "HDR Full compile -final (slow!)"; then, select the "$light_exe" line in the list below that. In the Parameters field, append the options you wish to use, as shown below.
Source 2007 added three additional options you can use when compiling to improve the realism during compile. To access these, open Expert mode in the Run Map dialog and select "HDR Full compile -final (slow!)"; then, select the "$light_exe" line in the list below that. In the Parameters field, append the options you wish to use, as shown below.
-staticproppolys
Normally, VRAD creates shadows under static props based on the collision mesh, since collision meshes are usually much simpler but still close enough to the prop's shape. This is usually sufficient, but some props may have oversimplified collision meshes—or none at all—causing VRAD to create unnatural shadows. This option allows you to override this for certain props and force VRAD to use the polygon mesh instead. This is also necessary if you need to use -textureshadows (see below). Simply append -staticproppolys to the $light_exe Parameters list (see above).
-textureshadows
Not all props have their "holes" defined solely by geometry. Mesh fences, for example, use textures with alpha channels. These are not normally recognized by VRAD, so if you use them you will have to either disable shadows from them (which sometimes produces decent results) or add this option, which forces VRAD to take alpha channels into account as well, just like with brushes.
To make -textureshadows work, you need to create a custom RAD file for your map listing which props you want this option to affect. Extract the lights.rad file from the game in question using GCFScape or Crafty, place it in the game folder, and give it a new name. Then, open it in any text editor and append the line forcetextureshadow [full path of prop] to the file for each model you want this to affect. You will also need to have -staticproppolys enabled for this to work. Finally, append -lights [name of your custom RAD file] -textureshadows to the $light_exe Parameters list (see above).
-staticproplighting
Unlike the other two, this option affects the lighting received by props. Props are generally lit based on the lighting levels at their origin (see info_lighting above), which can lead to unnatural lighting if a light source is aimed at only one side of the prop or if the prop is half in shadow and halfway in light. This option forces VRAD to calculate the lighting level at each vertex instead. Of these three options, this one will probably affect compile time the most, but it is usually a necessary step in making the map's props look convincing.
Simply append -staticproplighting to the $light_exe Parameters list (see above).
Techniques
Lightmap Optimization
Lightmaps store nearly all the lighting information in Source BSPs, and their efficient use equates directly to efficient lighting. They are the key contributor to BSP file size: efficient usage is a must for anyone wanting their map to be downloaded off the cuff and is preferable for everybody.
Lightmap scale is the basic component of optimization. It determines how detailed lighting information will be for a given face (you can see the effects above). The more information stored, the bigger the file size. Small lightmap scales allow for fine details but come at the cost of a bigger file, and lag if very high density lightmap is overused. Large lightmap scales create fuzzier lighting but lead to smaller files. Determining when a face needs a detailed lightmap and when it doesn't is therefore the task.
This can mostly be done by eye from a compiled map. Look for the faces that receive high contrast shadows or specific details, as they are often the best candidates for low (i.e., detailed) lightmap scales. Faces with slow blends or lighting that only slightly differs across them on the other hand can safely have their scale raised.
Example
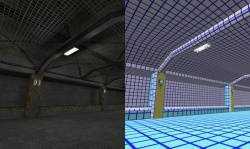
For a working example, look to the hallway shown on the right. One side shows the in-game compiled version and the other side shows the lightmaps as displayed in Hammer. The lightmap view is easy to access: left click on the word "Camera" in the top left of your 3D view, and from the drop down select 3D Lightmap Grid. In this view, yellow faces have smaller-than-default scales, white faces are at the default, and blue are larger.
The hallway we are looking at has wall mounted lights and a few ceiling lights as well. In the picture it's clear to see where the lightmap scale has been increased and decreased. The front of the pillar has an increased lightmap because of the light source on its face, to catch all the detail. This is not such a major problem as the pillar is a small thin face and the only area with a lower scale. The floor and a few of the walls along the edge have been scaled up, as looking at the in-game rendering little to no detail or change is seen in the lightmap; they are excellent candidates, the floor especially so with its large size. The other faces have been left at the default resolution as they all have some play of shadows or changes in brightness. While not detailed or essential enough to warrant a smaller scale, increasing the scale would only serve to create poor looking lighting as the lack of detail would show.
While technically possible to decrease the entire scales across the entire map for crisp shadows, the compile time and filesize expense almost always outweighs the benefit. Finding the balance between increasing and decreasing the lightmaps may take a few lighting compiles and some guesswork, but performed correctly can both enhance your map and reduce its file size.
Shadow Creation
Creating shadows from translucent materials with -TextureShadows (External Link)
Shadow Creation: Alternative Method
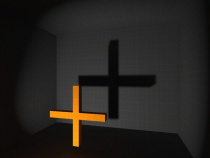
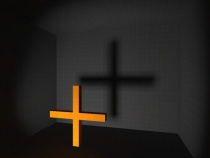
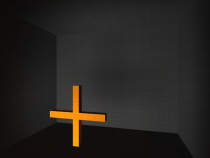
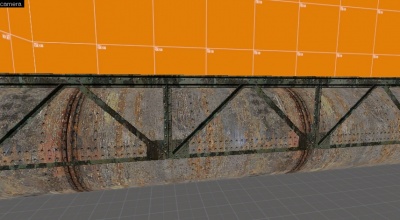
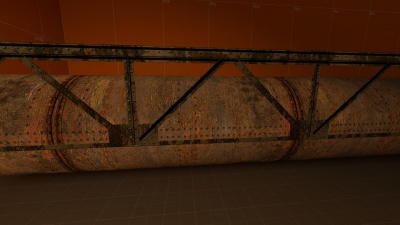
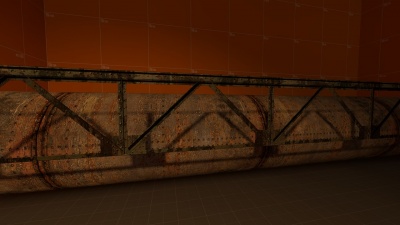
Some props appear to allow static light to pass through it, but have a collision mesh that swallows the prop whole (most, if not all, fence props in the ![]() Half-Life 2 series are a good example of this). This results in a large, unrealistic shadow. A workaround for this is to create a func_brush from the material, disable the shadows, and utilize the
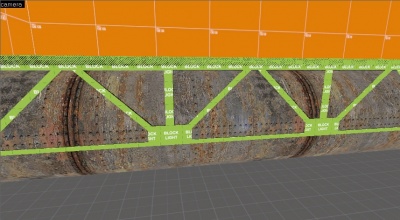
Half-Life 2 series are a good example of this). This results in a large, unrealistic shadow. A workaround for this is to create a func_brush from the material, disable the shadows, and utilize the toolsblocklight tool texture. This can be easy or difficult, depending on the size of the prop. Basically, you must draw brushes of toolsblocklight where light would normally be blocked on the brush/prop.
By creating the trusses out of Block Light material, you can "fake" the shadows.
