全文翻译:求生的兔。
暴风骤雨战役雷暴实例创建教程
(以下下载均已失效,而在你的目录Left 4 Dead 2\sdk_content\mapsrc\instance下已拥有c4m4_storm_ents.vmf文件了。)
雷暴天气是一个非常酷的效果, 而且事实上它比你想象中的容易制作。教程参考自 这儿。(此处开始可以不用往下看,请直接看准备工作。)然而,我们还得为此先做一些准备工作。这是一个.zip文件,包含了已更新的文件内容,以方便您自己编辑您的雷暴天气。
StormEnts.zip
 注意:在.zip中的这个文件 c4m4_storm_ents.vmf已经被我从官方源文件中反编译提取的内容所取代。 如果你使用老版本的 c4m4_storm_ents.vmf这个文件处理你的地图, 那么天空盒子会显得非常棘手,难以处理。请使用更新版本的c4m4_storm_ents.vmf文件,已经修复了这个问题。 如果你也喜欢反编译的官方地图内容,请点击这儿下载。
当你下载完storm_ents.zip这个文件时。前往你的 Left 4 Dead 2 \mapsrc\ 文件夹。创建一个新的文件夹叫\myinstances\ 或者和这个类似的名字(不能是中文)。并且解压 the storm_ents.zip 文件到你创建的文件夹内。这是为了确保你的游戏工具在更新时不会被官方覆盖文件!
准备工作
首先,你的地图需要拥有一个3D Skybox(天空盒子)。当你已经创建或者拥有天空盒子的时候,点击软件中的“map”找到“Map Properties”,并且设置“Map Properties”为sky_l4d_c4m4_hdr。这是V社暴风骤雨官方的天空贴图(当然你也可以选择你喜欢的)。
创建雷
强烈建议不使用“func_instance”实体而是打开以下所有vmf进行复制里面的实体,不然有少许bug!
我们将使用func_instance实体来设置雷,首先进入你地图的可玩区域,创建一个实体“func_instance”。
 注意:本次需要3个func_instance实体。
将func_instance实体按照以下内容进行设置属性:
 注意:这是设置雷电的逻辑效果和声音。
- 设置 Fix Up Name 为 "
c4m4_storm_logic"
- 设置 VMF Filename 为 "
instance/c4m4_storm_logic.vmf"  注意:点击这个选项边上的“browse”,选择默认跳出文件夹内的instance/c4m4_storm_logic.vmf。
- 设置 Entity Name Fix Up 为 "None"
下一步, 创建第二个 func_instance 实体在第一个附件某处,并且按照以下内容进行设置属性:
 注意:这是设置环境实体,如果你地图已经有了,请删除相关或者使用你认为你设置好的环境,这些环境实体属于C4M4的环境效果。
- 设置 Fix Up Name 为 "
c4m4_environment_ents"
- 设置 VMF Filename 为 "
instance/c4m4_environment_ents.vmf"  注意:点击这个选项边上的“browse”,选择默认跳出文件夹内的instance/c4m4_environment_ents.vmf。
- 设置 Entity Name Fix Up 为 "None"
第三步也是最后一步,将 func_instance 实体设置在sky_camera实体的3dskybox空间(即在远景盒子内,没有需要创建)。 把这个新创建的 func_instance实体放在和sky_camera完全一致的位置上(即重叠2个实体),并且按照以下内容进行设置属性
 注意:这是设置雷电的粒子效果。
- 设置 Fix Up Name 为 "
c4m4_storm_ents"
- 设置 VMF Filename 为 "
instance/c4m4_storm_ents.vmf"  注意:点击这个选项边上的“browse”,选择默认跳出文件夹内的instance/c4m4_storm_ents.vmf。
- 设置 Entity Name Fix Up 为 "None"
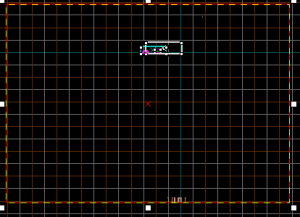
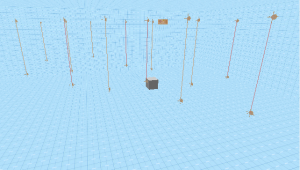
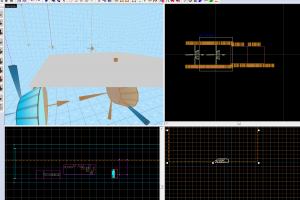
 注意:他的默认范围非常大,需要手动调整实体,所以你可以看看右边的图片。
 注意:如果编译出现could not open instance file提示的话,将这些func_instance全部删除,并且打开对应的vmf,从vmf复制全部实体到你的游戏地图内,这也许是个Bug。
创建暴雨
现在我们只需要添加一些雨天气效果到地图内。方法是,创建一个能够覆盖住整个游戏区域(远景盒子不要)的固体(笔刷),并且将其应用于tools/toolstrigger材质,并且转换这个固体为func_precipitation(转换方式,选中这个固体,ctrl+t变成固实体,并且修改class为func_precipitation)。设置Precipitation Type为"Particle Rain Storm",并且将它的Name设置为 "rain"。
 注意:其他参数例如密度和速度由你自己考虑测试,如果你的雨水在游戏内没有效果显示,你可能需要将这个固实体'func_precipitation增高一些。在steam开发者论坛上有人建议高度为1024个单位(前提是能覆盖住你的地图,如果你地图比这个还高,也许还需要更高。),但是我并不知道func_precipitation实际需要多高。
 注意:func_precipiation会自动检测建筑物,以至于让室内不会下雨,当然凡是也有意外,有些时候(特指你的室内转换成了func_detail之类的固实体),那么这个转换的室内很有可能会下雨,使用实体func_precipitation_blocker来覆盖住你不需要下雨的地方。方法是,创建一个固体(笔刷),并且同样应用上tools/toolstrigger材质,然后转换为func_precipitation_blocker固实体,并且根据需要调整位置和大小,可以多放,比如某2个区域你都不想下雨,但是离得有点远,你并不想将这2个区域所连接的地方取消下雨,那么就放置2个这个固实体来覆盖他们。
下一步,我们将暴雨带来的雾挡在我们的建筑外面。方法是创建一个固体(笔刷),并且将其应用于tools/fogvolume材质。转换为fog_volume实体,然后调整其位置和大小,以覆盖你需要覆盖的建筑区域。如果有多个区域就设置多个此实体(指如上雨水屏蔽一样)将fog_volume实体按照以下内容进行设置属性:
- 设置 Fog Name 为 to "
foginteriorcontroller"
- 设置 Postprocess Name 为 "
fx_settings_interior"
 注意:如果你这样设置,属性栏可能会显示红色字体,不用担心它是无效的,它是直接调用游戏源码内的参数,所以就这样设置就行。
最后,我们只需要添加雨的声音效果了。方法是,回到你放置的前两个func_instance实体位置。在它们的附近创建一个叫env_soundscape_triggerable的实体,并且按照以下内容进行设置属性:
- 设置 Name 为 "
rain_interior"
- 设置 Radius 为 "
0"
- 设置 Soundscape 为 "
rain.interior.med"
再创建第二个 env_soundscape_triggerable 实体并且按照以下内容进行设置属性:
- 设置 Name 为 "
rain_exterior"
- 设置 Radius 为 "
0"
- 设置 Soundscape 为 "
rain.water.med"
现在要做的就是触发这些雨的声音。方法是,进入到你建筑的出口处(门)。
 注意:你需要在每一个建筑的门出口处都这么做。
放置一个能够和门一样大的固体(笔刷)。这个固体需要应用tools/toolstrigger材质。并且转换为trigger_soundscape实体,然后设置Soundscape为"rain_exterior"。
现在,再放置第二个同样的固体(笔刷)于门的入口处(门前)。同样是应用tools/toolstrigger材质,并且转换为trigger_soundscape实体。设置Soundscape为"rain_interior"。
 注意:你也需要在每一个建筑的门入口处都这么做。
这两个实体的作用是,当玩家进门或者出门的时候。室内与室外会让雨声听起来不一样。然后复制一份内部的雨声固实体(指Soundscape为"rain_interior"的固实体)将其完全覆盖住你的出生点房间(如果是室外则换成另一个Soundscape为"rain_exterior"的固实体)。如果你不这么做,那么玩家出生时则听不到雨声直到玩家出去或者进入场景(指你已经为所有的出入口放置了声音触发实体)。
 注意:假设你的房间为一个或者多个主入口指大门,里面有许多小房间,你并不需要为小房间设置声音变化,你只需要为主入口设置,当然某些破败的场景,比如墙体倒塌,房间暴露于室外,你可能需要灵活运用!
测试你的雷暴天气
就是这么多!你需要设置一个按钮,来给你的地图效果进行测试。方法是,放置一个按钮,设置它的输出,输出到的目标实体为"relay_storm_start",输出方式为"Trigger"。
 注意:可能目标为红色字体不用担心,它会生效的。
 注意:这个是测试雷暴的按钮,这个按钮可以让你按下一次按钮出现一次雷暴,如果你不想设置这个按钮,你在地图上游玩时,它也会周期性的进行雷暴效果。
第二种测试方式是打开控制台(确保sv_cheats 参数是 "1") 并且按照一下内容进行输入指令:
ent_fire relay_storm_start trigger
这是一个雷暴效果的测试样本地图(文件链接已失效,我将会在以后做一份我自己的上传。),安全室外的按钮会引发暴风雨,而更远处的按钮只会引发一场尸潮恐慌时间。安全室门边上有个梯子,以至于能够让你到达屋顶。
L4D2_StormSampleMap.zip
参考
Creating the Hard Rain Campaign's Rain Storm Effect
The thunderstorm effect in the Hard Rain campaign is a very cool effect, and it is actually simpler to get it working than you might think. The information in this article is based on a tutorial, that can be found here. However, I had to make some changes to get it working. Instead of editting the storm entities instance files yourself as in the tutorial linked above, here is a .zip file containing the already updated files for your convenience.
StormEnts.zip
 注意:The updated c4m4_storm_ents.vmf file in this .zip file has been replaced with storm entities I copied out of a decompiled version of one of the Hard Rain maps. If you use the c4m4_storm_ents.vmf file that comes with the Authoring Tools, then the skybox gets very glitchy during storms. Using this updated version of c4m4_storm_ents.vmf fixes that problem and will also give you the movement in the clouds that you see in the Hard Rain campaign. And if you would like the decompiled versions of the L4D2 campaign maps, they can be downloaded from here
After downloading the storm_ents.zip file, go into your Left 4 Dead 2 \mapsrc\ folder. Create a new folder called \myinstances\ or something similar, and unzip the storm_ents.zip file into it. This is to ensure that these files won't get overwritten the next time the L4D2 Authoring Tools get updated.
Getting Started
First, you need to have a map with a 3D Skybox. Once you have a 3D skybox setup in your map, go into your Map Properties and set the SkyBox Texture Name to sky_l4d_c4m4_hdr. This is the skybox texture that Valve used in the Hard Rain campaign.
Creating the Storm
We are going to use the func_instance entity to setup the storm, by instancing the storm instance files that you downloaded (in StormEnts.Zip above). First, go to the center of the playable area of your map. Create a func_instance entity.
 注意:You may want to place these first two func_instance entities high above the ground so they're out of the way, as it doesn't really matter where you put them.
Now set up the following properties on the func_instance entity:
- Set the Fix Up Name field to "
c4m4_storm_logic"
- Set the VMF Filename field to "
myinstances/c4m4_storm_logic.vmf"  注意:Change "myinstances" to the folder you unzipped StormEnts.zip into
- Set the Entity Name Fix Up field to "None"
Next, create a second func_instance entity somewhere nearby, and setup its properties like this:
- Set the Fix Up Name field to "
c4m4_environment_ents"
- Set the VMF Filename field to "
myinstances/c4m4_environment_ents.vmf"  注意:Change "myinstances" to the folder you unzipped StormEnts.zip into
- Set the Entity Name Fix Up field to "None"
For the third and final func_instance entity, go to the sky_camera entity in your 3D skybox. Place a func_instance at about the same place as the sky_Camera entity and set up its properties like this:
- Set the Fix Up Name field to "
c4m4_storm_ents"
- Set the VMF Filename field to "
myinstances/c4m4_storm_ents.vmf"  注意:Change "myinstances" to the folder you unzipped StormEnts.zip into
- Set the Entity Name Fix Up field to "None"
Creating the Rain
Now we just need to add the rain into the map. To do this, create a brush that covers your entire playable area, cover it with the tools/trigger texture, and make this brush a func_precipitation entity. Set its Precipitation Type property to "Particle Rain Storm", and set its Name property to "rain".
 注意:If your rain doesn't show up in-game, you may need to make your func_precipitation brush taller. A height of 1024 units was suggested in the steam sdk forums, but I don't know how tall the func_precipitation actually has to be to work.
 注意:The func_precipiation entity automatically detects the presence of buildings, so that it won't rain inside your building. But if you need to block rain in other areas (like under large props), you can use func_precipitation_blocker entities to do so. To make one, you just make a brush covered with the tools/trigger texture and make it a func_precipitation_blocker entity, then move and resize it as needed.
Next, we want to keep the rain fog out of our buildings. To do this, create a brush and cover it with the tools/fogvolume texture. Make this brush a fog_volume entity. Then move and resize the brush so it covers all of the interior area of your building. Use multiple fog brushes if you have multiple indoor rooms and corridors. Set up your fog_volume entity (or entities) like this:
- Set the Fog Name field to "
foginteriorcontroller"
- Set the Postprocess Name field to "
fx_settings_interior"
 注意:When you type these in, they will appear red, but don't worry they will work fine. It's just doing that since we used instances instead of copying and pasting the storm entities into our map.
Lastly, we just need to add the sound effects for the rain. For this, go to where you placed the first two func_instance entities. Somewhere nearby, create an env_soundscape_triggerable entity and set up its properties like this:
- Set the Name field to "
rain_interior"
- Set the Radius field to "
0"
- Set the Soundscape field to "
rain.interior.med"
Now create a second env_soundscape_triggerable entity here and setup its properties like this:
- Set the Name field to "
rain_exterior"
- Set the Radius field to "
0"
- Set the Soundscape field to "
rain.water.med"
All that's left to do now, is trigger these rain sounds. For this, go to the entrance of your building.
 注意:You will need to do this at each entrance to an interior area in your map.
Place a trigger brush covering the entrance on the outside of the doorway. This brush should be covered with the tools\trigger texture, and make it a trigger_soundscape entity. Set its Soundscape field to "rain_exterior".
Now place a second trigger brush covering the entrance on the inside of the doorway. This brush should be covered with the tools\trigger texture, and make it a trigger_soundscape entity. Set its Soundscape field to "rain_interior".
These two triggers will switch the soundscape when the player enters or exits the doorway. This makes the rain sound different when you are outside, than it does when you are in an interior area. Now, make a copy of the trigger that you placed on the inside of the doorway. Move and resize this copy so that it covers most of the starting room. This way the survivors will spawn inside this trigger, and it will then activate the interior rain soundscape. Otherwise, when the map starts, the player will not hear the rain until they go outside.
Testing Your Storm
That's it! You should now have a working storm in your map. To test it, you can setup a button and have it target the entity "relay_storm_start" via the input "Trigger".
 注意:If you do this, the output on your button will appear red in the editor, but don't worry it will work. It's just doing that since we used instances instead of copying and pasting the storm entities into our map.
 注意:If you just sit and wait in your map, it will storm periodically by itself.
A second way to test your storm is by opening the console (make sure sv_cheats is set to "1") and type in the following command:
ent_fire relay_storm_start trigger
Here is a sample map with the storm working. The button just outside the saferoom door will trigger a storm. The other button further away simply triggers a panic event.
There is also a ladder near the safe room door, allowing you to get onto the safe room roof.
L4D2_StormSampleMap.zip
If you want to tweak this setup, there is a lot you can do. You'll probably want to make copies of the storm instance files to experiment with so you still have the originals from the StormEnts.zip file (the download link is at the top of this page).
See also
 注意:点击这个选项边上的“browse”,选择默认跳出文件夹内的instance/c4m4_storm_logic.vmf。
 注意:点击这个选项边上的“browse”,选择默认跳出文件夹内的instance/c4m4_environment_ents.vmf。
 注意:点击这个选项边上的“browse”,选择默认跳出文件夹内的instance/c4m4_storm_ents.vmf。

