Source 2/Docs/Level Design/Hammer Overview: Difference between revisions
m (EggBot AutoTocRight - Detected article with contents table that would be better with {{toc-right}} enabled. If reverted, please leave a message on my talkpage to improve EggBot.) |
SirYodaJedi (talk | contribs) No edit summary |
||
| (28 intermediate revisions by 8 users not shown) | |||
| Line 1: | Line 1: | ||
{{LanguageBar}} | |||
{{toc-right}} | {{toc-right}} | ||
{{ | <onlyinclude> | ||
| | {{Note|This article was originally written for {{Dota2|4}}, but the content of this page also largely applies to all other {{src2|4}} games.}} | ||
| | |||
}} | |||
{{ | |||
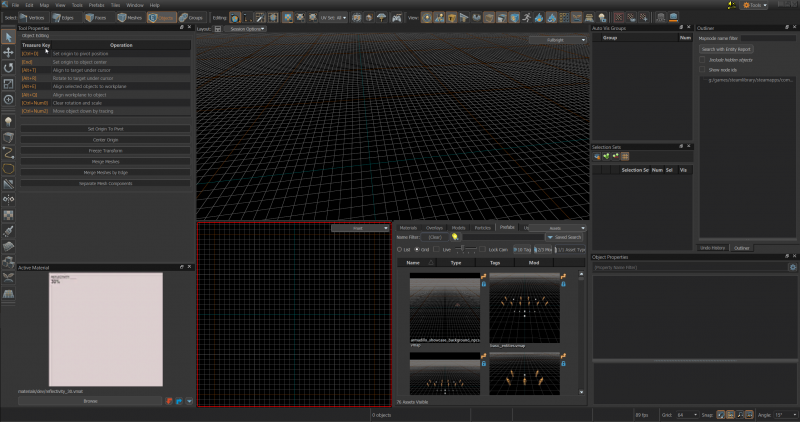
Most of the Hammer interface can be moved around and changed to suit the individual user, with the exception of the main editing windows. These have a variety of layout options, but cannot be moved around. | Most of the Hammer interface can be moved around and changed to suit the individual user, with the exception of the main editing windows. These have a variety of layout options, but cannot be moved around. | ||
[[File:Hammer overview | [[File:Hammer overview default01.png|800px|thumb|center|The default Hammer layout]] | ||
== 3D Viewport == | == 3D Viewport == | ||
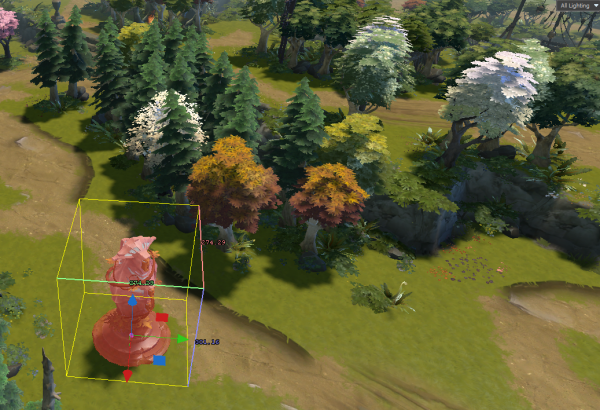
This shows you a 3D view of your map and allows you to navigate around, as discussed in the [[ | This shows you a 3D view of your map and allows you to navigate around, as discussed in the [[Source 2/Docs/Level Design/Navigation|Navigation]] tutorial earlier. Much of your work will be done in this viewport. | ||
You can adjust the lighting used in this viewport by toggling between All Lighting ({{ | You can adjust the lighting used in this viewport by toggling between All Lighting ({{Key|F6}}) and Fullbright ({{Key|F5}}). | ||
[[File:hammer_overview_3d_viewport.png|600px|thumb|center|View of the 3D viewport.]] | [[File:hammer_overview_3d_viewport.png|600px|thumb|center|View of the 3D viewport.]] | ||
| Line 22: | Line 17: | ||
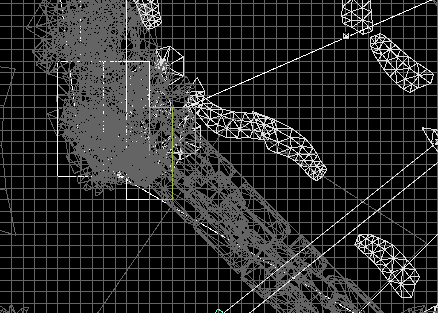
The 2D viewport gives you a top, front, or side view of your map, which can be useful when you want to see an object from a certain view or work on geometry in a way that's constrained along certain axes. | The 2D viewport gives you a top, front, or side view of your map, which can be useful when you want to see an object from a certain view or work on geometry in a way that's constrained along certain axes. | ||
* {{ | * {{Key|Ctrl|Spacebar}} cycles between top, front, and side views. | ||
* {{ | * {{Key|Ctrl|A|Spacebar}} with a selection cycles between top, front, and side views centering the view on that selection. | ||
[[File:hammer_overview_2d_viewport.png|600px|thumb|center|View of the 2D viewport. You can set this 2D view to be from the Top, Front, or Side.]] | [[File:hammer_overview_2d_viewport.png|600px|thumb|center|View of the 2D viewport. You can set this 2D view to be from the Top, Front, or Side.]] | ||
| Line 39: | Line 34: | ||
Covers the various tools for accomplishing tasks in Hammer. When a tool is active, the ''Tool Properties'' pane to the right shows its unique properties and commands. | Covers the various tools for accomplishing tasks in Hammer. When a tool is active, the ''Tool Properties'' pane to the right shows its unique properties and commands. | ||
Tools are globally accessible. This means that if you hit the | Tools are globally accessible. This means that if you hit the Key associated with another tool, e.g. {{Key|Shift|S}} for ''Selection Tool'', you will be switched to that tool from whichever one you were in. | ||
{{tip|Hammer will display shortcut | {{tip|Hammer will display shortcut Keys when hovering the mouse over buttons. Most commonly used buttons have shortcut Keys associated with them.}} | ||
[[File:hammer_overview_icon_selection_tool.png|42px|left]] | [[File:hammer_overview_icon_selection_tool.png|42px|left]] | ||
=== Selection Tool === | === Selection Tool === | ||
The ''Selection Tool'' is the default tool when Hammer is started and is the most basic way to select geometry elements (vertices, edges, faces, meshes), objects, and groups. Once a selection is made it can be manipulated via the various other tools available. | The ''Selection Tool'' is the default tool when Hammer is started and is the most basic way to select geometry elements (vertices, edges, faces, meshes), objects, and groups. Once a selection is made it can be manipulated via the various other tools available. | ||
* {{ | * {{Key|Shift|S}} - Selection | ||
[[File:hammer_overview_icon_translate_tool.png|42px|left]] | [[File:hammer_overview_icon_translate_tool.png|42px|left]] | ||
=== Translate Tool === | === Translate Tool === | ||
[[File:Hammer overview snap settings.png|300px|thumb|right|Snap settings; Located bottom right side in Hammer.]] | [[File:Hammer overview snap settings.png|300px|thumb|right|Snap settings; Located bottom right side in Hammer.]] | ||
The ''Translate Tool'' allows movement of a selection along the X, Y, or Z axis. Drag the gizmo's red arrow for X-axis movement, green arrow for Y-axis movement, or blue arrow for Z-axis movement. You can also grab the colored squares to translate the object along two axes at once. Translation distance is dictated by grid size but can be overridden by holding {{ | The ''Translate Tool'' allows movement of a selection along the X, Y, or Z axis. Drag the gizmo's red arrow for X-axis movement, green arrow for Y-axis movement, or blue arrow for Z-axis movement. You can also grab the colored squares to translate the object along two axes at once. Translation distance is dictated by grid size but can be overridden by holding {{Key|Ctrl}} while translating the selection. | ||
* {{ | * {{Key|T}} - Translate | ||
* {{ | * {{Key|Ctrl|LMB|}} - While translating a selection this temporarily disables grid snapping | ||
* {{ | * {{Key|[}} and {{Key|]}} - Change grid size in power of two increments | ||
{{tip|Grabbing the small purple origin on the ''Translate Tool'' will allow movement on any axis but more importantly will snap the selection to the surface of another element. Useful for quick prop placement.}} | {{tip|Grabbing the small purple origin on the ''Translate Tool'' will allow movement on any axis but more importantly will snap the selection to the surface of another element. Useful for quick prop placement.}} | ||
| Line 66: | Line 62: | ||
[[File:hammer_overview_icon_rotate_tool.png|42px|left]] | [[File:hammer_overview_icon_rotate_tool.png|42px|left]] | ||
=== Rotate Tool === | === Rotate Tool === | ||
The ''Rotate Tool'' allows rotation of models along any axis. The gizmo will change to red, green, and blue circles and dragging any of these will rotate the object along the desired axis. It is possible to rotate along multiple axes by dragging the yellow sphere in the center of the gizmo (hidden until hovering the pointer over it). The angle at which that rotation snaps is determined by the value provided for ''Angle'' at the bottom right of Hammer. | The ''Rotate Tool'' allows rotation of models along any axis. The gizmo will change to red, green, and blue circles and dragging any of these will rotate the object along the desired axis. It is possible to rotate along multiple axes by dragging the yellow sphere in the center of the gizmo (hidden until hovering the pointer over it). The angle at which that rotation snaps is determined by the value provided for ''Angle'' at the bottom right of Hammer. | ||
* {{ | * {{Key|R}} - Rotate | ||
* {{ | * {{Key|Ctrl|LMB|}} - While rotating this temporarily disables the angle snap settings | ||
* ''Angle'' - Bottom right of the Hammer window defines snap angle | * ''Angle'' - Bottom right of the Hammer window defines snap angle | ||
[[File:hammer_overview_icon_scale_tool.png|42px|left]] | [[File:hammer_overview_icon_scale_tool.png|42px|left]] | ||
=== Scale Tool === | === Scale Tool === | ||
The ''Scale Tool'' allows you to scale geometry ''and'' models. Its gizmo is composed of red, green, and blue cubes. Drag the red cube to scale your geometry along the X axis, green to scale along the Y axis, blue to scale along the Z axis. Similar to ''Translate'', you can scale along two axes at once by dragging the appropriate squares. It is also possible to scale along all three axes at once by dragging the purple cube at the origin of the gizmo. | |||
{{Tip| After dragging the scale tool along a given axis, you can use the NumPad to input values to scale by that percentage amount. For example, if you drag the center purple cube and then input "2.0" on the numpad it will scale it double what is it's original size. }} | |||
* {{ | * {{Key|E}} - Scale | ||
[[File:hammer_overview_icon_pivot_tool.png|42px|left]] | [[File:hammer_overview_icon_pivot_tool.png|42px|left]] | ||
=== Pivot Tool === | === Pivot Tool === | ||
The ''Pivot Tool'' allows changing of a selection's pivot point. Various tools use the pivot point to determine how to act upon your selection. For example, if rotating a cube around a pivot that's located in the cube's exact center, the cube will spin in place. Moving the pivot to one of the cube's corners will cause it to rotate around that specific corner. Moving an element's pivot point is a temporary setting, unless you use ''Set Origin To Pivot''. Deselecting and re-selecting will reset the pivot point. | The ''Pivot Tool'' allows changing of a selection's pivot point. Various tools use the pivot point to determine how to act upon your selection. For example, if rotating a cube around a pivot that's located in the cube's exact center, the cube will spin in place. Moving the pivot to one of the cube's corners will cause it to rotate around that specific corner. Moving an element's pivot point is a temporary setting, unless you use ''Set Origin To Pivot''. Deselecting and re-selecting will reset the pivot point. | ||
* {{ | * {{Key|Insert}} - Enter/Exit Pivot Tool | ||
* {{ | * {{Key|End}} - Reset Pivot | ||
* ''Set Origin To Pivot'' - Only applies to meshes but can be used to save the pivot point for future selections | * ''Set Origin To Pivot'' - Only applies to meshes but can be used to save the pivot point for future selections | ||
[[File:hammer_overview_icon_entity_tool.png|42px|left]] | [[File:hammer_overview_icon_entity_tool.png|42px|left]] | ||
=== Entity Tool === | === Entity Tool === | ||
The ''Entity Tool'' allows placement of any type of entity class in your map. These include things like lights, player spawn locations, AI spawn locations, logic relays, props, etc. | The ''Entity Tool'' allows placement of any type of entity class in your map. These include things like lights, player spawn locations, AI spawn locations, logic relays, props, etc. | ||
* {{ | * {{Key|Shift|E}} - Entity Tool | ||
* {{ | * {{Key|Alt|Enter}} - Opens properties for a placed entity | ||
[[File:hammer_overview_icon_block_tool.png|42px|left]] | [[File:hammer_overview_icon_block_tool.png|42px|left]] | ||
=== Block Tool === | === Block Tool === | ||
The ''Block Tool'' will create basic meshes. The most commonly used mesh is usually the 'block', hence the name of the tool. The usual workflow is to place basic geometry in the world and then use the more precise geometry editing tools (translate, rotate, scale) to hone in on the desired shape of the geometry. | The ''Block Tool'' will create basic meshes. The most commonly used mesh is usually the 'block', hence the name of the tool. The usual workflow is to place basic geometry in the world and then use the more precise geometry editing tools (translate, rotate, scale) to hone in on the desired shape of the geometry. | ||
Some of the other geometric shapes have presets to modify ahead of time to get different shapes. For example, the cylinder can make quick columns, arch can create arched doorways or spiral staircases, and so on. | Some of the other geometric shapes have presets to modify ahead of time to get different shapes. For example, the cylinder can make quick columns, arch can create arched doorways or spiral staircases, and so on. | ||
* {{ | * {{Key|Shift|B}} - Block Tool | ||
* {{ | * {{Key|Esc}} - Cancel creation | ||
* {{ | * {{Key|Enter}} or {{Key|Space}} - Confirm creation | ||
* Holding {{Key|Shift}} while drawing a brush will automatically set a temporary workplane to that surface under your cursor. | |||
{{tip|When confirming a shape created by the ''Block Tool'', changing to a mode such as ''Edges'' will select all edges on the newly created shape.}} | {{tip|When confirming a shape created by the ''Block Tool'', changing to a mode such as ''Edges'' will select all edges on the newly created shape.}} | ||
[[File:hammer_overview_icon_clipping_tool.png|42px|left]] | |||
=== Clipping Tool === | === Clipping Tool === | ||
The ''Clipping Tool'' will slice geometry in a variety of ways. Cuts must be made in the 2D viewport and must be confirmed with {{Key|Enter}}, otherwise the change is discarded. The ''Clipping Tool'' has three different modes that determine whether it keeps the geometry on one side of the cut, the other side of the cut, or both sides of the cut. Cycle through these by repeating the shortcut Key. | |||
* {{Key|Shift|X}} - Clipping Tool | |||
* {{Key|Enter}} - Confirm cut | |||
* {{ | |||
* {{ | |||
| Line 134: | Line 129: | ||
The ''Mirror Tool'' allows mirroring of a selection across a user-defined axis. In the 2D view, click and drag a line to choose which axis it will use to mirror. | The ''Mirror Tool'' allows mirroring of a selection across a user-defined axis. In the 2D view, click and drag a line to choose which axis it will use to mirror. | ||
* {{ | * {{Key|Shift|F}} - Mirror | ||
[[File:hammer_overview_icon_texture_projection_tool.png|42px|left]] | [[File:hammer_overview_icon_texture_projection_tool.png|42px|left]] | ||
=== Texture Projection Tool === | === Texture Projection Tool === | ||
The ''Texture Projection Tool'' is used to do basic UV mapping. Can be useful for complex geometry that needs fine tuning. There are more automated methods for UV mapping covered in other parts of the documentation. | The ''Texture Projection Tool'' is used to do basic UV mapping. Can be useful for complex geometry that needs fine tuning. There are more automated methods for UV mapping covered in other parts of the documentation. | ||
* {{ | * {{Key|Shift|P}} - Texture Projection | ||
[[File:hammer_overview_icon_paint_tool.png|42px|left]] | [[File:hammer_overview_icon_paint_tool.png|42px|left]] | ||
=== Paint Tool === | === Paint Tool === | ||
The ''Paint Tool'' allows blending of materials on displacement geometry (often referred to as terrain but not limited to ground type materials). | The ''Paint Tool'' allows blending of materials on displacement geometry (often referred to as terrain but not limited to ground type materials). | ||
* {{ | * {{Key|Shift|V}} | ||
[[File:hammer_overview_icon_displacement_tool.png|42px|left]] | [[File:hammer_overview_icon_displacement_tool.png|42px|left]] | ||
=== Displacement Tool === | === Displacement Tool === | ||
The ''Displacement Tool'' is a method to sculpt geometry inside Hammer using ''displacements'' as a base. One usage case for this tool is to build rolling hills for a terrain-based map. | The ''Displacement Tool'' is a method to sculpt geometry inside Hammer using ''displacements'' as a base. One usage case for this tool is to build rolling hills for a terrain-based map. | ||
{{note|Requires a face to be subdivided. The tool will not work on regular geometry. This can be accomplished in the ''Face'' selection properties and selecting an appropriate subdivision amount}} | {{note|Requires a face to be subdivided. The tool will not work on regular geometry. This can be accomplished in the ''Face'' selection properties and selecting an appropriate subdivision amount}} | ||
* {{ | * {{Key|Shift|D}} - Displacement Tool | ||
{{tip|Dota 2 terrain is comprised of a lot of smaller subdivided terrain. This is generally not shaped with the ''Displacement Tool'' due to the gameplay requirement of gameplay surfaces being completely flat.}} | {{tip|Dota 2 terrain is comprised of a lot of smaller subdivided terrain. This is generally not shaped with the ''Displacement Tool'' due to the gameplay requirement of gameplay surfaces being completely flat.}} | ||
| Line 166: | Line 161: | ||
[[File:hammer_overview_icon_asset_spray_tool.png|42px|left]] | [[File:hammer_overview_icon_asset_spray_tool.png|42px|left]] | ||
=== Asset Spray Tool === | === Asset Spray Tool === | ||
The ''Asset Spray Tool'' is a work-in-progress, unsupported tool that allows any asset to be "painted" onto surfaces in the world. | The ''Asset Spray Tool'' is a work-in-progress, unsupported tool that allows any asset to be "painted" onto surfaces in the world. | ||
[[File:hammer_overview_icon_tile_editor.png|42px|left]] | [[File:hammer_overview_icon_tile_editor.png|42px|left]] | ||
=== Tile Editor === | === Tile Editor === | ||
The ''Tile Editor'' allows the easy creation of custom maps using a set of predefined tiles that link together to form a playable gameplay space. In Tile Editor, you can paint terrain, water, paths, trees, plants, and even place shops, barracks and other gameplay objects. See the [[Dota_2_Workshop_Tools/Level_Design/Tile_Editor|Tile Editor introduction]] for details. | The ''Tile Editor'' allows the easy creation of custom maps using a set of predefined tiles that link together to form a playable gameplay space. In Tile Editor, you can paint terrain, water, paths, trees, plants, and even place shops, barracks and other gameplay objects. See the [[Dota_2_Workshop_Tools/Level_Design/Tile_Editor|Tile Editor introduction]] for details. | ||
| Line 180: | Line 175: | ||
[[File:hammer_overview_icon_path_tool.png|42px|left]] | [[File:hammer_overview_icon_path_tool.png|42px|left]] | ||
=== Path Tool === | === Path Tool === | ||
[[File:Hammer overview path tool.png| | [[File:Hammer overview path tool.png|150px|thumb|right|The default path tool settings.]] | ||
The ''Path Tool'' is the tool for making paths. You can use this to make prop based splines for curved geometry. There's a few types of rope you can add: ''Generic Path, Static Cable, Trajectory Path, | The ''Path Tool'' is the tool for making paths. You can use this to make prop based splines for curved geometry. There's a few types of rope you can add: ''Generic Path, Static Cable, Trajectory Path, move_Keyframed, move_rope, move_track, and path_particle_rope''. The ''path_particle_rope'' uses particles as rope. Set it from selecting a particle from the asset browser. | ||
* {{ | * {{Key|Shift|P}} - Path Tool | ||
[[File:hammer_overview_icon_physics_simulation.png|42px|left]] | [[File:hammer_overview_icon_physics_simulation.png|42px|left]] | ||
=== Physics Tool === | |||
[[File:Hammer overview physics simulation tool.png|150px|thumb|right|The tool with nothing selected.]] | |||
''Physics Simulation'' allows you to use the prop_physics abilities in the editor. Open the menu, select a prop_physics and click ''Start Simulation'' or press {{Key|Space}}. | |||
* {{Key|Shift|C}} - Physics Simulation Menu | |||
* {{Key|Space}} - Toggles the simulation. | |||
* {{Key|LMB}} - On the currently simulated objects, click dragging an object will move it around. | |||
{{clr}} | {{clr}} | ||
[[File:hammer_overview_icon_mesh_projection_tool.png|42px|left]] | |||
=== Mesh Projection Tool === | |||
[[File:Hammer overview mesh projection tool.png|150px|thumb|right|The settings of Mesh Project.]] | |||
''Mesh Projection'' projects a selected mesh or mesh components onto the visible objects in the world using the projection direction selected in the tool. | |||
* {{Key|Space}} - Reprojects based on the settings. | |||
* {{Key|Enter}} - Confirms the projection | |||
* {{Key|Esc}} - Cancels the projection | |||
== Selection Modes == | == Selection Modes == | ||
[[File:hammer_overview_selection_modes.png|400px|thumb|center|The different Selection Modes.]] | [[File:hammer_overview_selection_modes.png|400px|thumb|center|The different Selection Modes.]] | ||
| Line 207: | Line 209: | ||
Selection modes are covered in more detail in [[Dota 2 Workshop Tools/Level Design/Basic Construction|Basic Construction]]. | Selection modes are covered in more detail in [[Dota 2 Workshop Tools/Level Design/Basic Construction|Basic Construction]]. | ||
* {{ | * {{Key|1}} ''Vertices'' | ||
* {{ | * {{Key|2}} ''Edges'' | ||
* {{ | * {{Key|3}} ''Faces'' | ||
* {{ | * {{Key|4}} ''Meshes'' | ||
* {{ | * {{Key|5}} ''Objects'' | ||
* {{ | * {{Key|6}} ''Groups'' | ||
== Undo History == | == Undo History == | ||
[[File:Hammer overview undo history.png|150px|thumb|right|Example of clicking to undo a set of actions.]] | [[File:Hammer overview undo history.png|150px|thumb|right|Example of clicking to undo a set of actions.]] | ||
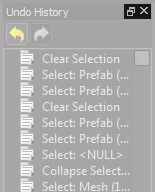
Each action taken in Hammer will appear in the ''Undo History''. Clicking on a previous change which will change the state of the map to that point in time. There are cases where this is a much clearer and faster way of undoing changes than using {{ | Each action taken in Hammer will appear in the ''Undo History''. Clicking on a previous change which will change the state of the map to that point in time. There are cases where this is a much clearer and faster way of undoing changes than using {{Key|Ctrl}}+{{Key|Z}} a large number of times to get to your desired map state. | ||
* {{ | * {{Key|Ctrl|Z}} - Undo | ||
{{clr}} | {{clr}} | ||
| Line 229: | Line 231: | ||
For more on this see [[Dota 2 Workshop Tools/Level Design/Command History|Command History]]. | For more on this see [[Dota 2 Workshop Tools/Level Design/Command History|Command History]]. | ||
* {{ | * {{Key|Shift|G}} - Repeat single command | ||
{{clr}} | {{clr}} | ||
| Line 235: | Line 237: | ||
[[File:hammer_overview_outliner.png|150px|thumb|right|Outliner.]] | [[File:hammer_overview_outliner.png|150px|thumb|right|Outliner.]] | ||
The ''Outliner'' pane provides a view of all the objects in a map. Objects can be selected here much like in the 2D or 3D view. Basic searches can be run via the ''Mapnode name filter'' field. Advanced filtering options are located under the ''Entity filter options'' checkbox, which allows searching of entities by various class and/or any | The ''Outliner'' pane provides a view of all the objects in a map. Objects can be selected here much like in the 2D or 3D view. Basic searches can be run via the ''Mapnode name filter'' field. Advanced filtering options are located under the ''Entity filter options'' checkbox, which allows searching of entities by various class and/or any Key/value combinations. | ||
{{clr}} | {{clr}} | ||
| Line 244: | Line 246: | ||
It may be desirable to place an entire region of a map in a selection set to easily toggle on/off. This would be accomplished via a new custom selection set to help keep the map more organized. This is especially useful in very complex or large maps. | It may be desirable to place an entire region of a map in a selection set to easily toggle on/off. This would be accomplished via a new custom selection set to help keep the map more organized. This is especially useful in very complex or large maps. | ||
To add objects to an existing selection set, simply select what you would like to add and press the Key combination. Choose the existing set from the drop-down menu and click OK. | |||
* {{Key|Ctrl|R}} - Create selection set | |||
{{clr}} | {{clr}} | ||
== Object Properties == | == Object Properties == | ||
[[File: | [[File:Hammer overview object properties 01.png|600px|thumb|right|Object Properties.]] | ||
The ''Object Properties'' pane displays the various properties that can be changed on any given object. ''Object Properties'' contains everything that defines a particular entity, and also includes the ''Input'' and ''Output'' tabs of the logic system. | The ''Object Properties'' pane displays the various properties that can be changed on any given object. ''Object Properties'' contains everything that defines a particular entity, and also includes the ''Input'' and ''Output'' tabs of the logic system. | ||
* {{ | * {{Key|Alt|Enter}} - Object Properties | ||
{{clr}} | {{clr}} | ||
| Line 258: | Line 264: | ||
Displays the currently active material. Any geometry created will have this material applied to it. Click the ''Browse'' button to set it to a different material. When in Faces selection mode, right-clicking a face and choosing ''Lift Material Under Cursor'' from the drop-down menu will make it the active material. | Displays the currently active material. Any geometry created will have this material applied to it. Click the ''Browse'' button to set it to a different material. When in Faces selection mode, right-clicking a face and choosing ''Lift Material Under Cursor'' from the drop-down menu will make it the active material. | ||
* {{ | * {{Key|Ctrl|M}} - Lift material under the cursor and make it the new active material | ||
* {{ | * {{Key|Shift|T}} - Apply active material to the currently selected face or mesh | ||
{{clr}} | {{clr}} | ||
== Assets Tabs == | == Assets Tabs == | ||
[[File: | [[File:Hammer overview assets tabs01.png|500px|thumb|center|Assets Tabs.]] | ||
Similar in setup to the ''Asset Browser'', this contains tabs for each of the various types of pieces of content used to create a map: ''Materials'', ''Decals'', ''Models'', ''Particles'', ''Prefabs'', and ''Selection''. | Similar in setup to the ''Asset Browser'', this contains tabs for each of the various types of pieces of content used to create a map: ''Materials'', ''Decals'', ''Models'', ''Particles'', ''Prefabs'', and ''Selection''. | ||
| Line 276: | Line 282: | ||
* ''Toggle Grid Navigation Preview'': Displays Dota 2's navigation grid inside of Hammer highlighting pathable and unpathable regions. | * ''Toggle Grid Navigation Preview'': Displays Dota 2's navigation grid inside of Hammer highlighting pathable and unpathable regions. | ||
* ''Tools'' -> ''Options'' -> ''Key Bindings'' can be used to see a list of all Hammer commands | * ''Tools'' -> ''Options'' -> ''Key Bindings'' can be used to see a list of all Hammer commands | ||
** Note: This only shows commands that have | ** Note: This only shows commands that have hotKeys associated with them. | ||
** Use the filter field to search for a particular context (e.g. "ToolSelection") or a particular command (e.g. "merge"). | ** Use the filter field to search for a particular context (e.g. "ToolSelection") or a particular command (e.g. "merge"). | ||
* {{ | * {{Key|F1}} will open a help menu that shows all the command categories. | ||
** {{ | ** {{Key|RMB}} -> ''All Commands'' does the same as above. | ||
** Either search through the categories or use the filter field to search for a command. | ** Either search through the categories or use the filter field to search for a command. | ||
'''Next''': [[ | '''Next''': [[Source 2/Docs/Level Design/Basic Construction|Basic Construction]]{{Hla tools topicons}} | ||
{{Cs2 tools topicons}} | |||
{{ | {{Dota 2Tools topicons}}[[Category:Source 2 Level Design]]</onlyinclude> | ||
[[Category: | |||
Latest revision as of 07:20, 8 May 2025
Most of the Hammer interface can be moved around and changed to suit the individual user, with the exception of the main editing windows. These have a variety of layout options, but cannot be moved around.
3D Viewport
This shows you a 3D view of your map and allows you to navigate around, as discussed in the Navigation tutorial earlier. Much of your work will be done in this viewport.
You can adjust the lighting used in this viewport by toggling between All Lighting (F6) and Fullbright (F5).
2D Viewport
The 2D viewport gives you a top, front, or side view of your map, which can be useful when you want to see an object from a certain view or work on geometry in a way that's constrained along certain axes.
- Ctrl+Spacebar cycles between top, front, and side views.
- Ctrl+A+Spacebar with a selection cycles between top, front, and side views centering the view on that selection.
Customizing Window Panes
Almost any pane can be popped out or closed using the small buttons in the top right of a pane. The small overlapped windows icon can be used to pop the pane out. Once a pane is popped out it can be re-sized and dropped back into the layout. A pane can also be closed using the small "X".
This overview assumes a default Hammer layout.
Tools
Covers the various tools for accomplishing tasks in Hammer. When a tool is active, the Tool Properties pane to the right shows its unique properties and commands.
Tools are globally accessible. This means that if you hit the Key associated with another tool, e.g. ⇧ Shift+S for Selection Tool, you will be switched to that tool from whichever one you were in.
Selection Tool
The Selection Tool is the default tool when Hammer is started and is the most basic way to select geometry elements (vertices, edges, faces, meshes), objects, and groups. Once a selection is made it can be manipulated via the various other tools available.
- ⇧ Shift+S - Selection
Translate Tool
The Translate Tool allows movement of a selection along the X, Y, or Z axis. Drag the gizmo's red arrow for X-axis movement, green arrow for Y-axis movement, or blue arrow for Z-axis movement. You can also grab the colored squares to translate the object along two axes at once. Translation distance is dictated by grid size but can be overridden by holding Ctrl while translating the selection.
- T - Translate
- Ctrl+
 - While translating a selection this temporarily disables grid snapping
 - [ and ] - Change grid size in power of two increments
Rotate Tool
The Rotate Tool allows rotation of models along any axis. The gizmo will change to red, green, and blue circles and dragging any of these will rotate the object along the desired axis. It is possible to rotate along multiple axes by dragging the yellow sphere in the center of the gizmo (hidden until hovering the pointer over it). The angle at which that rotation snaps is determined by the value provided for Angle at the bottom right of Hammer.
- R - Rotate
- Ctrl+
 - While rotating this temporarily disables the angle snap settings
 - Angle - Bottom right of the Hammer window defines snap angle
Scale Tool
The Scale Tool allows you to scale geometry and models. Its gizmo is composed of red, green, and blue cubes. Drag the red cube to scale your geometry along the X axis, green to scale along the Y axis, blue to scale along the Z axis. Similar to Translate, you can scale along two axes at once by dragging the appropriate squares. It is also possible to scale along all three axes at once by dragging the purple cube at the origin of the gizmo.
- E - Scale
Pivot Tool
The Pivot Tool allows changing of a selection's pivot point. Various tools use the pivot point to determine how to act upon your selection. For example, if rotating a cube around a pivot that's located in the cube's exact center, the cube will spin in place. Moving the pivot to one of the cube's corners will cause it to rotate around that specific corner. Moving an element's pivot point is a temporary setting, unless you use Set Origin To Pivot. Deselecting and re-selecting will reset the pivot point.
- Insert - Enter/Exit Pivot Tool
- End - Reset Pivot
- Set Origin To Pivot - Only applies to meshes but can be used to save the pivot point for future selections
Entity Tool
The Entity Tool allows placement of any type of entity class in your map. These include things like lights, player spawn locations, AI spawn locations, logic relays, props, etc.
- ⇧ Shift+E - Entity Tool
- Alt+↵ Enter - Opens properties for a placed entity
Block Tool
The Block Tool will create basic meshes. The most commonly used mesh is usually the 'block', hence the name of the tool. The usual workflow is to place basic geometry in the world and then use the more precise geometry editing tools (translate, rotate, scale) to hone in on the desired shape of the geometry.
Some of the other geometric shapes have presets to modify ahead of time to get different shapes. For example, the cylinder can make quick columns, arch can create arched doorways or spiral staircases, and so on.
- ⇧ Shift+B - Block Tool
- Esc - Cancel creation
- ↵ Enter or Space - Confirm creation
- Holding ⇧ Shift while drawing a brush will automatically set a temporary workplane to that surface under your cursor.
Clipping Tool
The Clipping Tool will slice geometry in a variety of ways. Cuts must be made in the 2D viewport and must be confirmed with ↵ Enter, otherwise the change is discarded. The Clipping Tool has three different modes that determine whether it keeps the geometry on one side of the cut, the other side of the cut, or both sides of the cut. Cycle through these by repeating the shortcut Key.
- ⇧ Shift+X - Clipping Tool
- ↵ Enter - Confirm cut
Mirror Tool
The Mirror Tool allows mirroring of a selection across a user-defined axis. In the 2D view, click and drag a line to choose which axis it will use to mirror.
- ⇧ Shift+F - Mirror
Texture Projection Tool
The Texture Projection Tool is used to do basic UV mapping. Can be useful for complex geometry that needs fine tuning. There are more automated methods for UV mapping covered in other parts of the documentation.
- ⇧ Shift+P - Texture Projection
Paint Tool
The Paint Tool allows blending of materials on displacement geometry (often referred to as terrain but not limited to ground type materials).
- ⇧ Shift+V
Displacement Tool
The Displacement Tool is a method to sculpt geometry inside Hammer using displacements as a base. One usage case for this tool is to build rolling hills for a terrain-based map.
- ⇧ Shift+D - Displacement Tool
Asset Spray Tool
The Asset Spray Tool is a work-in-progress, unsupported tool that allows any asset to be "painted" onto surfaces in the world.
Tile Editor
The Tile Editor allows the easy creation of custom maps using a set of predefined tiles that link together to form a playable gameplay space. In Tile Editor, you can paint terrain, water, paths, trees, plants, and even place shops, barracks and other gameplay objects. See the Tile Editor introduction for details.
Path Tool
The Path Tool is the tool for making paths. You can use this to make prop based splines for curved geometry. There's a few types of rope you can add: Generic Path, Static Cable, Trajectory Path, move_Keyframed, move_rope, move_track, and path_particle_rope. The path_particle_rope uses particles as rope. Set it from selecting a particle from the asset browser.
- ⇧ Shift+P - Path Tool
Physics Tool
Physics Simulation allows you to use the prop_physics abilities in the editor. Open the menu, select a prop_physics and click Start Simulation or press Space.
- ⇧ Shift+C - Physics Simulation Menu
- Space - Toggles the simulation.
 - On the currently simulated objects, click dragging an object will move it around.
Mesh Projection Tool
Mesh Projection projects a selected mesh or mesh components onto the visible objects in the world using the projection direction selected in the tool.
- Space - Reprojects based on the settings.
- ↵ Enter - Confirms the projection
- Esc - Cancels the projection
Selection Modes
Your active Selection Mode defines the element that can be selected. Vertices, edges, faces, meshes, objects, groups, bones, and navigation are all valid selection modes.
Selection modes are covered in more detail in Basic Construction.
- 1 Vertices
- 2 Edges
- 3 Faces
- 4 Meshes
- 5 Objects
- 6 Groups
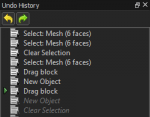
Undo History
Each action taken in Hammer will appear in the Undo History. Clicking on a previous change which will change the state of the map to that point in time. There are cases where this is a much clearer and faster way of undoing changes than using Ctrl+Z a large number of times to get to your desired map state.
- Ctrl+Z - Undo
Command History
Any action performed in Hammer gets tracked as a command in the Command History pane. The Repeat Commands can be used in conjunction with the selected command (or multiple selected commands) to repeat the desired action.
For more on this see Command History.
- ⇧ Shift+G - Repeat single command
Outliner
The Outliner pane provides a view of all the objects in a map. Objects can be selected here much like in the 2D or 3D view. Basic searches can be run via the Mapnode name filter field. Advanced filtering options are located under the Entity filter options checkbox, which allows searching of entities by various class and/or any Key/value combinations.
Selection Sets
The Selection Sets pane displays all the objects in the map. The Auto selection set is generated automatically and contains all the objects in a map. Custom selection sets can be defined via the New Selection Set button. You can use the buttons to the left of a category to hide or show objects en masse.
It may be desirable to place an entire region of a map in a selection set to easily toggle on/off. This would be accomplished via a new custom selection set to help keep the map more organized. This is especially useful in very complex or large maps.
To add objects to an existing selection set, simply select what you would like to add and press the Key combination. Choose the existing set from the drop-down menu and click OK.
- Ctrl+R - Create selection set
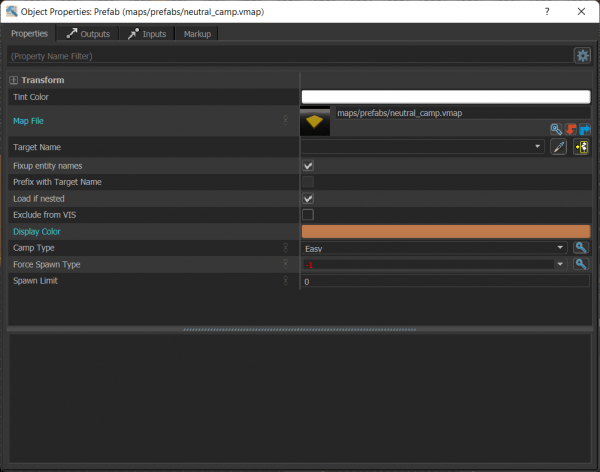
Object Properties
The Object Properties pane displays the various properties that can be changed on any given object. Object Properties contains everything that defines a particular entity, and also includes the Input and Output tabs of the logic system.
- Alt+↵ Enter - Object Properties
Active Material
Displays the currently active material. Any geometry created will have this material applied to it. Click the Browse button to set it to a different material. When in Faces selection mode, right-clicking a face and choosing Lift Material Under Cursor from the drop-down menu will make it the active material.
- Ctrl+M - Lift material under the cursor and make it the new active material
- ⇧ Shift+T - Apply active material to the currently selected face or mesh
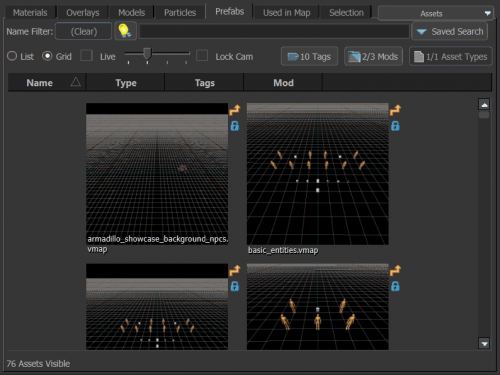
Assets Tabs
Similar in setup to the Asset Browser, this contains tabs for each of the various types of pieces of content used to create a map: Materials, Decals, Models, Particles, Prefabs, and Selection.
Useful Settings
- Tools -> Options -> View 3D
- Backplane Distance: Change this value to adjust how far map geometry renders in the 3D viewport. This can help with rendering performance in large complex maps.
- Forward Speed Max: Adjusts how quickly the camera moves through the 3D viewport.
- Toggle Grid Navigation Preview: Displays Dota 2's navigation grid inside of Hammer highlighting pathable and unpathable regions.
- Tools -> Options -> Key Bindings can be used to see a list of all Hammer commands
- Note: This only shows commands that have hotKeys associated with them.
- Use the filter field to search for a particular context (e.g. "ToolSelection") or a particular command (e.g. "merge").
- F1 will open a help menu that shows all the command categories.
 -> All Commands does the same as above.
- Either search through the categories or use the filter field to search for a command.
Next: Basic Construction
