User:SirYodaJedi/Creating detail textures from normal maps for GoldSrc
Jump to navigation
Jump to search

 Important:This page assumes the existing textures are designed for traditional
  Source Engine-style rendering. If the textures are designed for PBR, they should be baked into traditional Blinn Phong textures first. Only a $basetexture (henceforth albedo) and $bumpmap (henceforth normal map) will be used.
 Warning:Only normal maps (DirectX or OpenGL) work with this method; ssbumps cannot be used![confirm]
To convert ssbumps to regular normal maps, use a tool such as SsbumpToNormal.
 Note:
Note:
 Note:This tutorial uses
  GIMP. This is possible to do in Photoshop, but the process may or may not be slightly different.
This is a draft user page. It is a work in progress open to editing by anyone.
Remember to check for any notes left by the tagger at this article's talk page.
Remember to check for any notes left by the tagger at this article's talk page.
This page explains how to use existing normal maps to create detail textures that can be used to add more detail and simulate bumpmapping in ![]() GoldSrc's vanilla OpenGL renderer, without using up additional AllocBlock.
GoldSrc's vanilla OpenGL renderer, without using up additional AllocBlock.
To convert ssbumps to regular normal maps, use a tool such as SsbumpToNormal.
- If the normal map is swizzled, it will be necessary to unswizzle. This usually means moving the alpha channel to the red channel. This tutorial explains how to do this in
 GIMP. (
 Source normal maps are not swizzled in vanilla shaders.)
- If the normal map is a 2-channel normal map (blue channel is either not present or a single color), it is highly recommended to convert it to a 3-channel
normal map. The Microsoft tool DirectXTex can do this, and vtex will do this automatically for textures with
normal 1. ( Source 2 normal maps are usually 2-channel)
Creating the detail texture
- Downscale the diffuse to a resolution where it will be roughly 1.0 scale (1 texel per unit), and add it to your WAD.
- Open the associated normal map texture in GIMP. Downscale it to 512x512 or lower if it isn't already (1024x1024 or lower in
 ).
).
 Tip:For best results, the detail texture should be at least double the resolution of the WAD texture (ex: 64x64 detail for 32x32 WAD, 256x256 detail for 128x128 WAD).
 Bug:The detail texture must be a power of two for mipmaps to be generated correctly, regardless of the WAD texture resolution (ex: 256x256 detail for 96x96 WAD).
 - In the Colors drop down menu, choose the Components submenu, and click Decompose.
- Set the color model to RGB, and make sure "Decompose to layers" is selected. Click OK.
- If you have an OpenGL normal map, skip to step 6.
- If you have a DirectX normal map, select the "Green" layer, then click "Invert" in the Colors drop down menu.
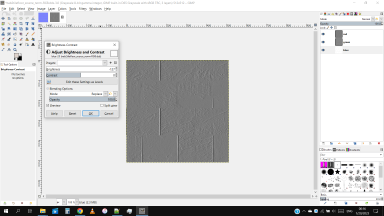
- Next, select the "Blue" layer, then click "Brightness and Contrast" in the Colors drop down menu. Set brightness to -127, then click OK.
- In the Colors drop down menu, choose the Components submenu, and click "Recompose".
- Switch back to the first image. In the Image drop-down menu, click "Flatten image". File:Norm2detail - flatten image.pngThis will ensure that the image doesn't have an (unnecessary) alpha channel, which would mess up the texture in-game if the TGA is compressed.
- Convert the image to greyscale, then convert it back to RGB.
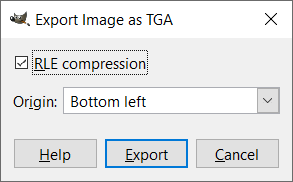
- Export as TGA, using these settings:
- Set the detail texture to
1.0 1.0scale in the detail.txt file.
Adapting for Source
Todo: Freeing up $detail slot by baking into $basetexture

