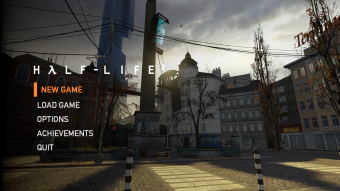
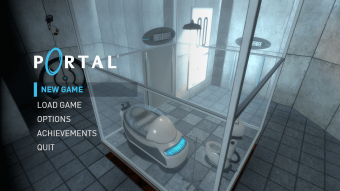
Gamepad UI in mods


This page details how to make your Portal or Half-Life 2 mod compatible with the controller-oriented UI added in early 2022. This will ensure that your mod is properly playable on Steam Deck, and it's menu can be navigate using controllers.
 Confirm:Is this fixed in the SDK 2013 version of gamepad UI?
 Note:This appears to not happen in the SDK 2013 version of the gamepad UI, so it is only an issue for mods based directly on HL2/Portal.
sound/ui/gamestartup*.mp3 files are present. If menu music is desired, you can play it through entity logic in background maps instead.
 Note:This was fixed in the public SDK 2013 version of the gamepad UI.
Games and mods that uses Gamepad UI
 Half-Life 2,
  Half-Life 2: Lost Coast and Episodes
 Portal
 Entropy : Zero 2
Basics
The gamepad UI is enabled by default on Steam Deck, and can also be enabled on any platform by passing -gamepadui, or running Steam in Big Picture mode (since ![]() 20th anniversary update) in the launch options.
20th anniversary update) in the launch options.
By default, enabling -gamepadui (without using -dx9) will also enable the Vulkan renderer, which can cause the game to crash if the GPU does not support Vulkan.[1] However, latest version of ![]() (20th Anniversary) and
(20th Anniversary) and ![]() (since May 20, 2025 update) changed this, so enabling Gamepad UI no longer enables Vulkan renderer automatically.
(since May 20, 2025 update) changed this, so enabling Gamepad UI no longer enables Vulkan renderer automatically.
Additionally, on Portal with RTX (or RTX Remix games), you must use -dx9, otherwise the game would try to load up the original DXVK instead of RTX Remix's DXVK and completely breaks the renderer. Going to Video Options on Portal with RTX while also having Gamepad UI enabled will cause the new PBR-capable/RTX materials to be disabled.
The UI layout files are placed in a gamepadui folder within a search path, though which search path they're in by default depends on the game:
- Half-Life 2:
hl2/gamepadui/(fonts),hl2/hl2_pak_dir.vpk/gamepadui/(layouts)- Episode One:
episodic/ep1_pak_dir.vpk/gamepadui/, plus the above - Episode Two:
ep2/ep2_pak_dir.vpk/gamepadui/, plus the above
- Episode One:
- Portal:
hl2/gamepadui/,portal/portal_pak_dir.vpk/gamepadui/
The graphics for the gamepad UI are located at materials/gamepadui/. These are always packed into the games' VPKs, though you don't need to do this for your mod.
Now that you know what files you'll be working with, you can get started adapting them for your mod.
Before compiling
First, you have to remove the #if and #endif for "0" on Panel.h on the vgui_controls project
The code was supposed to be like around ln 952 to 975 on Panel.h
If you don't do this, you might get errors about gamepadui_buttons.obj and gamepadui.dll while compiling
Layout changes
Removing the achievements button
As with the desktop UI, the list of achievements is hardcoded and can't be changed in non-code mods, so the achievements button should be removed from the menu. Copy mainmenu.res into your mod's gamepadui folder, open it, and find the following entry:
	"Achievements"
	{
		"text"			"#GameUI_GameMenu_Achievements"
		"command"		"cmd gamepadui_openachievementsdialog"
		"priority"		"2"
		"family"		"all"
	}
Simply remove it from the file. This will get rid of the achievements button.
Removing the post-game radios toggle
The gamepad UI includes an option to disable the ARG radios that appear after completing the game. While this is a useful quality-of-life feature in base Portal, it doesn't do much in mods, as the ARG radios only get added to the original Portal maps. As such, you may wish to remove it in your mod. To do so, copy options.res into your mod's gamepadui folder, open it, and find the following entry under the Portals category:
			"Radios"
			{
				"text"			"#Deck_Radios"
				"type"			"wheelywheel"
				"convar"		"portal_disable_radios"

				"options"
				{
					"1"	"#gameui_disabled"
					"0"	"#gameui_enabled"
				}
			}
As with the achievements button, you can simply remove it.
Graphics
High resolution chapter images
The gamepad UI uses new high-resolution versions of the chapter images, so by default your mod's chapters will appear using the original images, even if you provided custom ones for the desktop UI. The new chapter images should be taken at 16:9 aspect ratio, resized to 1024x512 (or 2048x1024), and placed at materials/gamepadui/chapter#.vtf, with # being replaced by the chapter number.
If your mod has fewer chapters than the base game, don't bother including VMTs, as these will automatically be reused from the base game. If you do need more chapters than this, the VMTs should be set up as follows:
"UnlitGeneric"
{
	"$basetexture" "gamepadui/chapter#"
	"$vertexcolor" 1
	"$vertexalpha" 1
	"$ignorez" 1
	"$no_fullbright" "1"
}
Replace # in the basetexture line with the chapter number.
Logo
You can choose to make your logo an image or text. By default, Half-Life 2 and its episodes use a text logo, while Portal uses an image logo.
Image
Create an image with a 3:1 aspect ratio, and place your logo in it as desired. Resize the resulting image to 1024x512, then place it in materials/gamepadui/ with any name.
For Portal mods, naming it portal_logo.vtf is all you need to do to get it to appear. If you want to change the name of the image or are modding Half-Life 2, there's a bit of extra setup involved.
First, an accompanying VMT is needed to load the texture. It should be set up as such:
"UnlitGeneric"
{
	"$basetexture" "gamepadui/logo"
	"$vertexcolor" 1
	"$vertexalpha" 1
	"$translucent" 1
	"$ignorez" 1
	"$no_fullbright" "1"
}
(Replace logo in the basetexture line with the name of the texture.)
Now you need to configure the main menu to actually display your logo. Copy schememainmenu.res into your mod's gamepadui folder and open it. Under BaseSettings, add the following line:
"Logo.Image" "gamepadui/logo"
(Again, you should replace logo in the material path with whatever you named your VMT.)
This will make your logo image appear in-game.
Text
Copy schememainmenu.res into your mod's gamepadui folder and open it. This contains all of the configuration you'll need, although what you need to do from here depends on whether you're modding Portal or Half-Life 2.
For Portal, under BaseSettings, remove the Logo.Image line. This will disable the logo image that Portal normally uses and fallback to text. This is all you need to do, unless you want to change the font, in which case continue reading.
Half-Life 2 defaults to a text logo, but it uses the HL2 icons font which appears nonsensical with other text. To fix this, or to change the font in a Portal mod, locate the following entry under Fonts near the bottom of the file:
		"Logo.Font"
		{
			"settings"
			{
				"name"			"HalfLife2"
				"tall"			"34"
				"weight"		"400"
				"antialias"		"1"
			}
		}
Change the settings as desired. In addition to these, blur can also be used to blur the text by a certain amount.
Portal uses Trebuchet MS as the font with a tall value of 72 and a blur of 2, so you may wish to simply copy that, but you can also configure this in any way you want. If you're using a custom font, you'll want to place the font file in either resource/ or gamepadui/fonts/, and add an entry for it to CustomFontFiles at the bottom of the file.
Like in the desktop UI, the game title is pulled from gameinfo.txt automatically, and does not need to be separately specified anywhere.
Loading screen icon
The icon in the center of the loading screen spinner defaults to a lambda or portal icon. You may wish to change this to match your mod's logo. The texture should be 256x256 and located at materials/gamepadui/game_logo.vtf. There are no special considerations in regards to the aspect ratio, but the icon should ideally fit within a circle about 200 pixels in diameter to avoid overlapping the spinner.
Bonus maps and commentary
Unlike the desktop UI, the gamepad UI has the bonus maps and developer commentary buttons placed in the bottom right of the New Game menu, with the former opening a submenu while the latter will directly load the highlighted chapter in commentary mode. Unfortunately however, these extra buttons are hardcoded to only appear when specific -game parameters are passed on the command line. As such, it's currently impossible for these buttons to appear in mods.
Bonus maps
For bonus maps, a workaround is to add the button directly to the main menu, like in the desktop UI. Open the mainmenu.res file from earlier, and add the following entry anywhere between two of the buttons:
	"BonusMaps"
	{
		"text"			"#GameUI_GameMenu_BonusMaps"
		"command"		"cmd gamepadui_openbonusmapsdialog"
		"priority"		"3"
		"family"		"all"
	}
(Depending on where you put it, you may need to adjust the Priority values for all of the buttons - they should be in descending order. Not doing this can result in the buttons randomly changing order after the menu is reloaded.)
The bonus maps menu will load your existing bonus map definitions and icons, so no specific changes need to be made to those. However, the menu currently has two limitations:
- Scrolling is not properly supported, so folders with more than 6 maps will have them stick off the bottom of the screen (though they can still be selected)
- The "description" line that can be set for a map or folder is not shown anywhere in gamepad UI
Commentary
Unfortunately, the above workaround doesn't work for developer commentary due to it being entirely integrated into the New Game menu. It may be possible to add commentary as a bonus maps entry, but this would also appear in the desktop UI.
Additional customization
References
| References |
|---|