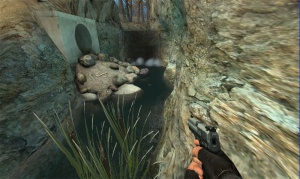
Flowing water
Jump to navigation
Jump to search


This article or section needs a screenshot to help visually convey the subject.
You can upload screenshots at Special:Upload. For help, see Help:Images.
You can upload screenshots at Special:Upload. For help, see Help:Images.
This method has been obsoleted by $scroll1 and $flowmap.
- Use GCFScape to extract "root\cstrike\materials\models\props\CS_militia\river01.vtf" from "cstrike_pak_dir.vpk"
- Place this file in your "<game>/materials/flow" directory and then restart Hammer and/or the Source SDK.
- Create a .VMT file called "flow" in the same directory and paste the following inside it:
"LightmappedGeneric"
{
	"$basetexture"	"flow/river01"
	"$translucent"	1
	"$nocull"	1
    	"$decal"	1

	"Proxies"
	{
		"TextureScroll"
		{
			"texturescrollvar" "$baseTextureTransform"
			"texturescrollrate" .15
			"texturescrollangle" 270.00
		}
	}
}
Straight
- Create your water geometry and give it a nice water material.
- Copy all of your water geometry and place this copy one unit above and away from the original geometry.
- Texture the surface of this new geometry in the new "flow" material.
- Adjust the scale and shift to conform with the edges of the water.
- Compile.
Corners & turns
- Create your water geometry and give it a nice water material.
- Copy all of your water geometry and place this copy one unit above and away from the original geometry.
- Cut this copy into shapes of the correct dimensions for sewing ( 64 x 128 x 256 512 x 1024 x 2048 x etc depending how wide your river is go to the nearest value).
- Texture the surface of this new geometry in the new "flow" material (we will call this textured face "face x").
- Using the "Texture Application Box" make the top "face x" a displacement (the higher the power, the more power you have to pinpoint turns).
- Use "Paint Geometry" with the axis set to either X or Y axis and move the edges of the water flow to match up with the original waters boarder/containment.
- Make use of the "sew" tool to keep all the flowing-water displacements connected. Make sure when you are finished the geometry of the water-flow, to align the texture on each of the cuts so it flows correctly and consistent with the flowing animation.
- Compile.
Troubleshooting and notes
- To distribute a map using this method you should include the "river01.vtf" and "flow.vmt" files in the BSP using a program such as Bspzip, or distribute a .RES file with the map (zipping is more reliable).
- If the water appears to be flowing upstream (i.e. in the wrong direction), set the texture's rotation to 180.
- For extra realism particle, splash and sound effects will be required. The env_embers entity can be used to simulate a splash effect.
See also
- Water
- Alpha channel
- Creating a Material
- Creating Decals
- Half-Life 2 Shader Fallbacks
- Shader Types and Parameters
External links
- Creating Scrolling materials
- Interlopers.net Waterfalls Tutorial - A similar method for creating flowing water.
