Category:Day of Defeat: Source level design
Overview
A Day of Defeat: Source map consists of these basic elements:
- A series of cap zones, denoted by flags
- Cap zones should be carefully balanced to avoid one of the teams having an unfair advantage.
- Distinct spawn areas for both teams
- Multiple exits
- Preferably no way to get into them from outside
- A map with well-defined pathways and areas
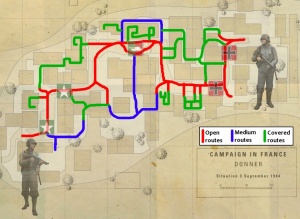
- Every point in the map should be approachable from at least two directions
- Large chokepoints should be used sparingly
- A mini-map
- Displays the map from an overhead perspective
- Should use distinct colours (e.g. the official maps' parchment style), so as not to blend in with the main first person view.
With the above in mind you should be able to create maps that function correctly. This article will cover each area in-depth if you need help.
Creating cap zones
Cap zones are the locations in which players stand to capture an area for their team. Every cap zone should have a flag near its centre to make it clear who is in control of the zone, and where the zone is. Cap zones can be configured to take longer or shorter amounts of time and to require different numbers of friendly soldiers to capture.
A cap zone consists of two entities:
dod_capture_area- Brush entity
- Defines the area the cap zone will cover
- Defines the time needed to cap
- Defines the number of soldiers needed to cap
- Defines which flag (dod_control_point) it refers to
- Must be textured with
tools/toolstrigger
dod_control_point- Point entity
- Displays the cap zone's flag
- Must have a unique index point number
- Stores the cap zone's name
- Defines sound to play (e.g. "Area secure!") when zone is capped
- Defines the flag icon to display in the HUD
Every DOD Source map also requires a single dod_control_point_master, to define any round timers and do various other things behind the scenes.
When placing cap zones, take great care to ensure they are balanced between the two teams. A map with every flag in the Axis spawn isn't going to be much fun! You can achieve balance through positioning, tweaking the number of soldiers needed to cap and/or the amount of time needed to cap for each team, or even making a cap zone inactive until another cap zone is taken, creating a chain.
Tips
- Always provide some form of cover at a cap zone, unless you specifically want there to be none
- Try to make cap zones locations a platoon would logically want to have in their possession
Creating spawns
Spawns are simply locations where players appear when the round first starts or after they die. There are two entities involved:
It's usually best to place a team's spawn points in a single location, or at the very least sizable groups. Make sure that the spawn points are facing a useful direction (you will see a graphical representation in Hammer to help with this), so that the players will be able to orient themselves quickly, and never place them in view of a location which an enemy player can access.
Lastly, always ensure that there are multiple exits from a spawn, but no entrances. Doing both of these will help combat spawn camping: it is nearly impossible for an abusive player to cover five or more exits at once, if they can't get past them.
Creating the main map area

Day of Defeat: Source's gameplay is based around out-manoeuvring opponents by moving to a position where they are not aware of your presence, cannot attack you, or are less suited to combat than you (e.g. Assault class down a long alley) - ideally all three. For this reason, a good DOD Source map will provide:
- A mixture of:
- Small areas with many corners (e.g. interiors, ruins)
- Open areas with cover (e.g. ruined street)
- Open areas without cover (e.g. clean street, field)
- A large number of inter-connecting paths
- Each area should be approachable from at least two directions
- The number of exits (including windows etc.) in an area should be balanced against the number of entrances
- Suitable line-of-fire lanes for supporting classes
- MGs
- Snipers
- Bazookas?
Spend some time studying the official maps and you will begin to understand how they are constructed, and how they achieve these goals. For instance, there is always one or more paths which are largely in interior locations, and there is always at least one 'direct' path in the open, and there are usually several other paths that shade in between.
Books could and have been written on map design, and this is no place to start another. Study others' maps and play the game to get a deeper understanding of its mechanics, and your designs will steadily improve.
Creating the Mini-Map
To create a map overview, follow these steps:
- Load your map with
sv_cheats 1 - Join a team
- Disable any fog with
fog_override 1 - Switch to the overhead view with
cl_leveloverview X, where X is the scale factor you wish to use - Walk around (use
noclipor change the scale factor if needs be) until the entire map is on the screen - Hide the game interface with
cl_drawhud 0 - Take your screenshot, ideally in TGA format
- Note down the most recent position information displayed in the console
- Create a VTF from your screenshot (see Creating a Material)
- Due to the way in which mini-maps are displayed, transparency is generally something to avoid.
- You can find a generic background image for your mini-map on the Day of Defeat forums. [1]
- Create a VMT for your new texture (see below for code)
- Do not include the
.bspextension in$basetexturewhen creating the VMT - Ensure both files have the same name as your map, again without the
.bspextension
- Do not include the
- Place both the VTF and VMT in the
dod/materials/overviews/folder - Create an overview file in
dod/resource/overviews(see below for code)- The file should be called
mapname.txt
- The file should be called
- Load the map and ensure that the overview is working
You may wish to use BSPZIP to embed the files you created in your BSP.
VMT code
"UnlitGeneric"
{
	"$basetexture" "overviews/mapname"
	"$vertexcolor" "1"
	"$vertexalpha" "1"
	"$no_fullbright" "1"
	"$ignorez" "1"
}
Do not include the .bsp extension in $basetexture!
Overview definition code
"mapname"
{
	"material" "overviews/mapname"
	"pos_x" "Your position data"
	"pos_y" "Your position data"
	"scale" "Your scale"
	"rotate" "0"
	"zoom" "1"
}
- Do not include the
.bspextension for mapname! - Fill in
pos_x,pos_y, andscalefrom the console message you noted down.
My overview is missing bits of my map!
The overview tool attempts to intelligently remove portions of the map that are not wanted on an overview: roofs, inaccessible areas, and so on. However, it is not perfect.
Required: how to get round these issues
See Also
Pages in category "Day of Defeat: Source level design"
This category contains only the following page.
