Creating a Capture Point
Required entities
A working control point needs these 3 entities in the map to function:
Picking a good position
Capture Zones should be placed in area which has
- enough space for about 10 players.
- two or more access routes.
- one or two ideal position for sentry guns.
- alternative ways of destroying the sentry guns in the ideal position.
- cover from the sentries in the ideal positions.
You can control the sentry locations using func_nobuild brush entities to make zones which engineers can't build in. Without meeting these criteria, the capture point either becomes too easy to capture or defend, or gets crowded rather quickly.
Creating the basic layout
Once you have picked out the position for your capture point, it's time to lay down what designates it as the capture zone. Here is what you should do:
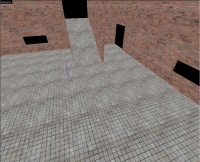
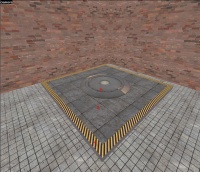
- Create 4 brushes to serve as a border for the capture zone, make them about 4-16 units in height and 16 units wide. Texture them with
props/hazardstrip001aon top andmetal/ibeam001bon the sides. (number 1 on picture) - Inside the border, create a brush with the same height as the surrounding brushes and pick whatever texture you want. For this tutorial, We're going to use
metal/metalfloor003a. (number 2) - Select all "borders" and "floors" and tie them to a func_detail entity to save compile time.
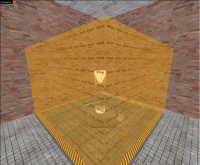
- Create a prop_dynamic in the middle, which will server as the point's base. For now, Name it
prop_cap_1and set its World Model tomodels/props_gameplay/cap_point_base.mdl. (number 3) - Optionally you may also add info_overlay entities with the material
signs/capture_zone.
Promotion to capture point
As mentioned above, three entities play a key role in creating a working capture point. They are trigger_capture_area, team_control_point, and team_control_point_master. In this step, we are going to create and play around with them.
First, create a team_control_point_master entity somewhere in the map and Name it master_control_point.
Next, add a team_control_point entity in the middle of the capture point prop. We are going to set up a few properties, so I'm going to list them with values assigned.
- Name:
control_point_1 - Print name: (you can set a descriptive name of the place here - selected warehouse)
Warehouse - Group index: Unless you are making a multi-round map, leave this set to the default
0value for all capture points. - Default owner: This determines the owner of the point when the round starts. Leave it set it to
Neither. - Index: You should order your control points starting from 0. So if this is the
nth point, set this ton-1. - Warning Type:
Normal Announcements
Now, create a brush over the whole capture zone (including the borders) with a height over 256. Set its texture to tools/toolstrigger. Press CTRL+T to tie it to an entity. Select trigger_capture_area from the dropdown list. Again, I'm going to list the key values you will need to set.
- Name:
capture_area_1 - Control Point:
control_point_1 - Can *team* cap?: If you want an Attack/Defense style map, set the value for the defending team to
No, otherwise leave both teams set toYes. - Number of *team* players to cap: The ideal value is
2, but if you're making a map with 5 capture points, ideally, you will want to set the first capture points' to 1, the second ones' to 2 and the middle one's to 3. - *team* spawn adjust: You don't want to set this too high or a team will either spawn too fast or never spawn. I set both to
5. - Time to cap: The closer to the headquarters, the less you will want this to be. Ideally, this should be
5-20seconds.
This entity also should have two outputs.
My Output > Target Entity Target Input Parameter Delay Only Once 
OnCapTeam1 prop_cap_1 Skin 1 0.00 No 
OnCapTeam2 prop_cap_1 Skin 2 0.00 No
That should conclude the basics.
Additional possibilities
Of course, simply laying out capture points without any control will only create chaos. Therefore you will need to add entities which control these capture points. Depending on the type of your map this is a team_control_point_master (if you're creating a map with only one round) or multiple team_control_point_rounds (if you're creating a round based map such as Hydro or Dustbowl).
- If you are creating a one-round system, then in your
team_control_point_masterentity, set the order of drawing the capture points in the Cap Layout field with the syntax "index1,index2 index3" where , is a line break and space is an in-line break between points. In this case, a pyramid would be displayed (gravelpit-style), with index1 on top and the other two on the bottom. You can also set whether a team can win by capturing all points or not using the Restrict Team from Winning field. Finally, you can set it to switch teams when a team wins by modifying the Switch teams on map win field. This is explained in-depth in the Creating a Linear Gameplay Map article.
 Note:Unlimited control points can be used. Index is the Index field of a control point.
- If you are creating a round-based system, then leave the Cap Layout field empty. Also, the Restrict Team from Winning of the
team_control_point_masterdoesn't apply. Finally, Switch Teams on Map Win only applies when a victory or defeat had been triggered (refer to dustbowl). Ateam_control_point_roundcan be set up to open or close specific doors (hydro-style) when the round begins using its Outputs. It has a new field called Priority. Higher priority rounds are played first, as you can see on dustbowl, the first round has the highest priority, therefore always played first. The Control Points This Round is a replacement field for Cap Layout, but this one requires you to enter the name of the control point, not the index. And finally, the good old Restrict Team from Winning returns here, with the usual setting. - If you want to create multiple control points which can be captured in any order, Gravel Pit style, set the "RED/BLU Previous Control Point 1" value to the point you are currently modifying. For example, if you are modifying control_point_1, set "RED Previous Control Point 1" to control_point_1.


