Mesh Editing 4
The previous tutorial covered the pivot tool and how changing its position can allow for interesting modifications to basic tools. Up until now, all manipulations have occurred in world space. Everything is axial aligned to the grid. It is possible to work in a local space but that can get unwieldy if large complex objects are required at some arbitrary angle.
This can be handled by using a local axis and local grid to facilitate complex yet manageable geometry.
Selection Local Space Axes
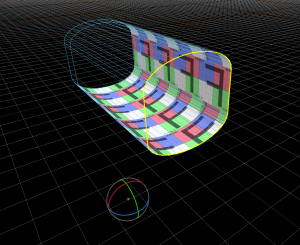
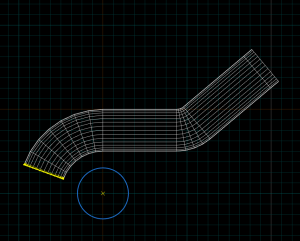
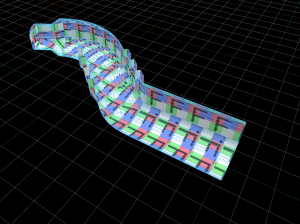
Create a suitable segment of tunnel using the techniques discussed prior. Using the pivot tool, extend some edges into a non-right angled curve something similar to the example shown.
The goal is to extend this now off grid, non-axial aligned section, straight forward.
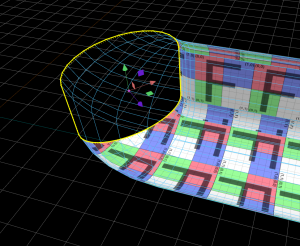
- With the edges at the end selected and Translate T mode enabled, click the "use selection's local space axes for gizmo" button. Or simply Tab ⇆. The translation gizmo in the 3D view will slightly change colour and will now be aligned with the edges along the selected edge of the tunnel.
- Use ⇧ Shift+
 to extrude along the local axis and extend the tunnel along this new, non world space aligned, direction.
 - Press Tab ⇆ to toggle back to world space.
The Workplane
One of the limitations of the local space axes mode is that the pivot cannot be moved. It's pivot point is chosen automatically each time and aligned to the normal of the selected element. If one wanted to create a section of geometry that was aligned to the angled part of the tunnel, it would be difficult and likely messy to do so.
The Workplane allows users to effectively set the grid to any normal desired. Creating a temporary world space on a specific normal direction.
Located next to the world and local space buttons is the Pick workplane from objects and surfaces button, or ⇧ Shift+Q. When selected the mouse cursor changes to a eyedropper. Click on a face to set the new workplane. Click on different faces to see how it chooses the direction from face to face.
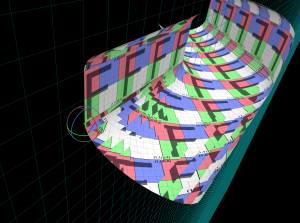
If the floor of the tunnel is curved similar to the example images, use a vertical wall. Notice when a face is selected the rotation gizmo allows the rotation of the workplane itself. This can be useful to re-align the workplane in the 2D views to something more useful as sometimes it may be upside down or flipped which could be confusing.
Return to the Selection tool ⇧ Shift+S, re-select the edge-loop at the end of the tunnel which should now be aligned to the new workplane that was set. Faces and edges can now be extruded in world space, because the grid itself has changed and now represents world space.
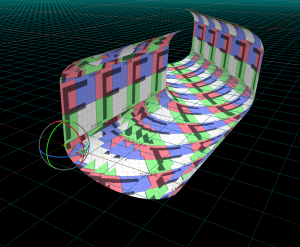
Continue working like this on the tunnel, using the workplane to add architectural details to arbitrarily angled sections. Add more alcoves and side-tunnels, using the bridge tool to potentially even make new looped corridors by joining together side-sections. Merge ragged edges with Merge M. Cut holes into faces to add new doorways, delete edges in curves to add some angularity, generally make some interesting shapes.
You can reset the workplane by pressing ⇧ Shift+Q then Esc.
Other Useful Tools
Additional tools that can be useful.
Clipping Tool
The clipping tool can be used in the 2D view to cut meshes or faces into pieces.
Shortcut: ⇧ Shift+X
- In Meshes selection mode, it will slice the selection mesh into two.
- While in Faces selection mode, it will slice selected faces into smaller ones.
- With the icons in the tools settings, you can pick which half of the mesh or faces to keep, or both. Using ⇧ Shift+X will toggle through these options and display the remaining geometry.
The clipping tool is good for adding additional straight edge loops.
Mirror Tool
Used to create a mirrored version of a mesh or selection of faces along a straight line by drawing a reflection axis in the 2D view. In Meshes selection mode it creates a new mirrored version of the mesh while in Faces selection mode it mirrors the faces but keeps them part of the same mesh.
Shortcut: ⇧ Shift+F
Bevel
Used for adding rounded corners to something. It uses the current grid size to indicate the amount of bevel. Experiment with this to see what it can do. Can be a bit troublesome on some corners and complicated edges but a very useful shortcut to manually slicing and moving.
Shortcut: F
Conclusions so far
While we're definitely not done yet, this should have been a fairly broad introduction to what's now possible with Hammer 2's mesh editing tools. A lot of this knowledge can also apply to 3D modelling programs such as Modo or Maya. Learning to use one of those as well can be a valuable complement to existing level design skills.
Next: Mesh Texturing Basics
