Portal BTS - Tutorial - Vacuum Tubes

You can upload screenshots at Special:Upload. For help, see the Help:Images.
Introduction
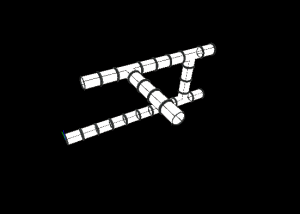
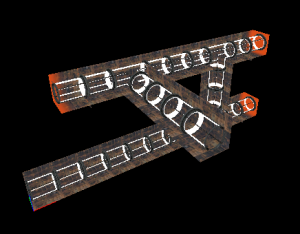
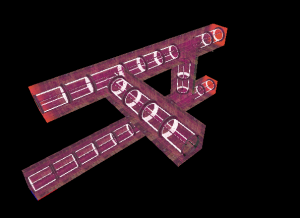
This guide will teach you how to create Vacuum Tubes. You can enter some vacuum tubes however, other vacuum tubes are just for detail.
Enterable Tubes
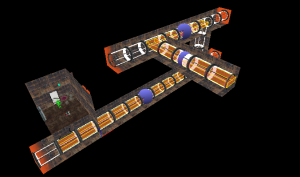
Enterable vacuum tubes are seen in testchmb_a_15.
Setting Up
Put prop_static entities. Set their model to these:
- Straight Tube - clear_tube_straight.mdl
- Mutli-Directional Tube - clear_tube_tjoint.mdl
- Broken Tube - clear_tube_broken.mdl
- 90 Degree Tubes - clear_tube_90deg.mdl
Enter the following properties:
| Property Name | Value |
|---|---|
| Collisions | Not Solid |
Create your path with the models.
Walls
Create walls with the nodraw texture, and texture the inside faces or visible faces with metal/metalwall_bts_006a. Create orange pits as well.
Simple Collisions
Put brushes around the tubes with the invisible texture. The ceiling and floor brushes should be 32 units in width and the side brushes should be 24 units in Width. Turn all of these brushes to a func_detail.
Movement
Horizontal Movement
Create brushes with the Trigger texture 32 units high and 80 in width, the length will depend on how long your tube is.
Tie each individual brush to a trigger_push entity and enter the following properties:
| Property Name | Value |
|---|---|
| Speed of Push | 350 |
Tick the Clients flag and set its Push Direction to the direction your tube will go.
Vertical Movement
If your pipes require you to move up, you need to create a 80w*80l*16h brush with the Invisible texture, tie it to a func_door entity and enter the following properties:
| Property Name | Value |
|---|---|
| Name | door_push_up_pipe |
| Speed | 200 |
| Forced Closed | Yes |
| Move Direction | -90 0 0 |
Set the Lip value to the distance you need the door to move as a negative number.
Create a 29w*128l*64h brush with the trigger texture, tie this brush to a trigger_multiple and enter the following properties.
| My Output | Target Entity | Target Input | Parameter | Delay | Only Once | |
|---|---|---|---|---|---|---|
| OnStartTouch | door_push_up_pipe | Open | <none> | 0.00 | No |
Under flags, untick Touch Opens and tick Door Silent. Set the lip value to a negative value to move the door upwards.
Make sure there are no trigger_push brushes that interfere with the door_push_up_pipe. You will also have to force the player to crouch.
Lighting
Create a light entity and enter the following properties:
| Property Name | Value |
|---|---|
| Brightness | 242 91 0 100 |
| BrightnessScaleHDR | .5 |
| Constant | 500000 |
Place these lights 592 units away from each other. Sometimes you can put these lights closer if necessary.
Entrance
Create an env_soundscape and enter the following properties:
| Property Name | Value |
|---|---|
| Radius | 64 |
| Soundscape | portal_escape.tube |
Place the soundscape inside of the entrance.
You will have to get creative if you don't want the entrance to your tube to be a broken tube.
Broken Tube
Create a tube with the clear_tube_broken model.
Put invisible brushes around the broken tube model for collision.
Force Crouch
Create a point_clientcommand entity and set its name to clientcommand.
Create a trigger_multiple entity and enter the following outputs:
| My Output | Target Entity | Target Input | Parameter | Delay | Only Once | |
|---|---|---|---|---|---|---|
| OnTrigger | clientcommand | Command | +duck | 0.00 | No | |
| OnEndTouch | clientcommand | Command | -duck | 0.00 | No |
Sound
Create an ambient_generic entity and enter the following properties:
| Property Name | Value |
|---|---|
| Name | sound_suction |
| Sound Name | Portal.tube_suck |
Under Flags, tick Is NOT Looped.
Place the ambient_generic inside the tube, but move it a bit closer to the direction the tube is going.
Particles
Create an ambient_generic entity and enter the following properties:
| Property Name | Value |
|---|---|
| Name | particles_broken_tube_suck |
| Particle System Name | broken_tube_suck |
Under Flags, tick Is NOT Looped.
In Portal, the first 2 Control Point values were used, however, they don't change the particle in any way so they can be left ignored.
Place the particle above the broken tube model.
Starting the Effects
Create a logic_relay entity and set its name to relay_broken_tube_effects.
| My Output | Target Entity | Target Input | Parameter | Delay | Only Once | |
|---|---|---|---|---|---|---|
| OnTrigger | sound_suction | PlaySound | <none> | 0.00 | No | |
| OnTrigger | particles_broken_tube_suck | Start | <none> | 0.00 | No |
Exit
Place a new soundscape to what you need.
You will have to get creative if you don't want the exit to your tube to be a Box Dropper Lid breaking. Some level designers create another broken tube for the exit.
Box Dropper
First, complete the Box dropper guide.
The top of the box dropper shaft uses the portal_testchmb.tight_space soundscape.
Make sure the tube exit drops you into the box dropper.
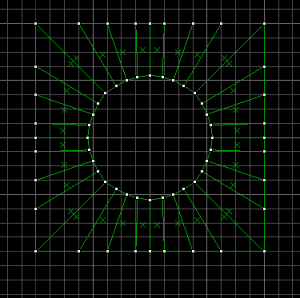
Arch
Create a 128*128*8 arch with the nodraw texture and enter the following properties:
- Wall Width: 29
- Number of Sides: 32
Use the vertex tool to create this exact shape:
Tie the brushes to a func_detail.
Texture the top faces and the center faces with metal/metalwall_bts_006a.
testchmb_a_15 creates the arch because the map uses a slightly outdated version of Test Chamber 09, optionally you can texture the center faces with metal/metalwall061f because the area came from an earlier art pass.Detail Vacuum Tubes
These vacuum tubes can simply be seen shooting boxes across the tube. However, not all vacuum tubes require boxes.
