Skybox (2D) with Terragen and Skypaint - Advanced
This tutorial explains how to create more advanced skies with Terragen, in combination with Skypaint and Photoshop. It was created because I find that Terragen lacks certain functions, especially advanced cloud editing. I made a few skies back in 2005 using a different technique, I got a lot of requests for a tutorial but had no time writing it, I later found the Skypaint application and since it was so much easier to use for the same result I decided to write the tutorial. To be able to complete this you might want to have the full versions of the software mentioned, its not needed, but quality will come there after. --Hipshot 02:59, 8 Jan 2006 (PST)
If you feel that this tutorial is to straight on and you don't have the skills required, I suggest that you go through this before, its a more basic Terragen sky guide.
Terragen

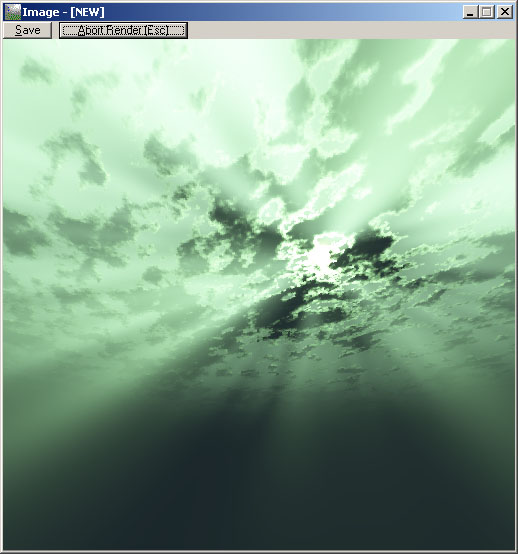
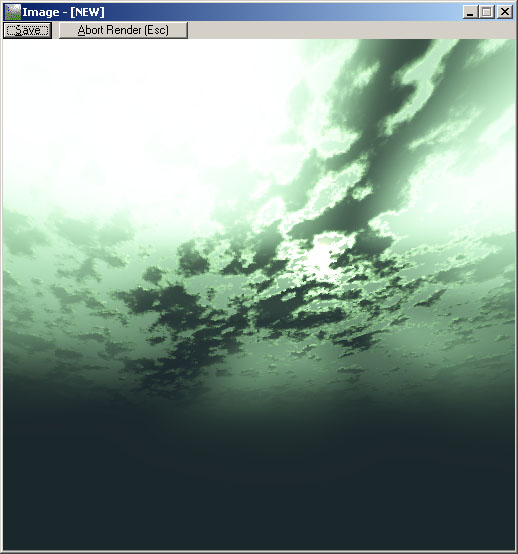
To start, you need to render an environment within Terragen. Since you will be basing you sky on this scene, make sure you are happy with it, cause if you regeret it later you might have lost a lot of work. There's very little space for undos here. Something that is important to know is, that a final render, will look 'different' compared to the little preview even if they are compiled with the same quality settings. This is actually a part of the whole problem and one of the main reasons why I made this from the beginning. The preview image often looks great and its the one you are going by the whole time until you decides that you are done and then you make a final rendering with (maybe) your desktop resolution. Then you notice that the image dosen't look at all that good anymore, it dosen't look like the little preview. It looks worse, much worse. Why is this? Well, it's becaues when you render a larger image, the edges of the details will not as thick compared to the content itself and that will, in many cases make epsecially clouds look stretched, bland and flat (take a pen and paper, doodle a character, a very small one, then make the same character 10x bigger with the same pen, the same problem). Ground detailing suffers the same, but there are more options to counter that look. Compare this Preview with this Final render of the same image, if you while looking at the Preview think about how it would look like ingame, large, you would not imagine what you see in the Final render picture. You will think of a more full and thick sky.
Some other things that can be good to know about Terragen is; 3D clouds of 1 thickness will in most, if not always look better than 1 2D clouds. Never make clouds too thick in most cases that will give the clouds a odd look since they are duplicated on top of each other, it depends on the scene, but if there is strong light and low fog to cover the artifacts, then it will not look good; Atmosphere Accuracy under Render Settings can really look different and a higher accuracy dosen't mean a better look, it depends on various other settings, compare this Middle and this High; Don't forgett that the fog alltitude is half-height so if you are supposed to have a fog that is BELOW the camera, it is supposed to be set at half or below the camera height; 100% fog will completely cover compare to 99% there is nothing between if you want something between, change something else.
Script
Anyway, when you are satisfied with the scene, you are supposed to render all six images (textures) for environment map. You could do it manually, but why would you? There is a script that can do it for you and if its a complex sky, you might want to sleep while it's processing all the six images. The _up will take the most time and the _dn the least. Make sure your camera settings are locked and enter the Terragen menu and load the following script (save the code in notepad and save the file as sky.tgs):
initanim "C:\", 1

; Front
camh 0
camp 0
camb 0
zoom 1
frend

; Right
camh 90
camp 0
camb 0
zoom 1
frend

; Back
camh 180
camp 0
camb 0
zoom 1
frend

; Left
camh 270
camp 0
camb 0
zoom 1
frend

; Top
camh 0
camp 90
camb 0
zoom 1
frend

; Bottom
camh 0
camp -90
camb 0
zoom 1
frend
Fileformat and names

When that is done, you will, in your C-root find six .BMP pictures, named 0001.bmp - 06. What you need to do now is to convert them to uncompressed .TGA. That can be done using Photoshop but I will use a batch compiler because it's faster. After that you need to rename the pictures so that they can be used as a environment map. Follow the following guide:
| Original name | Change to |
|---|---|
| 0001 | xxx_rt |
| 0002 | xxx_ft |
| 0003 | xxx_lf |
| 0004 | xxx_bk |
| 0005 | xxx_up |
| 0006 | xxx_dn |
The underscore is not needed (in some games it is eg. Q3), but I use it because I think its easier to tell the images apart. When you input a sky in Hammer and the skyname has a underscore in it, you need to take that into account, if not, the sky won't work. Now, over to Skypaint.
Skypaint

Skypaint, a small application made especially for painting in 3D environments. The webpage says "Cut days off your production schedules by painting 360° backdrops instead of modeling and rendering them." and yes days it is, some things here would really take days to render in the same quality within a professional environment application, Terragen (0.9) is very limited and can't do most of them at all. Anyway, download the app and instal it, make sure you instal the Photoshop plugin also. This is very important, if this is not made correctly, all is lost. You might have to manually move the plugin from Skypaints instal-folder to the plugin-folder of Photoshop. When that is done, open Photoshop so its ready to use.
Open skypaint, found in the start menu. Go to file->open, choose the option Quake II, Targa and select the sky in your C-Root (you should only se the xxx_ft.tga file of that sky not the other parts). When it's open, will it be your first chance to preview your sky in 3D, you can hold down the MOUSE1 and turn around the view. You should do this to see if there're any problems (if there is, you did something wrong in the previous steps).
After you checked the skys consistency, turn the view to a part where you feel that yo want to add something. Now hit enter and see how the exact same view is transfered into Photoshop for editing.
Photoshop
The view I have in photoshop now, is the sun and I feel that I want to add a vortex-storm around it, so I go to NASA and enter their Hurrican section. I snag a huge satelite image from Katrina and I pastes a part from it onto the Skypaint picture. Now, your depth-thinking (Z) skills comes to hand, you need to wrap and distort the flat Katrina image to fit into the sky nicely and also you need to do color, contrast and some erasing before you can make this to look good. When you're done, make sure you flat all layers and enter the Skypaint plugin. *Poff* the edited view is inside Skypaint and you can turn around and watch your creation. However, if you are not satisfied with this, you will find it very hard to undo it. Its almost impossible, since you can't undo within Skypaint and if you for just one pixel flipped the camera you can never go back to the same position and undo within photoshop again. So make sure you save (save as another name, its better) the sky in Skypaint everytime you made something that you feel like keeping. Make sure you never save over the base sky until you are really sure that you are done.

The hurricane Katrina, satellite photo by NASA.
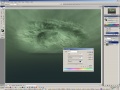
Katrina being distorted in Photoshop
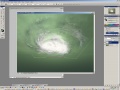
Katrina is now a cool vortex around the sun!
Quick n' Dirty snapshot from the movie Day after Tomorrow
Flipped around, adjusting colors.
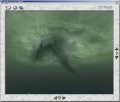
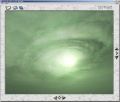
After a while - Added a dark tornado inside the 'hole'.
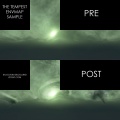
Pre and post compare of the entire environment map.
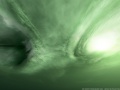
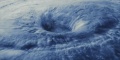
Wallpaper of a part of the sky, 1600x1200.


In game
To make this appear ingame, you need to convert the .TGA into a material structure. You should consult the main Terragen-Sky article if you don't know how to do that.
Problems
Well, that was simple. But there is of course some problems that might occur, I'm going to explain some of the troubles you might have with this (I've had).
First, Skypaint, the application and plugin, they are old and they act odd sometimes. After you opend a image from Skypaint in Photoshop, Skypaint (the application) sometimes disappear and won't show again, you will need to force Skypaint to quit (you can't open skypaint again using the shortcut/exe) using the Taskmanager and you won't be able to save what you had in there. To avoid this, or actually to recover Skypaint again, make sure you never close the Skypaint picture in Photoshop and if you need to get back without having anything edited, revert until you are back where you started in Photoshop and then use the plugin.
Second, it's very important that you don't edit the image beyound the bounderies in Photoshop, unless you know what you do of course. If you do this, there will be odd edges in the sky inside Skypaint, since the image cuts-off there. This can be very hard to fix afterwards.
Third, saving is the key, I've said it before in this article, but since undoing is in many cases impossible as soon as you get outside Photoshop, you need to save the sky a lot, use save as and save them like version1, version2 or something. In the end you might end up having ~5-10 different versions of the same sky, but that's not a bad thing. When you are completely done, throw away everyhting you don't need.
External links
Other
Since this was made because of lacking features in Terragen 0.9, I need to say that Terragen 2 is by the door, it's supposed to be released early this year (2006) and the improvements are incredible, here are some images.
| Environment articles: | |
|---|---|
| Skies and environment maps | |
| Terrain and displacement mapping | Displacements • Creating Holes in Displacements • Digital Elevation Models • Creating custom terrain with Worldmachine |