Adding Point Entities: Difference between revisions
Darknkreepy (talk | contribs) No edit summary |
Darknkreepy (talk | contribs) No edit summary |
||
| Line 19: | Line 19: | ||
Choose the appropriate entity from the drop-down list. | Choose the appropriate entity from the drop-down list. | ||
{{clr}} | |||
[[Image:hammer_placeentity.jpg|thumb|right|400px|Left-click on the floor in the 3D View to place the starting entity.]] | [[Image:hammer_placeentity.jpg|thumb|right|400px|Left-click on the floor in the 3D View to place the starting entity.]] | ||
| Line 25: | Line 25: | ||
Next we'll place this entity in the map. When placing entities aligned with a surface, you can do this simply by clicking where on the surface you want it in the '''3D View''', so click somewhere on the floor of the room, like in the image here, and the entity will be placed at the spot you click. | Next we'll place this entity in the map. When placing entities aligned with a surface, you can do this simply by clicking where on the surface you want it in the '''3D View''', so click somewhere on the floor of the room, like in the image here, and the entity will be placed at the spot you click. | ||
{{clr}} | |||
[[Image:hammer_pick357.jpg|thumb|left|200px|Pick the [[weapon_357]] from the entity list.]] | [[Image:hammer_pick357.jpg|thumb|left|200px|Pick the [[weapon_357]] from the entity list.]] | ||
| Line 39: | Line 39: | ||
Click in the '''3D View''' to place the [[weapon_357]] entity, just like you did with the player starting point, as shown to the right. | Click in the '''3D View''' to place the [[weapon_357]] entity, just like you did with the player starting point, as shown to the right. | ||
{{clr}} | |||
[[Image:hammer_pick357ammo.jpg|thumb|left|200px|Pick the [[item_ammo_357]] from the entity list.]] | [[Image:hammer_pick357ammo.jpg|thumb|left|200px|Pick the [[item_ammo_357]] from the entity list.]] | ||
| Line 53: | Line 53: | ||
Place the [[item_ammo_357]] entity next to the [[weapon_357]], as shown. | Place the [[item_ammo_357]] entity next to the [[weapon_357]], as shown. | ||
{{clr}} | |||
{{NavBar|Applying Textures|Your First Map|Adding Light}} | {{NavBar|Applying Textures|Your First Map|Adding Light}} | ||
Revision as of 11:30, 28 October 2006
Next, we'll insert some entities into the map.
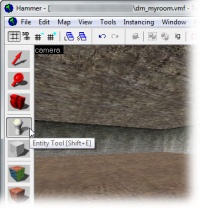
Entities are placed using the Entity Tool. Select it from the left side icon bar. (It's the white lightbulb.)
Next we pick which entity to insert. There is a list of possible entities in the Object Toolbar (by default in the lower right corner of the Hammer window).
The first entity that we will pick is where the player will spawn when he enters the map. What entity to choose from the list depends on what game you are creating this map for.
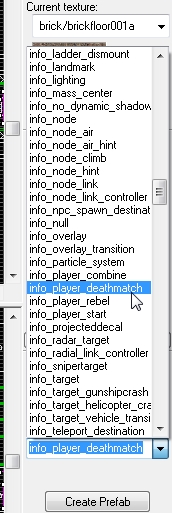
- If you are creating a map for Half-Life 2: Deathmatch, the game will spawn the player at the info_player_deathmatch entity. (If the info_player_deathmatch does not appear in the list, you need to add the hl2mp.fgd game configuration file. See Hammer_Game_Configurations for help.)
- If you are creating a single player map for Half-Life 2, the game will spawn the player at the info_player_start entity.
Choose the appropriate entity from the drop-down list.
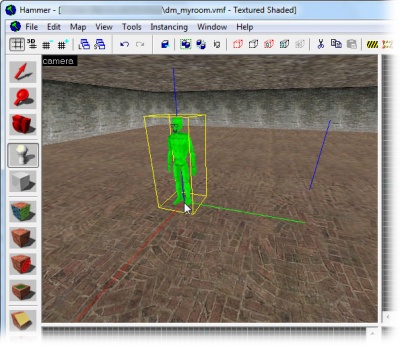
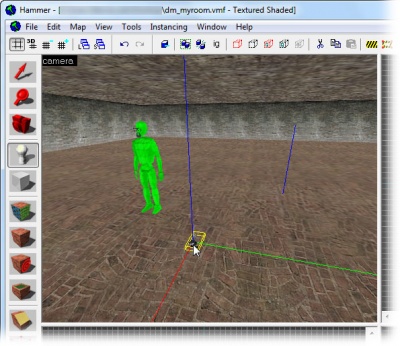
Next we'll place this entity in the map. When placing entities aligned with a surface, you can do this simply by clicking where on the surface you want it in the 3D View, so click somewhere on the floor of the room, like in the image here, and the entity will be placed at the spot you click.
Next we will place a weapon.
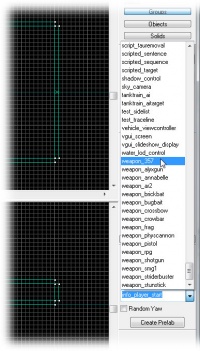
Pick the weapon_357 entity from the entity list in the Object Toolbar, as shown to the left.
The weapon_357 entity will spawn the .357 magnum revolver where it is placed.
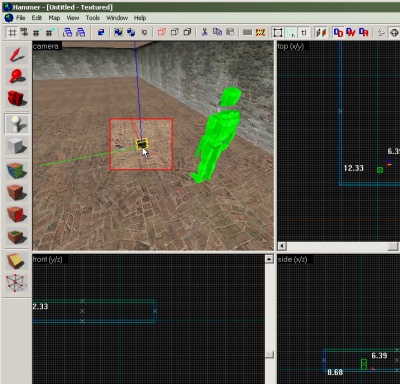
Click in the 3D View to place the weapon_357 entity, just like you did with the player starting point, as shown to the right.
Next we will place some ammo.
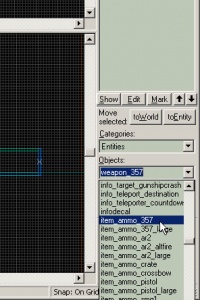
Pick the item_ammo_357 entity from the entity list.
This entity is a box of .357 ammo for the magnum revolver.
Place the item_ammo_357 entity next to the weapon_357, as shown.
