Team Fortress 2 Design Theory: Difference between revisions
Thunder4ik (talk | contribs) m (Unicodifying, replaced: [[Image: → [[File: (13)) |
|||
| (124 intermediate revisions by 36 users not shown) | |||
| Line 1: | Line 1: | ||
{{TF2 topicon}} {{lang}} [[Category:Team Fortress 2]] [[Category:Theory]] | |||
{{toc-right}} | |||
{{tf2|4}} is a highly diversified multiplayer game, and well-designed maps that accommodate all of the player classes equally are critically important to it. Unfortunately while understanding how the game plays is one thing, creating a quality map that compliments it is quite another. | |||
* | * '''A good map is fast and fun to play on.''' The best maps can run on a 24/7 server without getting boring even after the second or third reload. | ||
* | * '''A good map accommodates every class.''' If a class is useless on a map, players who prefer that class are liable to disconnect when your work comes up in a server's rotation. | ||
* | * '''A good map is ''designed'', not simply ''constructed''.''' If all you are doing is re-creating the surface appearance of another map, you're highly unlikely to create something worth playing in its own right. | ||
== Gametype == | |||
{{ | The first step in creating a TF2 map is choosing a gametype. Ten are currently officially supported. | ||
=== Arena === | |||
{{main|TF2/Making an Arena map}} | |||
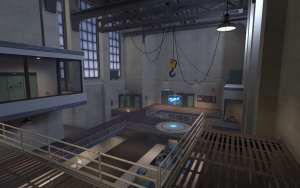
[[File:Arena Lumberyard 01.jpg|thumb|Lumberyard's CP. The side doors open when it unlocks.]] | |||
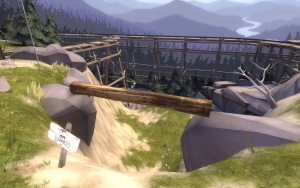
[[File:Arena Lumberyard 03.jpg|thumb|Players should be forced to make a tradeoff if they want to pick up health. Falling here means death!]] | |||
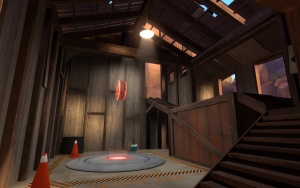
Arena is similar to {{cs|2}}. Players do not respawn, there are no or very few health pickups (but bodies of water are often provided for dousing flames), and rounds are won either by eliminating the enemy team or capturing a single control point somewhere in the middle of the map. | |||
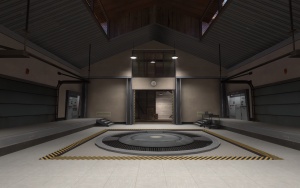
Balance in arena needs to be on a knife-edge, so it's strongly recommended that maps for it be symmetrical. To prevent camping, you should also make spawn rooms open to the enemy team. | |||
The central control point should start locked to encourage players to fight each other; in fact, its only real purpose is to force an end to the map if they start to hide. In all of Valve's maps, the point unlocks after sixty seconds. | |||
; Advantages | |||
: Arena is designed to be played quickly, so maps are very small and comparatively quick to create. | |||
: Simple win conditions simplify [[entity]] work. | |||
: Symmetric design makes things simpler still. | |||
; Disadvantages | |||
: Arena forces precise team balance, which can lead to players sitting out entire rounds if there are too many on one team. | |||
: Due to the comparative irrelevance of the point, the mode can feel unfocused. | |||
: Players will be paying far closer attention to your work. Make sure that it is balanced and there are no exploits! | |||
: '''Arena is no longer supported in Valve's official matchmaking.''' Most new players are unfamiliar with the mode, and it's unpopular with many. | |||
=== CTF — Capture the Flag === | |||
{{main|TF2/Flag Based Goal Systems}} | |||
== | In CTF, each team has a "''flag''" (usually an intelligence briefcase) and a capture zone. Players need to take the enemy's intelligence back to their own capture zone. | ||
It is common for the flag points and capture zones to be located in the same place, but they don't have to be. Separating the flag and capture zone can create interesting map designs where the teams have two areas to attack and defend. This creates many "jobs" for the players, so it's generally a good idea to use larger maps in this case. This design choice is very rare. | |||
[[File:Blue side 01.jpg|thumb|2fort's Blue entrance.]] | |||
[[File:Red side 01.jpg|thumb|2fort's Red entrance.]] | |||
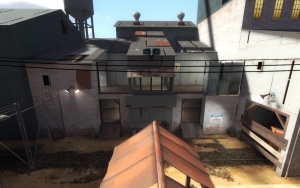
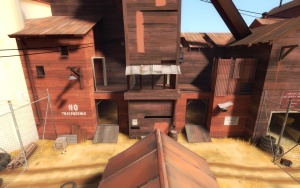
CTF tends to be the easiest style of gameplay to design maps for, as its maps are generally small and symmetrical in layout. <code>ctf_2fort</code> is the classic example of this: it consists of two bases directly opposite one another, each with the same layout. The only difference between them is the decor. The pictures on the right show how both sides look very different from one another even though their layouts are the same. | |||
The easiest way to make a symmetric CTF map is to build the basic layout for half of your map, create a copy and mirror or rotate the copy 180 degrees and merge them face-to-face. You can then customize and re-texture it to your liking, making sure to update the names and keyvalues of any important entities (spawnrooms, objectives, doors). | |||
If you choose to make an asymmetrical map, you have to make sure no unfair advantages are given to either team. It should take roughly the same amount of time and effort for either team to defend or to capture. Any disadvantages that one team may have probably aren't going to be nullified by each team playing a round on each side. | |||
Also bear in mind that having to make a long journey to and from the enemy flag can make a map get very boring very quickly. It's recommended that you keep map sizes to a minimum and include lots of obstacles and alternate routes. This doesn't apply for things like Mannpower where all clases are hyper-mobile. | |||
=== | ; Advantages | ||
: Relatively simple design | |||
: Map design can be simplified using symmetry between the two sides. | |||
; Disadvantages | |||
: Non-symmetric maps can be very difficult and time-consuming to balance. | |||
: With a symmetric design, any changes you make to the layout of one side have to be duplicated on the other side. | |||
: If capping is too difficult, players may lose interest in the objective. | |||
==== Mannpower ==== | |||
{{todo|get images}} | |||
Mannpower is a variant of CtF inspired by old ''Quake'' deathmatches. Firstly, all classes have a [[tf weapon grapplinghook|grappling hook]] equipped in an extra slot, affording all players much more mobility. Secondly, powerups spawn in predefined locations around the map, granting the players who collect them special buffs until they die. When a player dies, they drop their powerup, but only players from the other team can pick it up. | |||
Mannpower maps are generally symmetrical, have lots and lots of room for players to move around, and allow players to move around a lot vertically as well as horizontally. Unlike normal CtF, many more flag captures (usually 7) are required to win the game. | |||
; Advantages | |||
: Unique gameplay | |||
; Disadvantages | |||
: Mode is unfamiliar and not very popular | |||
: Much, ''much'' more entity work than normal CtF | |||
==== SD – Special Delivery ==== | |||
{{todo|get images}} | |||
Special Delivery is a distinctive form of CTF. Rather than each team having their own flag and capture zone, there's one neutral flag and one drop-off point. The teams compete to bring the flag to the capture zone three times before their opponents do. | |||
; Advantages | |||
: (see CTF) | |||
: Uncommon game mode (only two official maps) means it's more novel | |||
; Disadvantages | |||
: (see CTF) | |||
: Relatively static objectives can lead to stalematey gameplay | |||
=== CP — Control Points === | |||
Control Point maps require players to capture at least one instance of their namesake from the enemy team. The precise mechanic that leads to a team's victory is up to you, but it usually involves one team capturing all of the CPs on a map, with the last one being the closest to the enemy's spawn. | |||
There are two ways of handling this: | |||
== | ====A/D – Attack/Defend==== | ||
: | {{Main|TF2/Creating a CP assault map}} | ||
[[File:Red CP1 Interior 01.jpg|thumb|Interior of Dustbowl 1-1. Grenades can easily be thrown in for massive damage.]] | |||
[[File:Red CP3 FInal 01.jpg|thumb|Dustbowl 3-2, the final CP. Very open, and with just two small corridors leading into it.]] | |||
CP | Attack/Defend CP maps cast one team as the attacker (usually BLU) and the other (typically RED) as the defender. Once a control point in an A/D map is captured, it is locked to prevent the defenders from pushing back, and the attackers win the match by capturing all of them. | ||
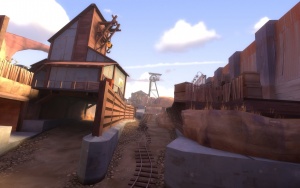
<code>cp_dustbowl</code> and <code>cp_gorge</code> are prime examples of this gameplay mode. Basic map construction tends to place control points in "stages." Stages contain a number of control points indicated by a round. Once BLU captures each control point within a stage, they either are awarded a point or gain access to another stage. While stages can be designed in any way, they tend to never be symmetrical, resulting in variable shape, flow, and design as the map progresses. Maps can have a number of stages, though most maps have either one or three. Stages can have a number of control points attached to them, as well as offer individual gameplay experiences based around control point locations and paths directed to them. | |||
; Advantages | |||
: More variety | |||
: Sense of progress | |||
: Better control of pacing | |||
: Popular with players | |||
; Disadvantages | |||
: Much harder to balance | |||
==== Push ==== | |||
[[File:BLue middleCP 01.jpg|thumb|Granary's central, symmetrical CP.]] | |||
Symmetric CP maps allow either team to attack or defend as they please, and are won when one or the other holds every point. <code>cp_well</code>, <code>cp_granary</code>, and <code>cp_badlands</code> are the main examples. In them, both teams begin with the two points on their side of the map and start by fighting over the neutral middle point. Since the maps are symmetrical, whichever team holds the middle point is generally winning the game. | |||
The "push gamemode" is usually referred to by however many points the map has—almost always 5CP, but 3CP maps do exist. | |||
Traditionally, only two points are ever unlocked in symmetrical maps. This focuses the fight in one area and allows players to concentrate on the matter at hand, without worrying that a pesky Scout has slipped past them and is going to take an undefended point far behind their lines. | |||
; Advantages | |||
: Symmetry halves design work | |||
; Disadvantages | |||
: Matches can go on for a long time if no team gains a decisive advantage, leading to player burnout | |||
: Size is a constant issue at times. Larger push maps can be problematic for slower classes. | |||
=== KotH — King of the Hill === | |||
{{main|TF2/King of the Hill}} | |||
[[File:Viaduct 01.jpg|thumb|Viaduct's central point. All of the fighting occurs around here.]] | |||
In the King of the Hill gametype, both teams assault a central point. The control point unlocks 30 seconds after the round has started. When one team captures the point, their timer on the top of the screen starts ticking down. If the other team captures the point then their timer starts ticking down and the other team's timer stops. (E.g., if BLU ran their timer down to 2:30 and then RED took over the control point, then the Blue timer would stop at 2:30 and the Red timer would start ticking down.) | |||
When the timer for one team has reached zero, that team wins. If the point is partially captured when a team's timer reaches zero, overtime occurs until the point is either captured by the other team or defended by the team with zero on their timer. If the other team captures the point during overtime, their timer will start ticking even though the other team's timer is 0. | |||
KotH maps are popular on many servers due to their simplistic gameplay and chaotic action occurring at one control point. They should always be symmetrical to ensure team balance and should also be relatively small due to having only one point. | |||
;Advantages | |||
:Easy to create | |||
:Easy to balance | |||
:Relatively popular | |||
:Very unlikely for one round to go long enough to burn out the player | |||
;Disadvantages | |||
:Not much depth | |||
:Can get repetitive due to short round times | |||
=== MvM — Mann vs. Machine === | |||
{{todo}} | |||
=== | |||
TF2's take on a players-versus-environment gamemode. | |||
=== PASS — P.A.S.S. Time === | |||
{{main|TF2/PASSTime}} | |||
{{todo|get images}} | |||
P.A.S.S. Time is "a deadly game of soccer-hockey-basketball." A "[[passtime ball|jack]]" spawns in the middle of the map, and each team is trying to bring it to the enemy team's goal. Complicating things, the jack carrier cannot attack. P.A.S.S. Time is characterized by large maps with lots of open areas. To aid slower classes in keeping up, [[trigger catapult|jump pads]], speed boosts, and air vents may dot the map. | |||
; Advantages | |||
: Unique gameplay | |||
; Disadvantages | |||
: Mode is unfamiliar to many players and not widely popular | |||
: | : Lots and lots of entity work | ||
: Many classes can feel irrelevant | |||
=== PL — Payload === | |||
[[File:Goldrush path.jpg|thumb|Goldrush 3-1. Note the tunnel adjacent to the track.]] | |||
Payload is an assault gametype in which control points are captured with a moving bomb cart instead of by players. Attackers push the cart along a rail track and over the timer-extending CPs by standing nearby, while defending players stop it by either keeping attackers away from it or standing near it themselves. Payload was introduced with <code>pl_goldrush</code>, which was TF2's most popular map for quite some time after release. | |||
Payload has many similarities to Attack/Defend, but there are some subtle differences apart from the literal bomb. The biggest is that the objective area doesn't leap from one area to another as it does in A/D. The bomb trundles steadily on, meaning attackers can't backcap the next point before the defenders are ready. This removes the temptation some players feel to defend a locked point "just in case." | |||
; Advantages | |||
: (See [[#CP_-_Control_Point|Assault CP]]) | |||
: A "smoother" experience. Progress is gradual, instead of the sudden lurches of CP maps. | |||
: Bomb cart is a clear focal point at all times. | |||
; Disadvantages | |||
: (See [[#CP_-_Control_Point|Assault CP]]) | |||
: A lot of entity work, especially including custom models for Payload explosions. | |||
: Bulk of attackers must take a completely predictable path. | |||
=== | ====PLR – Payload Race ==== | ||
{{todo|get images}} | |||
Payload Race is rather similar to Payload, but with one crucial difference: each team has its own cart to push. By extension, this means each team is trying to stop the other from capping. Also unlike standard Payload, PLR maps usually don't have a timer—the teams set timers for each other as they attempt to be the first to finish the map. If the map has multiple stages, a stage will end when either team finishes it, but the winners will get a head start on the next stage (or win outright, if it's the final stage). | |||
PLR maps should be symmetrical so the map is fair to both teams, but how they go about this symmetry can be somewhat unique. Single-stage PLR maps, like <code>plr_bananabay</code>, tend to circle around and cross over themselves, lending themselves to more standard symmetry. Long or multi-stage PLR maps, however, such as <code>plr_nightfall</code>, have to be symmetrical along their ''length'', rather than radially or along their width. | |||
; Advantages | |||
: "Smoother" experience, just like PL | |||
: Gamemode is relatively unexplored and thus novel | |||
: Simultaneous attack and defense results in a wide variety of roles for both teams | |||
; Disadvantages | |||
: Lack of a timer means sometimes gameplay just stalls | |||
: Twice the carts, twice the entity work | |||
: The fact that progress happens regardless of who wins means the first stages of multi-stage maps can feel irrelevant | |||
= | === PD — Player Destruction === | ||
{{main|TF2/Creating a Payload Map}} | |||
{{todo|get images}} | |||
Player Destruction is somewhat like a cross between Arena and Special Delivery. The focus of the mode is on killing other players—rather like Arena, though the real objective is to collect the pickups they drop when they die (one plus however many pickups they were carrying). Periodically, however, a capture zone will open up for players to deposit their pickups, which is where the teams actually score points. The focus then shifts to trying to drop pickups off there while preventing the other team from doing so, rather like SD. Then the point closes, and the team-deathmatch-esque period resumes. The game ends when one team deposits a certain amount of these pickups, that team being the winner. | |||
; Advantages | |||
: Uncommon mode lends to its novelty | |||
: Arena-style gameplay favors symmetrical maps, but not as critically as other modes | |||
; Disadvantages | |||
: Mode can feel unfocused when the capture zone is closed | |||
=== TC — Territorial Control === | |||
{{main|TF2/Territorial Control}} | |||
[[File:Hydro BuildingCP 01.jpg|thumb|An inner CP on Hydro, currently owned by Blue.]] | |||
[[File:Hydro DIshCP 01.jpg|thumb|A outer CP on Hydro, raised up above a radar dish. Height becomes an issue here.]] | |||
Territorial Control can be thought of roughly as linear, round-based CP on a nonlinear map. Four cross-connected areas are fought over two-by-two until one team controls all, at which point a one-way assault into their "headquarters" launches. If this seems confusing, play a few rounds of <code>tc_hydro</code> (the only official TC map to date), and you'll soon get the hang of it. | |||
If neither team capture an area within a time limit, the round is declared a draw and, if the server has it enabled, sudden death mode begins. This will happen quite a lot, unfortunately, since the four main areas can be played in any order, so all need to be balanced against each other. | |||
This also makes TC maps the hardest to create, since you've got 3*3 = 9 possible combinations to cater for! Texturing can also be challenging, since each area can be owned by either team, leading to a predominance of neutral tones.<!-- comma to separate clauses --> | |||
On top of all this, Hydro is unpopular on servers thanks to the number of stalemates it leads to and the perception of it being confusing. You might have trouble getting server operators to include your map in their rotation. | |||
; Advantages | |||
: Very few are made, so there's less competition | |||
: Can afford to experiment and try a variety of different ideas in one map | |||
; Disadvantages | |||
: Very difficult to balance four different areas against each other | |||
: Visual design difficulties | |||
: Very large | |||
: Enormous amounts of entity work; these maps are the ones most likely to run into engine limits | |||
== Design == | |||
There is a great deal that can be said on this subject, so consider the following a brief introduction only. | |||
{{tip|Try sketching your layout idea with pen and paper first. It's much faster than building something in Hammer only to discover that it doesn't work, or that you want to do something else.}} | |||
; Class abilities | |||
: The key to a fun map is playing off each class's abilities against the others'. Height, sightlines, windows, cover, and arena size are just a few of the tools you have at your disposal. Here are general guidelines to what makes a map fun to play on for each class: | |||
*Scout: Open areas which allow the Scout to make use of his speed to dodge, flanks that the Scout can use to get behind his enemies by the time they reach an objective, and elevated positions separated by gaps that he can double jump across, giving more leeway to maneuver around enemies. | |||
*Soldier: High walls and ceilings for rocket jumping. Small health kits along a typical rocket jumping path let the Soldier regain the health lost from rocket jumping, allowing him to quickly get in the fight after reaching his destination. | |||
*Pyro: Enclosed spaces where the Pyro can get the drop on unsuspecting enemies, as well as cliffs/long drops to airblast enemies off of—especially for shutting down an Über push. | |||
*Demoman: Doorways for setting up sticky traps, enclosed spaces that make it easier to hit enemies with the Grenade Launcher, high ceilings, and long areas to sticky jump across. | |||
*Heavy: Moderately sized areas that enemies are funneled into—usually by a narrow hallway. Not se large that the minigun's spread and falloff make it easy for enemies to get around him without taking substantial damage. | |||
*Engineer: Areas—usually elevated—with plentiful ammo for setting up buildings and out-of-the-way rooms for setting up teleporters. | |||
*Medic: There's nothing that really benefits Medic specifically. Generous cover and routes bypassing major sightlines are a massive boon to Medic's survivability, since he is usually a high-priority target. At the same time, too many flanks can make it too easy for enemies to sneak up behind and ambush him. | |||
*Sniper: Long sightlines. Sniper is unique in that his effective range far exceeds any other class—it is essentially infinite. Sightlines need to be carefully balanced so that a single Sniper can't shut down most approaching enemies before they can even notice him but still have enough space that the Sniper isn't useless. | |||
*Spy: Ammo packs sprinkled along the map that allow him to keep his cloak up, alcoves or corners that he can uncloak and disguise without being immediately discovered, flank routes and cover which allow Spy to avoid crossfire in a fight. | |||
; Objective location | |||
: Where to place flags, control points, or the payload track is the most important decision you'll make. Closed spaces are generally harder to defend than open spaces, unless that space is so open sniping becomes viable. Raising the objective up makes approaching it a more delicate (and potentially frustrating) act, while lowering it allows players to pound whoever is down there from a height. <!-- again, commas are used to separate clauses --> | |||
; Ammo boxes and health kits | |||
: Ammo benefits most classes but especially Engineers, allowing them to build a nest far more efficiently. This makes the rest of the team less reliant on ammo packs as an Engineer can more easily set up a Dispenser. Health kits are a very powerful tool to control the flow of combat, as areas containing them will be valuable to all classes. | |||
; Entrances/exits | |||
: Never, never, EVER leave a team with only one entrance or exit to or from a location, unless it's at the very start or end of a map. Doing this invites grinding, griefing, and general misery. Main routes to and from a location should also be sufficiently wide enough that a single class can't completely lock it down. | |||
:Equally important is the balance of entrances/exits for each team. If one team has three choices of approach while another has ten, the second team has an obvious advantage (which may be what you want). | |||
; Detail | |||
: Don't choke your map with detail. That approach might work in story-driven single-player games, but in TF2 clarity is everything and detail only serves to slow the eye down. Try to focus your details around areas of interest, such as objectives like flags and control points, doorways, spawnrooms, and frequently used hallways. Detail any area the player will see up close often and pay attention to. | |||
Look at others' work, keep playing the game and keep making maps, and eventually you'll have an understanding of TF2 map design. | |||
=== | === Case study: GravelPit B === | ||
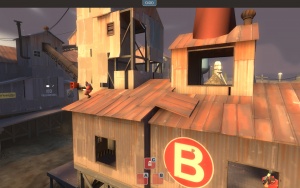
[[File:GravelPit Roof 01.jpg|thumb|Only Soldiers, Demomen, and Scouts can reach the roof of point B.]] | |||
* Gravelpit (Control Point B) has a well-balanced mix of outdoor and indoor combat, spiked with a rooftop that is only accessible to Soldiers, Demos, and Engineers. However, health and ammo can only be found by descending. If players on the roof are prepared to crouch down and stand on the rim of the bell tower they can fire down directly into about half of the CP's floorspace. | |||
* There is a raised platform to the left that can only be mounted by Soldiers/Demos and Scouts; other classes must run around the other side of the building, or else go in the front. | |||
* There are windows in the CP building to lob grenades through, the left of which reveal walls that allow Soldiers to deal splash damage to players or buildings sheltering nearby. | |||
* Elsewhere a small shack can provide shelter for an attacking Engineer's buildings, but an unbreakable window allows defenders to see what's happening inside. | |||
* There is a ring of rock spires, roofs, and thin wooden walls that Scouts can use to leap about on, though very few players actually do this. | |||
* Lastly, a raised walkway on the left edge of the arena provides cover for snipers, albeit with limited visibility. | |||
== Construction == | |||
=== Basic Elements of a TF2 Map === | |||
A map is built from basic geometrical elements. Some tutorials cover the creation of these elements. If maps are the complex molecules, the elements are the atoms. The covered topics include: | |||
* | * [[TF2/Respawn Areas|Respawn Areas]] | ||
* [[TF2/Resupply Areas|Resupply Areas]] | |||
* [[TF2/Creating_a_Capture_Point|Control Points]] | |||
Other tutorials approach the explanations in a different way. The following tutorials are in-depth explanations of the creation of certain elements and goal systems: | |||
* [[TF2/Creating a Linear Gameplay Map|Attack/Defense Gamemode]] | |||
* [[TF2/Flag Based Goal Systems|Capture the Flag]] | |||
[[ | |||
See '''[[TF2/Basic Map Construction|Basic Map Construction]]''' for details on how to create each component of a TF2 map. This section gives only general advice. | |||
=== Signage === | |||
TF2 maps have lots of signs in them that guide new players in the right direction. They take the form of models that you can place with the {{ent|prop_static}} entity, are located in the <code>props_gameplay/</code> folder, and all start with 'sign_'. Use the model browser's Skins tab to select the appropriate message and team color. | |||
The big arrows seen in Valve's maps are [[materials]], which can be used as [[decal]]s or by applying them to [[brush]]es. Hydro's round arrow sign can be found at <code>props_hydro/cap_point_arrow</code>, and will need a floating {{ent|func_brush}} with the appropriate material placed in front of them. | |||
{{tip| Dependent on map design and flow, a good idea would be to "enable/disable" signs based on which team is "supposed" to be in the area and where the goal is. This can help stop confusion with players going the wrong way if your map happens to offer multiple routes. You want to streamline your map using signs!}} | |||
=== Clipping === | |||
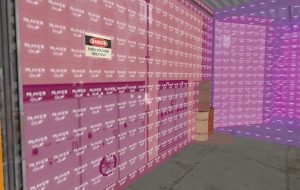
[[File:Clip.jpg|thumb|Use [[Tool textures|player clip]] [[brush]]es to stop players from getting stuck on complex walls.]] | |||
[[Clip texture|Clipping]] is the process of creating invisible walls in places where you don't want players, buildings, or both, to go. You should '''always''' associate one with a visual effect that lets players see that they can't go that way, unless it's in the sky or another location where people shouldn't be unless they've found a map exploit. Since rocket/sticky jumping can launch players high into the air, you need to be extra careful about doing this correctly! | |||
{{warning|Beware of creating 'perch points'. These happen when one object or clip brush sticks out from what's above it, by even the tiniest amount, allowing players to stand halfway up a wall.}} | |||
There are two types of clip. Each are made by applying a certain [[material]] to a [[brush]]: | |||
; <code>tools/toolsclip</code> or <code>tools/toolsplayerclip</code> | |||
: Stops characters from entering the volume, including players and Halloween bosses, but does not stop projectiles such as grenades | |||
: Player Clip doesn't stop NPCs, but Clip does. | |||
It's a good idea to clip the roofs of buildings and any small ledges unless you specifically want players to be able to access them. You should also use Clip/Player Clip-on "rough" surfaces that they might otherwise get stuck on when sliding along. | |||
=== Brush Heights === | |||
Study brush heights within your map, and try to design the map on an even ground. This not only helps with optimization, but it can also help how certain classes can move throughout the map. For example, if a scout double jumps and can't seem to reach a ledge due to it being a few units higher, lower it. Make no area of the map only restricted to one class, and allow at least half of the classes to be able to access multiple heights. Take into account as well the many unlockable weapons to come for further updates. Many of the weapons unlocked by classes have the ability to push other players. Things like cliffs or clipped areas could be griefed or accessible by such weapon features. | |||
The usual height of a wall tends to be '''192''' units. This offers enough space for all classes, while still maintaining realistic design. | |||
[[ | == See also == | ||
* {{tf2|2}} | |||
* [[What makes a good level?]] <!-- if it was a bad level, you wouldn't be sitting here discussing it now, would you? --> | |||
* [[Optimization (level design)]] | |||
Latest revision as of 23:16, 6 January 2024
![]() Team Fortress 2 is a highly diversified multiplayer game, and well-designed maps that accommodate all of the player classes equally are critically important to it. Unfortunately while understanding how the game plays is one thing, creating a quality map that compliments it is quite another.
Team Fortress 2 is a highly diversified multiplayer game, and well-designed maps that accommodate all of the player classes equally are critically important to it. Unfortunately while understanding how the game plays is one thing, creating a quality map that compliments it is quite another.
- A good map is fast and fun to play on. The best maps can run on a 24/7 server without getting boring even after the second or third reload.
- A good map accommodates every class. If a class is useless on a map, players who prefer that class are liable to disconnect when your work comes up in a server's rotation.
- A good map is designed, not simply constructed. If all you are doing is re-creating the surface appearance of another map, you're highly unlikely to create something worth playing in its own right.
Gametype
The first step in creating a TF2 map is choosing a gametype. Ten are currently officially supported.
Arena
Arena is similar to ![]() Counter-Strike. Players do not respawn, there are no or very few health pickups (but bodies of water are often provided for dousing flames), and rounds are won either by eliminating the enemy team or capturing a single control point somewhere in the middle of the map.
Counter-Strike. Players do not respawn, there are no or very few health pickups (but bodies of water are often provided for dousing flames), and rounds are won either by eliminating the enemy team or capturing a single control point somewhere in the middle of the map.
Balance in arena needs to be on a knife-edge, so it's strongly recommended that maps for it be symmetrical. To prevent camping, you should also make spawn rooms open to the enemy team.
The central control point should start locked to encourage players to fight each other; in fact, its only real purpose is to force an end to the map if they start to hide. In all of Valve's maps, the point unlocks after sixty seconds.
- Advantages
- Arena is designed to be played quickly, so maps are very small and comparatively quick to create.
- Simple win conditions simplify entity work.
- Symmetric design makes things simpler still.
- Disadvantages
- Arena forces precise team balance, which can lead to players sitting out entire rounds if there are too many on one team.
- Due to the comparative irrelevance of the point, the mode can feel unfocused.
- Players will be paying far closer attention to your work. Make sure that it is balanced and there are no exploits!
- Arena is no longer supported in Valve's official matchmaking. Most new players are unfamiliar with the mode, and it's unpopular with many.
CTF — Capture the Flag
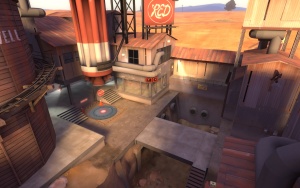
In CTF, each team has a "flag" (usually an intelligence briefcase) and a capture zone. Players need to take the enemy's intelligence back to their own capture zone.
It is common for the flag points and capture zones to be located in the same place, but they don't have to be. Separating the flag and capture zone can create interesting map designs where the teams have two areas to attack and defend. This creates many "jobs" for the players, so it's generally a good idea to use larger maps in this case. This design choice is very rare.
CTF tends to be the easiest style of gameplay to design maps for, as its maps are generally small and symmetrical in layout. ctf_2fort is the classic example of this: it consists of two bases directly opposite one another, each with the same layout. The only difference between them is the decor. The pictures on the right show how both sides look very different from one another even though their layouts are the same.
The easiest way to make a symmetric CTF map is to build the basic layout for half of your map, create a copy and mirror or rotate the copy 180 degrees and merge them face-to-face. You can then customize and re-texture it to your liking, making sure to update the names and keyvalues of any important entities (spawnrooms, objectives, doors).
If you choose to make an asymmetrical map, you have to make sure no unfair advantages are given to either team. It should take roughly the same amount of time and effort for either team to defend or to capture. Any disadvantages that one team may have probably aren't going to be nullified by each team playing a round on each side.
Also bear in mind that having to make a long journey to and from the enemy flag can make a map get very boring very quickly. It's recommended that you keep map sizes to a minimum and include lots of obstacles and alternate routes. This doesn't apply for things like Mannpower where all clases are hyper-mobile.
- Advantages
- Relatively simple design
- Map design can be simplified using symmetry between the two sides.
- Disadvantages
- Non-symmetric maps can be very difficult and time-consuming to balance.
- With a symmetric design, any changes you make to the layout of one side have to be duplicated on the other side.
- If capping is too difficult, players may lose interest in the objective.
Mannpower
Mannpower is a variant of CtF inspired by old Quake deathmatches. Firstly, all classes have a grappling hook equipped in an extra slot, affording all players much more mobility. Secondly, powerups spawn in predefined locations around the map, granting the players who collect them special buffs until they die. When a player dies, they drop their powerup, but only players from the other team can pick it up.
Mannpower maps are generally symmetrical, have lots and lots of room for players to move around, and allow players to move around a lot vertically as well as horizontally. Unlike normal CtF, many more flag captures (usually 7) are required to win the game.
- Advantages
- Unique gameplay
- Disadvantages
- Mode is unfamiliar and not very popular
- Much, much more entity work than normal CtF
SD – Special Delivery
Special Delivery is a distinctive form of CTF. Rather than each team having their own flag and capture zone, there's one neutral flag and one drop-off point. The teams compete to bring the flag to the capture zone three times before their opponents do.
- Advantages
- (see CTF)
- Uncommon game mode (only two official maps) means it's more novel
- Disadvantages
- (see CTF)
- Relatively static objectives can lead to stalematey gameplay
CP — Control Points
Control Point maps require players to capture at least one instance of their namesake from the enemy team. The precise mechanic that leads to a team's victory is up to you, but it usually involves one team capturing all of the CPs on a map, with the last one being the closest to the enemy's spawn.
There are two ways of handling this:
A/D – Attack/Defend
Attack/Defend CP maps cast one team as the attacker (usually BLU) and the other (typically RED) as the defender. Once a control point in an A/D map is captured, it is locked to prevent the defenders from pushing back, and the attackers win the match by capturing all of them.
cp_dustbowl and cp_gorge are prime examples of this gameplay mode. Basic map construction tends to place control points in "stages." Stages contain a number of control points indicated by a round. Once BLU captures each control point within a stage, they either are awarded a point or gain access to another stage. While stages can be designed in any way, they tend to never be symmetrical, resulting in variable shape, flow, and design as the map progresses. Maps can have a number of stages, though most maps have either one or three. Stages can have a number of control points attached to them, as well as offer individual gameplay experiences based around control point locations and paths directed to them.
- Advantages
- More variety
- Sense of progress
- Better control of pacing
- Popular with players
- Disadvantages
- Much harder to balance
Push
Symmetric CP maps allow either team to attack or defend as they please, and are won when one or the other holds every point. cp_well, cp_granary, and cp_badlands are the main examples. In them, both teams begin with the two points on their side of the map and start by fighting over the neutral middle point. Since the maps are symmetrical, whichever team holds the middle point is generally winning the game.
The "push gamemode" is usually referred to by however many points the map has—almost always 5CP, but 3CP maps do exist.
Traditionally, only two points are ever unlocked in symmetrical maps. This focuses the fight in one area and allows players to concentrate on the matter at hand, without worrying that a pesky Scout has slipped past them and is going to take an undefended point far behind their lines.
- Advantages
- Symmetry halves design work
- Disadvantages
- Matches can go on for a long time if no team gains a decisive advantage, leading to player burnout
- Size is a constant issue at times. Larger push maps can be problematic for slower classes.
KotH — King of the Hill
In the King of the Hill gametype, both teams assault a central point. The control point unlocks 30 seconds after the round has started. When one team captures the point, their timer on the top of the screen starts ticking down. If the other team captures the point then their timer starts ticking down and the other team's timer stops. (E.g., if BLU ran their timer down to 2:30 and then RED took over the control point, then the Blue timer would stop at 2:30 and the Red timer would start ticking down.)
When the timer for one team has reached zero, that team wins. If the point is partially captured when a team's timer reaches zero, overtime occurs until the point is either captured by the other team or defended by the team with zero on their timer. If the other team captures the point during overtime, their timer will start ticking even though the other team's timer is 0.
KotH maps are popular on many servers due to their simplistic gameplay and chaotic action occurring at one control point. They should always be symmetrical to ensure team balance and should also be relatively small due to having only one point.
- Advantages
- Easy to create
- Easy to balance
- Relatively popular
- Very unlikely for one round to go long enough to burn out the player
- Disadvantages
- Not much depth
- Can get repetitive due to short round times
MvM — Mann vs. Machine
[Todo]
TF2's take on a players-versus-environment gamemode.
PASS — P.A.S.S. Time
P.A.S.S. Time is "a deadly game of soccer-hockey-basketball." A "jack" spawns in the middle of the map, and each team is trying to bring it to the enemy team's goal. Complicating things, the jack carrier cannot attack. P.A.S.S. Time is characterized by large maps with lots of open areas. To aid slower classes in keeping up, jump pads, speed boosts, and air vents may dot the map.
- Advantages
- Unique gameplay
- Disadvantages
- Mode is unfamiliar to many players and not widely popular
- Lots and lots of entity work
- Many classes can feel irrelevant
PL — Payload
Payload is an assault gametype in which control points are captured with a moving bomb cart instead of by players. Attackers push the cart along a rail track and over the timer-extending CPs by standing nearby, while defending players stop it by either keeping attackers away from it or standing near it themselves. Payload was introduced with pl_goldrush, which was TF2's most popular map for quite some time after release.
Payload has many similarities to Attack/Defend, but there are some subtle differences apart from the literal bomb. The biggest is that the objective area doesn't leap from one area to another as it does in A/D. The bomb trundles steadily on, meaning attackers can't backcap the next point before the defenders are ready. This removes the temptation some players feel to defend a locked point "just in case."
- Advantages
- (See Assault CP)
- A "smoother" experience. Progress is gradual, instead of the sudden lurches of CP maps.
- Bomb cart is a clear focal point at all times.
- Disadvantages
- (See Assault CP)
- A lot of entity work, especially including custom models for Payload explosions.
- Bulk of attackers must take a completely predictable path.
PLR – Payload Race
Payload Race is rather similar to Payload, but with one crucial difference: each team has its own cart to push. By extension, this means each team is trying to stop the other from capping. Also unlike standard Payload, PLR maps usually don't have a timer—the teams set timers for each other as they attempt to be the first to finish the map. If the map has multiple stages, a stage will end when either team finishes it, but the winners will get a head start on the next stage (or win outright, if it's the final stage).
PLR maps should be symmetrical so the map is fair to both teams, but how they go about this symmetry can be somewhat unique. Single-stage PLR maps, like plr_bananabay, tend to circle around and cross over themselves, lending themselves to more standard symmetry. Long or multi-stage PLR maps, however, such as plr_nightfall, have to be symmetrical along their length, rather than radially or along their width.
- Advantages
- "Smoother" experience, just like PL
- Gamemode is relatively unexplored and thus novel
- Simultaneous attack and defense results in a wide variety of roles for both teams
- Disadvantages
- Lack of a timer means sometimes gameplay just stalls
- Twice the carts, twice the entity work
- The fact that progress happens regardless of who wins means the first stages of multi-stage maps can feel irrelevant
PD — Player Destruction
Player Destruction is somewhat like a cross between Arena and Special Delivery. The focus of the mode is on killing other players—rather like Arena, though the real objective is to collect the pickups they drop when they die (one plus however many pickups they were carrying). Periodically, however, a capture zone will open up for players to deposit their pickups, which is where the teams actually score points. The focus then shifts to trying to drop pickups off there while preventing the other team from doing so, rather like SD. Then the point closes, and the team-deathmatch-esque period resumes. The game ends when one team deposits a certain amount of these pickups, that team being the winner.
- Advantages
- Uncommon mode lends to its novelty
- Arena-style gameplay favors symmetrical maps, but not as critically as other modes
- Disadvantages
- Mode can feel unfocused when the capture zone is closed
TC — Territorial Control
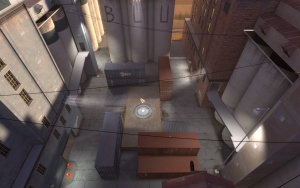
Territorial Control can be thought of roughly as linear, round-based CP on a nonlinear map. Four cross-connected areas are fought over two-by-two until one team controls all, at which point a one-way assault into their "headquarters" launches. If this seems confusing, play a few rounds of tc_hydro (the only official TC map to date), and you'll soon get the hang of it.
If neither team capture an area within a time limit, the round is declared a draw and, if the server has it enabled, sudden death mode begins. This will happen quite a lot, unfortunately, since the four main areas can be played in any order, so all need to be balanced against each other.
This also makes TC maps the hardest to create, since you've got 3*3 = 9 possible combinations to cater for! Texturing can also be challenging, since each area can be owned by either team, leading to a predominance of neutral tones.
On top of all this, Hydro is unpopular on servers thanks to the number of stalemates it leads to and the perception of it being confusing. You might have trouble getting server operators to include your map in their rotation.
- Advantages
- Very few are made, so there's less competition
- Can afford to experiment and try a variety of different ideas in one map
- Disadvantages
- Very difficult to balance four different areas against each other
- Visual design difficulties
- Very large
- Enormous amounts of entity work; these maps are the ones most likely to run into engine limits
Design
There is a great deal that can be said on this subject, so consider the following a brief introduction only.
- Class abilities
- The key to a fun map is playing off each class's abilities against the others'. Height, sightlines, windows, cover, and arena size are just a few of the tools you have at your disposal. Here are general guidelines to what makes a map fun to play on for each class:
- Scout: Open areas which allow the Scout to make use of his speed to dodge, flanks that the Scout can use to get behind his enemies by the time they reach an objective, and elevated positions separated by gaps that he can double jump across, giving more leeway to maneuver around enemies.
- Soldier: High walls and ceilings for rocket jumping. Small health kits along a typical rocket jumping path let the Soldier regain the health lost from rocket jumping, allowing him to quickly get in the fight after reaching his destination.
- Pyro: Enclosed spaces where the Pyro can get the drop on unsuspecting enemies, as well as cliffs/long drops to airblast enemies off of—especially for shutting down an Über push.
- Demoman: Doorways for setting up sticky traps, enclosed spaces that make it easier to hit enemies with the Grenade Launcher, high ceilings, and long areas to sticky jump across.
- Heavy: Moderately sized areas that enemies are funneled into—usually by a narrow hallway. Not se large that the minigun's spread and falloff make it easy for enemies to get around him without taking substantial damage.
- Engineer: Areas—usually elevated—with plentiful ammo for setting up buildings and out-of-the-way rooms for setting up teleporters.
- Medic: There's nothing that really benefits Medic specifically. Generous cover and routes bypassing major sightlines are a massive boon to Medic's survivability, since he is usually a high-priority target. At the same time, too many flanks can make it too easy for enemies to sneak up behind and ambush him.
- Sniper: Long sightlines. Sniper is unique in that his effective range far exceeds any other class—it is essentially infinite. Sightlines need to be carefully balanced so that a single Sniper can't shut down most approaching enemies before they can even notice him but still have enough space that the Sniper isn't useless.
- Spy: Ammo packs sprinkled along the map that allow him to keep his cloak up, alcoves or corners that he can uncloak and disguise without being immediately discovered, flank routes and cover which allow Spy to avoid crossfire in a fight.
- Objective location
- Where to place flags, control points, or the payload track is the most important decision you'll make. Closed spaces are generally harder to defend than open spaces, unless that space is so open sniping becomes viable. Raising the objective up makes approaching it a more delicate (and potentially frustrating) act, while lowering it allows players to pound whoever is down there from a height.
- Ammo boxes and health kits
- Ammo benefits most classes but especially Engineers, allowing them to build a nest far more efficiently. This makes the rest of the team less reliant on ammo packs as an Engineer can more easily set up a Dispenser. Health kits are a very powerful tool to control the flow of combat, as areas containing them will be valuable to all classes.
- Entrances/exits
- Never, never, EVER leave a team with only one entrance or exit to or from a location, unless it's at the very start or end of a map. Doing this invites grinding, griefing, and general misery. Main routes to and from a location should also be sufficiently wide enough that a single class can't completely lock it down.
- Equally important is the balance of entrances/exits for each team. If one team has three choices of approach while another has ten, the second team has an obvious advantage (which may be what you want).
- Detail
- Don't choke your map with detail. That approach might work in story-driven single-player games, but in TF2 clarity is everything and detail only serves to slow the eye down. Try to focus your details around areas of interest, such as objectives like flags and control points, doorways, spawnrooms, and frequently used hallways. Detail any area the player will see up close often and pay attention to.
Look at others' work, keep playing the game and keep making maps, and eventually you'll have an understanding of TF2 map design.
Case study: GravelPit B
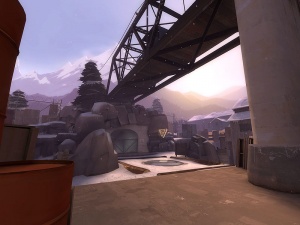
- Gravelpit (Control Point B) has a well-balanced mix of outdoor and indoor combat, spiked with a rooftop that is only accessible to Soldiers, Demos, and Engineers. However, health and ammo can only be found by descending. If players on the roof are prepared to crouch down and stand on the rim of the bell tower they can fire down directly into about half of the CP's floorspace.
- There is a raised platform to the left that can only be mounted by Soldiers/Demos and Scouts; other classes must run around the other side of the building, or else go in the front.
- There are windows in the CP building to lob grenades through, the left of which reveal walls that allow Soldiers to deal splash damage to players or buildings sheltering nearby.
- Elsewhere a small shack can provide shelter for an attacking Engineer's buildings, but an unbreakable window allows defenders to see what's happening inside.
- There is a ring of rock spires, roofs, and thin wooden walls that Scouts can use to leap about on, though very few players actually do this.
- Lastly, a raised walkway on the left edge of the arena provides cover for snipers, albeit with limited visibility.
Construction
Basic Elements of a TF2 Map
A map is built from basic geometrical elements. Some tutorials cover the creation of these elements. If maps are the complex molecules, the elements are the atoms. The covered topics include:
Other tutorials approach the explanations in a different way. The following tutorials are in-depth explanations of the creation of certain elements and goal systems:
See Basic Map Construction for details on how to create each component of a TF2 map. This section gives only general advice.
Signage
TF2 maps have lots of signs in them that guide new players in the right direction. They take the form of models that you can place with the prop_static entity, are located in the props_gameplay/ folder, and all start with 'sign_'. Use the model browser's Skins tab to select the appropriate message and team color.
The big arrows seen in Valve's maps are materials, which can be used as decals or by applying them to brushes. Hydro's round arrow sign can be found at props_hydro/cap_point_arrow, and will need a floating func_brush with the appropriate material placed in front of them.
Clipping
Clipping is the process of creating invisible walls in places where you don't want players, buildings, or both, to go. You should always associate one with a visual effect that lets players see that they can't go that way, unless it's in the sky or another location where people shouldn't be unless they've found a map exploit. Since rocket/sticky jumping can launch players high into the air, you need to be extra careful about doing this correctly!
There are two types of clip. Each are made by applying a certain material to a brush:
tools/toolscliportools/toolsplayerclip- Stops characters from entering the volume, including players and Halloween bosses, but does not stop projectiles such as grenades
- Player Clip doesn't stop NPCs, but Clip does.
It's a good idea to clip the roofs of buildings and any small ledges unless you specifically want players to be able to access them. You should also use Clip/Player Clip-on "rough" surfaces that they might otherwise get stuck on when sliding along.
Brush Heights
Study brush heights within your map, and try to design the map on an even ground. This not only helps with optimization, but it can also help how certain classes can move throughout the map. For example, if a scout double jumps and can't seem to reach a ledge due to it being a few units higher, lower it. Make no area of the map only restricted to one class, and allow at least half of the classes to be able to access multiple heights. Take into account as well the many unlockable weapons to come for further updates. Many of the weapons unlocked by classes have the ability to push other players. Things like cliffs or clipped areas could be griefed or accessible by such weapon features.
The usual height of a wall tends to be 192 units. This offers enough space for all classes, while still maintaining realistic design.
